 and
and 

How to configure Septentrio mosaic-G5 P3 and P3H
Introduction
This page is only valid for boards based on the Septentrio mosaic-G5 P3 and P3H modules, such as the simpleRTK 4 Pro (Septentrio mosaic-G5 P3) and simpleRTK 4 Heading (Septentrio mosaic-G5 P3H).
In this guide, we will show how to connect the module, configure key settings, manage data output, and ensure it is operating optimally for your application.
Install Driver and Septentrio RxTools
Connect the GNSS antenna to your receiver. Ensure the antenna has a clear view of the sky for testing functionality. Otherwise, you will not see satellite views or signals.
Connect the receiver to your PC via the USB port labeled POWER+GPS.
- When you connect this product to a PC for the first time, the PC may not recognize it. You will only see a new hard disk in your computer. Open it and install the Septentrio driver.
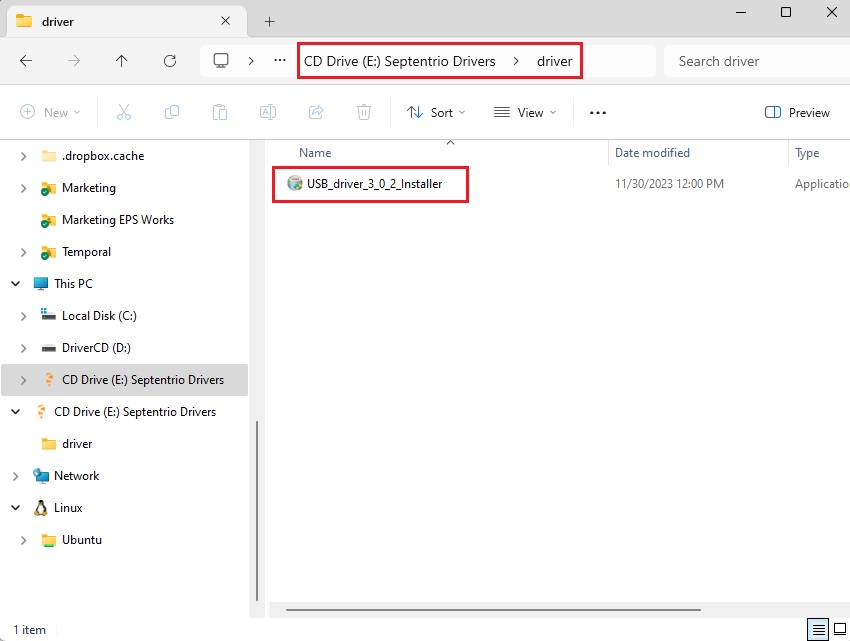
After installation is complete, disconnect and reconnect the receiver. Your PC will now recognize it. This only needs to be done once.
- Download the RxTools Software suite and install it for your operating system. This guide uses Microsoft Windows. This will install several applications on your computer. For this guide, we will use only the RxControl app and its intuitive GUI, which allows you to control your Septentrio receiver, perform data logging, and monitor the navigation solution.
Connect to the Receiver
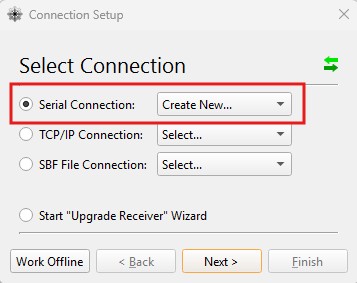
- Open the RxControl app and create a new Serial Connection. Press Next.
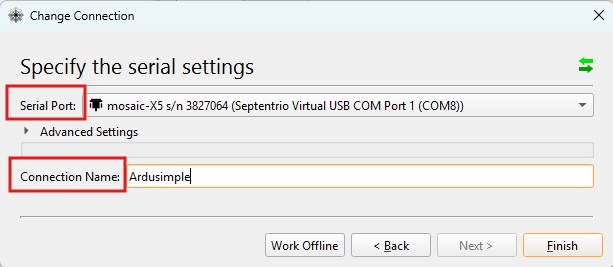
- Specify the computer serial port you want to use to connect to your mosaic-G5 receiver and enter a Connection Name. Press Finish.
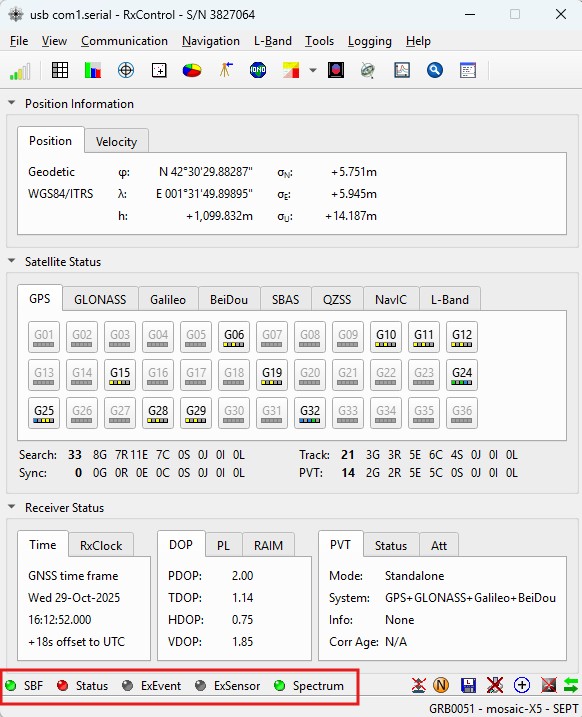
- The RxControl GUI will open. The status bar at the bottom will display information about the connection status, with blinking lights confirming the connection with your receiver and data streaming from it.
Send NMEA messages to Xbee Socket
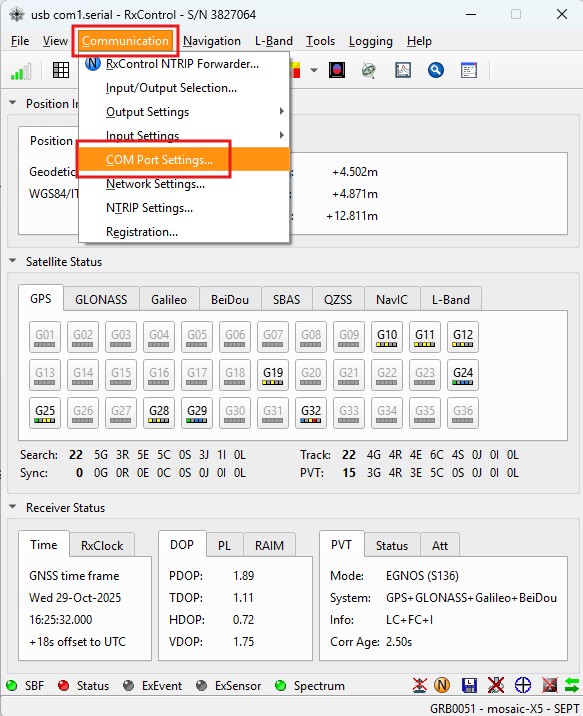
- In the main menu, go to Communication → COM port settings.
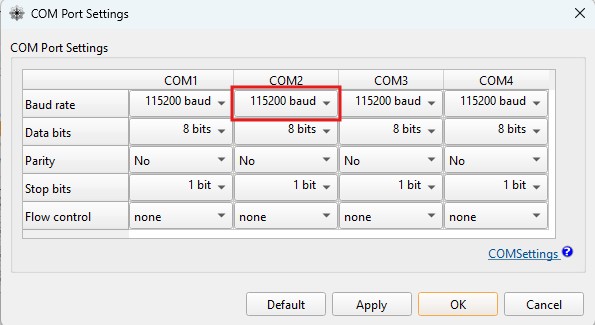
- Set the baud rate of COM2 to 115200 bps, as most of our communication plug-ins operate at this rate. Press OK.
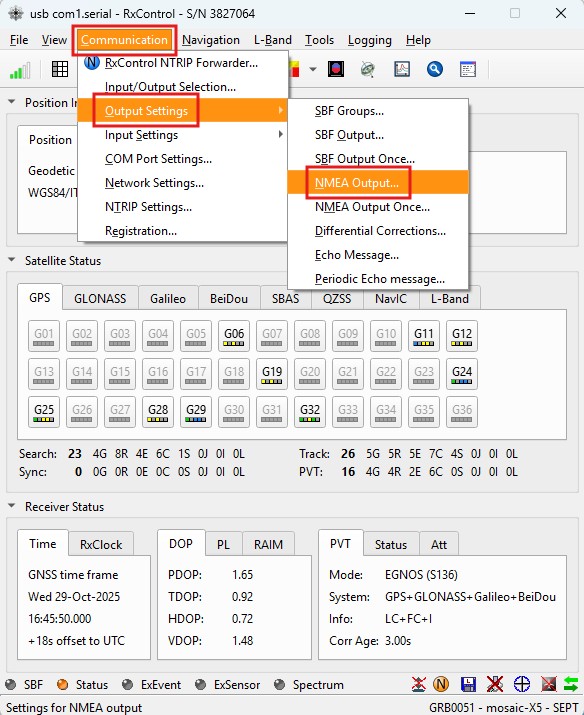
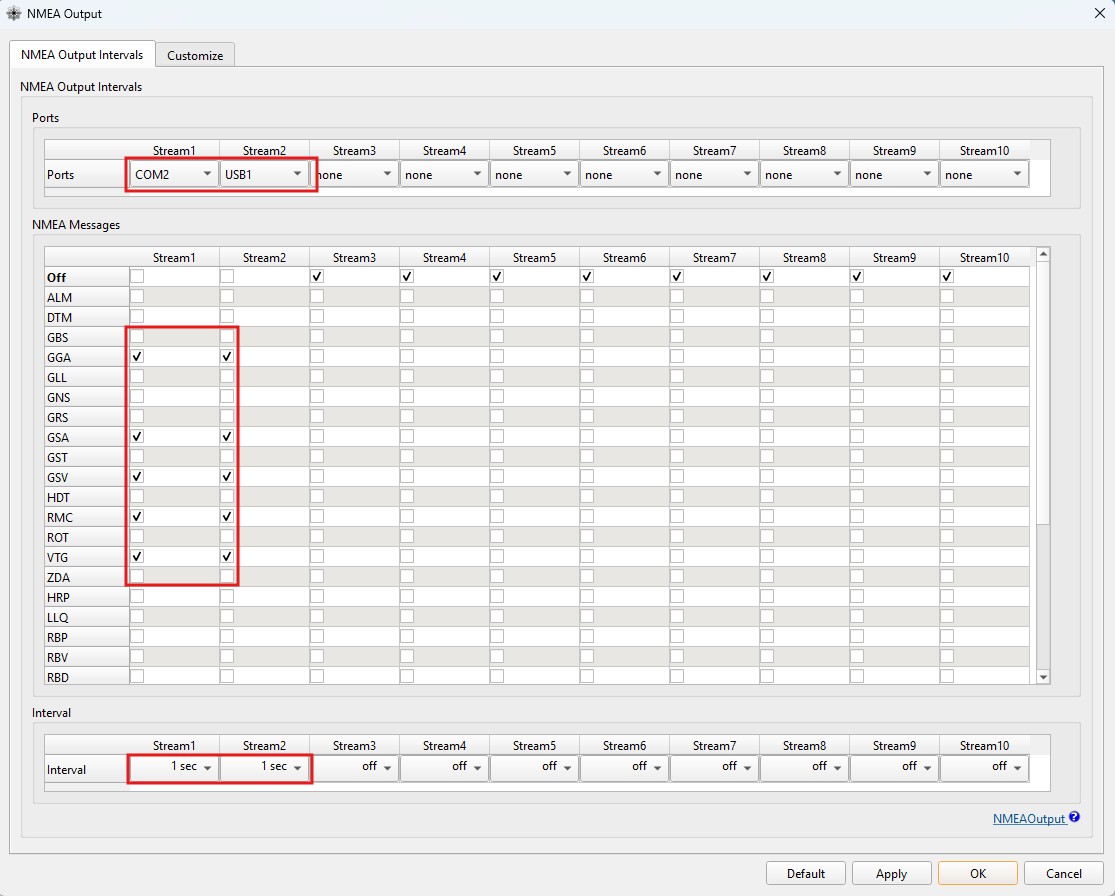
- In the main menu bar, select Communication → Output settings → NMEA Output.
- For Stream1, choose port COM2 and check your preferred NMEA messages. If unsure, we suggest selecting GGA, GSA, GST, GSV, RMC and VTG, as they are used by most applications. Set the interval to 1 second. Configure Stream2 with the exact same parameters as Stream1, but select the USB port that was used in step 7 to connect to the board (either USB1 or USB2). Press OK.
- In the main menu, go to Tools → Expert Console.
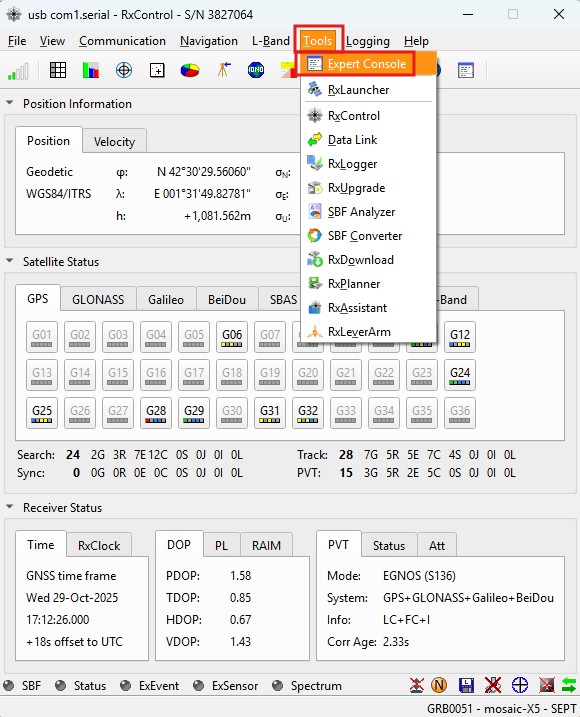
- Go to the NMEA tab in the Expert Console. You will observe the output NMEA messages.

Configure as a Rover
- Go to main menu Navigation → Positioning Mode.

- Choose Rover in PVT Mode, check All in Rover mode, and set Reference Position to Auto. Press OK. Now your receiver is configured as a rover.

Examples of configuration files
We provide a variety of configuration files designed for different purposes, such as configuring as a rover, sending NMEA messages via Bluetooth or BLE, or connecting to NTRIP corrections via 4G.
| Configuration | File |
|---|---|
Rover 1Hz
| Download |
Rover Maximum update rate (20Hz)
| Download |
| Send 1Hz full NMEA to Plugin This configuration file allows you to connect the receiver to your mobile device via Bluetooth, BLE, or use radio and other communication plugins on Xbee socket.
| Download |
| Send 1Hz GGA to Plugin This configuration file allows connection to an NTRIP client with VRS mountpoints.
| Download |
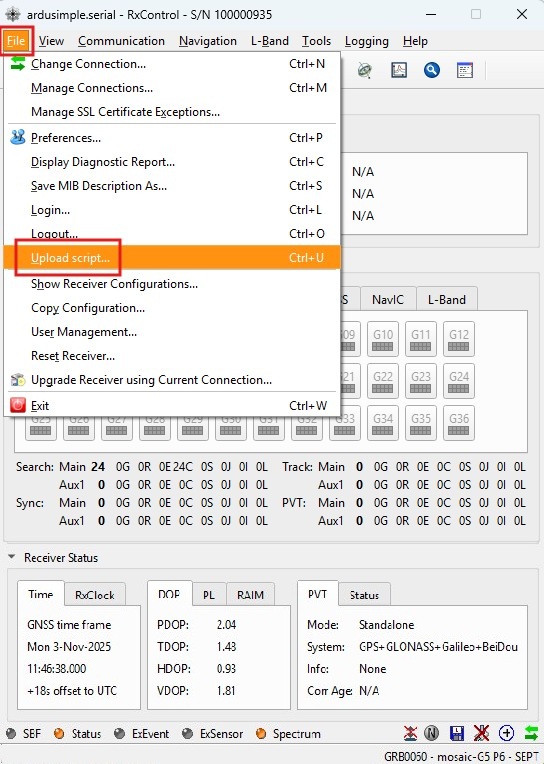
- To install a configuration file, go to the main menu File -> Upload script…
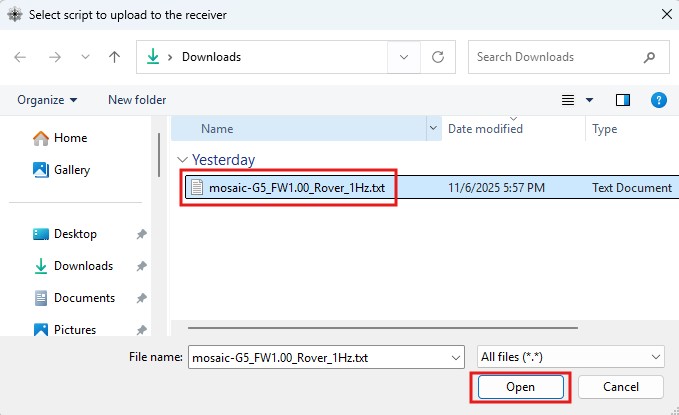
- Select the configuration file and press Open.
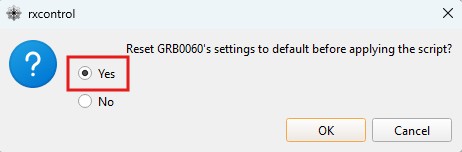
- You will be asked to reset the receiver to defaults before updating the configuration. Select Yes and press OK. The settings from the file are now applied to the receiver configuration.
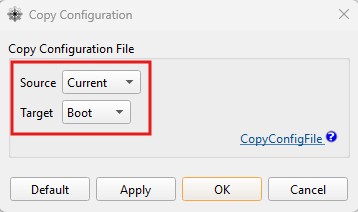
Save configuration
Once you have finished configuring your receiver either, either by loading a config file or editing parameters manually, the changes need to be saved to the receiver boot memory to make them persistent. If you do not do this, your changes will be lost after the receiver is power-cycled.
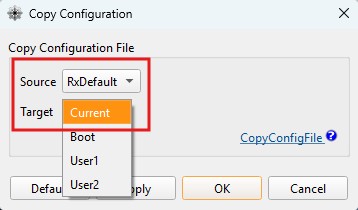
- Go to the main menu File -> Copy configuration…

- Set Source to Current and Target to Boot. Press OK.
Get RTK corrections
To achieve centimeter/millimeter-level accuracy with our GNSS receivers, you need access to RTK corrections. There are two ways to get RTK correction data:
via an NTRIP service
- Pros:
- Easy to use with just one receiver.
- No need to set up your own base station.
- Corrections can be received over the internet.
- Cons:
- Requires a reliable internet connection.
- Dependent on the availability of NTRIP services in your region.
- Subscription fees may apply for using NTRIP services.
via a Base-Rover setup
- Pros:
- Complete independence from external services.
- Works well in areas without internet access or NTRIP service.
- Full control over the accuracy and quality of the corrections.
- Cons:
- Requires two receivers (one base, one rover).
- More complex to set up and manage.
- The base station needs to be in a fixed position for reliable corrections.
NTRIP corrections
- You can find third-party base stations at RTK Correction Services in your Country. Register and get your server, port, username, password, and mount point from your NTRIP corrections provider. We will use them later.
- Go to main menu Communication -> RxControl NTRIP Forwarder…
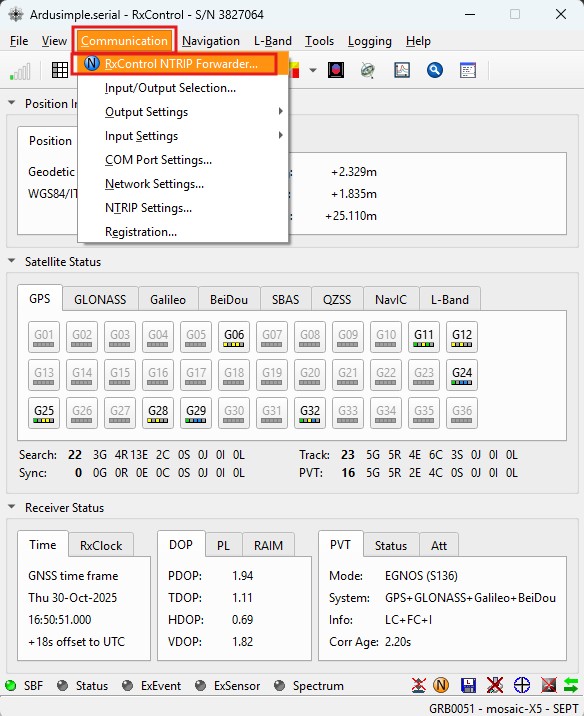
- This will bring up the NTRIP Forwarder dialog. Press Edit.

- In the NTRIP Settings dialog, fill in caster settings: Host, Port, user name, and password of the NTRIP account. This data should be provided by the NTRIP service when you register your account. Press OK.
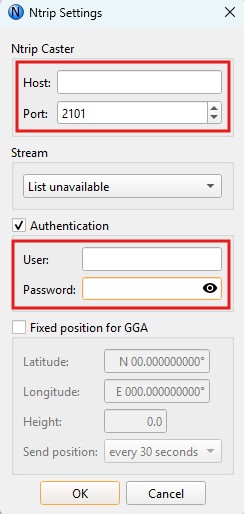
- If the NTRIP account credentrials were entered correctly, the Stream drop-down list will become active, and the RTK correction Mount Point can be selected. Press Start.
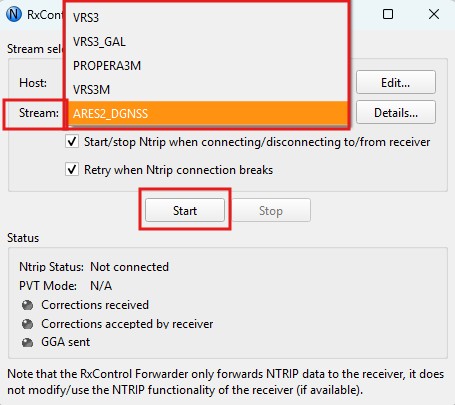
- The Status field of the NTRIP Settings dialog should show a successful connection and corrections data received.

- After a few minutes, the PVT Mode will become RTK Float or Fixed, and you will now have centimeter/millimeter level accuracy in your receiver.

There are three communication plugins which can be used to get access to NTRIP corrections: WiFi NTRIP Master, 4G NTRIP Master and Ethernet NTRIP Master.
Revert to factory defaults
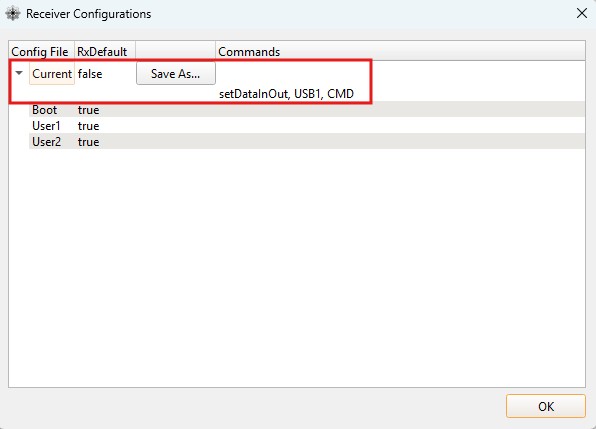
- Select main menu File -> Show Receiver Configurations…

- You can check all the available Receiver Configurations and see if they match factory defaults.
- You can set the current configuration to its default settings from the main menu File -> Copy configuration…
- Set Source to RxDefault and Target to Current. Press OK.
Log data
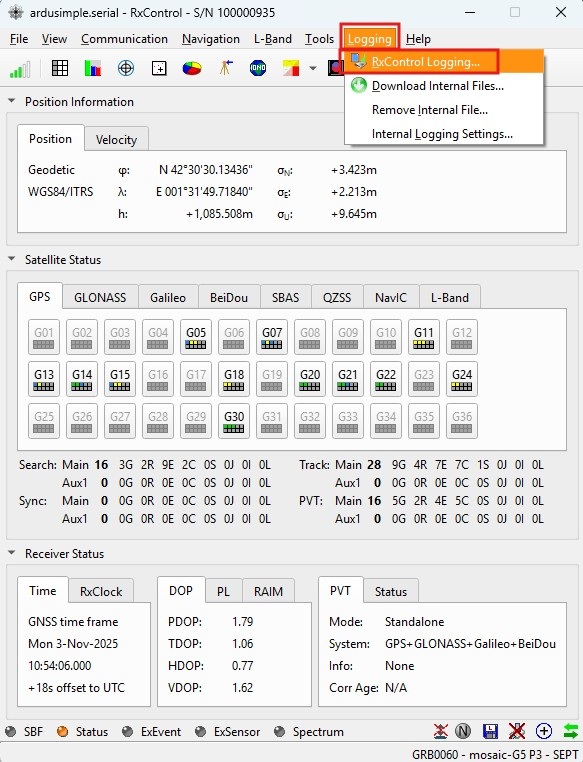
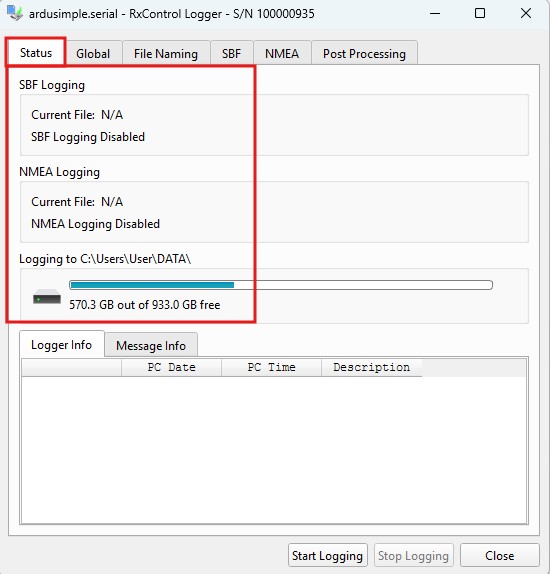
- While connected to your Septentrio G5 receiver via USB, you can use RxTools to log data to your PC drive. Go to the main menu Logging -> RxControl Logging…
- In the Status tab, you will find general information about the logging process and the space available on the PC drive.
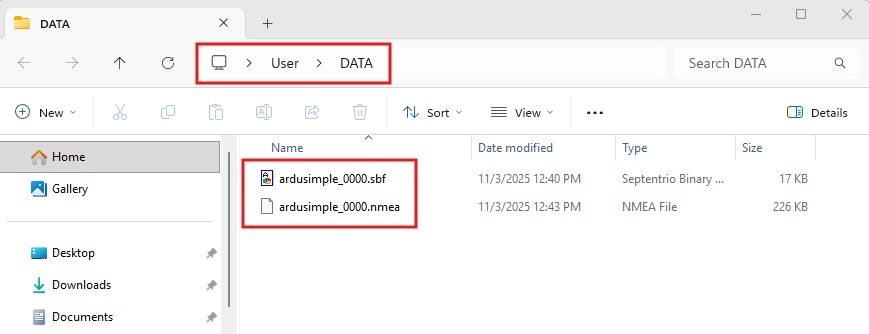
- In the Global tab, you can choose the Log Directory to save the logging files and the Message Types To Log as NMEA standard messages (ASCII files) and SBF (Septemtrio Binary Format) files, which can be afterwards replayed or converted into other common formats such as RINEX or KML using RxControl.

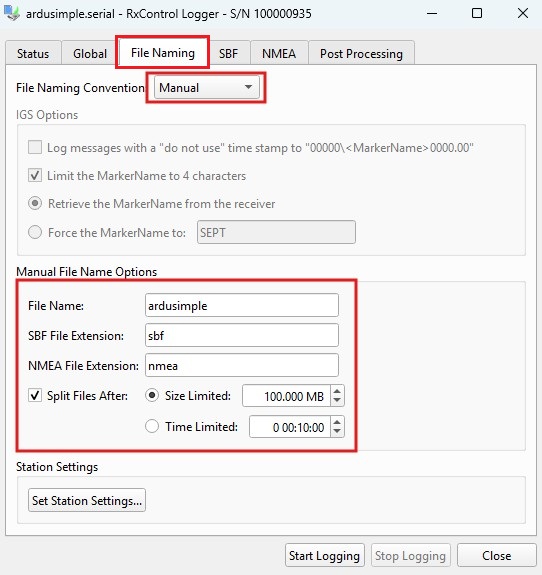
- At the File Naming tab, choose Manual File Naming Convention to manually type a common File Name and File Extension for both SBF and NMEA log files, and choose whether to Split Files After a specified file size or time limit is reached.
- The SBF tab is useful if you want to log RINEX files for PPK post-process analysis. Select the SBF file type you want to log, and the corresponding data will be activated accordingly.

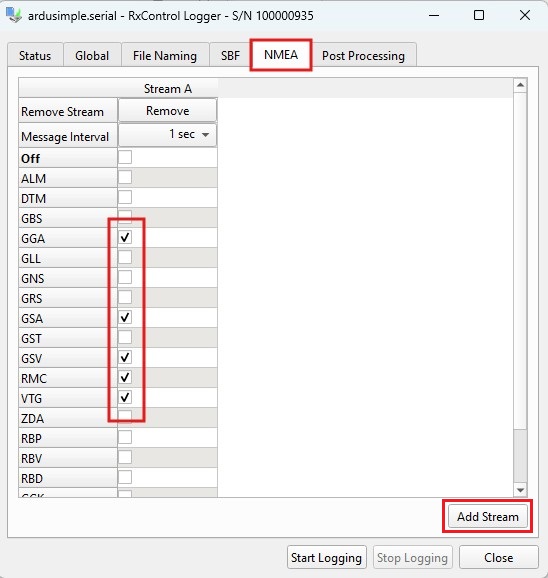
- In the NMEA tab, press the Add Stream button to create a new stream and activate the NMEA messages you want to log, usually GGA, GST, GSV, and VTG.
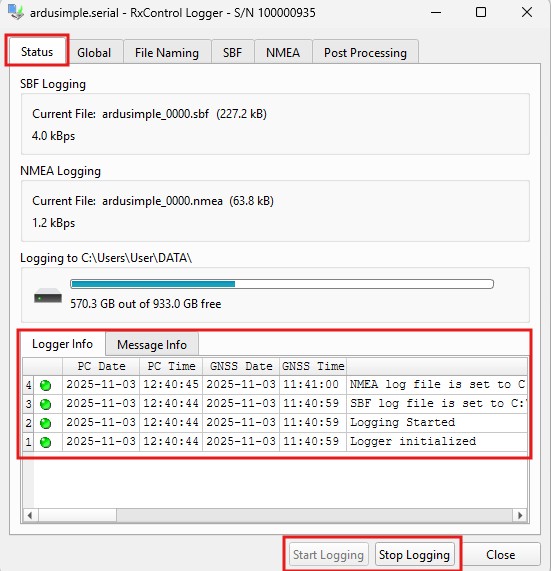
- Press the Start Logging button to start logging the files. You will find them in the designated PC drive folder. You can use your preferred tool to analyse the saved NMEA log files. For SBF log files, we recommend using RxTools SBF Analyzer. Press Stop Logging once you are done logging the receiver data.
Alternatively, you can log GNSS data directly to an SD card (without a computer) by inserting one of our Serial Datalogger to microSD plugins into the board’s XBee socket. This is ideal for PPK, RTK, and standalone applications.
Firmware upgrade
For simpleRTK 4 Pro board, download the latest stable firmware here.
For simpleRTK 4 Heading board, download the latest stable firmware here.
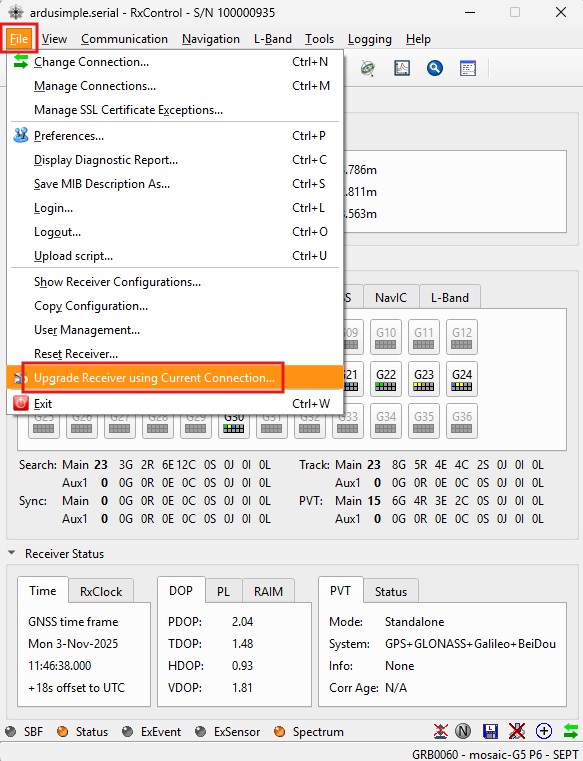
- Go to main menu File -> Upgrade Receiver using Current Connection…
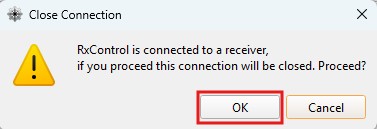
- Press OK in the Close Connection warning message.
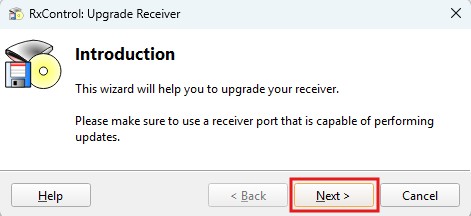
- The Upgrade Receiver GUI will open. Press Next.
- Download and uncompress the corresponding firmware zip file for your board (either G5 P3 or G5 P3H) from the links above, and press Browse…

- Select the firmware file without a “failsafe” name suffix and press Open.
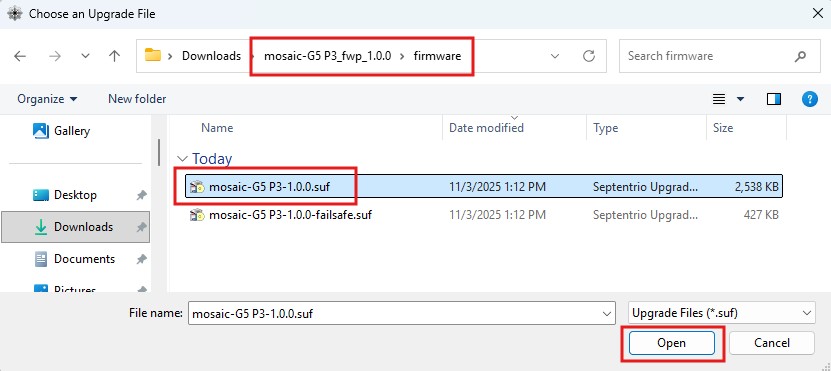
- Check that the firmware upgrade file is set correctly and press Next.

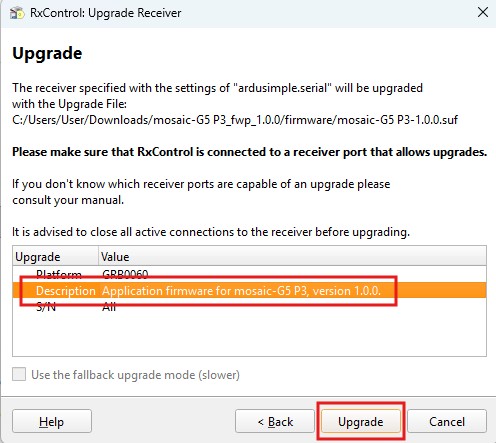
- A summary of the Upgrade Receiver settings will be displayed. Press Upgrade.
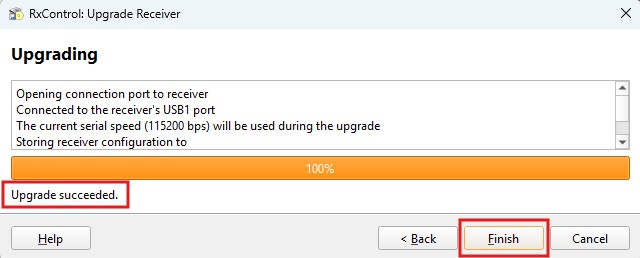
- The Upgrading window will open, showing its progress. Make sure not to disconnect your receiver during this process. If everything works correctly, you will see an Upgrade Succeeded message. Press Finish.
Septentrio documentation
If you are seeking detailed information, please refer to our related tutorials and Septentrio documentation provided below:
- Sale!
 Made in EuropeRTK4 Boards
simpleRTK 4 Heading
519,00€Original price was: 519,00€.499,00€Current price is: 499,00€. - Sale!Made in Europe

