 and
and 

User Guide: RTK Handheld 2 Mapping Kit
Overview
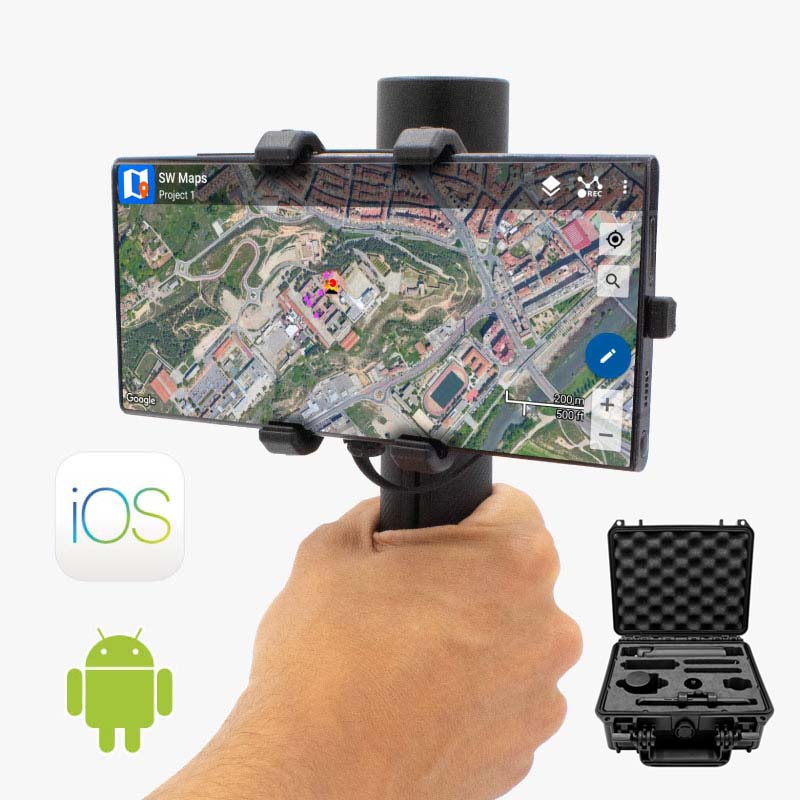
Get professional centimeter-level accuracy RTK surveying in the palm of your hand. This complete RTK Handheld 2 Mapping Kit comes in a waterproof transport case and with all the necessary accessories, so you can start your surveying project immediately.
Package
The package includes:
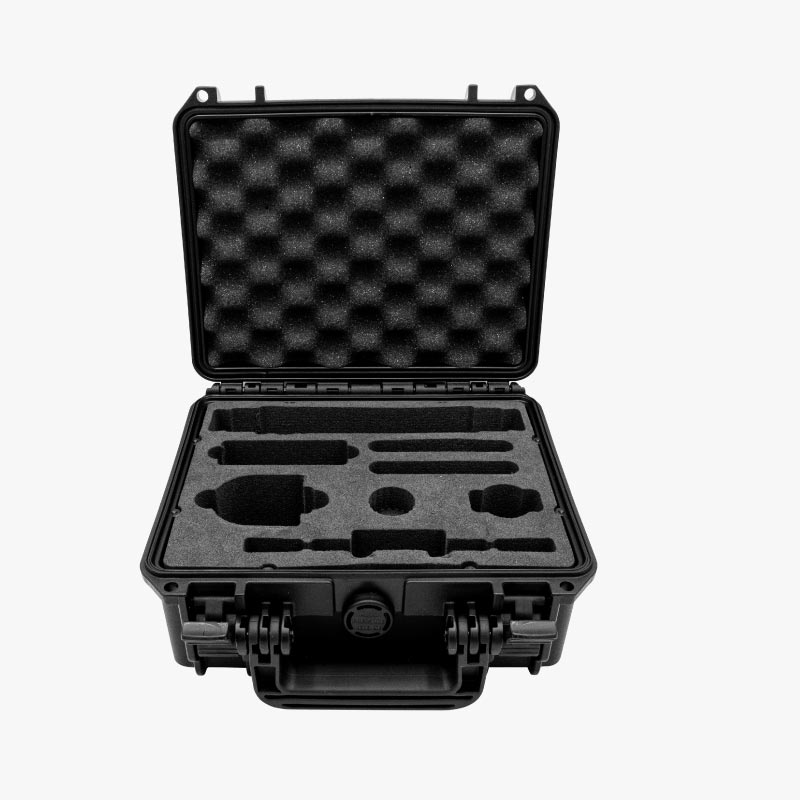
- Waterproof transport case with precut foam to fit all components.
- RTK Receiver & Antenna.
- RTK Receiver powered by u-blox ZED-F9P (inside IP53 plastic case): It’s already configured to send correction data and position information via USB and Bluetooth simultaneously.
- Bluetooth + Bluetooth Low Energy plugin: Allows connection with Android and iOS devices.
- Helical triple band + L-Band Antenna: High quality antenna for precision GNSS work, its spiral shape provides a wide reception angle.
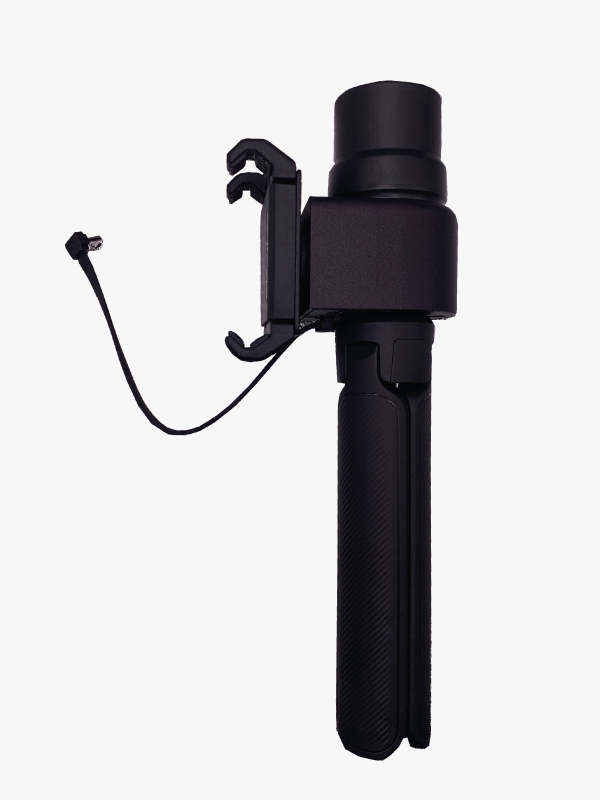
- The Mounting System:
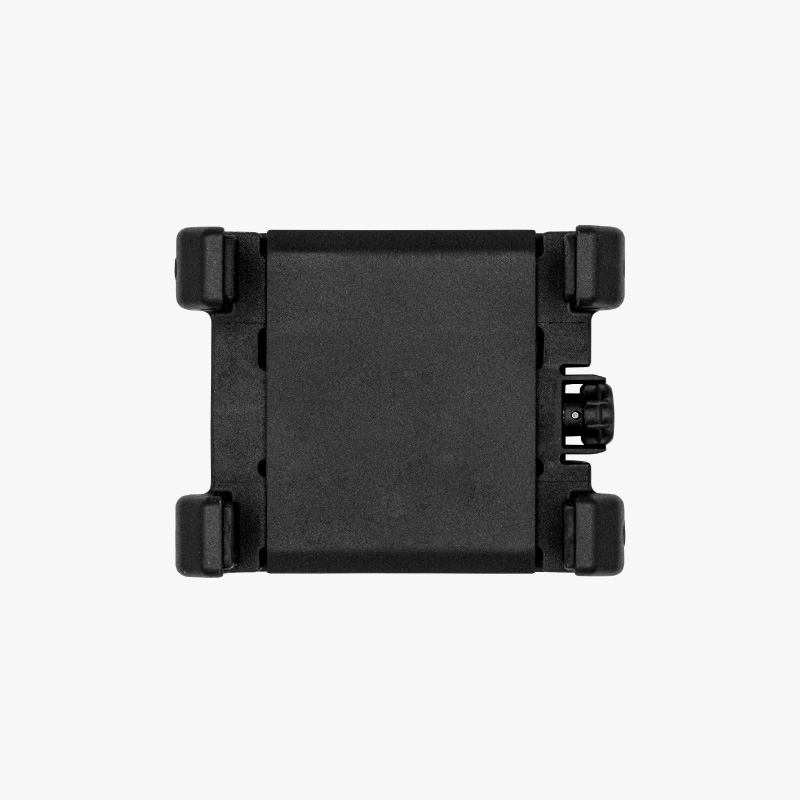
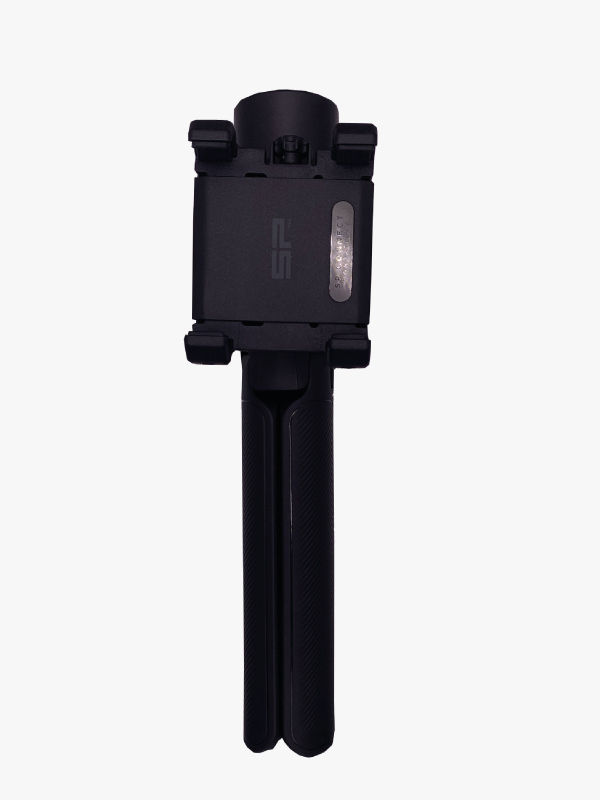
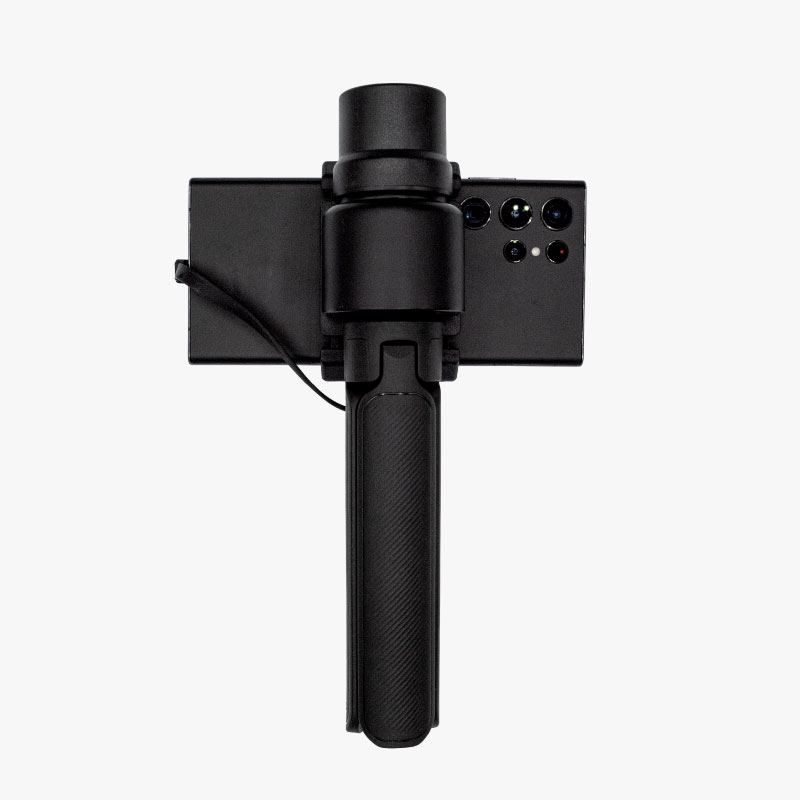
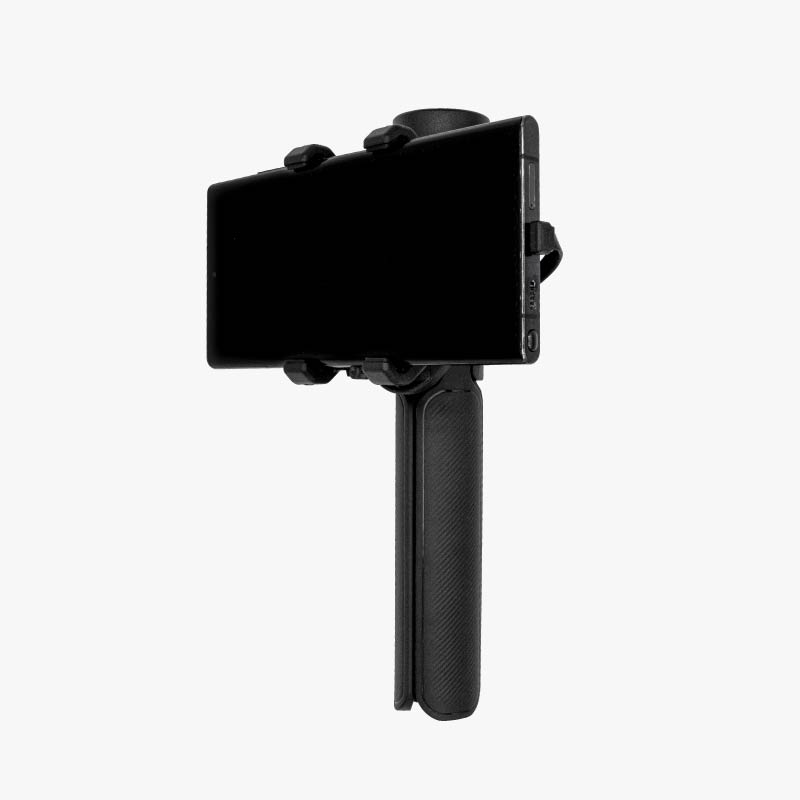
- Smartphone Holder: SP compatible with rubber bands that keep the phone stable and protect it from slipping. It accommodates phone sizes from 58mm to 82mm in width.
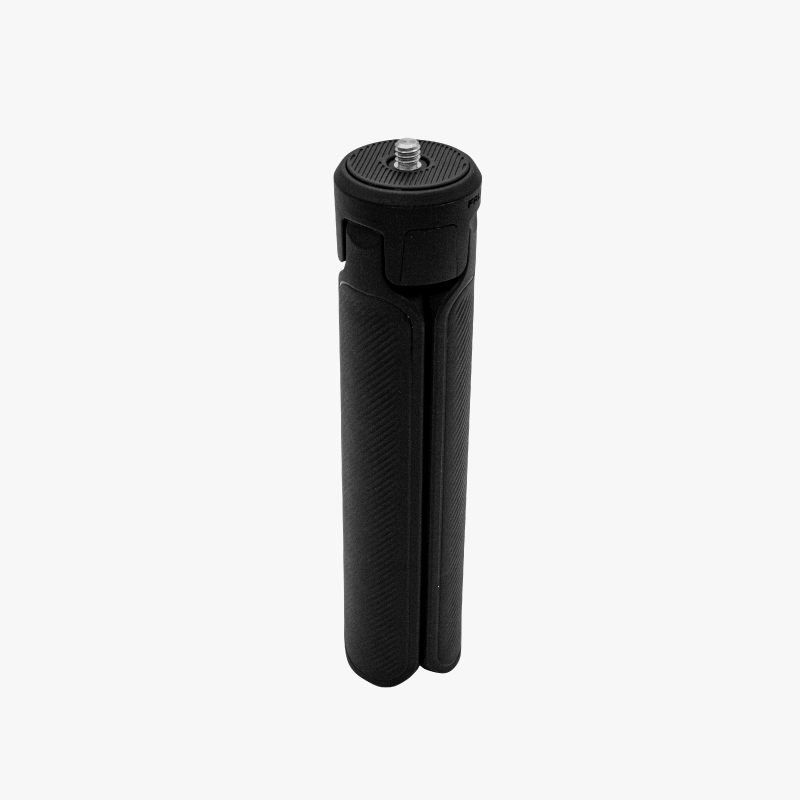
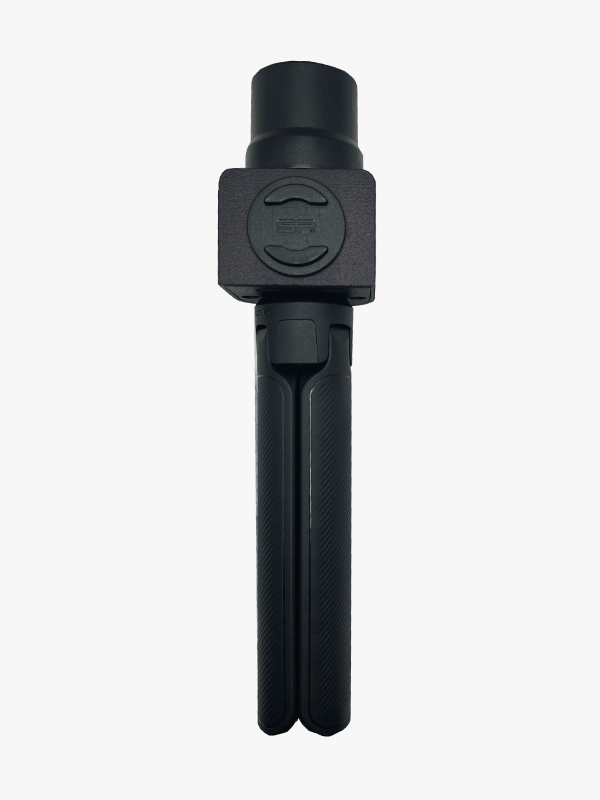
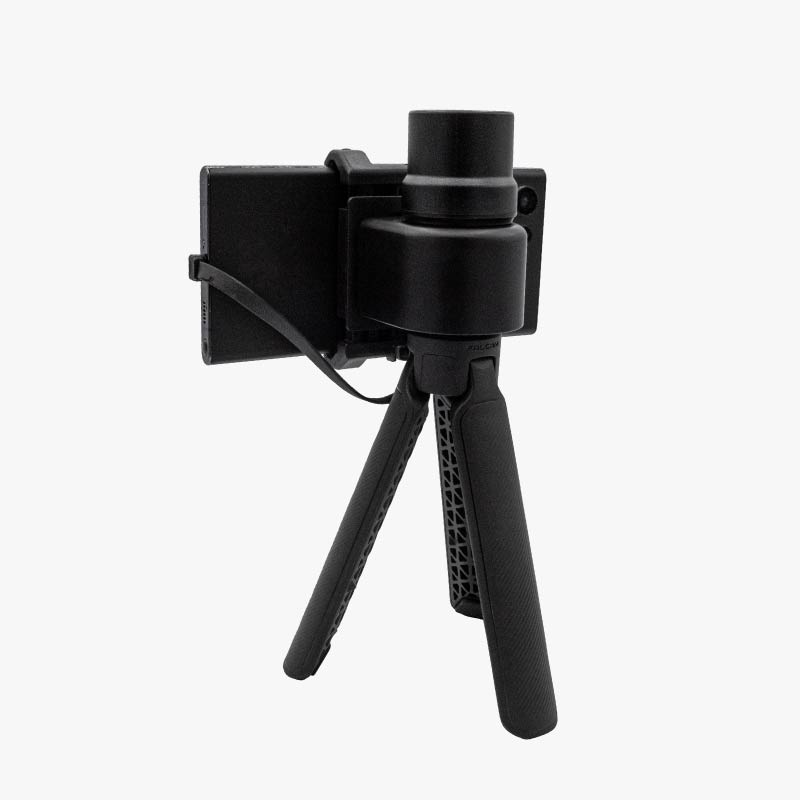
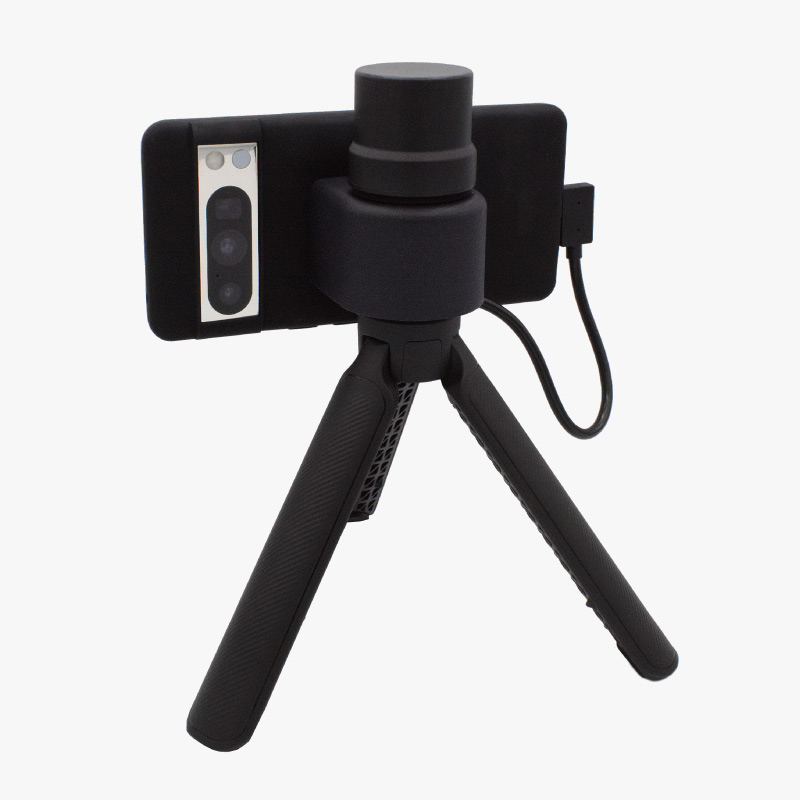
- Handgrip: Designed for comfortable, stable operation during long surveying sessions. It can also be unfolded to act as a small tripod.
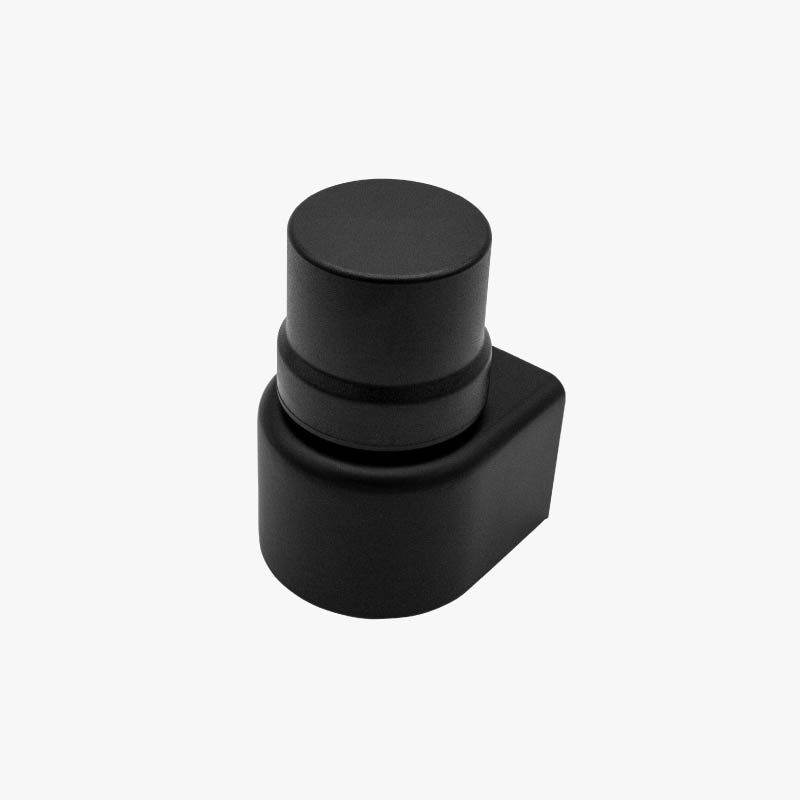
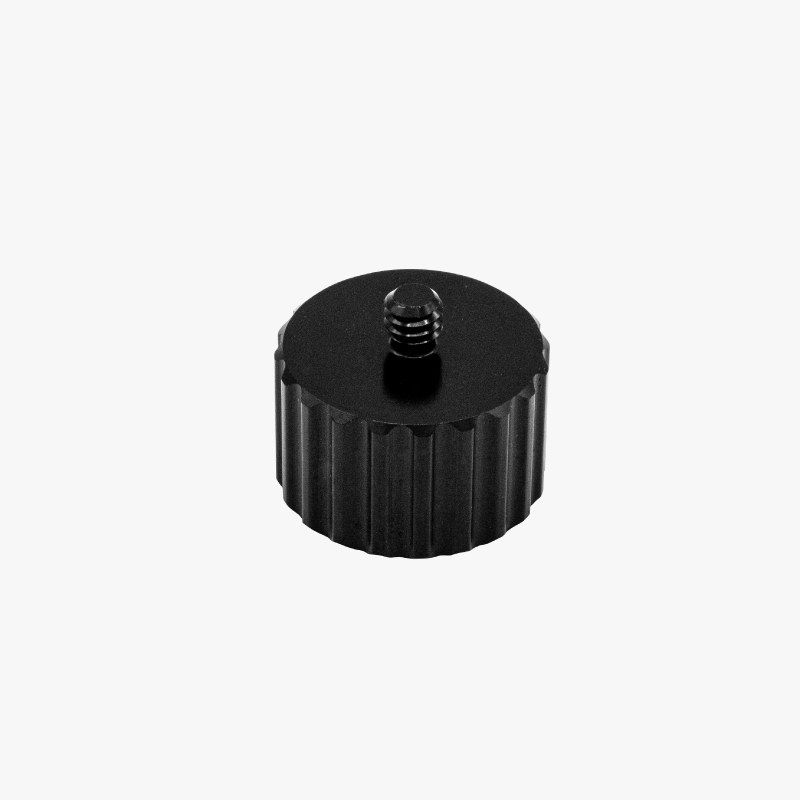
- Pole adapter to install the kit in a surveyor pole (1/4 male thread to surveyor pole female thread).
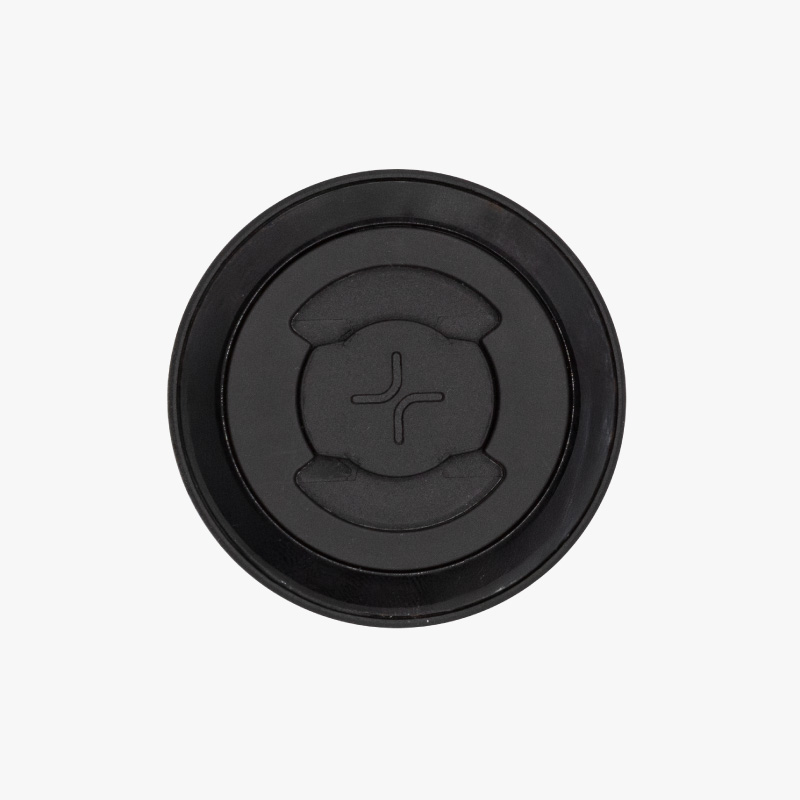
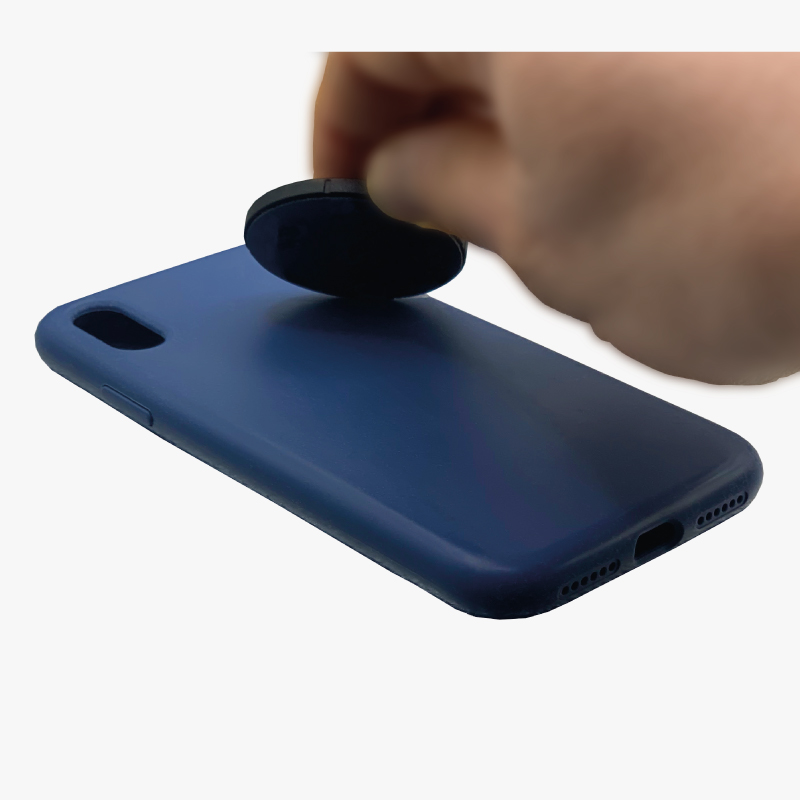
- Adhesive dock: Useful to set the phone in portrait orientation.
- 2x USB-C OTG Cable (15 cm): Used to connect the receiver directly to your smartphone. One is provided as a spare.

Unboxing
The RTK Handheld 2 Mapping Kit requires no special tools for assembly. The entire unit can be built by hand. Please follow the installation manual below.
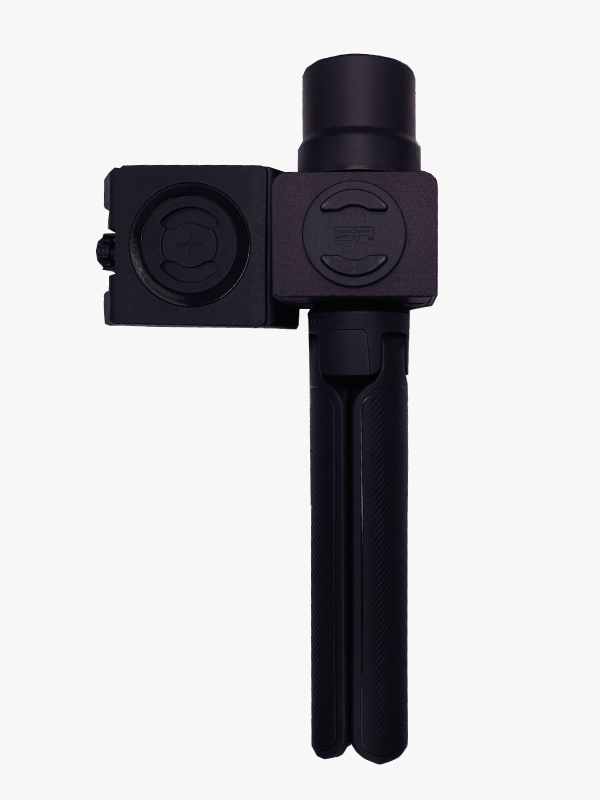
- Align the hole in the RTK Receiver with the handgrip and screw them together.
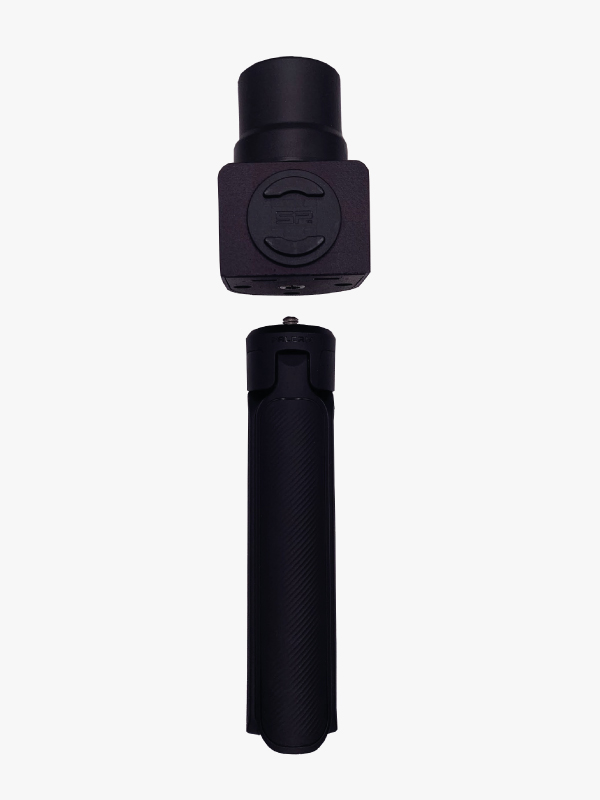
- To attach the smartphone holder, align the back side of it to the flat edge in the RTK Receiver case and rotate it 90 degrees until it locks in place (a bit of force might be needed to make it slide in).
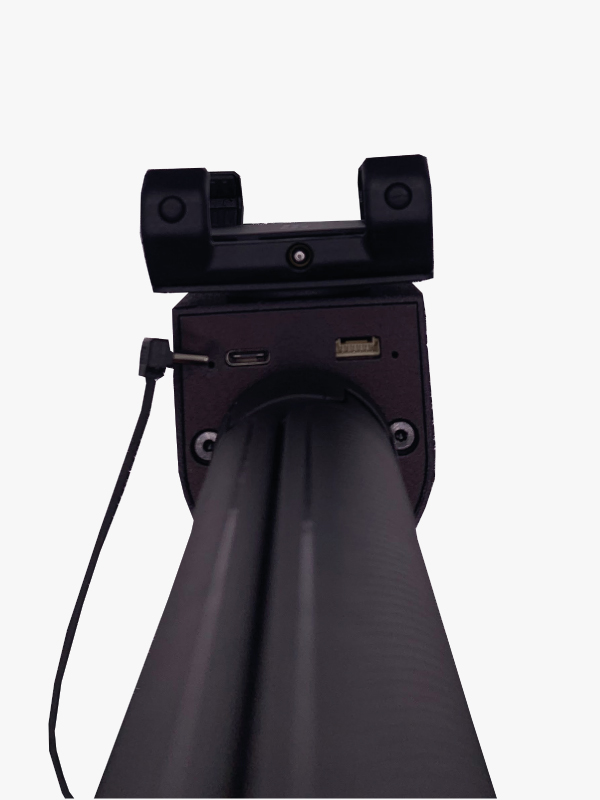
- Connect the USB OTG cable to the USB connector placed at the bottom of the receiver case.
- To attach your phone, open the phone holder’s arms by extending its handle and turning it counter-clockwise.
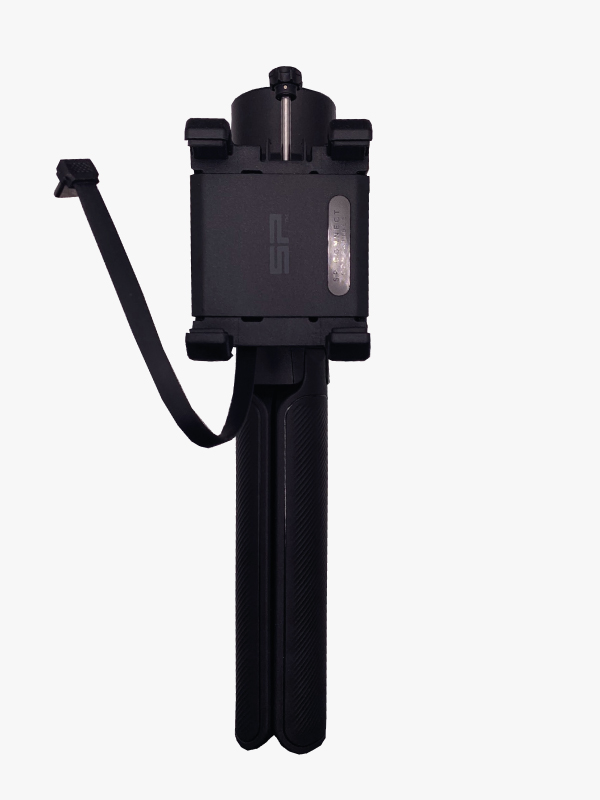
- Place your phone in the center and turn the handle 90 degrees (either clockwise or counterclockwise) until the phone is firmly held by the phone holder. Then, retract the handle back into its locking mechanism.
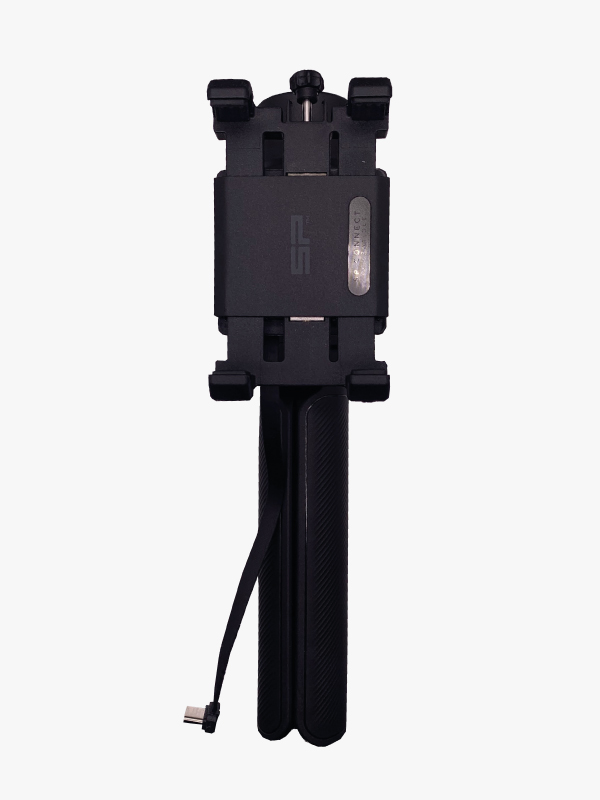
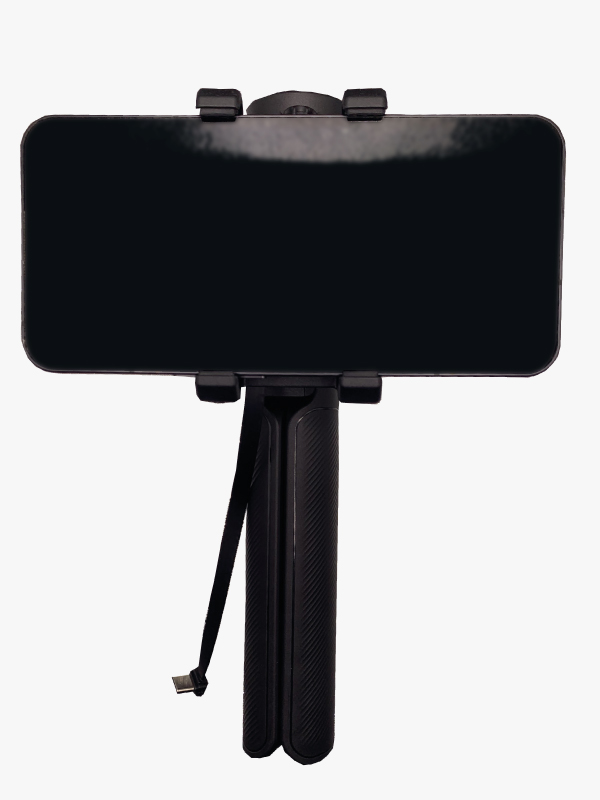
- Connect the USB-C OTG cable to your phone.
- Great work! With the assembly complete, your RTK Handheld 2 Mapping Kit is ready for its first survey.
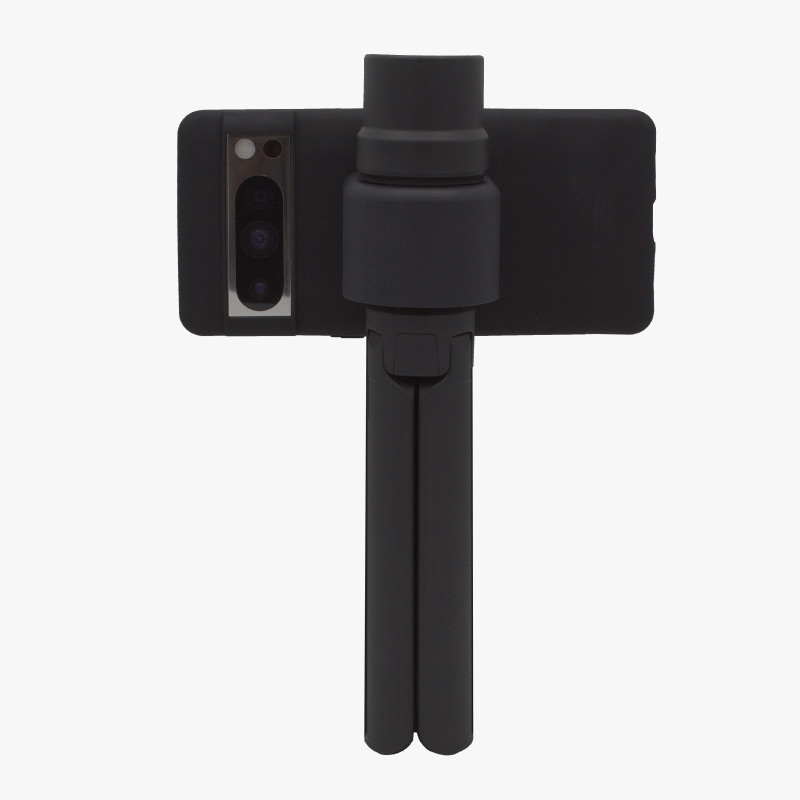
Portrait orientation of the smartphone
- If you want to use the handheld kit with your phone in portrait orientation, please note that the standard Smartphone holder should not be used. In this case, you should attach the Adhesive dock included in the package directly to the back of your phone case, and with the adhesive dock holes in horizontal direction. Be aware that when using the phone in portrait orientation some rear cameras may be obstructed by the kit, so place the adhesive dock as far as possible from the phone rear cameras to avoid this.
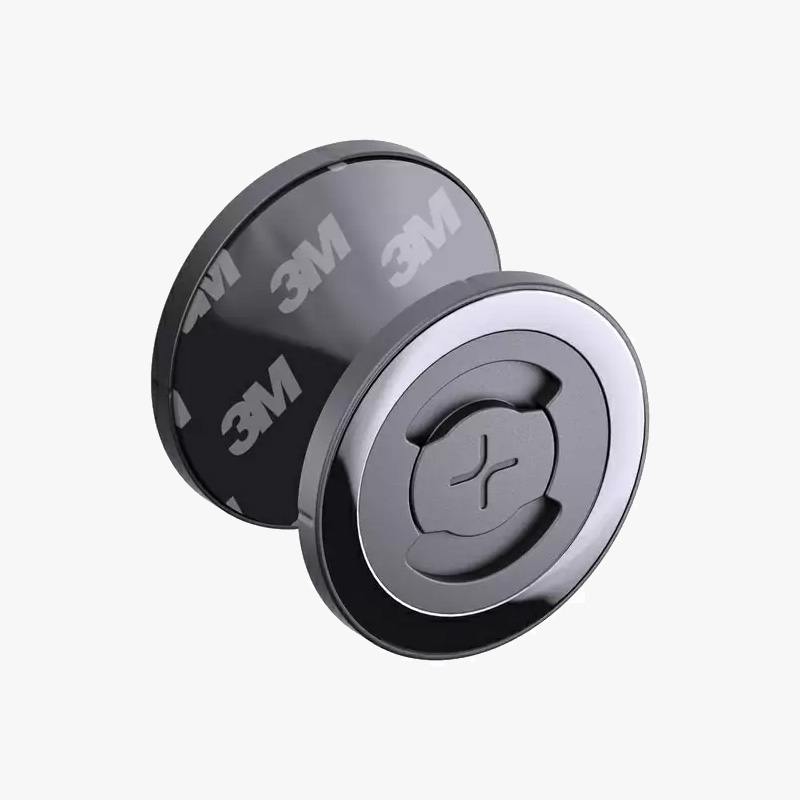

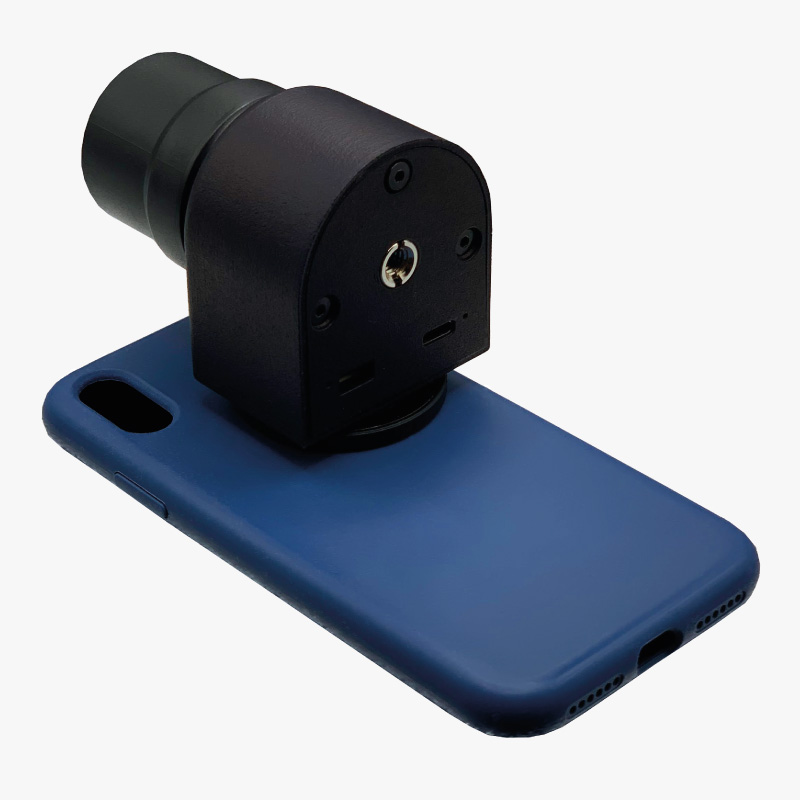
- Align the back side of the phone case to the flat edge in the RTK Receiver and rotate it 90 degrees until it locks in place. In this way you can use your smartphone with the kit in portrait orientation
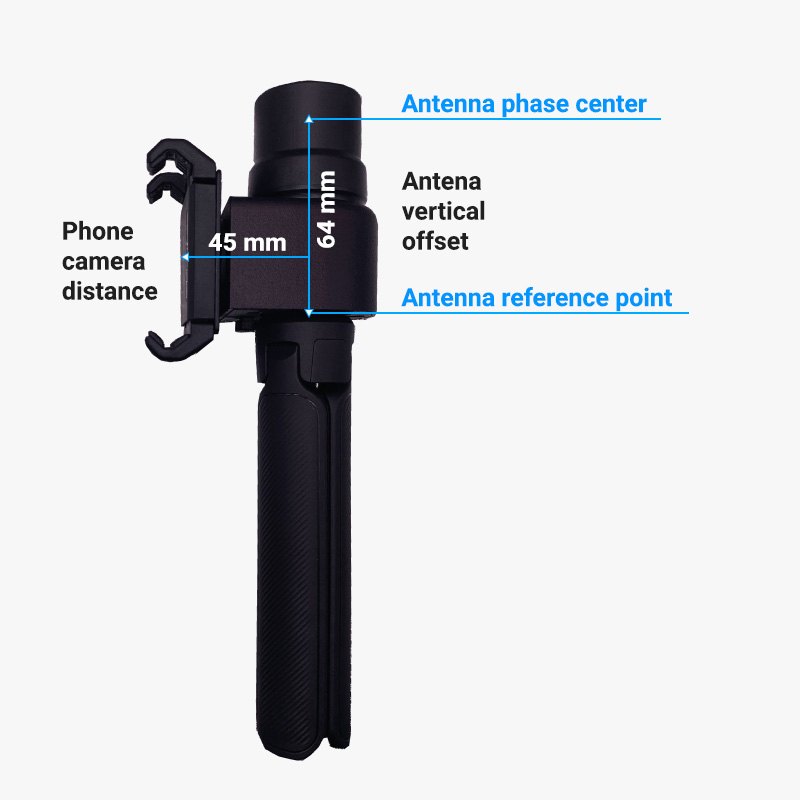
Photogrammetry
- In case of photogrammetry we do not recommend using the provided phone holder, but instead purchasing one of the SP-Connect phone cases (not included) with the attachment system embedded in it. They are available for the most popular phone brands including Apple, Google, Samsung and Xiaomi at the SP-Connect website.

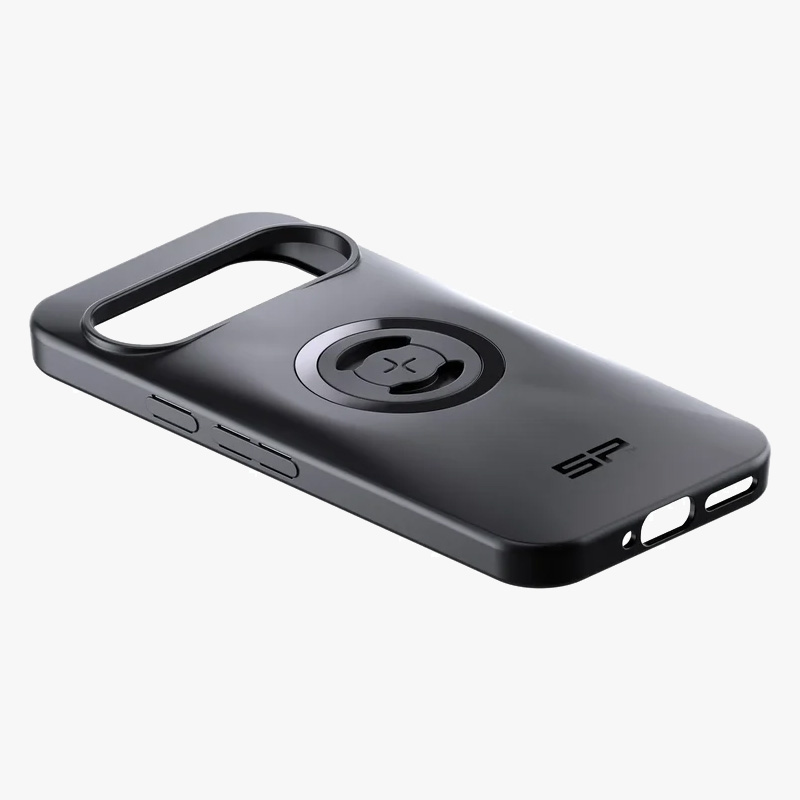
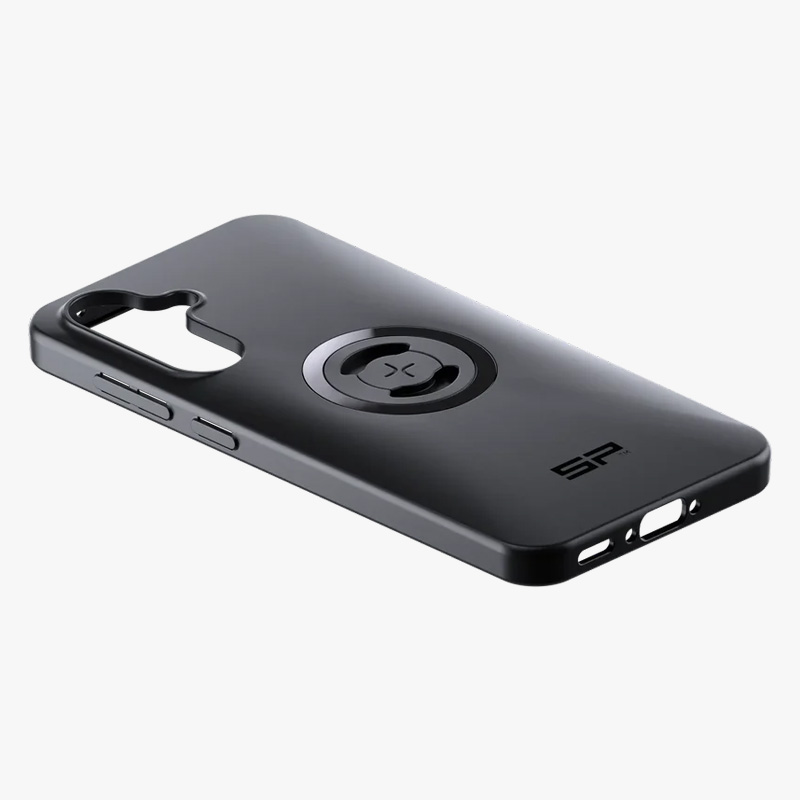
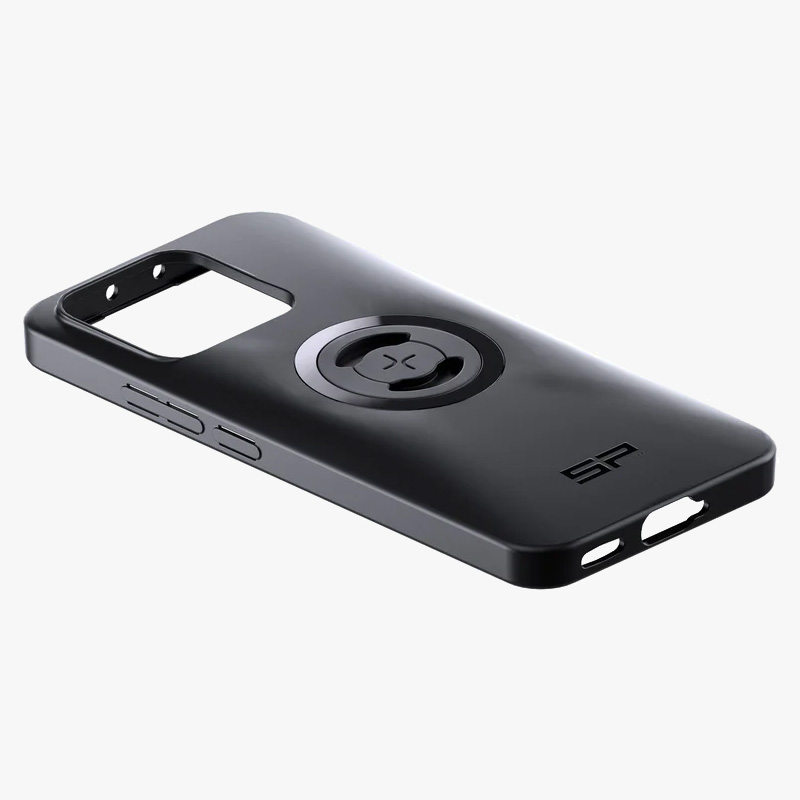
- This way you ensure that the smartphone is always mounted in the exact same position when using the RTK Handheld kit for photogrammetry. This is critical, as the offset (distance between the GNSS antenna and the camera lens) has to be introduced in the photogrammetry software and remain constant during image capture sessions.
Getting started
Connect the GNSS receiver to your device, in an open location with good view of the sky or near a window for testing its functionality.
on Android
There are numerous Android GIS applications that are compatible with the RTK Handheld 2 Mapping Kit, but SW Maps is our preferred one.
In this step-by-step tutorial we will explain how to connect your new RTK Handheld 2 Mapping Kit to your Android device using SW Maps. This can be done using either the provided USB-C OTG cable or by a Bluetooth Low Energy (BLE) connection.
- The USB-C OTG cable included in the package is the recommended method to connect to an Android device, as it powers the RTK receiver and transmits data at the same time, and the connection is more stable.
- There is an option to use a Bluetooth Low Energy connection instead, but then the receiver would need to be powered by an external power supply. In this case, we recommend ordering the handgrip with built-in battery, which will not only power your kit reliably but also give you a much more ergonomic setup compared to carrying an external power bank.
- Install SW Maps app on your Android device from the Google Play Store.
- Open the app and grant permissions (first time only).
Connect via a USB-C OTG cable (recommended)
- Connect RTK receiver with your Android device with USB OTG cable.
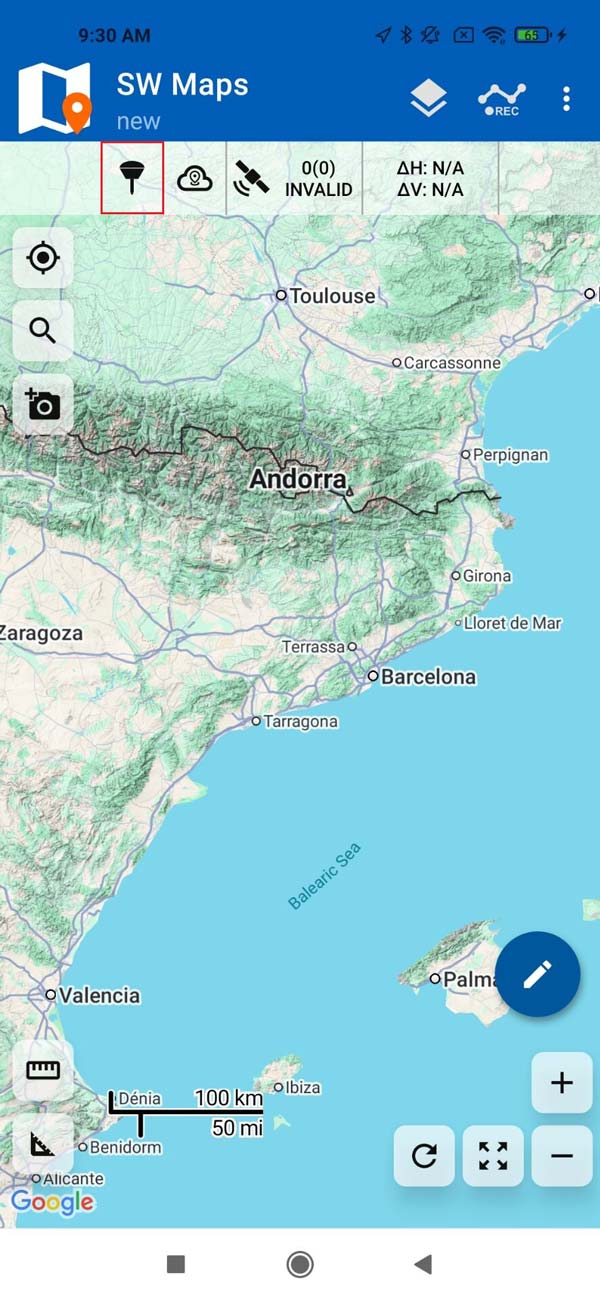
- Click on the antenna icon to show the connection menu.
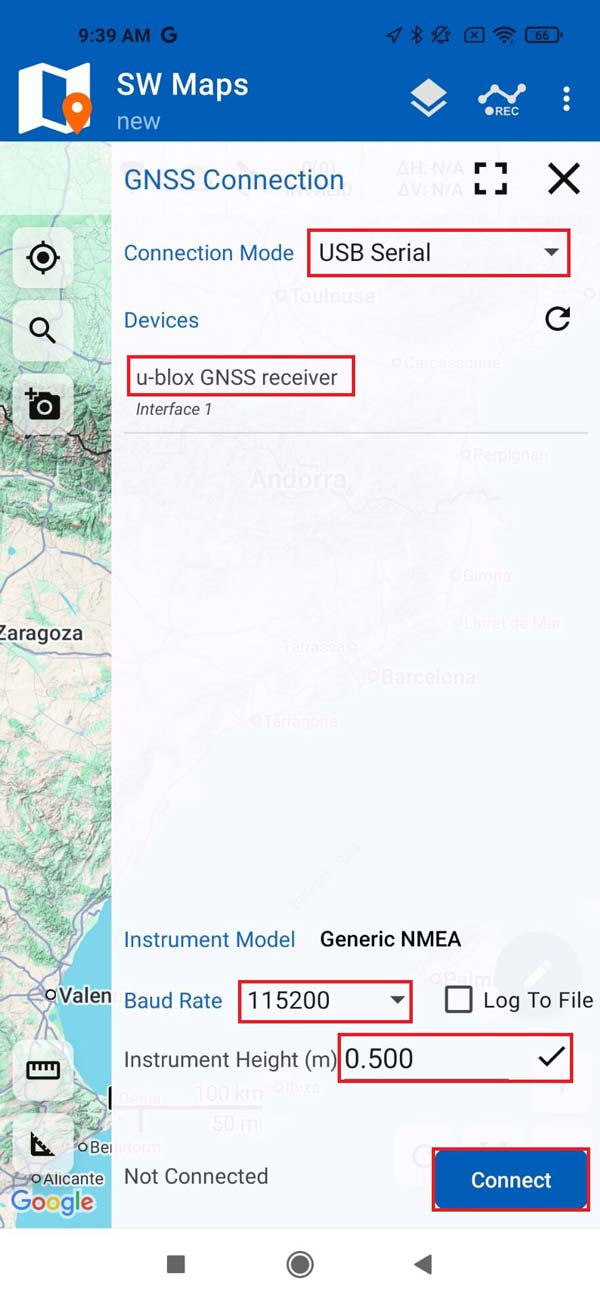
- Choose USB Serial as Connection Mode. Under Devices, tap u-blox GNSS receiver and set Baud Rate to 115200 bps.
- Instrument Height refers to the expected receiver elevation from the ground.
- If you are using the RTK kit handheld, set the instrument height to 0 since elevation measurements will not be precise due to natural hand movement.
- If you are using the kit with a surveying pole, set the instrument height to the exact height of the pole.
- Press CONNECT.
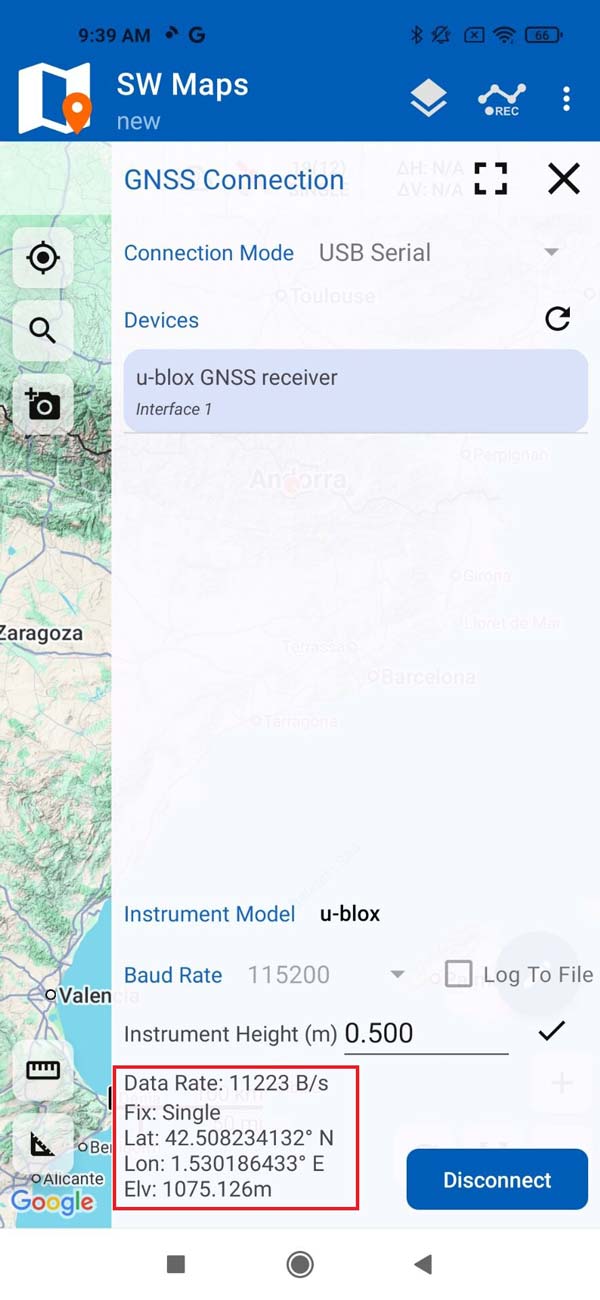
- You should now see a GNSS receiver successful connection and data transfer.
Connect via Bluetooth LE
- Power your RTK receiver by connecting USB cable to the power supply (smartphone/tablet/compatible powerbank). If you get any popup message to connect the USB device with any app, you can ignore it.
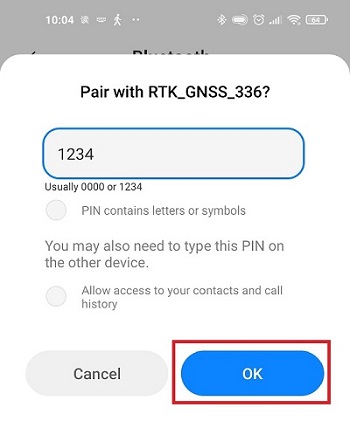
- Enable your smartphone/tablet Bluetooth, and pair it with your RTK receiver. When pairing your device, notice that it will appear as BT+BLE_Bridge _****. The password is always 1234.
The pairing only needs to be done once.
- Tap the antenna icon to show the GNSS Connection menu.
- Set Connection Mode to Bluetooth LE, and under Devices select the one you paired in step 4. Instrument Height refers to the expected receiver elevation from the ground.
- If you are using the RTK kit handheld, set the instrument height to 0 since elevation measurements will not be precise due to natural hand movement.
- If you are using the kit with a surveying pole, set the instrument height to the exact height of the pole.
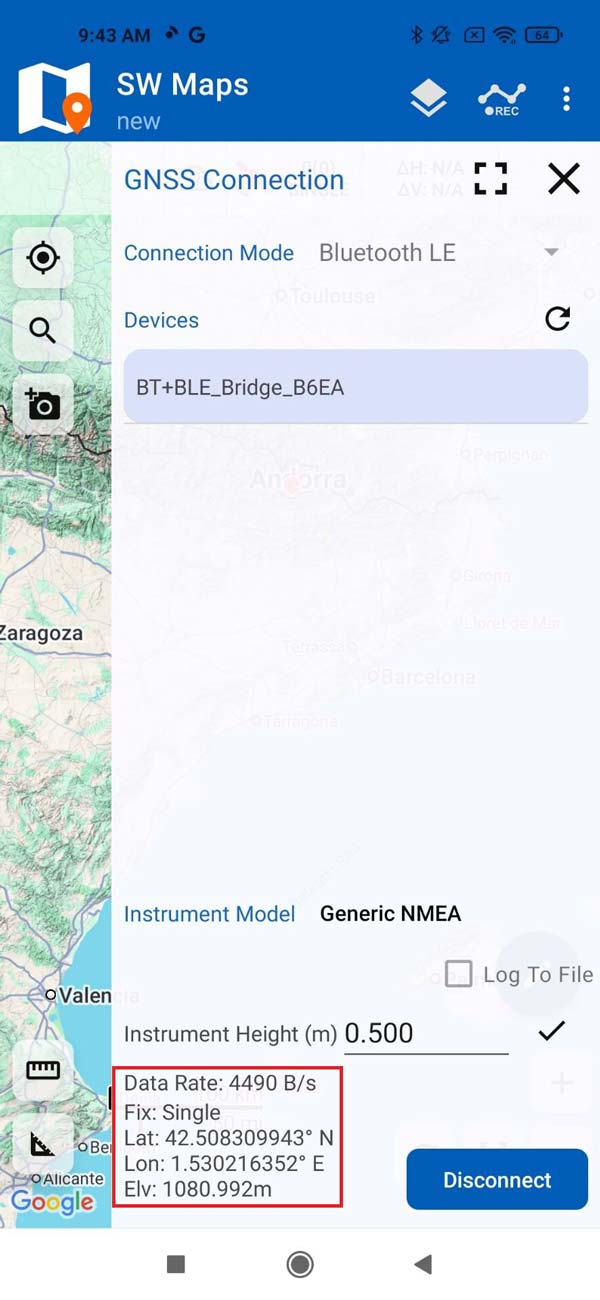
- Press CONNECT
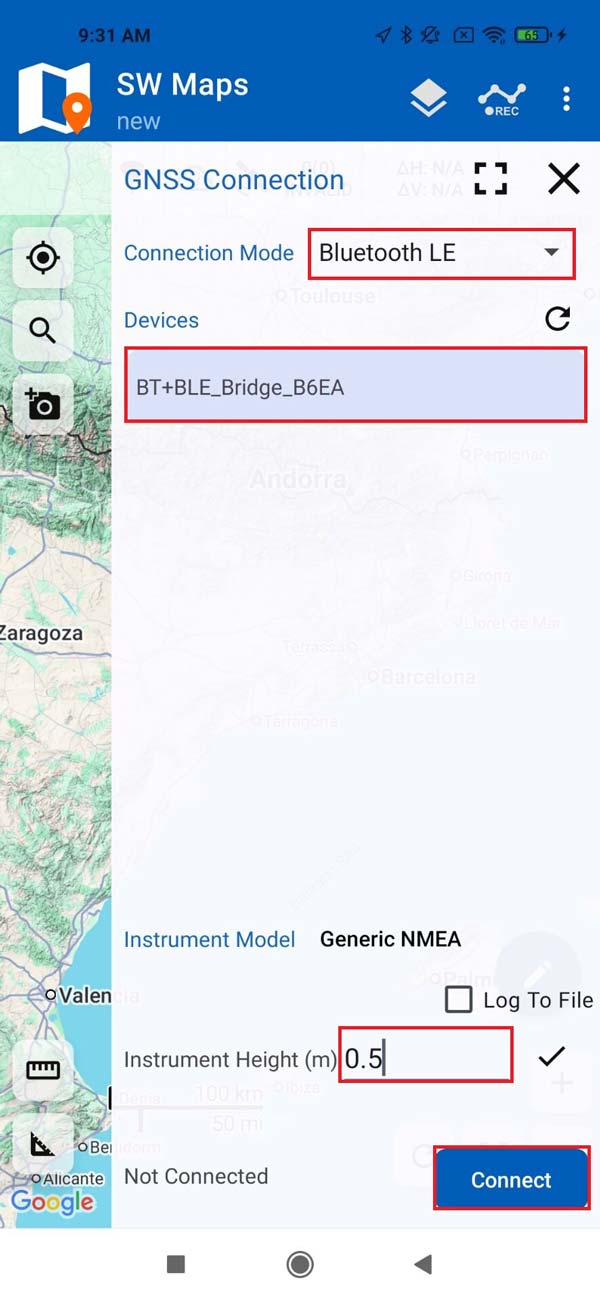
- You should now see a GNSS receiver successful connection and data transfer.
To get centimeter accurate measurements, it is needed to connect to a NTRIP service to get RTK corrections. If you need help to finding one, check the list of RTK Correction Services in your Country which we have prepared for you.
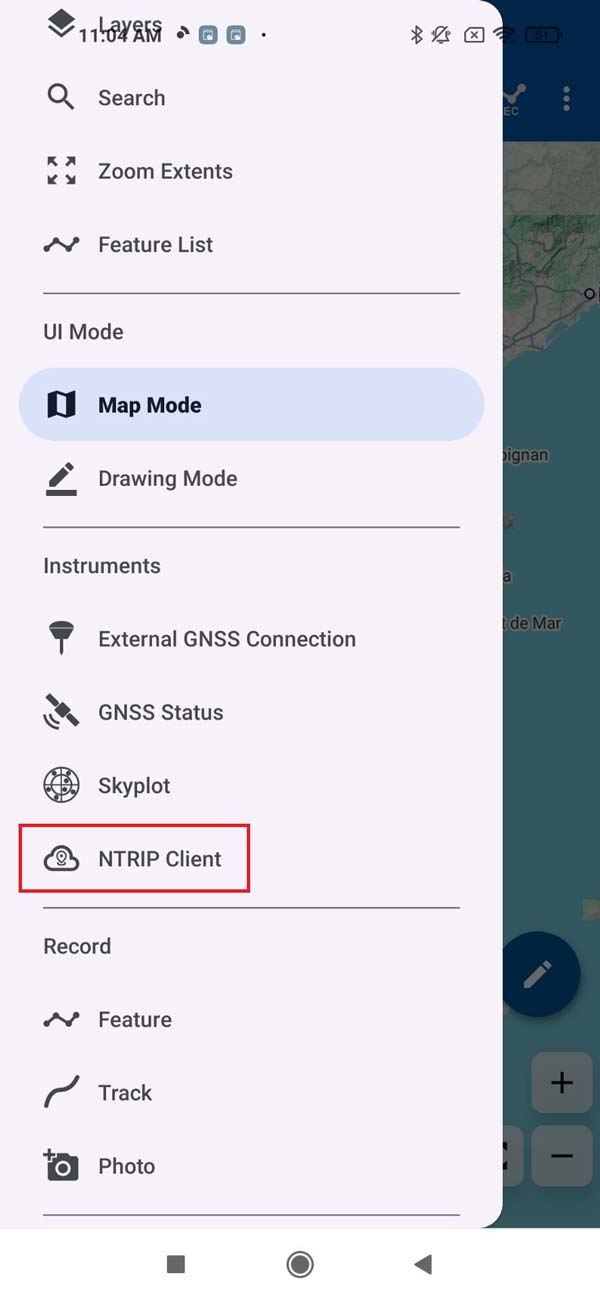
- Go back to SW Maps main menu and select NTRIP Client.
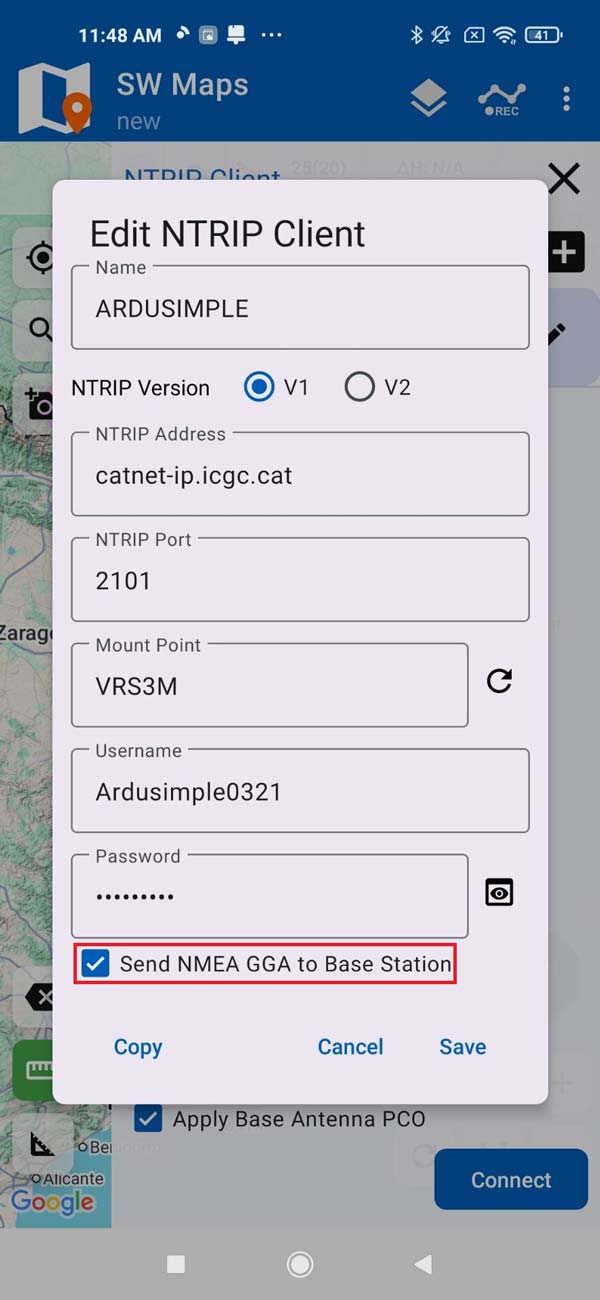
- Enter your NTRIP Client credentials:
- Name: A custom name you choose to save the NTRIP connection account.
- NTRIP Caster Address and NTRIP Port: This information should be provided to you by the NTRIP service when you set up your account.
- Mount Point: Choose the closest mount point to the area you are going to operate from.
- User Name and Password: This should be provided to you when you set up your account.
- We recommend enabling Send NMEA GGA to Base Station option to send your location to the NTRIP caster.
- Press SAVE.
- Enter your NTRIP Client credentials:
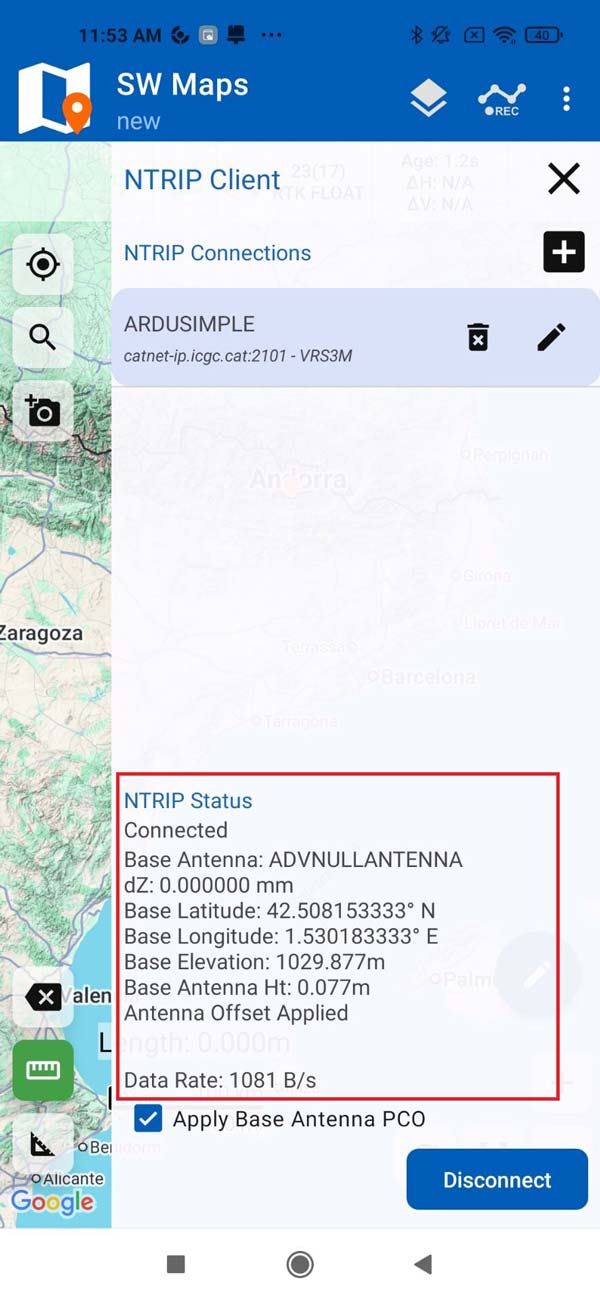
- Press CONNECT. At NTRIP Status you will see a successful connection and data streaming to your device.
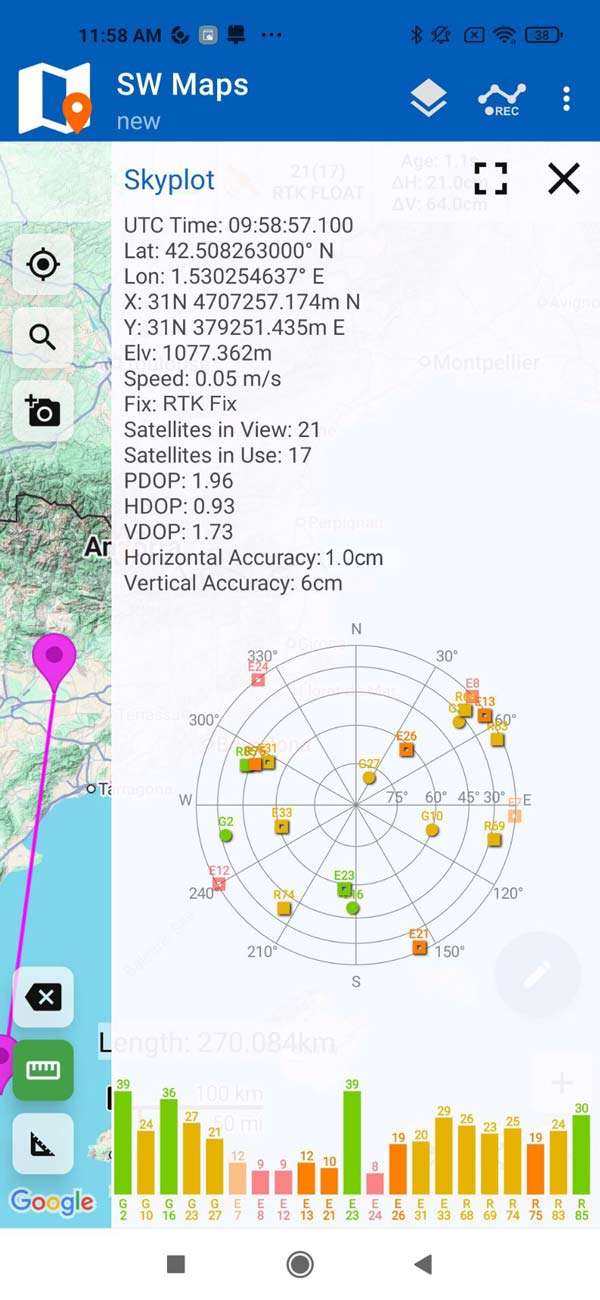
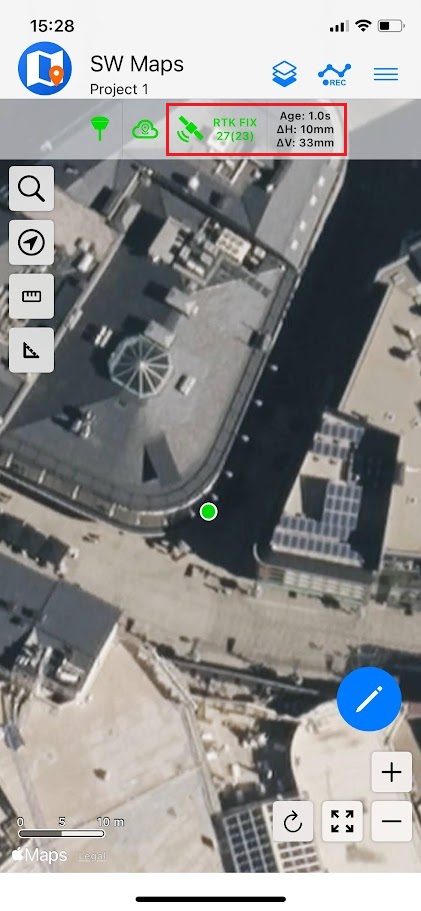
- Go back to SW Maps main menu and select Skyplot. You should now see the available satellites at your position, Fix set to either RTK Float or RTK Fix, and centimeter level Horizontal and Vertical Accuracy.
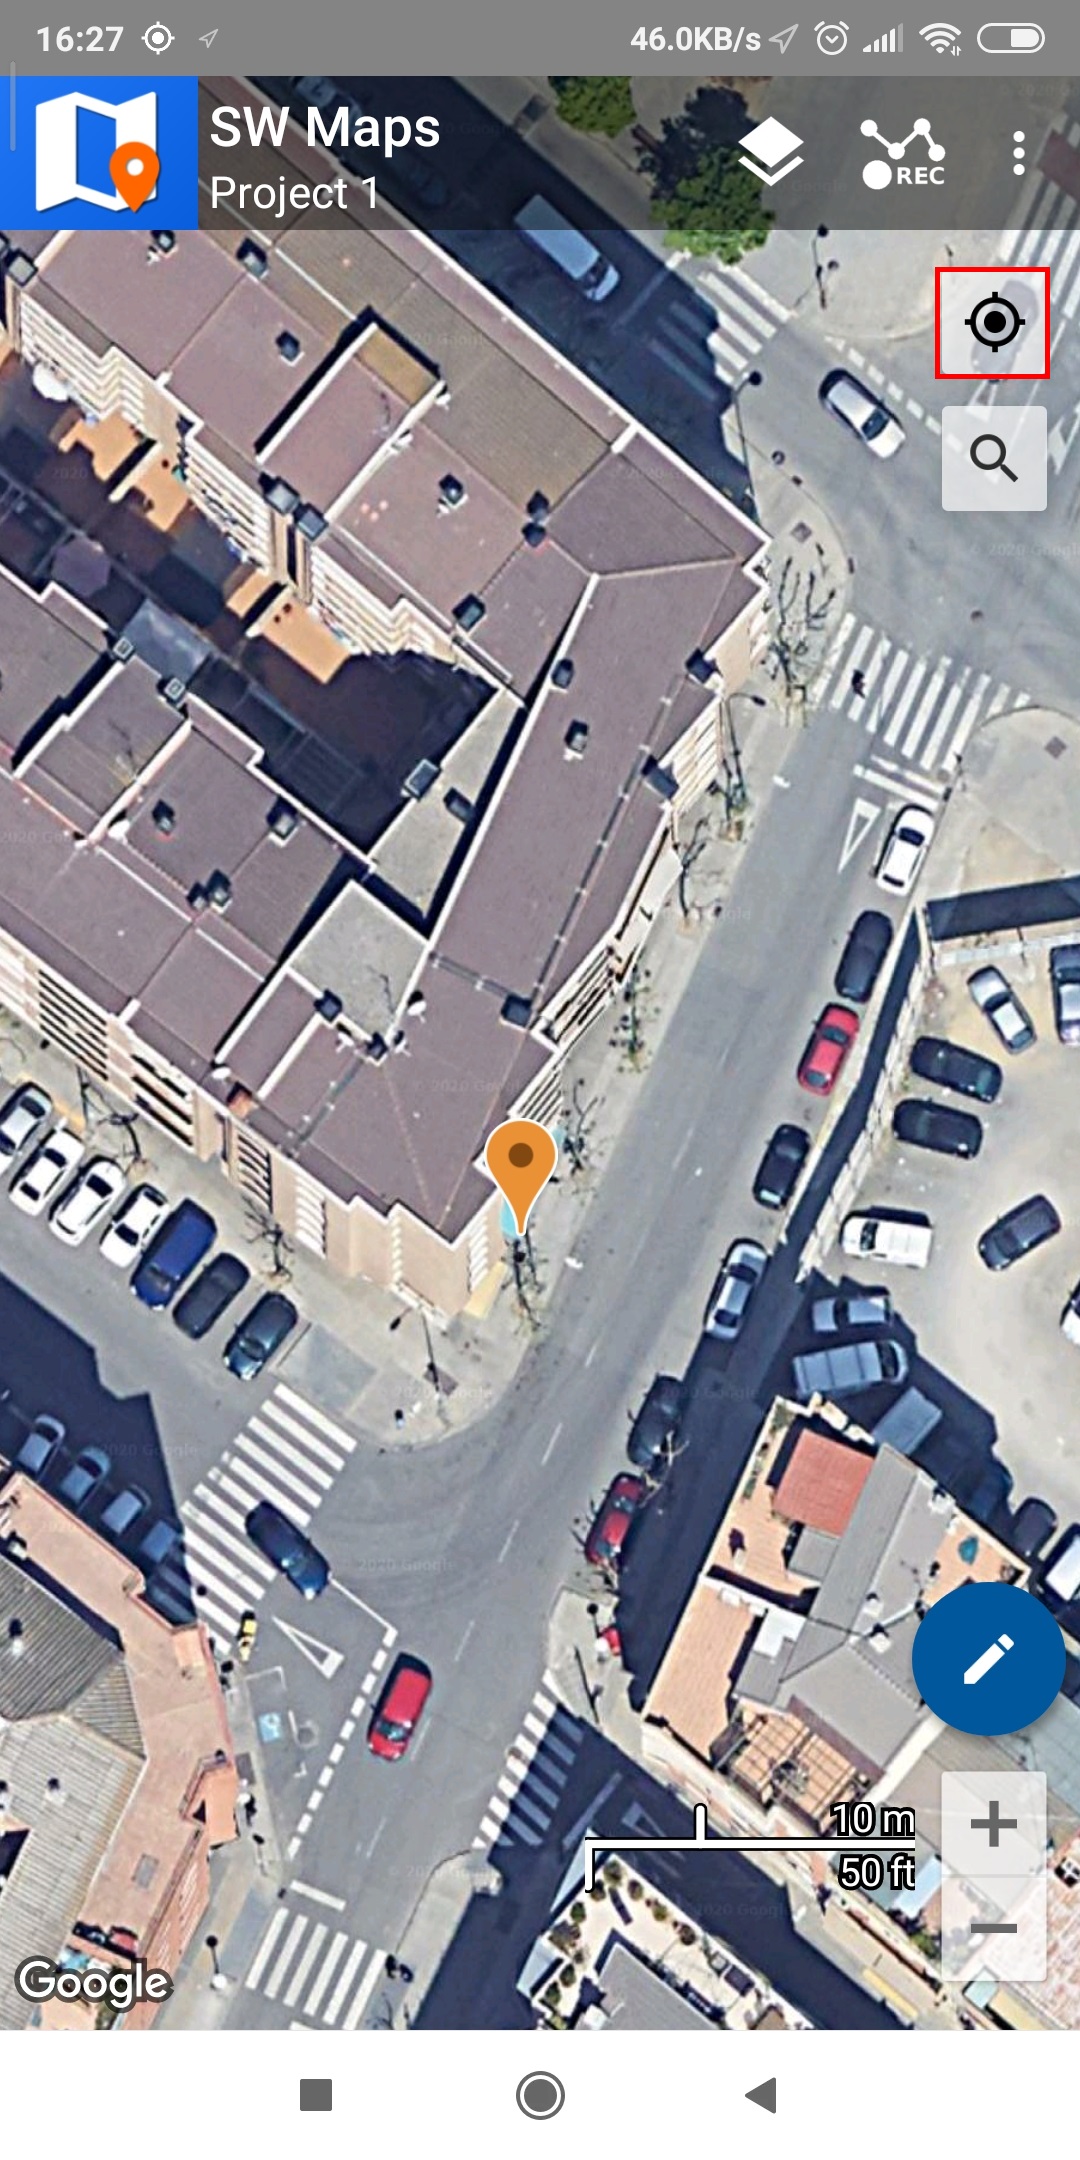
- To re-center the map on your location, click the icon highlighted in red. The pointer indicating your location will dynamically switch its color based on the receiver Fix status:
- Orange when the status is RTK Float with slightly less accuracy.
- Green when the status is RTK Fix with full centimeter accuracy.
For further information on how to use this application please follow the SW Maps user guide.
The kit supports a wide range of third-party integrations. Use the table below to learn which apps you can use with your kit and how to do that.
If you cannot find your preferred app in the list, please contact us and we will test it for you.
| App | Android |
|---|---|
| SurvX | supported |
| Surpad | |
| Lefebure | supported |
| SW Maps | supported |
| Mapit GIS | supported |
| Field Navigator | |
| AgriBus Professional | supported |
| FieldBee | |
| PinPoint GIS | |
| Field Maps | supported |
| Google Maps | supported |
| QField | supported |
| LocusGIS | |
| Mobile Topographer | supported |
| Kizeo Forms | supported |
| ODK Collect | supported |
| MicroSurvey FieldGenius | supported |
| Mergin Maps | |
| Aplitop TcpGPS | |
| PointMan | |
| OCAD Sketch App | |
| X-Survey | supported |
| Tersus GNSS NUWA | supported |
| Arcoda Next | supported |
| Arcoda 3D Photo Survey | supported |
| 3Dsurvey SiteScan | supported |
| 3Dsurvey RTK Videogrammetry | supported |
| 3D geotag scanner | supported |
| Avenza Maps | supported |
| Iphigénie | supported |
| Agro Measure Map Pro | supported |
| ColDonAgro | supported |
| GeoSpot GNSS | supported |
| ArcGIS Fieldmaps | supported |
| Other Android apps |
on iOS
The recommended app to use the RTK Handheld 2 Mapping Kit on an Apple iOS device is SW Maps using a Bluetooth Low Energy (BLE) connection.
Note:
- If your iOS device has USB-C connector you will use USB-C OTG cable included in the package to power your RTK receiver.
- If your iOS device has a Lightning connector it cannot be used to power the RTK kit. In this case, we recommend ordering the handgrip with built-in battery. It will not only power your kit reliably but also it will be a much more ergonomic setup compared to carrying an external power bank.
- Install SW Maps app on your iOS device from the Apple Store.
- Open the app and grant permissions (first time only).
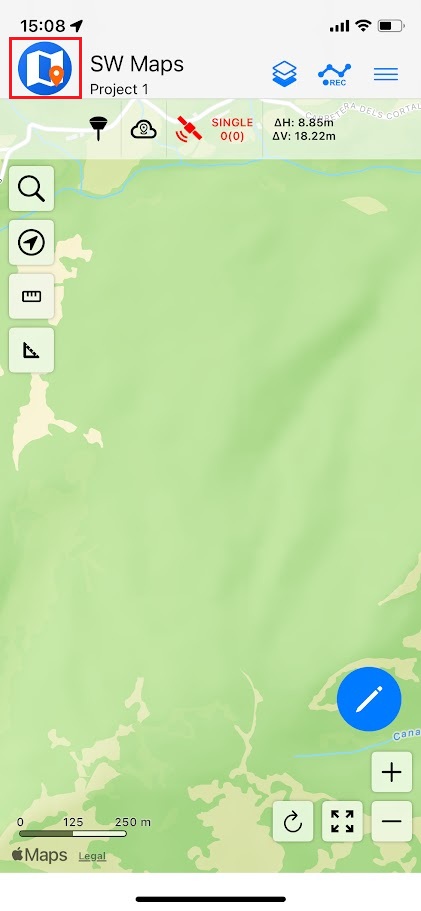
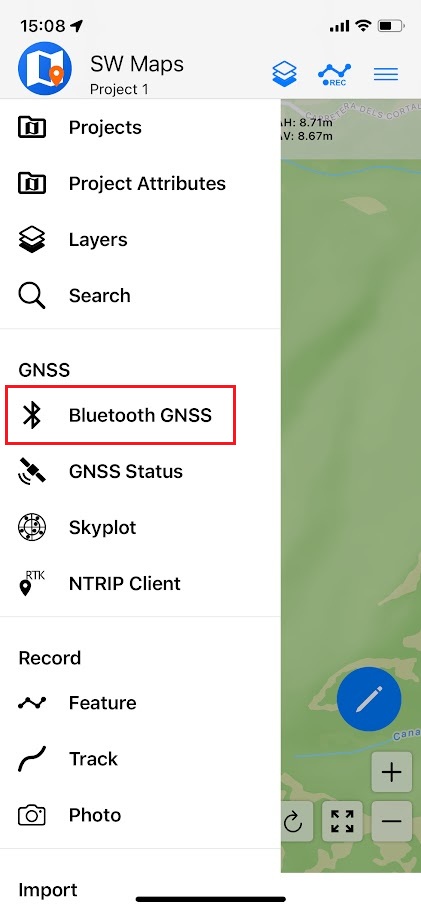
- Click on the SW Maps icon to show the app menu.
- Select Bluetooth GNSS option.
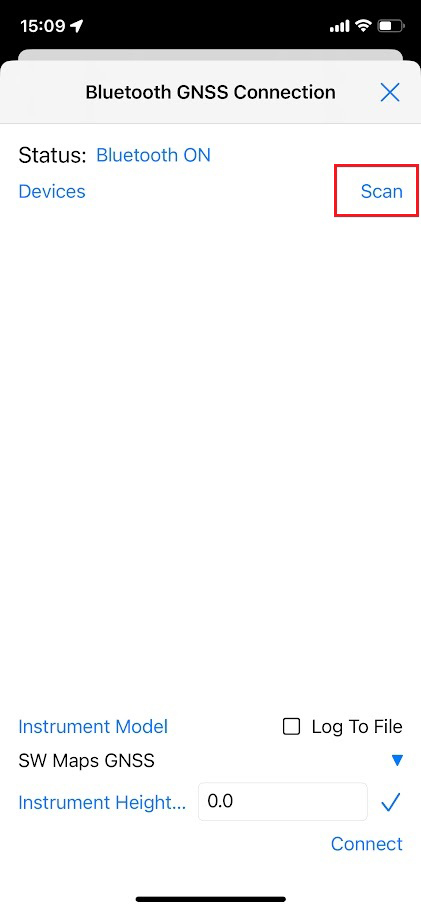
- Press Scan to search for Bluetooth devices.
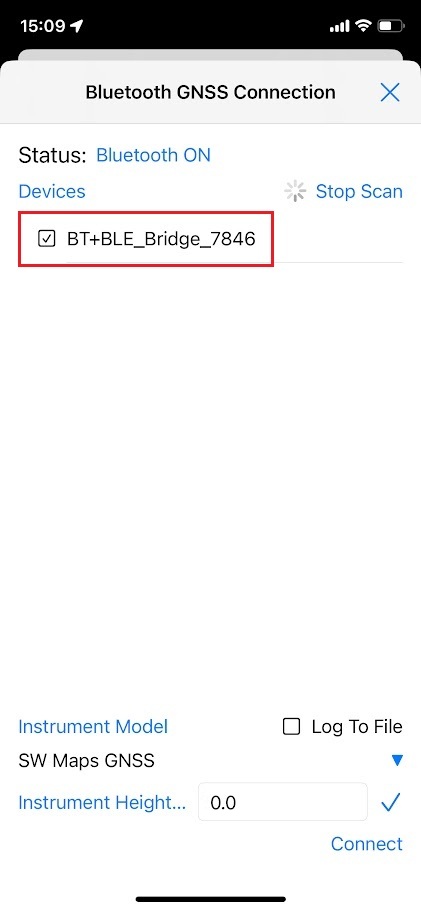
- BT+BLE_Bridge_XXXX device will appear if your phone is close enough to the receiver. Select its checkbox and stop scanning.
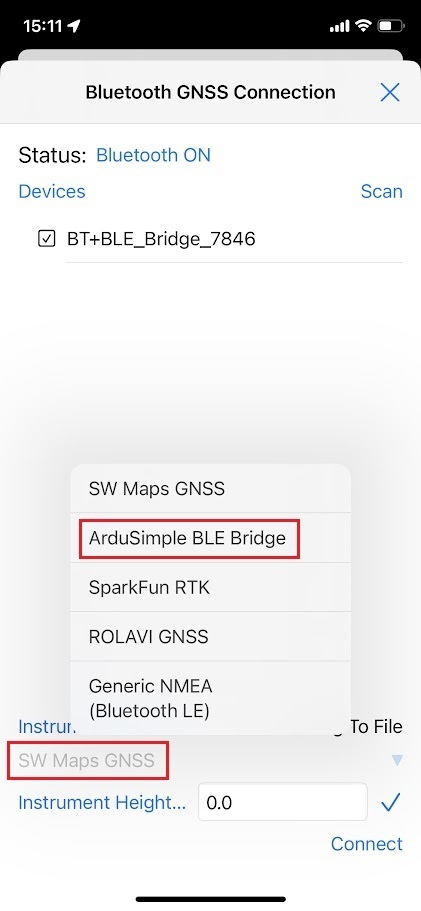
- From dropdown menu SW Maps GNSS select Ardusimple BLE Bridge option.
- Instrument Height refers to the expected receiver elevation from the ground.
- If you are using the RTK kit handheld, set the instrument height to 0 since elevation measurements will not be precise due to natural hand movement.
- If you are using the kit with a surveying pole, set the instrument height to the exact height of the pole.
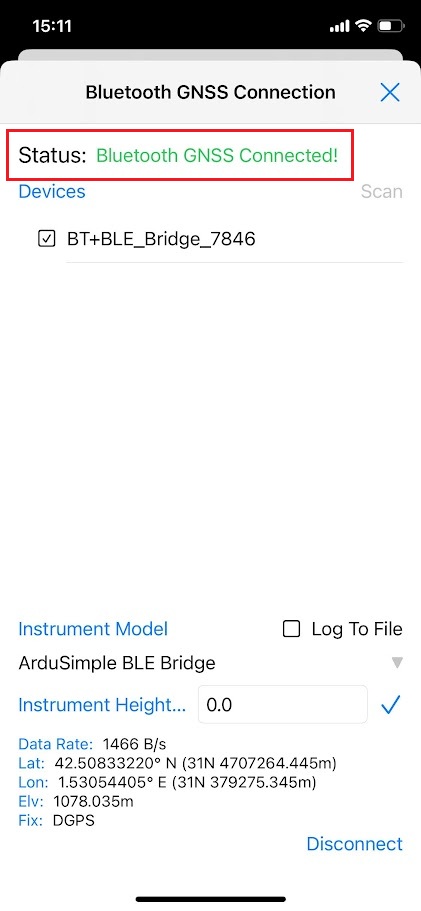
- Press Connect. You should see a “Bluetooth GNSS connected!” message and data streaming from the receiver.
To get centimeter accurate measurements, it is needed to connect to a NTRIP service to get RTK corrections. If you need help finding one, check the list of RTK Correction Services in your Country which we have prepared for you.
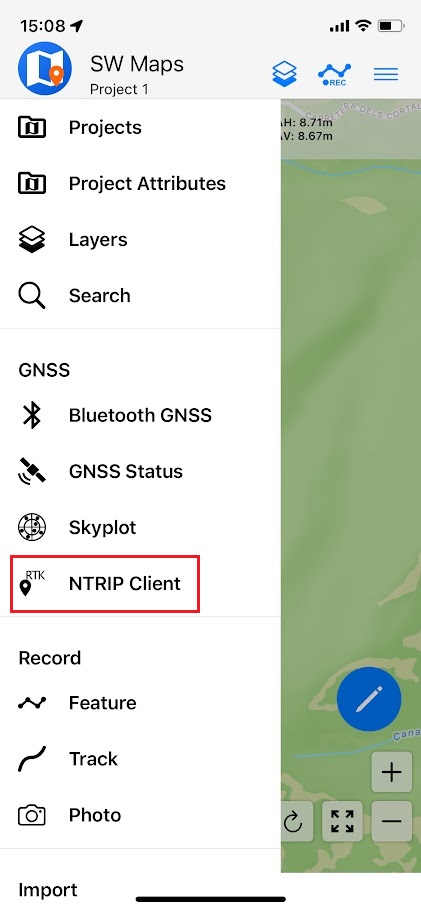
- Tap SW Maps menu and select the NTRIP Client option.
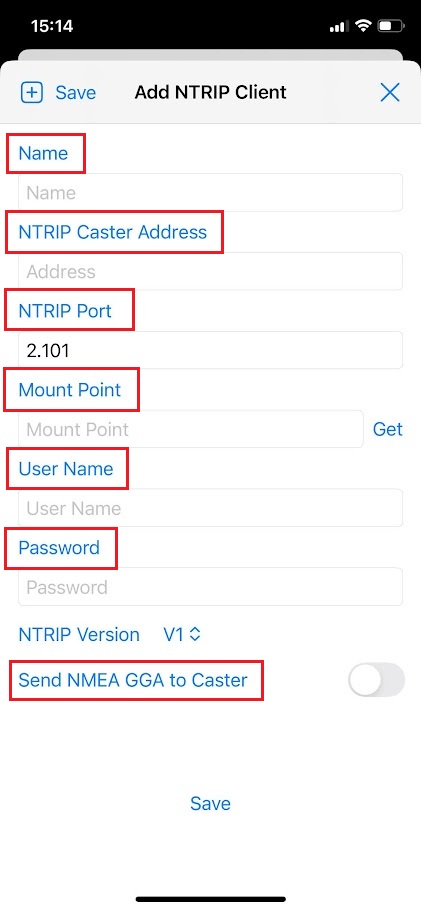
- Enter your NTRIP credentials:
- Name: A custom name you choose to save the NTRIP connection account.
- NTRIP Caster Address and NTRIP Port: This information should be provided to you by the NTRIP service when you set up your account.
- Mount Point: Choose the closest mount point to the area you are going to operate from.
- User Name and Password: This should be provided to you when you set up your account.
- We recommend enabling Send NMEA GGA to Caster option to send your location to the NTRIP caster.
- Once connected, you will see the data streamed from the NTRIP service.

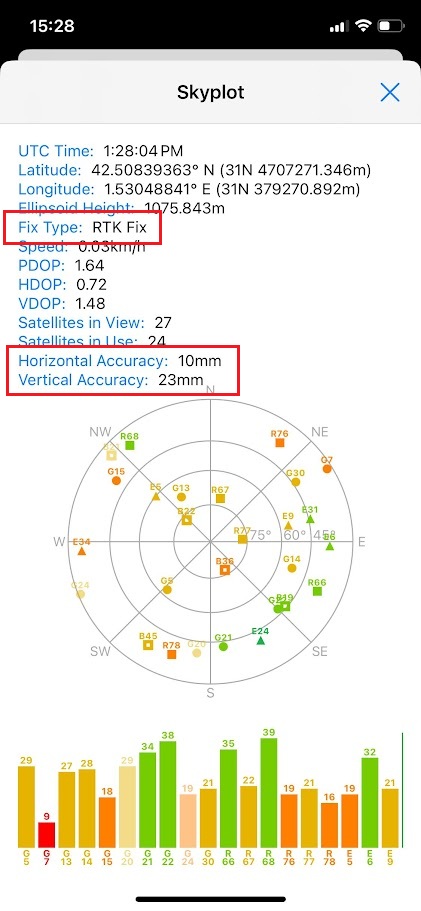
- To verify that you are getting precise position, tap SW Maps menu and select Skyplot option. You will see an RTK Fix Type, and Horizontal Accuracy and Vertical Accuracy confirming that you are now working with centimeter level accuracy GNSS positioning.
- To re-center the map on your location, click the arrow icon highlighted in red. The pointer indicating your location will dynamically switch its color based on the receiver Fix Type status:
- Orange when the status is RTK Float with slightly less accuracy.
- Green when the status is RTK Fix with full centimeter accuracy.
For further information on how to use this application please follow the SW Maps user guide.
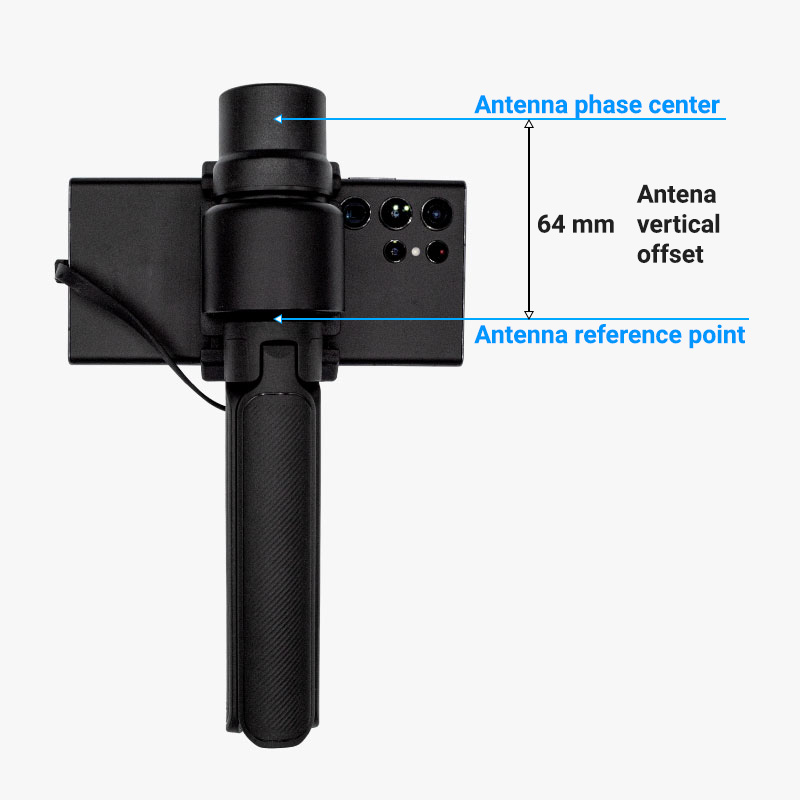
Antenna offset
The RTK Handheld 2 Mapping Kit calculates positions at the antenna phase center (APC), which is the effective point where GNSS signals are received. On this device, the APC is located 64 mm above the bottom of the plastic enclosure (antenna reference point, ARP).
For correct ground-level coordinates, the antenna height must be the distance from the ground point to the APC. This consists of:
- the height from the ground to the bottom of the device (ARP) — this is the value you read on the survey pole scale, and
- the internal antenna offset (APC), which is +64 mm.
In practice, take the pole height shown on the pole and add 64 mm. Enter this total value as the antenna height in the app you are using to get accurate elevations.
Related tutorials
Reset to factory settings
The kit is pre-configured to send NMEA data simultaneously via Bluetooth and USB.
If you change any settings and the product stops working, you can revert to factory setting by following these steps:
- Connect the receiver to your computer or PC via USB.
- Run u-blox u-center (you can download it here) and connect to the proper COM port.
- Go to View –>Message View and navigate to UBX–>MON–>VER.
- You can read the firmware version in the window:
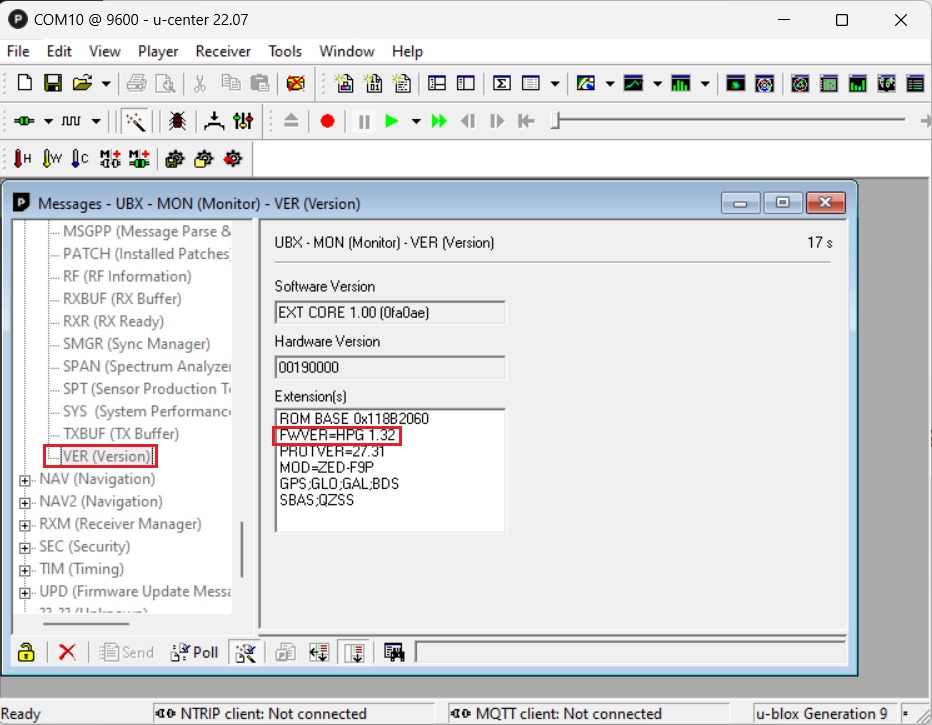
- Download configuration file simpleRTK2B_FW132_Bluetooth_BT_BLE_Bridge.
- In u-center Open Tools -> Receiver Configuration, pick your file that you download on the previous step and click Transfer File -> GNSS button.
- Once the configuration is done, go to Receiver->Action->Save Config to save the configuration on the RTK receiver.
Accessories and spare parts
Here you can find affordable accessories for your kit.
-

-
-
-
-
-
-
-
-
- Accessories
Waterproof Transport Case IP67
From USD $73.75 This product has multiple variants. The options may be chosen on the product page -
- RTK2B Boards
simpleRTK2B Micro
From USD $248.75 This product has multiple variants. The options may be chosen on the product page

