
 and
and 

How to send RTK base station corrections to ArduPilot with Mission Planner, QGroundControl and MAVProxy

On this page
Products used in this tutorial
Table of contents
This tutorial covers how to configure MissionPlanner and QGroundControl to send RTK corrections to the autopilot from a base station. The instructions have been tested with simpleRTK2B Budget, simpleRTK2B Lite and simpleRTK3B Pro receivers.
If you prefer to use an NTRIP service instead of your own base station, please follow the How to send NTRIP corrections to ArduPilot with MissionPlanner, QGroundControl and MAVProxy tutorial.
Required hardware
- simpleRTK2B – Basic Starter Kit (base station receiver)
- simpleRTK2B Heading – Basic Starter Kit (rover receiver)
- USB to USB-C cable
- Pixhawk cable set
- Holybro Pixhawk 6C (you can use your preferred autopilot)
- PC or laptop with an internet connection
Required software
- Mission Planner or QGroundControl
- RTKlib strsvr (needed for QGroundControl only)
- MAVProxy (needed for QGroundControl only)
How to send RTK base station corrections to ArduPilot using Mission Planner or QGroundControl
Configure and connect the base station receiver
To configure a GNSS receiver as a base station please follow the ArduSimple tutorial How to configure simpleRTK2B as static base station. Alternatively, if you are running the simpleRTK3B receiver follow the tutorial How to configure simpleRTK3B Pro as static base station.
Configure and connect the rover receiver
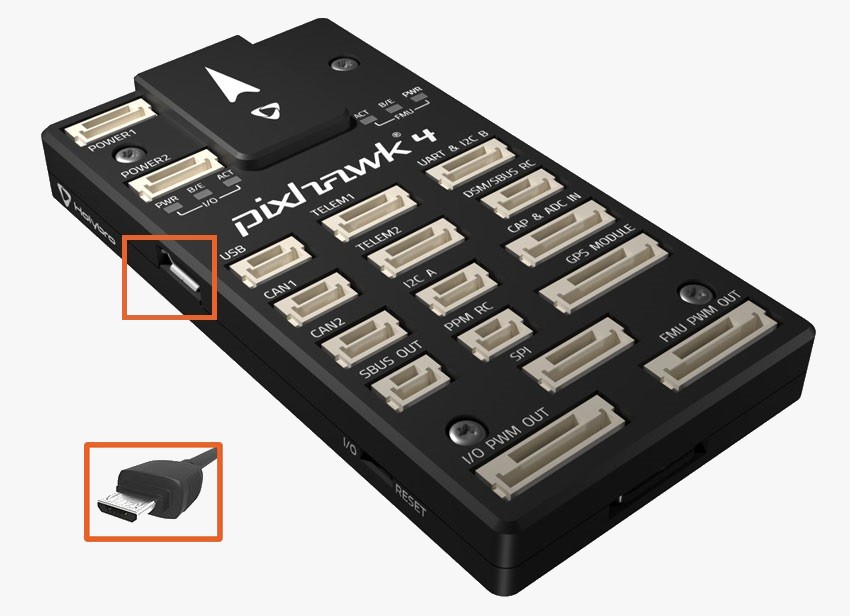
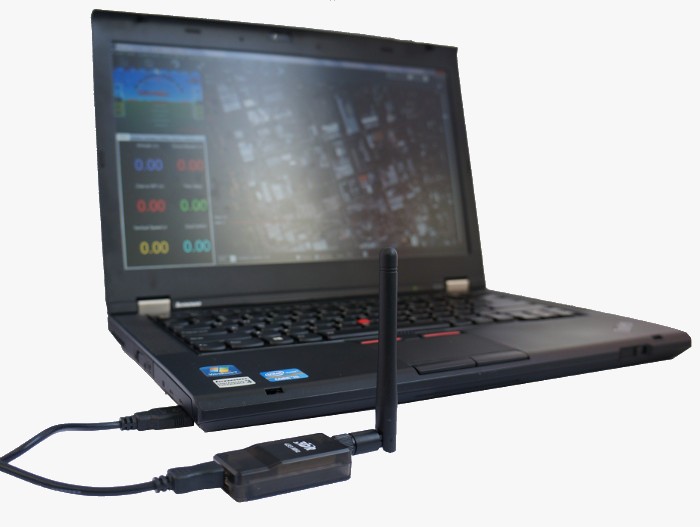
- Screw the antenna SMA connectors to the receivers by hand, and make sure you place antennas in a place with a clear non-obstructed sky view.
- Connect the receiver to the autopilot, and check that you have a GPS lock.
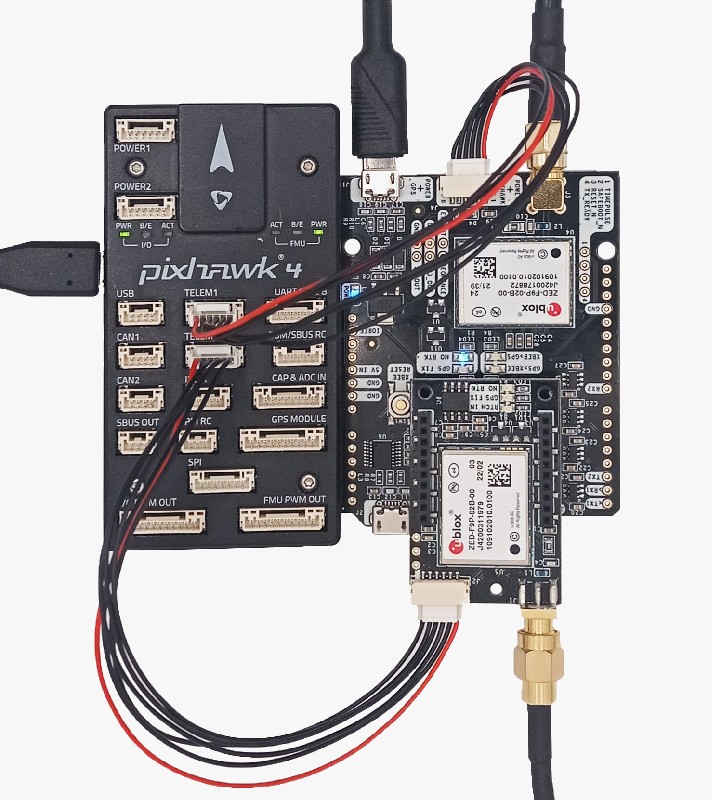
Send RTK corrections from a ground station using a base station receiver
With Mission Planner the process is extremely easy, the instructions are the same for simpleRTK2B Budget, simpleRTK2B Lite (u-blox ZED-F9P) and simpleRTK3B Pro (Septentrio mosaic-X5) receivers.
- Open Mission Planner and connect to your rover autopilot via a COM port.
- Go to SETUP -> Optional Hardware -> RTK/GPS Inject.
- Select the COM port the GNSS base station is using to connect to the computer, and set the proper baudrate (normally 115200). Press Connect.
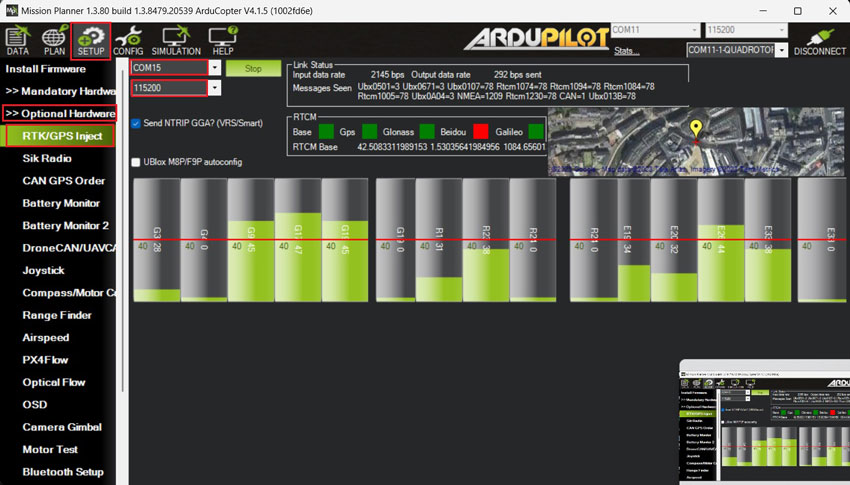
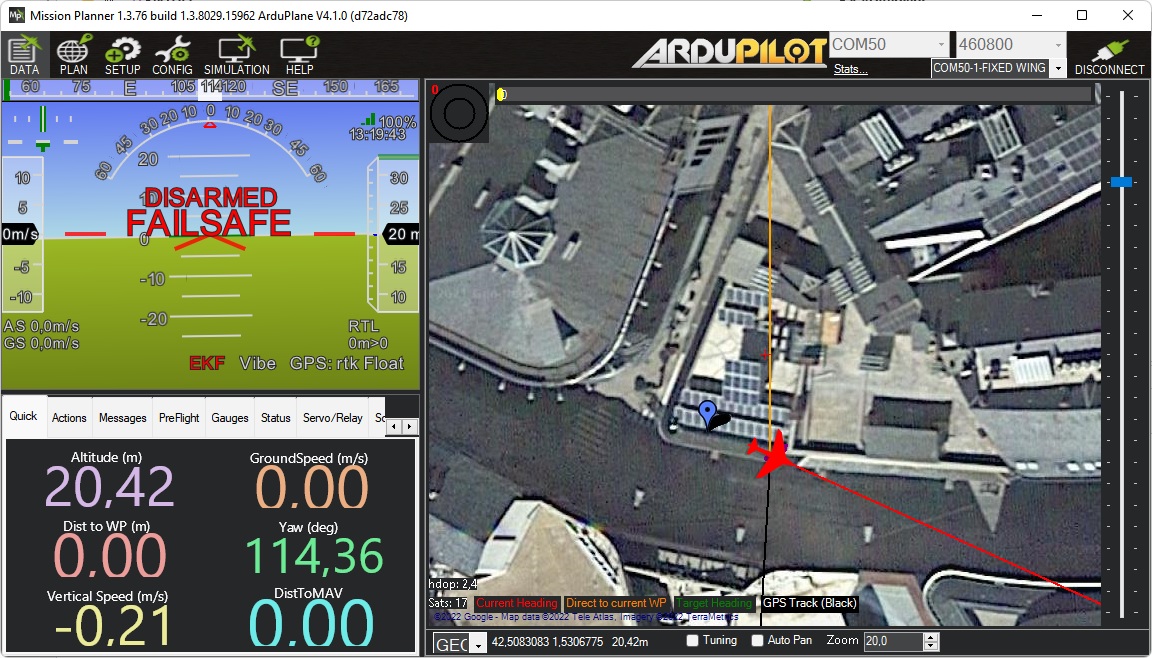
- Go back to the main screen of Mission Planner. You will find both the base station and the autopilot rover positions.
- The rover is correctly getting RTCM corrections coming from the base station if the Mission Planner GPS is in RTK Float/Fixed mode.
QGroundControl detects automatically both the simpleRTK2B Budget
and simpleRTK3B Pro boards (but not the simpleRTK2B Lite), connected via USB to the computer running it.
It configures automatically the receiver and starts streaming corrections to the GNSS receiver mounted on the autopilot.
We have tested the automatic configuration and the behavior is not always the expected one, so in this tutorial we will show you an alternative method that supports simpleRTK2B Lite receivers as base stations and works 100% of the time.
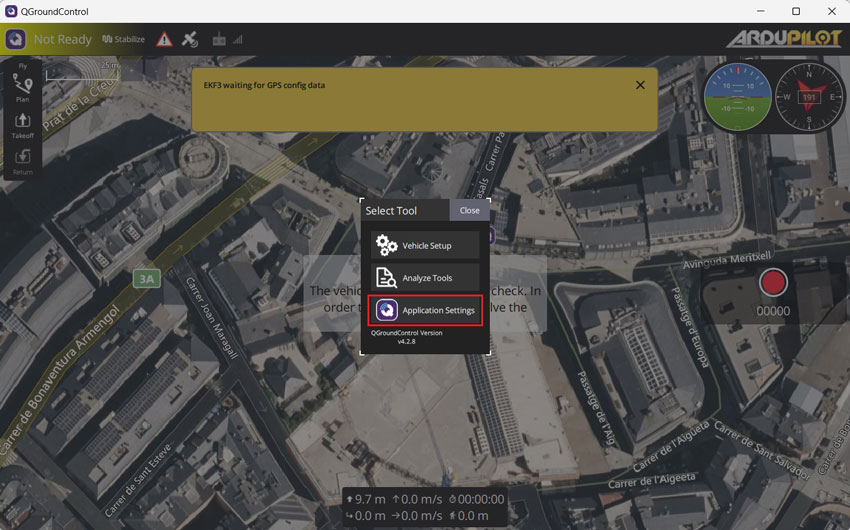
- Open QGroundControl and press Application Settings in the main menu.
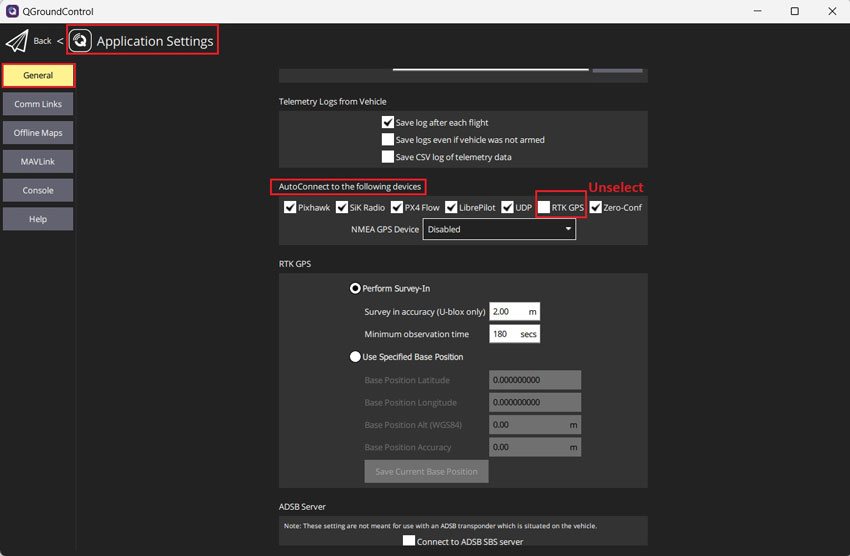
- Go to General –> AutoConnect to the following devices –> Unselect RTK GPS.
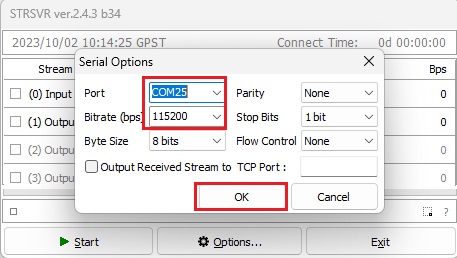
- Run STRSVR application. Select (0) Input as Serial port, click Opt… button.
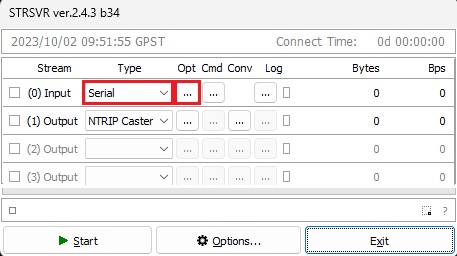
- Set Port to the COM port of your GNSS receiver base station. Set Bitrate (bps) to your GNSS receiver baudrate, click OK.
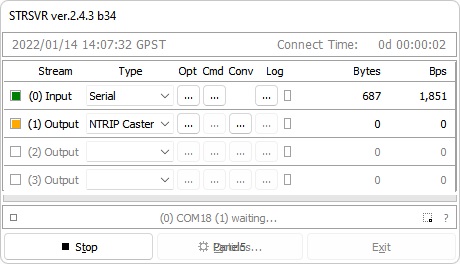
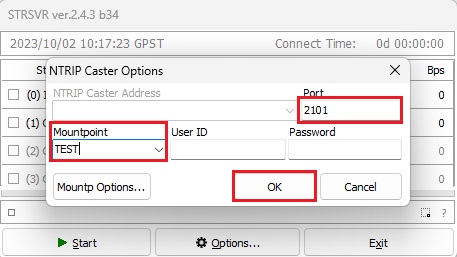
- Select (1) Output as NTRIP Caster, click Opt… button.
- Set Port, for example 2101. Set Mountpoint, for example TEST. You can leave UserID and Password empty and click OK.
- Run MAVProxy and go to Link –> Add –> Serial. Select the telemetry link or autopilot COM port and set Baud Rate. Click Add Link.
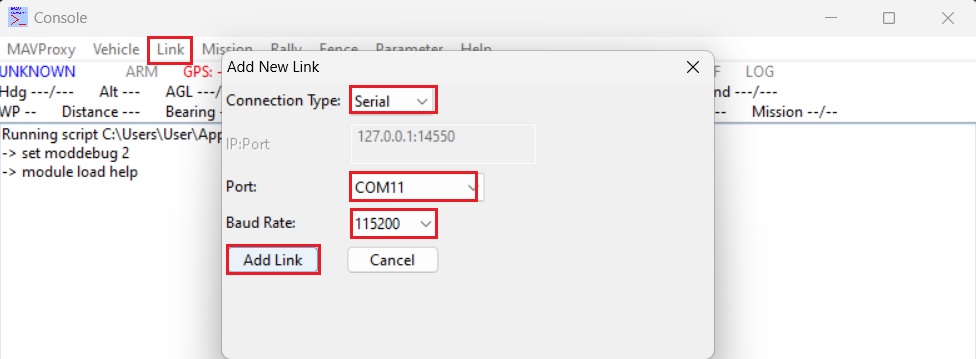
- If connection is OK, your MAVProxy screen should look similar like this.
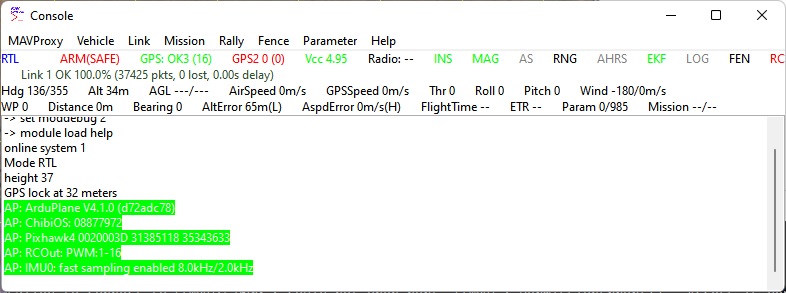
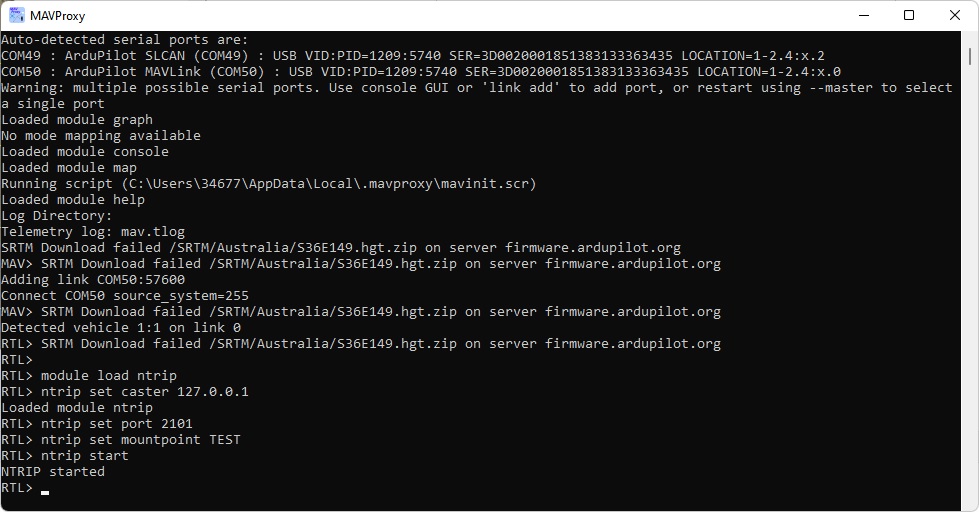
- Open MAVProxy terminal window and type:
- module load ntrip
- ntrip set caster 127.0.0.1
- ntrip set port 2101
- ntrip set mountpoint TEST
- ntrip start
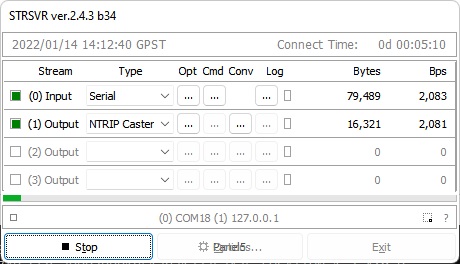
- After the previous step is completed, STRSVR should look similar to the example below, indicating that data transmission is in progress.
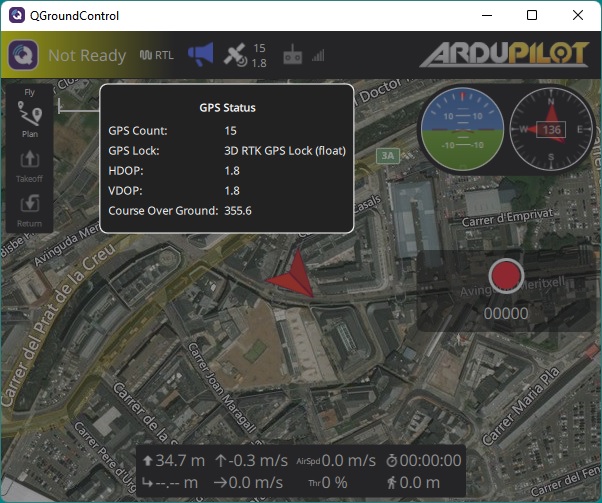
- The GNSS receiver connected to your autopilot will receive RTCM messages from your base station automatically and enter RTK fix/float mode.
Related products
If you want to do this tutorial, we have all the products in stock and ready to be shipped.
- RTK starter kits
simpleRTK2B Heading – Basic Starter Kit
414,00€ This product has multiple variants. The options may be chosen on the product page -

-
Still having issues?
Contact us for support from a real engineer—not AI—or request the tutorial you’re missing