and
and 


Mission Planner
QGroundControl
Mission Planner
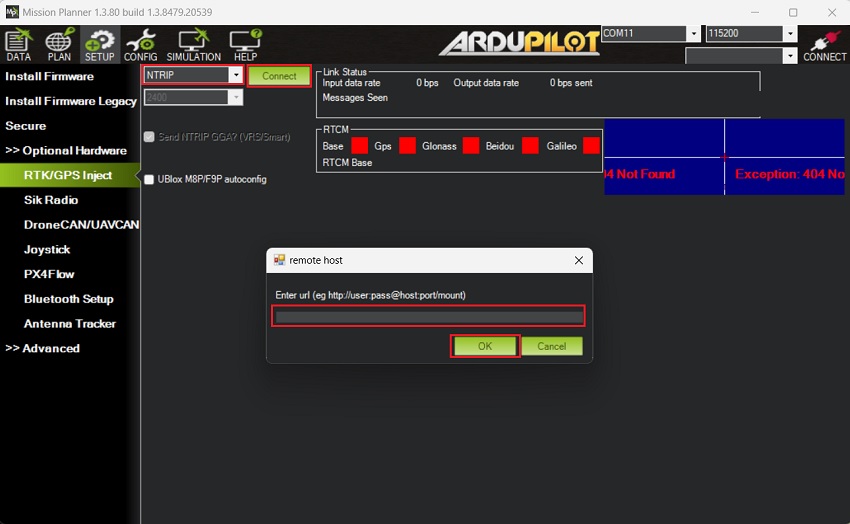
- Open MissionPlanner. Connect your AutoPilot via COM port.
- Go to SETUP–>Optional Hardware–>RTK/GPS Inject.
- Select NTRIP from the dropdown box and press Connect. A popup window will appear, enter your NTRIP caster credentials in this format: user:pass@host:port/mountpoint.
If you are unsure about available NTRIP service nearby, we have prepared a list of services operating in your country to assist you.
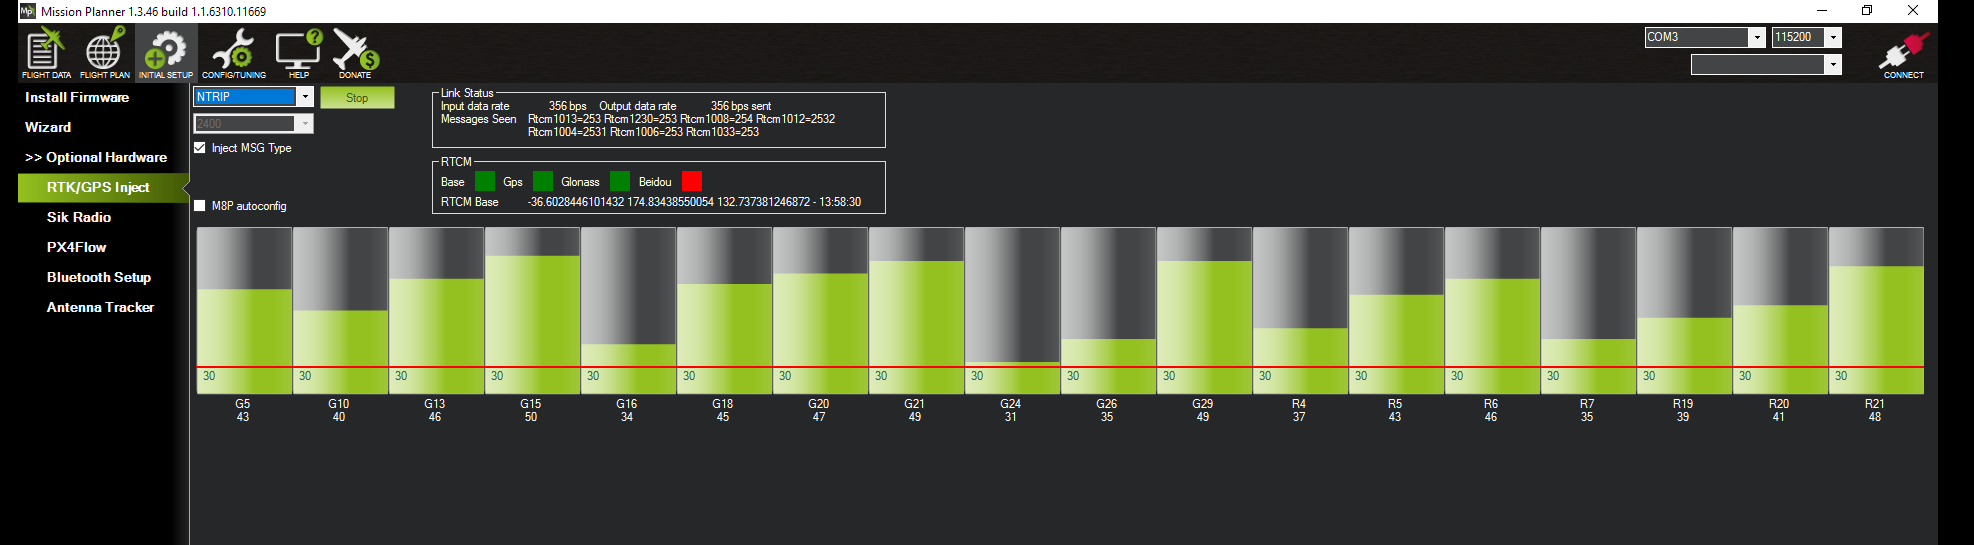
- If everything is correct, you will see a summary of GPS signal status and generated RTCM messages as well as the position of your GNSS base station on the map.
- Your autopilot-connected GNSS receiver will receive RTCM corrections and enter into fixed/float RTK mode.

QGroundControl
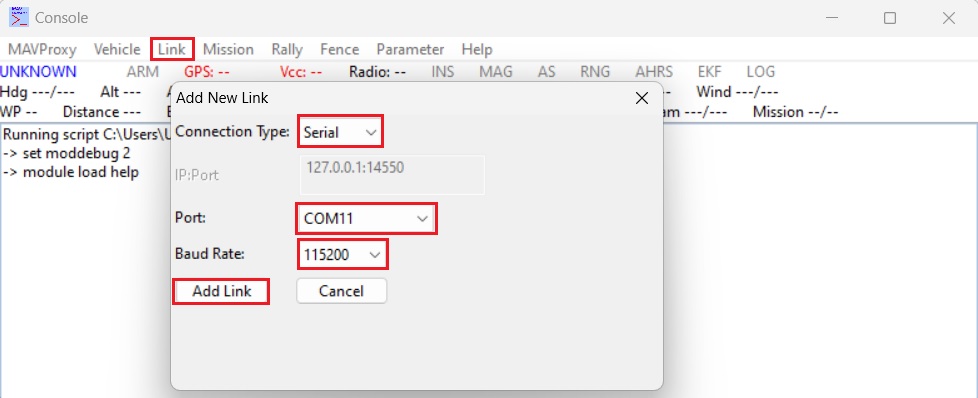
- Open QGroundControl. Run MAVProxy.
- In MAVProxy go to Link–>Add–>Serial–>Select the telemetry link or autopilot COM port and baudrate (typically the USB connection data rate is 115200 and the radio connection rate is 57600). Press Add Link.

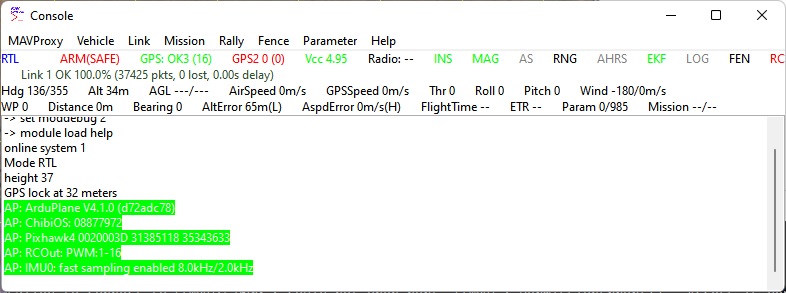
- If connection is Ok, your MAVProxy screen should look similar like this:

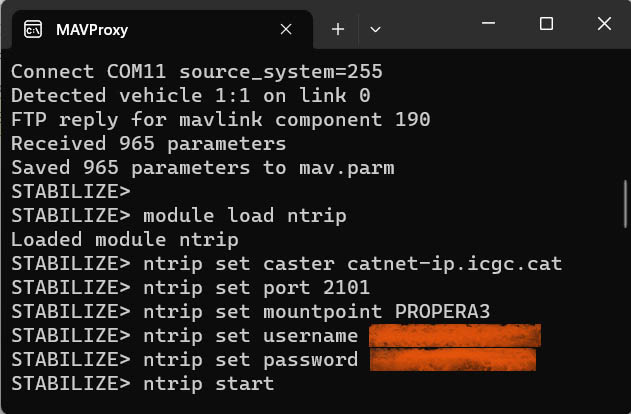
- In the MAVProxy terminal window type (replace XXXXX by your NTRIP caster credentials): module load ntrip ntrip set caster XXXXX ntrip set port XXXXX ntrip set mountpoint XXXXX ntrip set username XXXXX ntrip set password XXXXX ntrip start

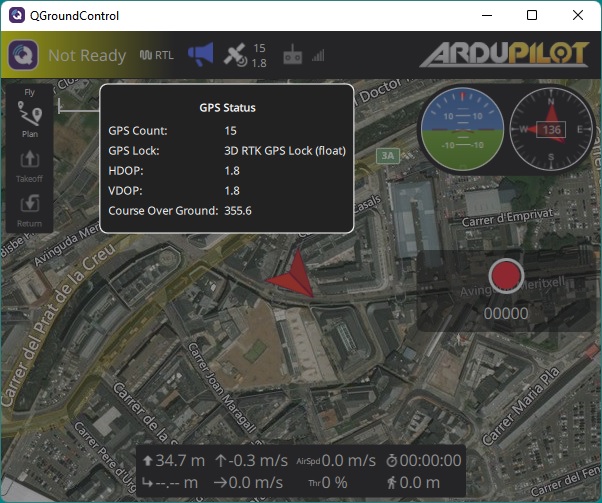
- The GNSS receiver, when connected to your autopilot, will automatically receive RTCM messages from your NTRIP caster and transition into RTK fix/float mode.