and
and 
via USB OTG
via Bluetooth Module
via BT+BLE Bridge
via WiFi NTRIP Master
via USB OTG
The best option (if your device supports it) since you can power and communicate with it at the same time.
- Connect RTK receiver with your Android device with USB OTG cable.
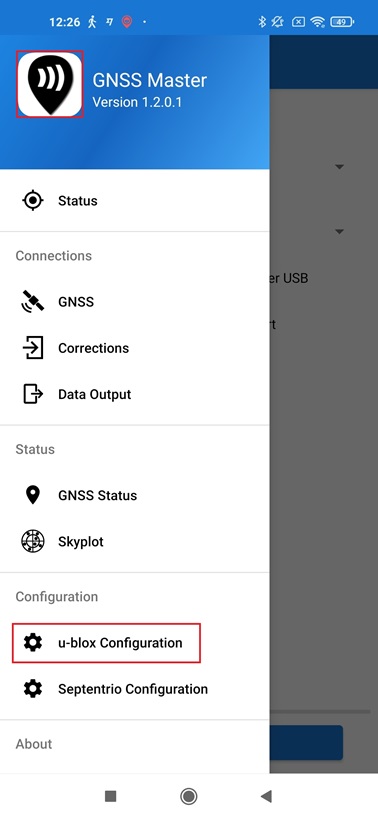
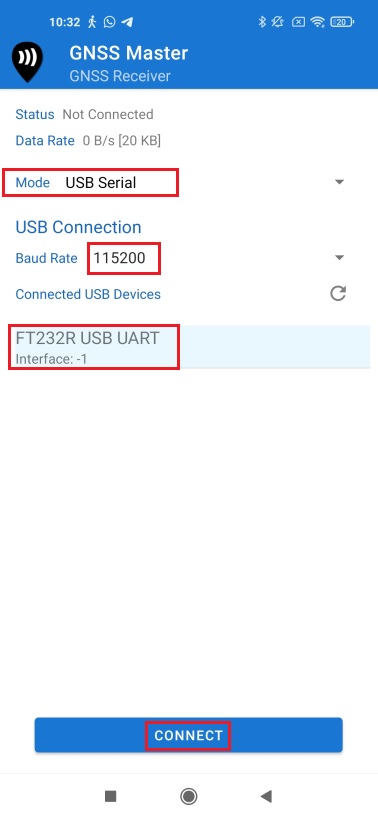
- Open GNSS Master app. Click the gear icon on the right side of GNSS Receiver Connection to enter the setup menu.

- Choose USB Serial at Mode.
Set Baud Rate to 115200 bps (If you use a different receiver, the Baud Rate should match with your receiver configuration).
At Connected USB Devices, it will automatically recognize your receiver with name ***** USB UART.
Press CONNECT.
via Bluetooth Module
- Power your RTK receiver by connecting USB cable to the power supply (smartphone/tablet/ compatible powerbank).
If you get any popup message to connect the USB device with any app, you can ignore it. - Enable your smartphone/tablet Bluetooth, and pair it with RTK receiver.
When pairing your device, notice that it may appear as RTK_GNSS_*** or as a generic MAC number (e.g.: F0:0A:95:9D:68:16).
The password is always 1234.
The pairing only needs to be done once.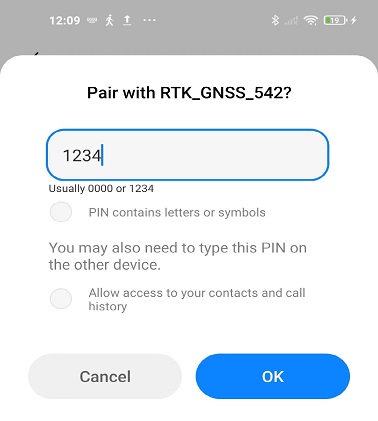
- Open GNSS Master app.
Click the gear icon on the right side of GNSS Receiver Connection to enter the setup menu.
- Choose Bluetooth at Mode. In Paired Devices choose the one you paired in step 2.
Press CONNECT.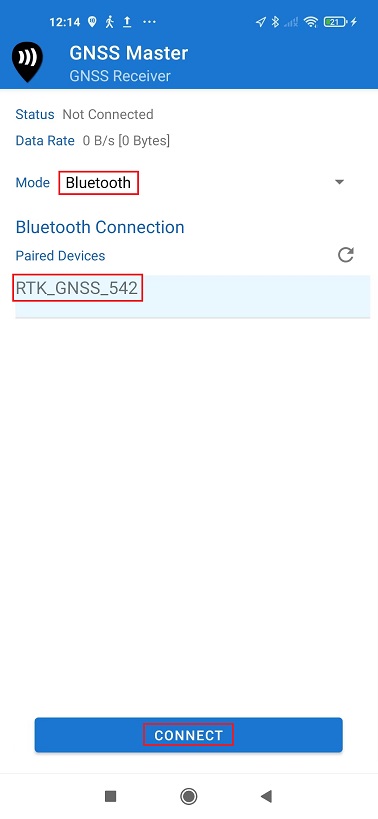
via BT+BLE Bridge
- Power your RTK receiver by connecting USB cable to the power supply (smartphone/tablet/ compatible powerbank).
If you get any popup message to connect the USB device with any app, you can ignore it. - Enable your smartphone/tablet Bluetooth, and pair it with your RTK receiver. When pairing your device, notice that it will appear as BT+BLE_Bridge _****. The password is always 1234.
The pairing only needs to be done once.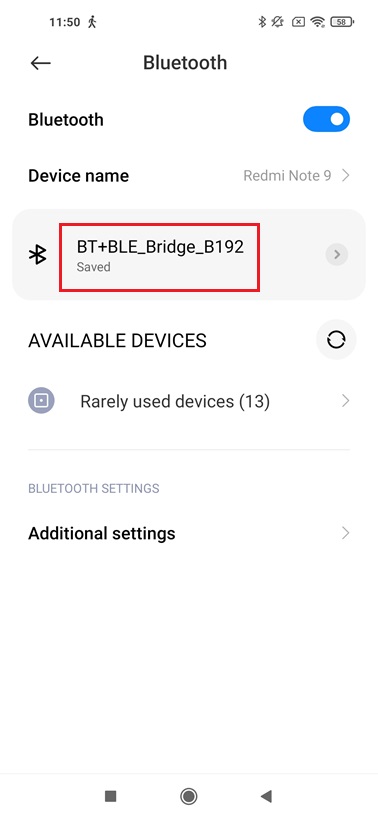
- Open GNSS Master app. Click the gear icon on the right side of GNSS Receiver Connection to enter the setup menu.
- Choose Bluetooth LE at Mode.
In Paired Devices choose the one you paired in step 2.
Press CONNECT.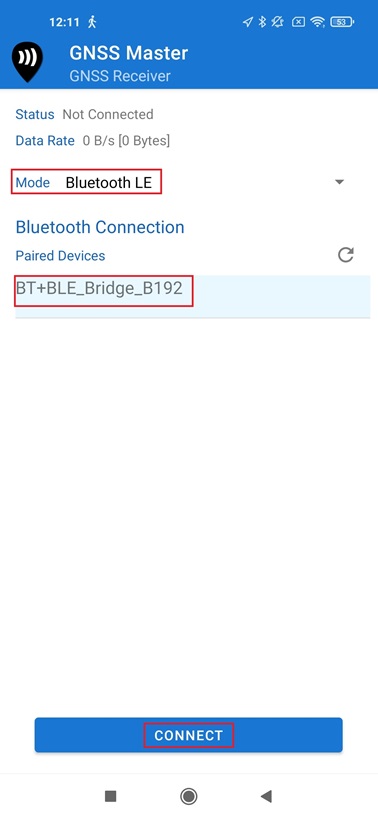
via WiFi NTRIP Master
- Power your RTK receiver by connecting USB cable to the power supply (smartphone/tablet/ compatible powerbank).
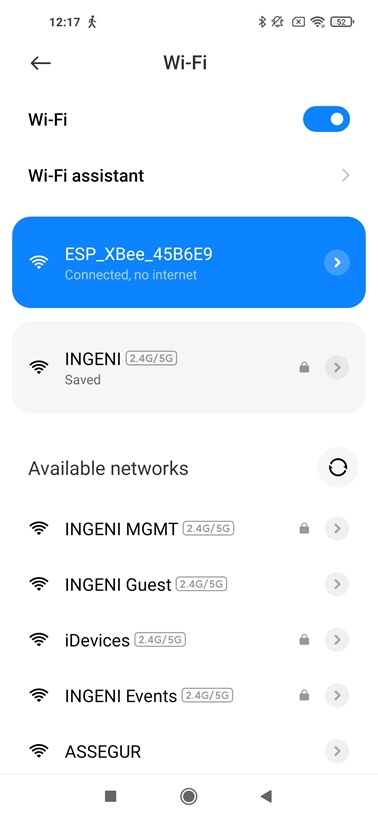
If you get any popup message to connect the USB device with any app, you can ignore it. - Enable your smartphone/tablet WiFi, and connect to the hotspot created by WiFi NTRIP Master. It will appear as ESP_XBee_*****.
- Open GNSS Master app. Click the gear icon on the right side of GNSS Receiver Connection to enter the setup menu.
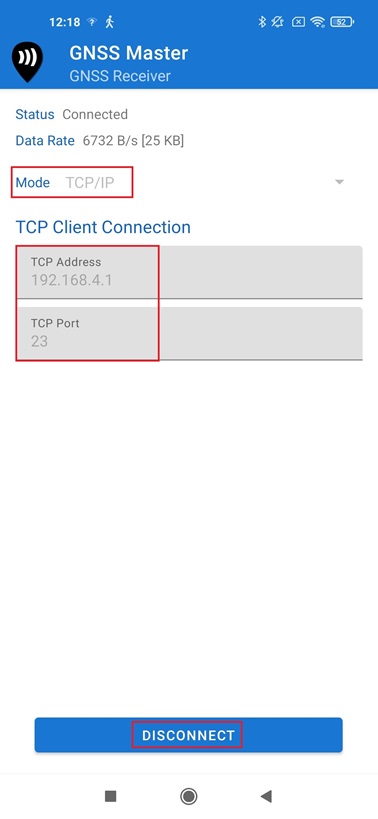
- Choose TCP/IP at Mode.
In TCP Address type in 192.168.4.1.
At TCP Port type 23.
Press CONNECT.