
 and
and 

How to configure triple-band Septentrio GNSS receiver and connect it to ArduPilot

Table of contents
In this tutorial we will guide you through the steps of how to connect simpleRTK3B Pro receiver powered by Septentrio Mosaic-X5 to ArduPilot.
Required hardware
- simpleRTK3B Pro
- Lightweight helical GNSS Tripleband + L-band antenna (IP67)
- SMA antenna RF cable extender (these items are needed particularly for helical antenna)
- USB to USB-C cable
- Pixhawk cable set
- Holybro Pixhawk 6C (you can also use your preferred autopilot)
- PC or laptop
Required software
Before start
Please check your ArduPilot firmware by connecting your Pixhawk to your computer using a USB to USB-C cable and opening Mission Planner. The firmware version shows at the top bar of the Mission Planner window.
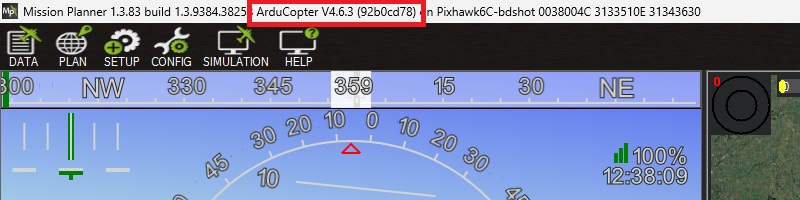
Note that we have validated the tutorial with these firmware versions:
- ArduRover 4.6.0 and 4.6.3
- ArduCopter 4.6.0 and 4.6.3
- ArduPlane 4.6.0 and 4.6.3
If you are running firmware version 4.0 or below, please update the firmware following the ArduPilot Loading Firmware tutorial. Otherwise some described parameters may not apply.
If your Pixhawk is running a different autopilot, then follow Loading Firmware onto boards without existing ArduPilot firmware.
How to connect simpleRTK3B Pro RTK receiver to ArduPilot?
Configure simpleRTK3B Pro RTK receiver
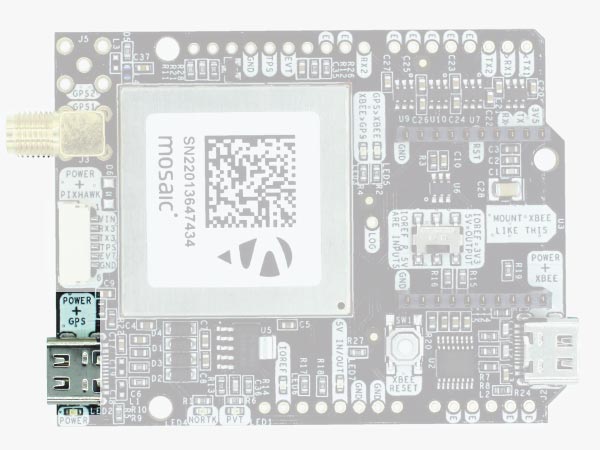
- Connect the simpleRTK3B Pro to your PC via the USB port labeled with POWER+GPS using USB-C cable.
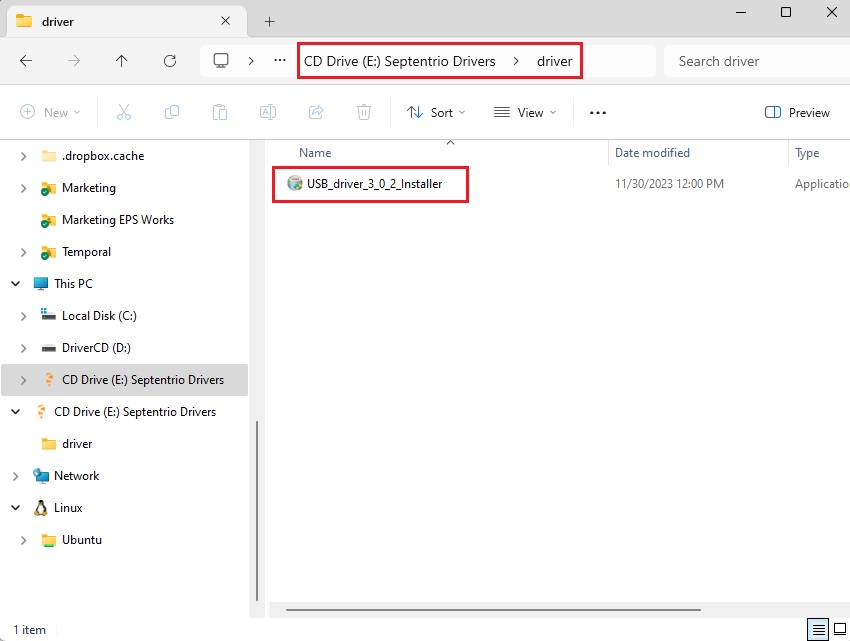
When you connect this product to a PC for the first time, the PC may not recognize it. You will only see a new Hard Disk in your computer. Open it and install the Septentrio driver. After installation, disconnect and reconnect again, your PC will recognize the receiver. This only needs to be done once.
- Open a browser and type 192.168.3.1 to open the Septentrio web interface.
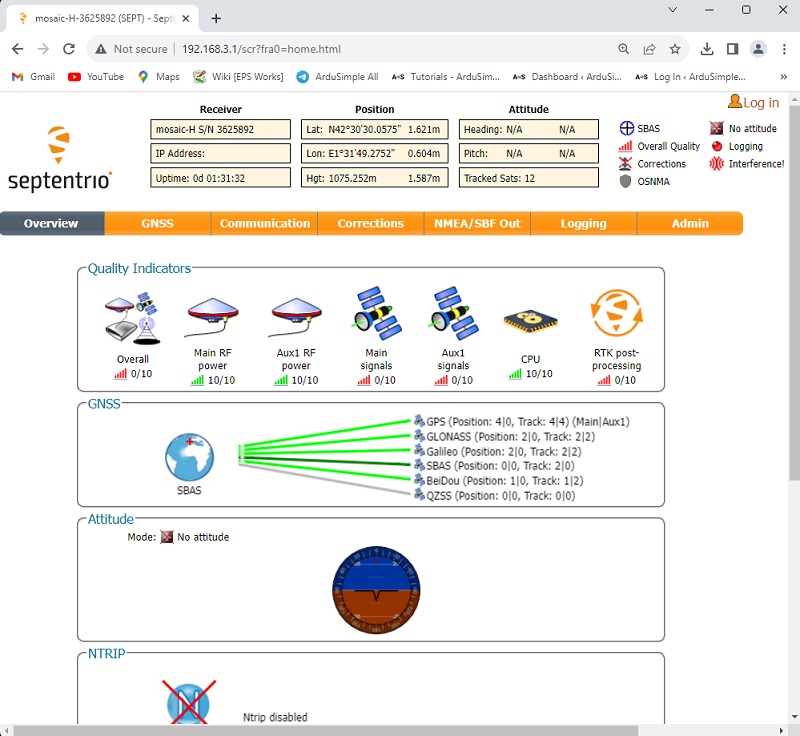
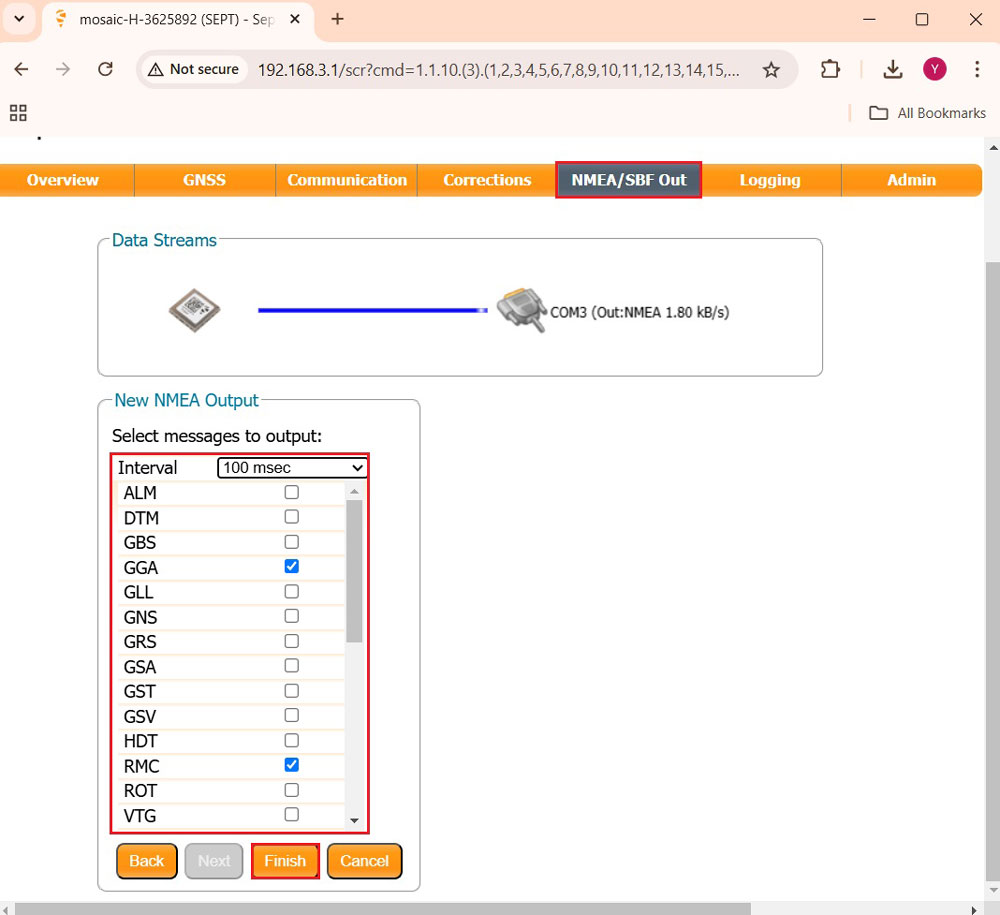
- In the menu bar, go to NMEA/SBC Out–>New NMEA stream–>Serial port (Next)–>COM3 (Next)–>Interval (100msec), select GGA, RMC. Click Finish.
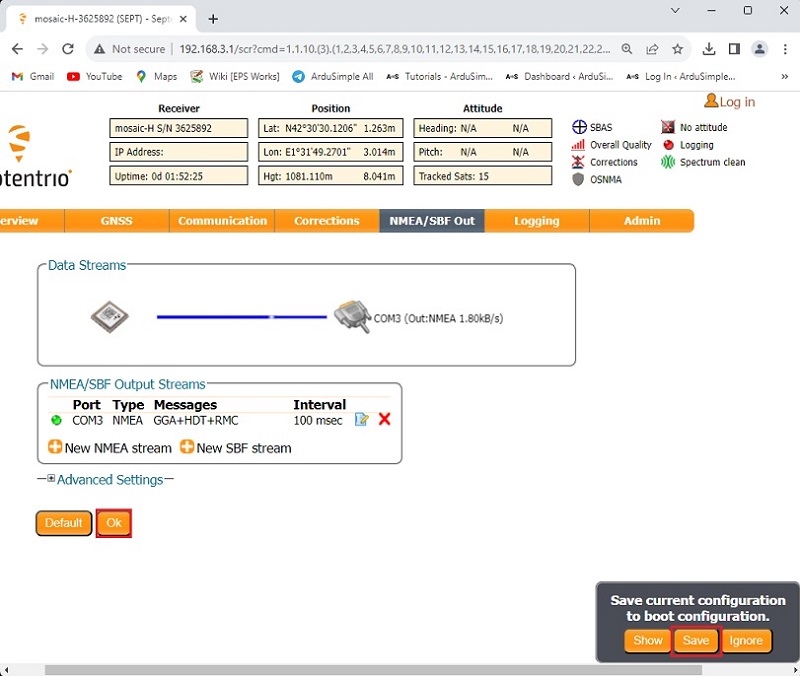
- Click Ok. On the lower right corner of your browser, a pop-up window will appear. Click Save configuration.
- Connect GNSS antenna to your receiver. Make sure it has a good view of the sky.
Configure ArduPilot
- Connect your Pixhawk to your computer using a USB to USB-C cable.
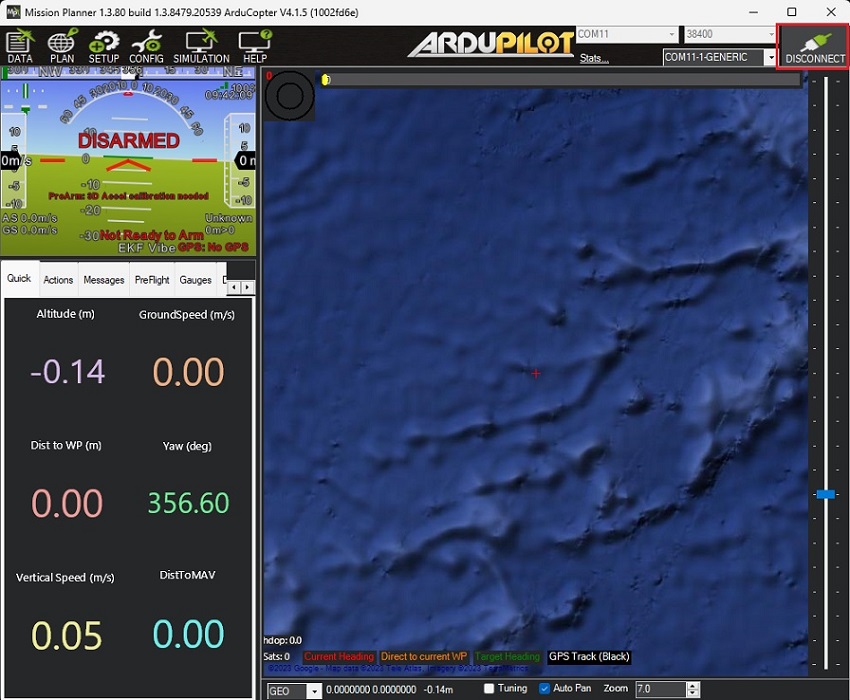
- Open Mission Planner and connect your Pixhawk to it with COM port.
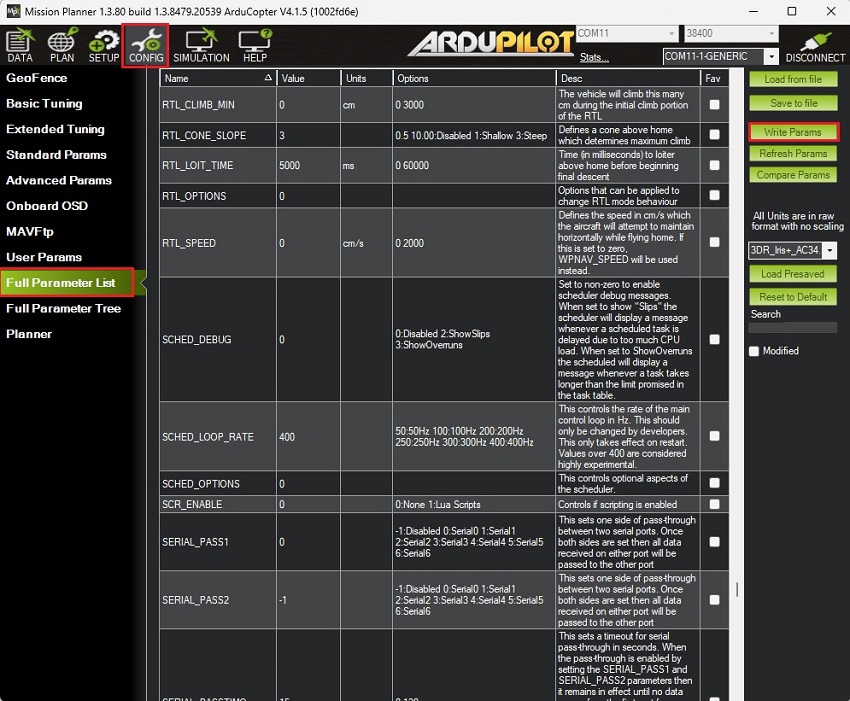
- Go to CONFIG -> Full Parameter List. Since the firmware version you are running might be a different one, here is the list of all the parameters modified from their default values:
- GPS_AUTO_CONFIG 1 -> 0 (Disables automatic configuration)
- GPS_AUTO_SWITCH 1 -> 0 (Use primary)
- GPS2_RATE_MS 200 -> 100 (10Hz)
- GPS2_TYPE 0 -> 5 (NMEA)
- SERIAL1_BAUD 57 -> 115 (115200)
- SERIAL1_PROTOCOL 2 -> 5 (GPS)
- Press Write Params to save your setting.
- After saving all the parameters make sure to power cycle your autopilot by disconnecting and reconnecting the USB cable.
Connect the GNSS/RTK kit to your ArduPilot
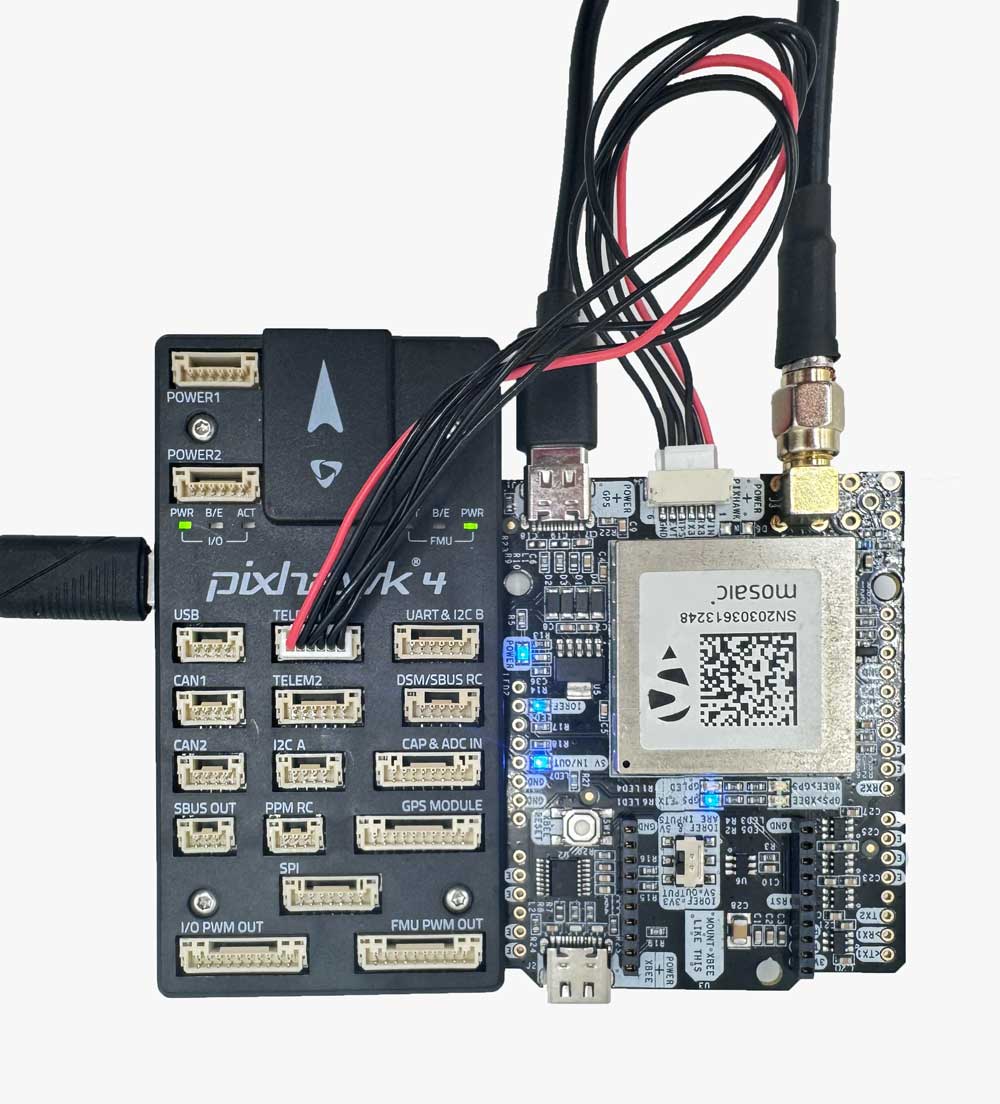
- Use the JST connector on the simpleRTK3B Pro and connect it to the TELEM1 port.
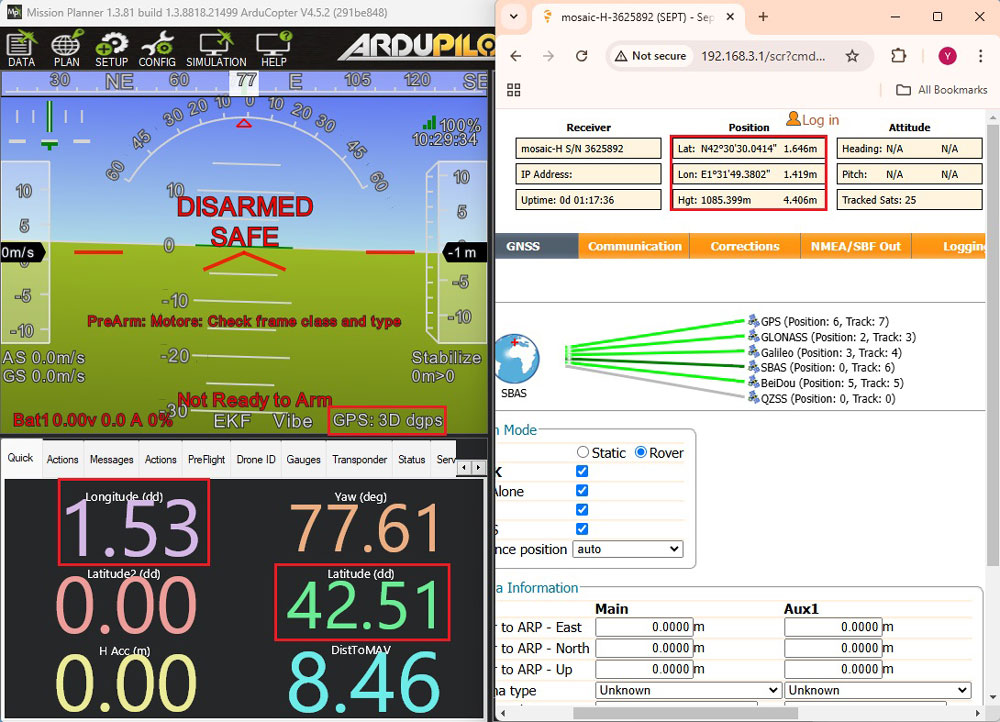
- Power and connect the autopilot, go to the Status tab and check the lat and lng parameters. You will find that the GPS fix type and coordinates do match the ones on Septentrio web interface. Note that the coordinates on Mission Planner are in Decimal Degrees(DD) while the coordinates on Septentrio web interface are in Degrees/Minutes/Seconds(DMS), hence the difference.
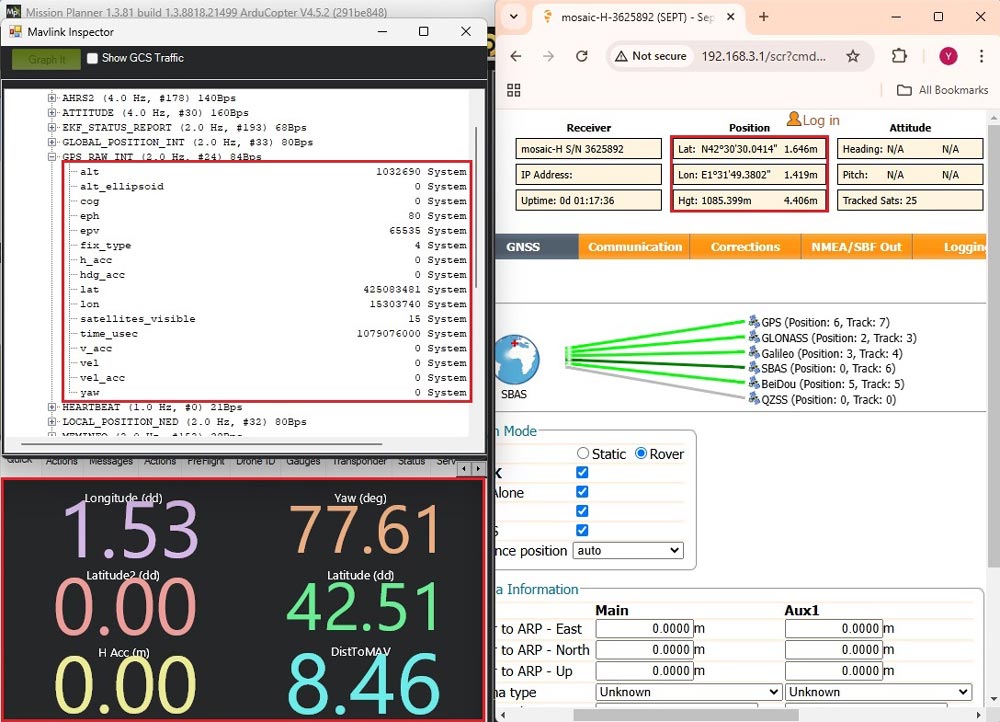
- For additional confirmation go to CTRL+F -> MAVlink inspector -> GPS2_RAW. The coordinates should match with Septentrio web interface.
Connect to RTK corrections
- To achieve centimeter-level precision in positioning, correction data must be transmitted to the rover. There are two main methods for delivering this correction data:
- Using online correction service (NTRIP): In this method, the rover receives real-time corrections through the NTRIP (Networked Transport of RTCM via Internet Protocol) protocol. This method is convenient for areas with reliable internet access and eliminates the need for setting up a physical base station.For guidance on integrating NTRIP corrections with ArduPilot, you can follow ArduSimple’s tutorial on sending NTRIP corrections to ArduPilot.
- Setting up a Base Station: This method is useful in areas where there is no internet access or NTRIP network available, but it requires extra equipment and setup. You can refer to ArduSimple’s tutorial on sending RTK base station corrections to ArduPilot for detailed instructions.
- In a few seconds, on Mission Planner you will GPS2 status change to rtk Float or rtk Fixed.
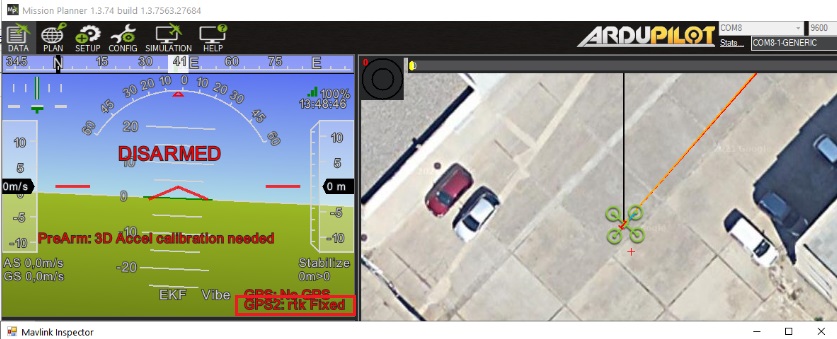
Now you can enjoy your ArduPilot project with your high precision RTK receiver!
Related products
If you want to do this tutorial, we have all the products in stock and ready to be shipped.
-

- Cables
SMA antenna RF cable extender
From 13,00€ This product has multiple variants. The options may be chosen on the product page -
-

RTK Assistant
Find the best products for your application in just a few questions.