and
and 


Mission Plannner
QGroundControl
Mission Plannner
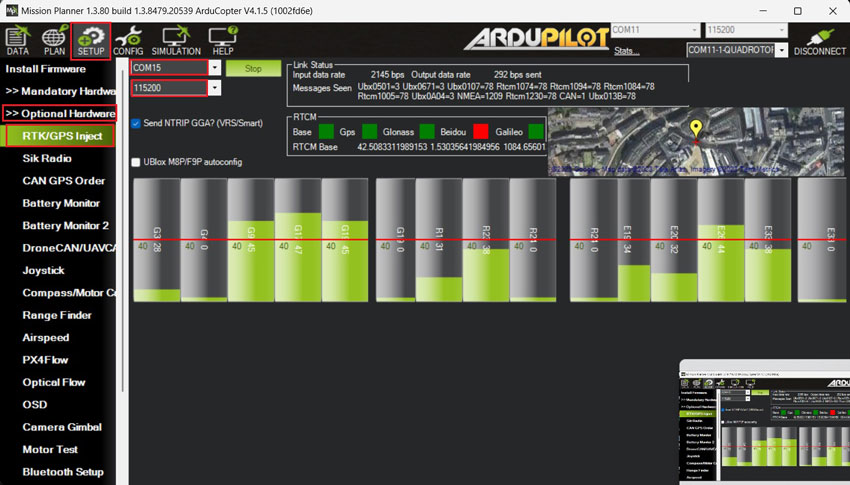
With Mission Planner the process is extremely easy, the instructions are the same for simpleRTK2B, simpleRTK2Blite (u-blox ZED-F9P) and simpleRTK3B (Septentrio Mosaic X5) receivers.
- Open Mission Planner and connect to your autopilot as usual via COM port.
- Go to SETUP–>Optional Hardware–>RTK/GPS Inject.
- Select the COM port where your GNSS base station is connected to and set the proper baudrate. Press Connect.

- Now you can connect your Heading kit to your autopilot by following the tutorial How to connect simpleRTK2B Heading to ArduPilot with external RTK corrections?
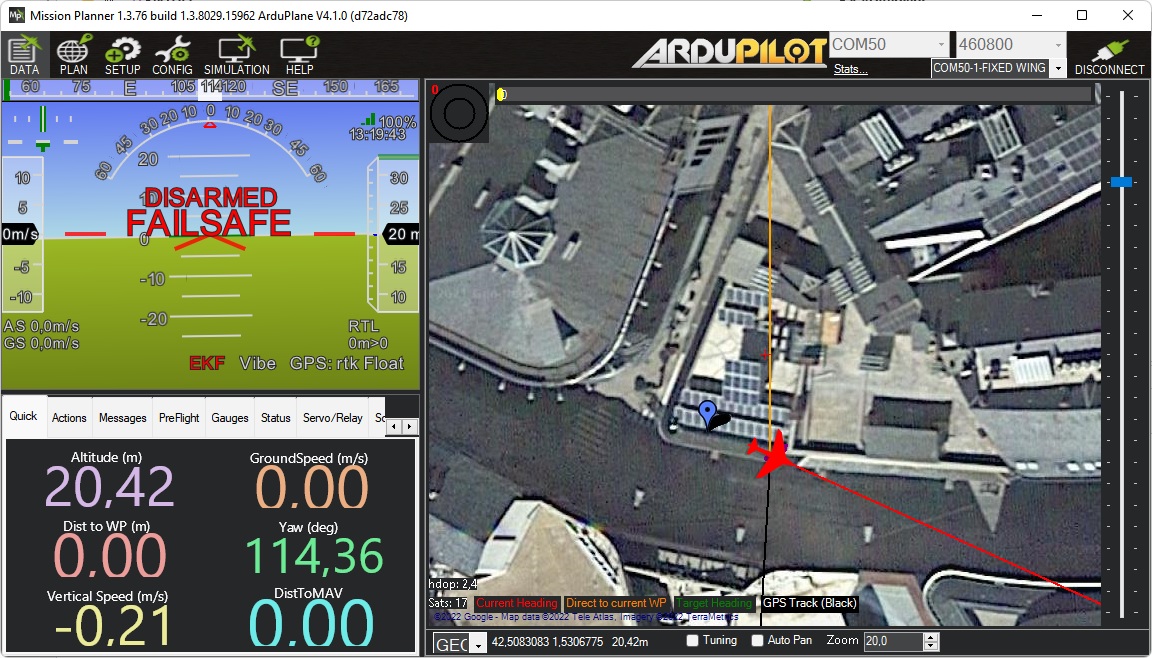
Then go back to the main screen of Mission Planner. Here, you will see both the base station position and your Ardupilot GNSS position.
QGroundControl
QGroundControl detects automatically both the simpleRTK2B and simpleRTK3B boards (not simpleRTK2Blite), connected via USB to the same computer as QGroundControl runs.
It configures automatically the receiver and starts streaming corrections to the GNSS receiver mounted on the Autopilot.
We have tested the automatic configuration and the behavior is not always the expected one, so in this tutorial we will show an alternative method that also supports simpleRTK2Blite receivers as base stations and works 100% of the time.
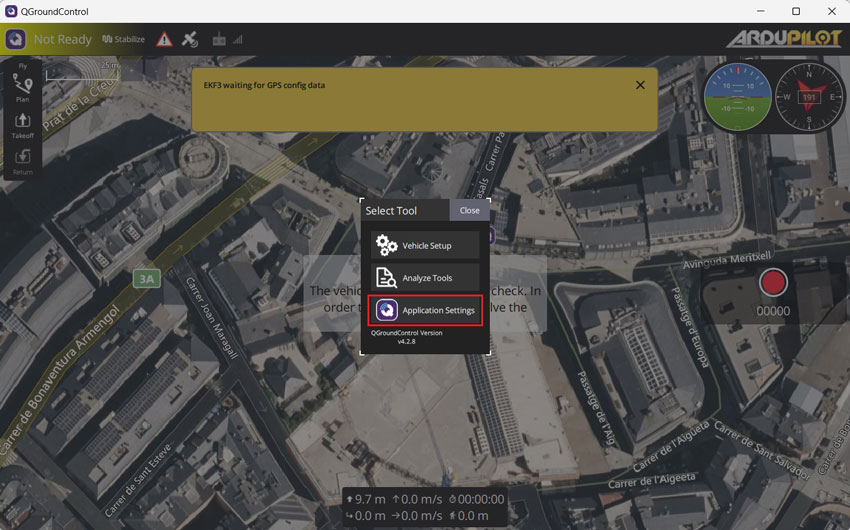
- Open QGroundControl and press Application Settings in the main menu.

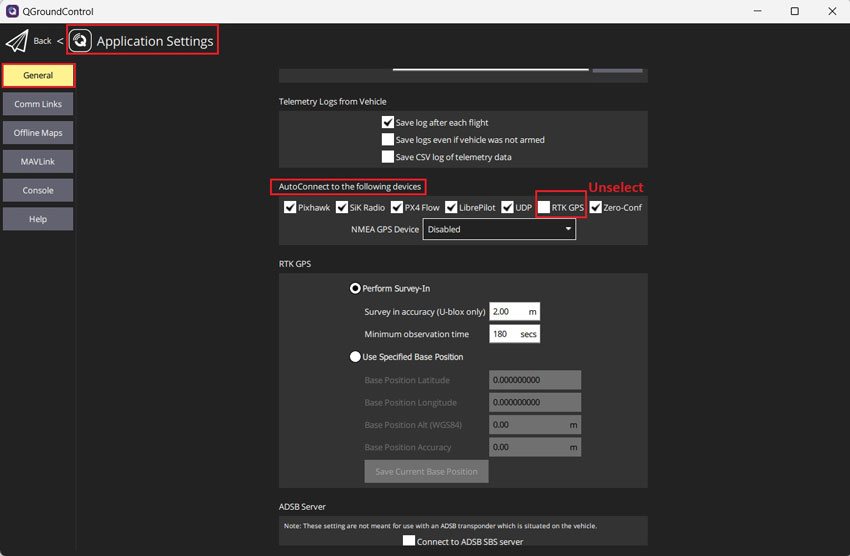
- Go to General–>AutoConnect to the following devices–>Unselect RTK GPS.

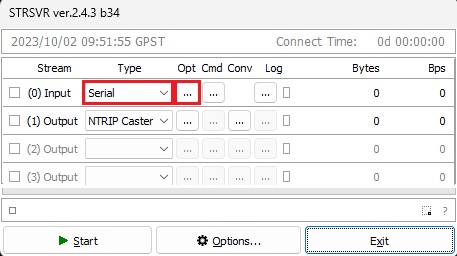
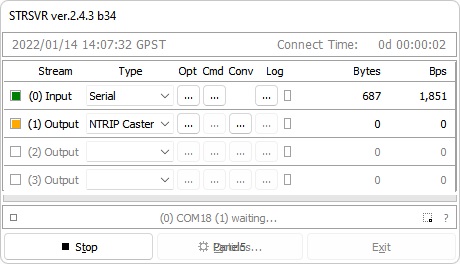
- Run STRSVR application. Select (0) Input as Serial port, click Opt … button.

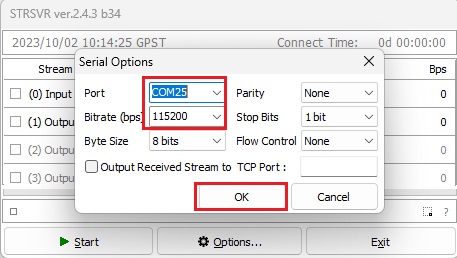
- Set Port to the COM port of your GNSS receiver base station.
Set Bitrate (bps) to your GNSS receiver baudrate, click OK.
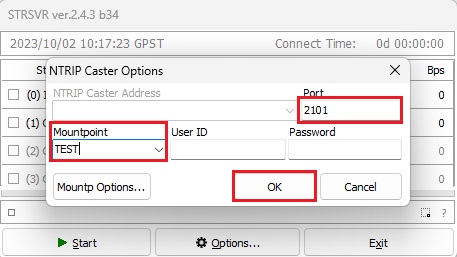
- Select (1) Output as NTRIP Caster, click Opt … button.

- Set Port, for example 2101.
Set Mountpoint, for example TEST.
You can leave UserID and Password empty, click OK.
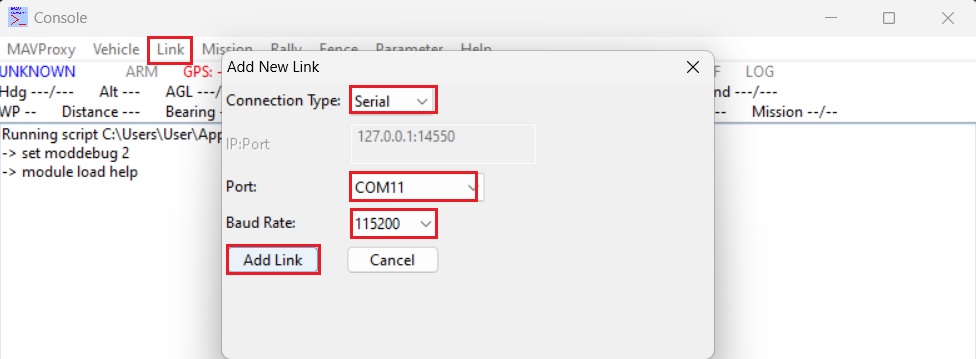
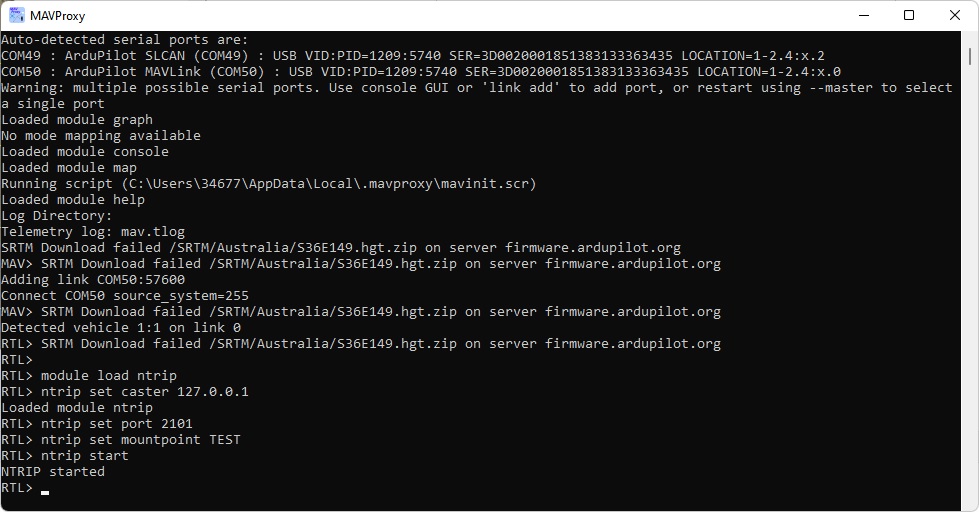
- Run MAVProxy.
Go to Link–>Add–>Serial–>Select the telemetry link or autopilot COM port and set Baud Rate. Click Add Link.
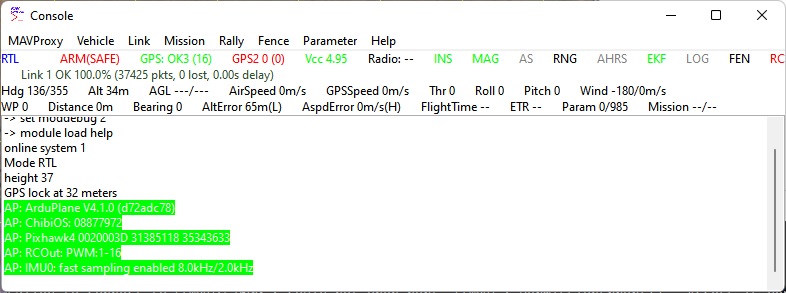
- If connection is OK, your MAVProxy screen should look similar like this.

- Open MAVProxy terminal window. Type:
module load ntrip
ntrip set caster 127.0.0.1
ntrip set port 2101
ntrip set mountpoint TEST
ntrip start
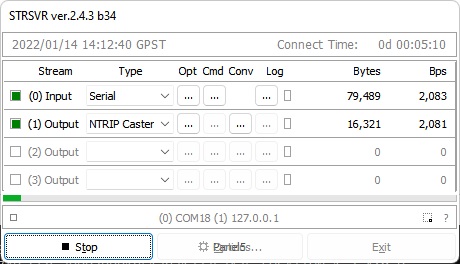
- After the previous step is completed, STRSVR should look similar to the example below, indicating that data transmission is in progress.
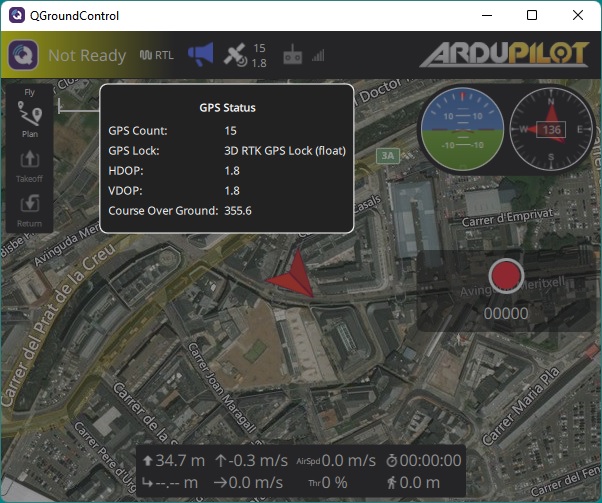
- The GNSS receiver connected to your autopilot will receive RTCM messages from your base station automatically and enter RTK fix/float mode.