
 and
and 

How to determine the exact position of your base station with simpleRTK3B Pro

Learn how to determine the coordinates of your RTK base station with high absolute positioning accuracy. We explain three methods: using a known reference point, an NTRIP service, or an online PPP post-processing service.
On this page
No headings were found on this page.
Products used in this tutorial

In the previous tutorial on configuring the simpleRTK3B as a static base station, we demonstrated the process of establishing the reference position using Septentrio’s auto mode. While this method provides a fundamental reference with good pass-to-pass accuracy, achieving high absolute accuracy for the rover requires the utilization of an exceptionally precise reference position. There are three ways of determining the geodetic reference position of your base station:
- Using a known reference point
Setting up the base station antenna above a known reference point, such as a geodetic control point or survey marker, offers a convenient method for acquiring a reliable reference position for the base receiver.
This approach is particularly suitable for users with an easy access to an accurate and up-to-date reference point.
- Using NTRIP service
You can connect to a NTRIP service to receive correction data. By logging the RTK positions and averaging them, it is possible to obtain a highly accurate reference position in a short amount of time.
This method proves beneficial for users situated in regions with access to an NTRIP service or RTK network.
- Using an online PPP post-processing service
If there is no reference geodesic point or RTK network in your region, you still can calculate the position of your base station by using an online Precise Point Positioning (PPP) service.
Popular services include postprocessing master service, CSRS-PPP service, OPUS and GDGPS. Generally, these services recommend a minimal log file duration of 1 to 3 hours, and an ideal duration of 24 hours. Some PPP services might require antenna calibration. If so, ensure you have a calibrated antenna like Calibrated Survey GNSS Tripleband + L-band antenna (IP67).
In this tutorial we will use postprocessing master service, which provides a quick result in a few minutes for a 1-hour log file, and a more accurate result for 24-hour log files.
Required hardware
- simpleRTK3B Pro
- Budget Survey Tripleband GNSS Antenna
- USB to USB-C cable
- a PC or laptop with internet access
Required software
- STRSVR of RTKlib (Optional if using a real-time RTK solution)
- Septentrio RxTools (Optional if using an online PPP post-processing service)
How to determine the reference position of your base station?
Enable L5 with Septentrio Mosaic-X5.
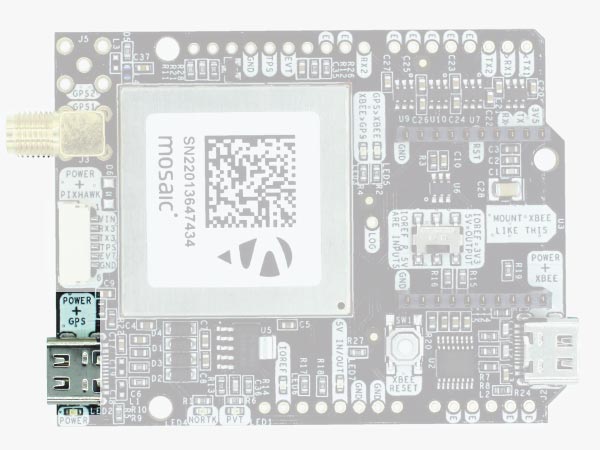
- Connect the receiver to your PC via the USB port labeled as POWER+GPS.
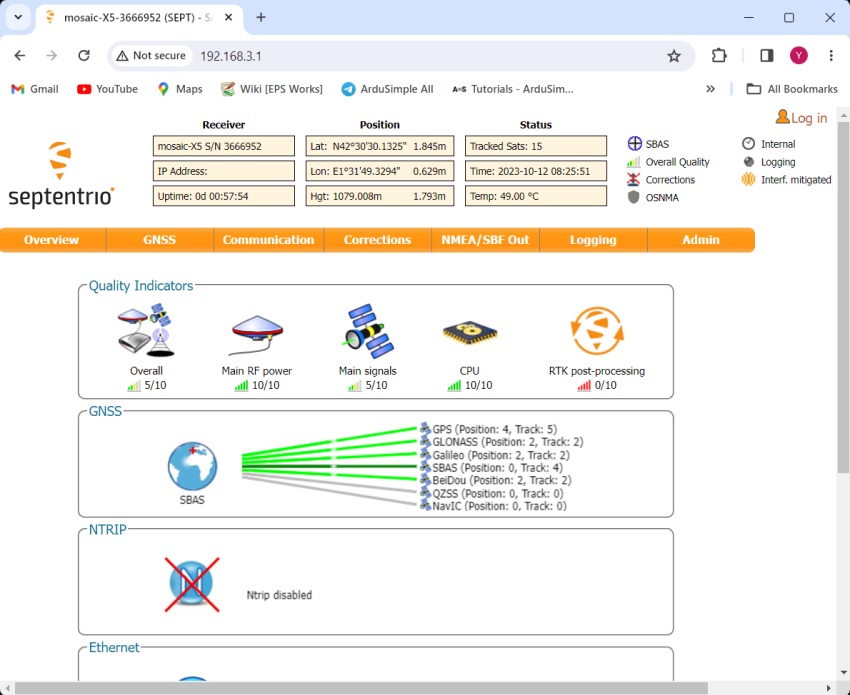
- Open Septentrio web interface by typing 192.168.3.1 in your browser.
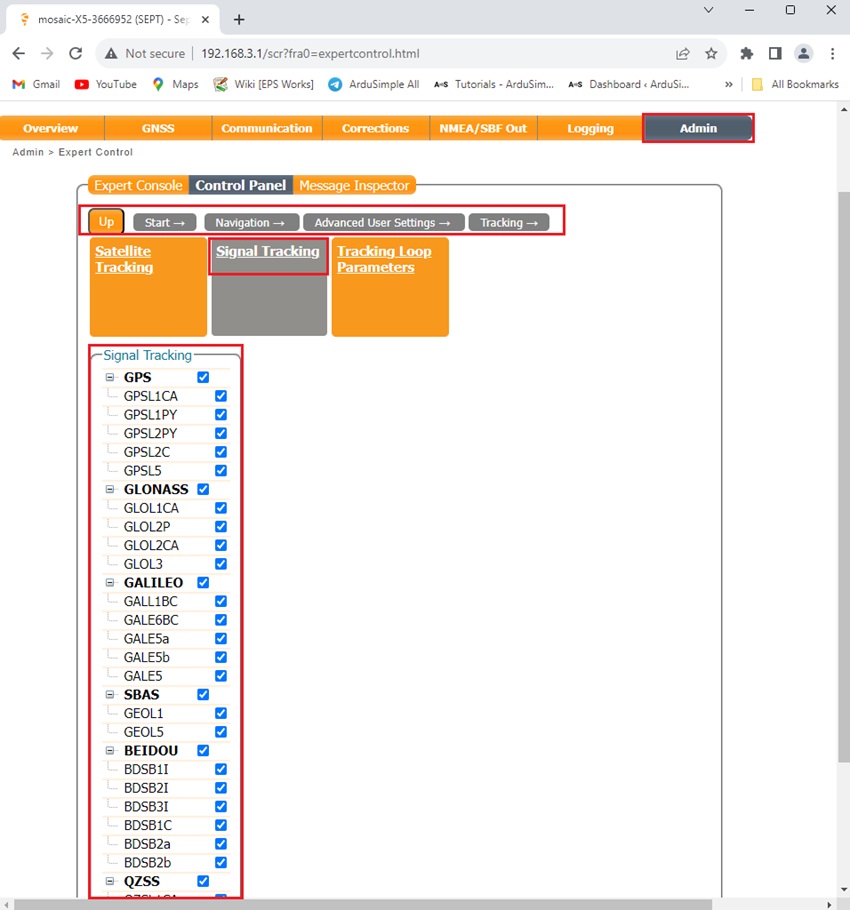
- L5 is disabled by default with Septentrio Mosaic-X5, thence we will enable L5 by going to Menu Bar–> Admin–>Expert Control–>Control Panel–>Navigation–>Advanced User Settings–>Tracking–>Signal Tracking.
Expand all satellite signals and select all band.
Click OK and save configuration.
Choose your preferred method to determine the geodetic reference position
- Log data from your receiver, and use the Septentrio RxTools to transform your SBF (Septentrio Binary Format) log file into RINEX files. If you don’t know how to do it, refer to tutorial about How to generate RINEX files with simpleRTK3B.
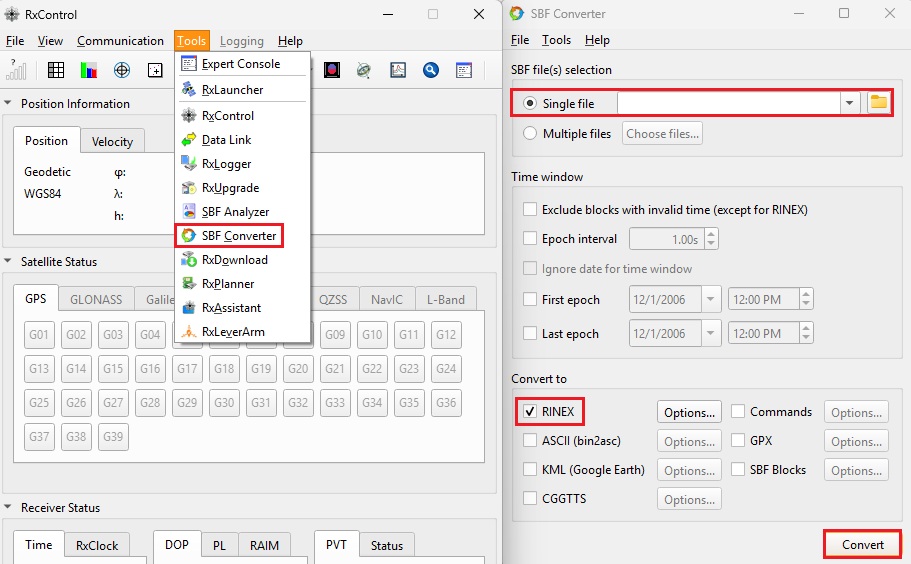
Note that in static mode, processing data at rates higher than 30 seconds does not improve the accuracy of the solution. It is recommended to record a minimum of 1 hour (preferably 24 hours) of data with a 30-second interval.
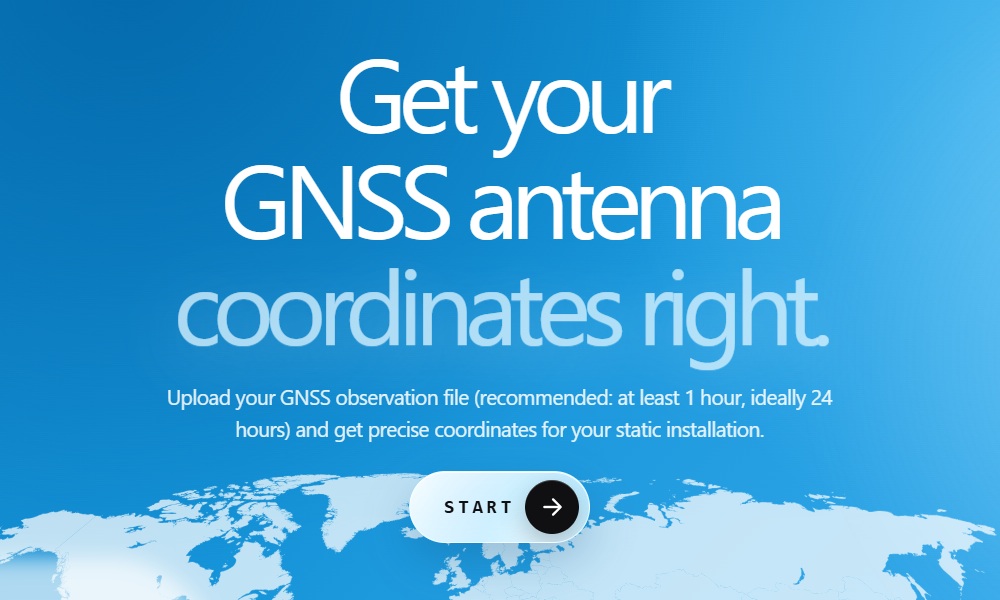
- In this tutorial we are going to use the postprocessing master online service. Press Start.
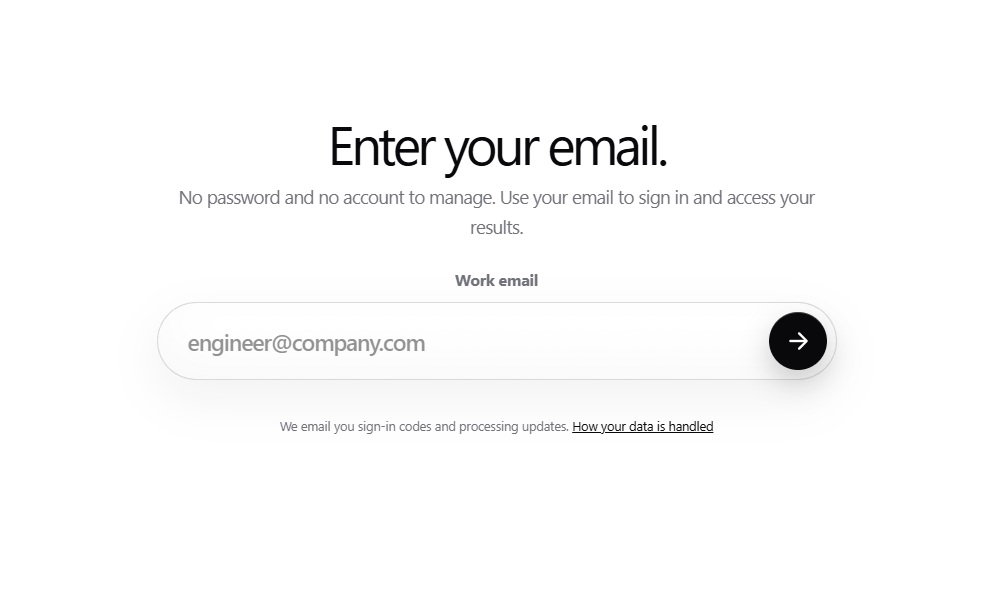
- The postprocessing master online service is free to use, but requires registration. Enter your email to create an account.
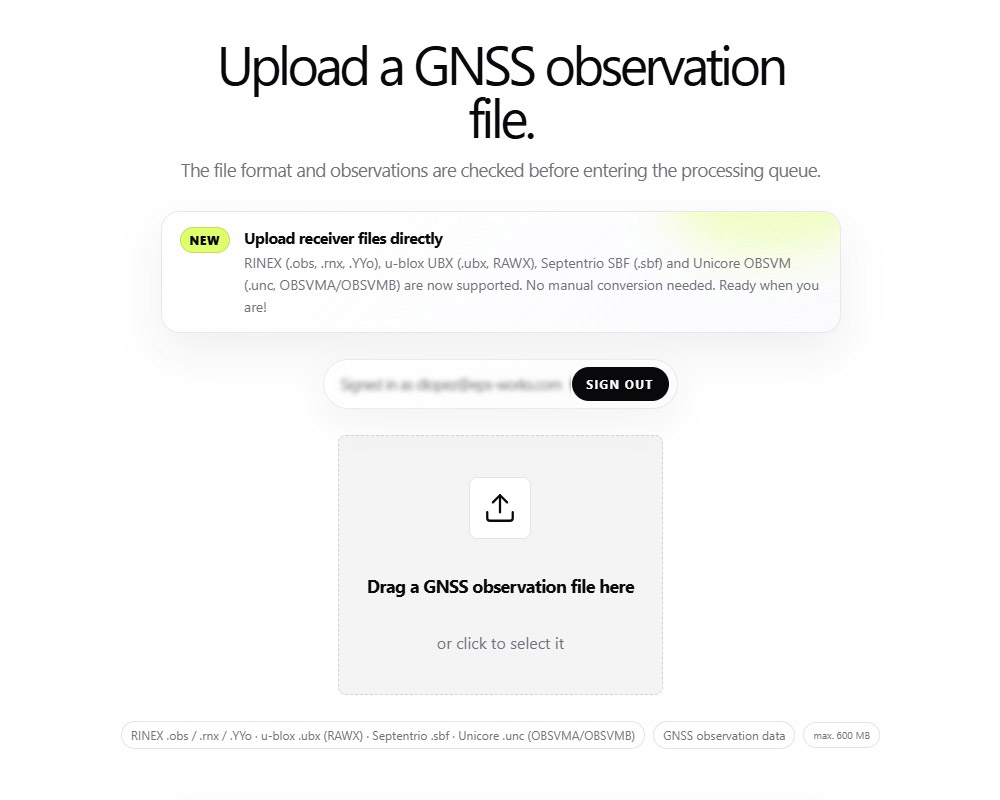
- After logging into your account, you can upload the RINEX files to start the PPP calculation. In our case we will use the RINEX Observation file generated in the previous step (the one with file extension .??O). Drag and drop the file into the web browser or click to browse your computer and select it.
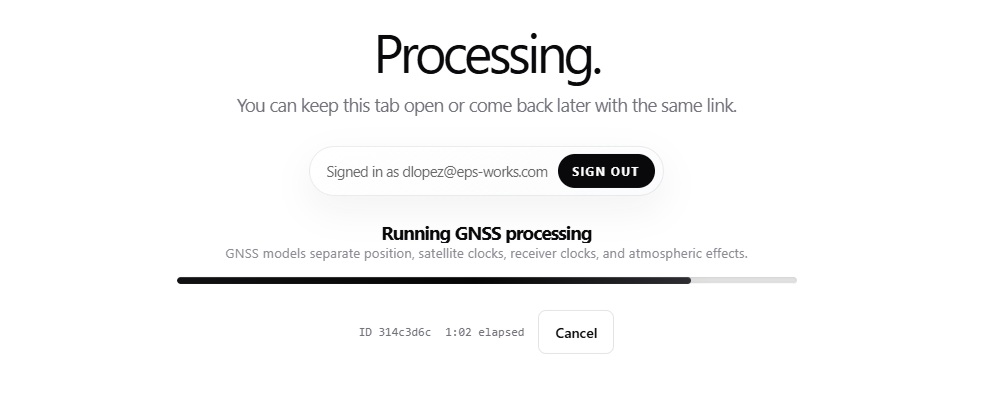
- The RINEX file processing will start…
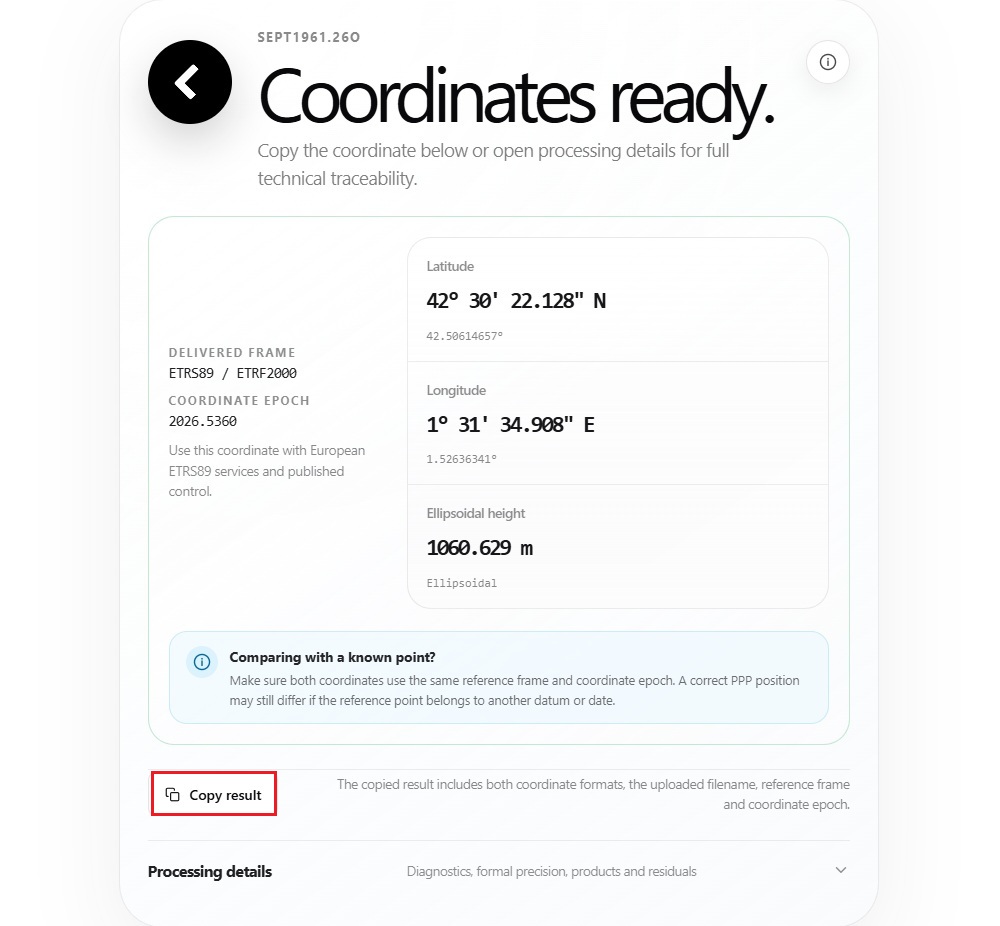
- Once the processing is over, you will receive the resulting coordinates for your base station. Click the Copy result button to keep the resulting coordinates in a document in your computer, or access them later by logging back into your account. The results are kept in the server for 7 days.
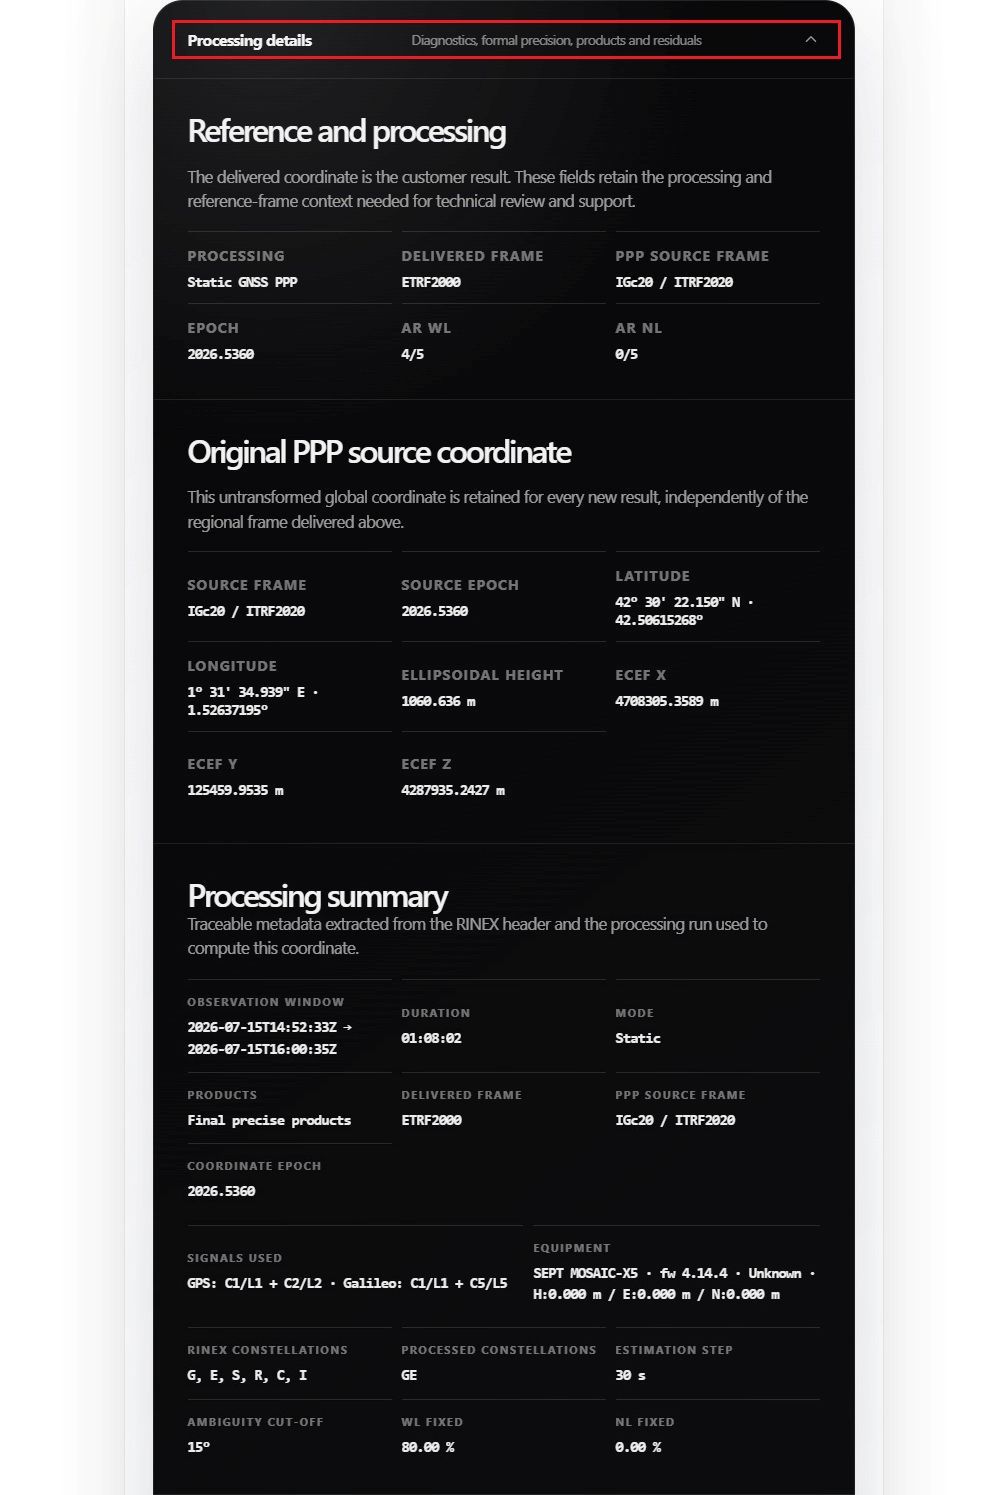
- Under Processing details, you will find all the information you might need to review and debug the results.
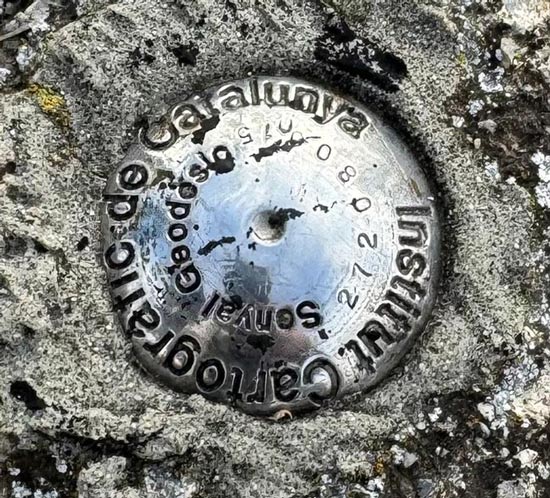
- Select an accurate and up-to date reference point, such as a geodetic control point or survey marker.In this tutorial, we use the Senyals-geodesics of Catalunya. Ensure that the reference point is situated in a location with a clear view of the sky, free from trees or other obstacles that may obstruct satellite signals.
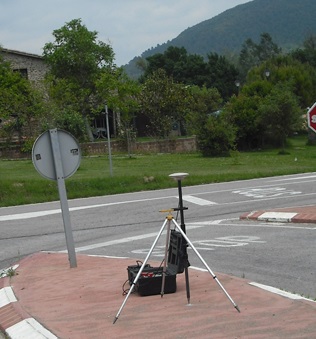
- Setting up the base station antenna above the reference point. With the use of a tribrach and tripod this can be done very accurately.
- The location of your base station will coincide with the Geodetic point’s location. You can retrieve the geographic coordinates information from the geodetic point’s description.Ensure to incorporate altitude information by adding the height difference between your Antenna Reference Point (ARP) and the marker.
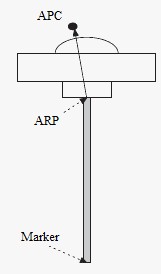
- Make sure there is a NTRIP service provider that covers your geographic location. If you need help to finding one, check the list of RTK Correction Services in your Country.
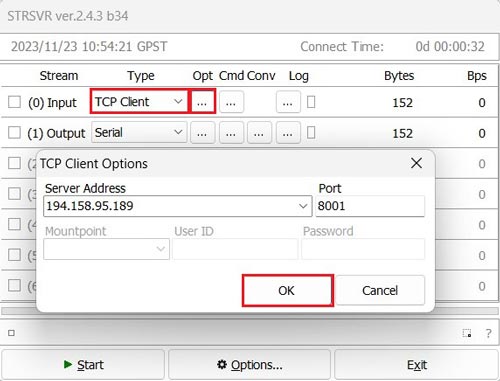
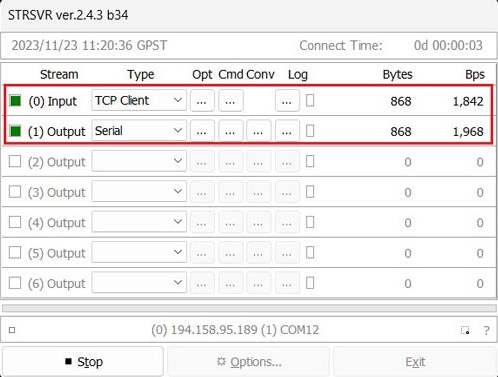
- Run STRSVR. At Input section, connect to an RTK network to receive corrections.Under Type choose the correction you use. Click the … icon under Opt to edit your correction service.
In this example, we are using the Andorra online correction service connected via TCP.
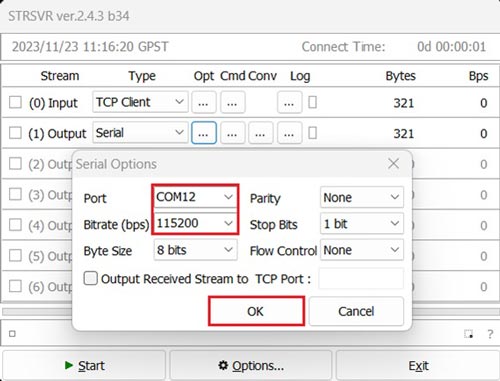
- Select Serial at Output. Configure the appropriate COM port and Bitrate (Note: the COM Port number may differ from the image). Click OK.
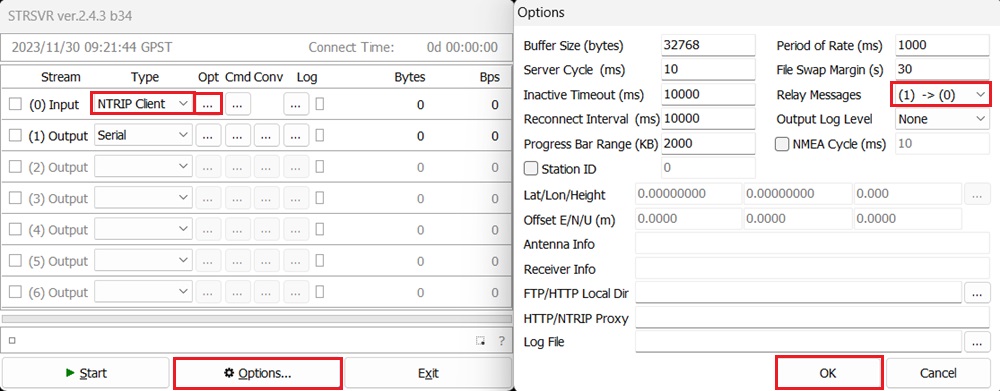
- If you are using a NTRIP service, note that some NTRIP Caster will need the location of your base station. Go to Options.At Relay Messages choose (1)–>(0), which means sending Stream (1) Output to Stream (0) Input. Thus the location information of your base station will be send back to NTRIP Caster. Remember to enable NMEA GGA output of your receiver at the same COM port. If you don’t know how to do it, check the User Guide.
- Click Start and you will observe data transmission.
- Go back to Septentrio web interface. Go to GNSS–>Position. At position Mode select Rover. Reference position choose auto.
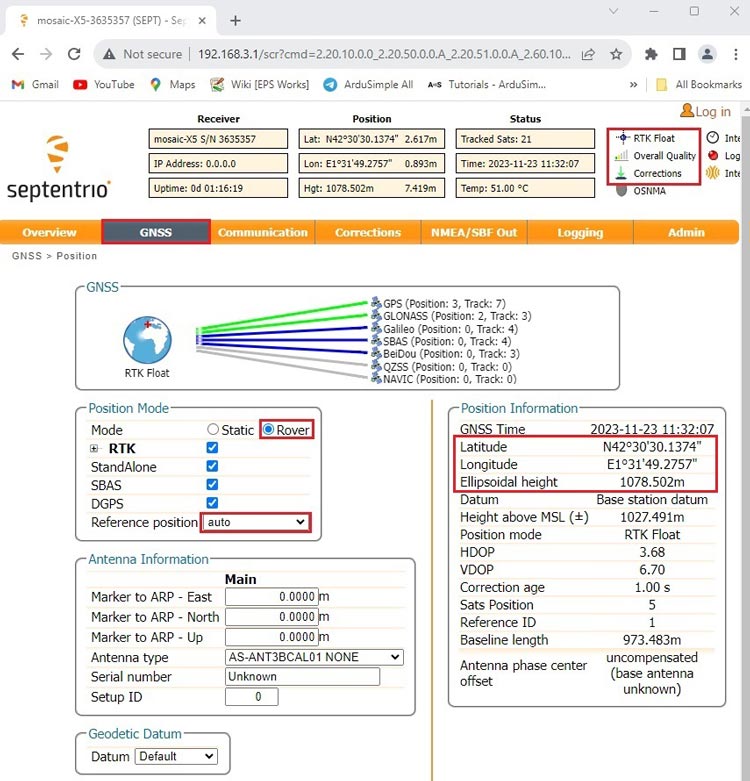
- In the upper-right corner, you should observe RTK Float or Fix with input corrections. Record the fixed data as the location of your base station, which will be utilized in step 13.
- For enhanced precision, consider logging data for a few hours.
Perform post-processing using your preferred programming language, such as MATLAB or Python, to extract the coordinates of RTK fixed points from the log file and compute the mean value as your reference postion.
Set the reference position as your antenna reference point static position.
- Go back to Septentrio web interface. In the menu bar go to GNSS–>Position. At Mode choose Static. At Reference position select Geodetic 1
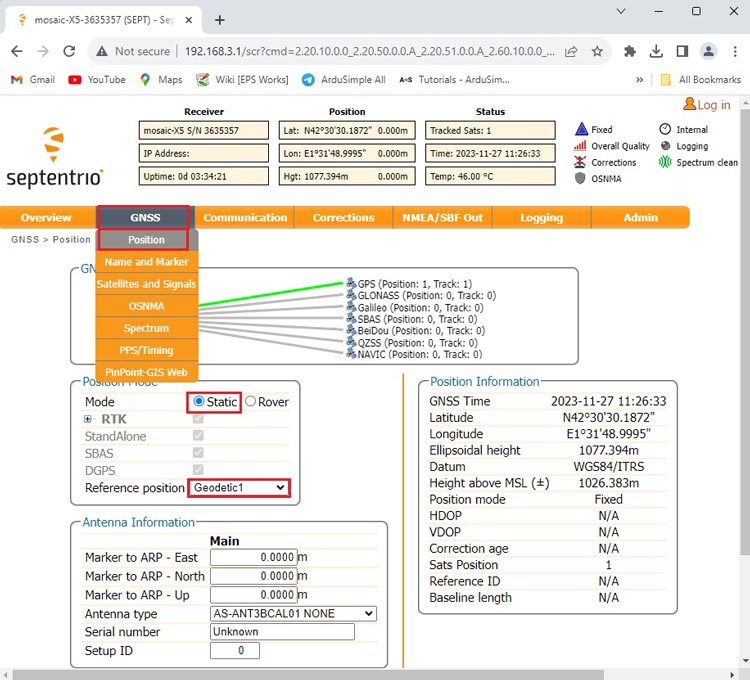
- Now scroll down and expand the Advanced Settings.
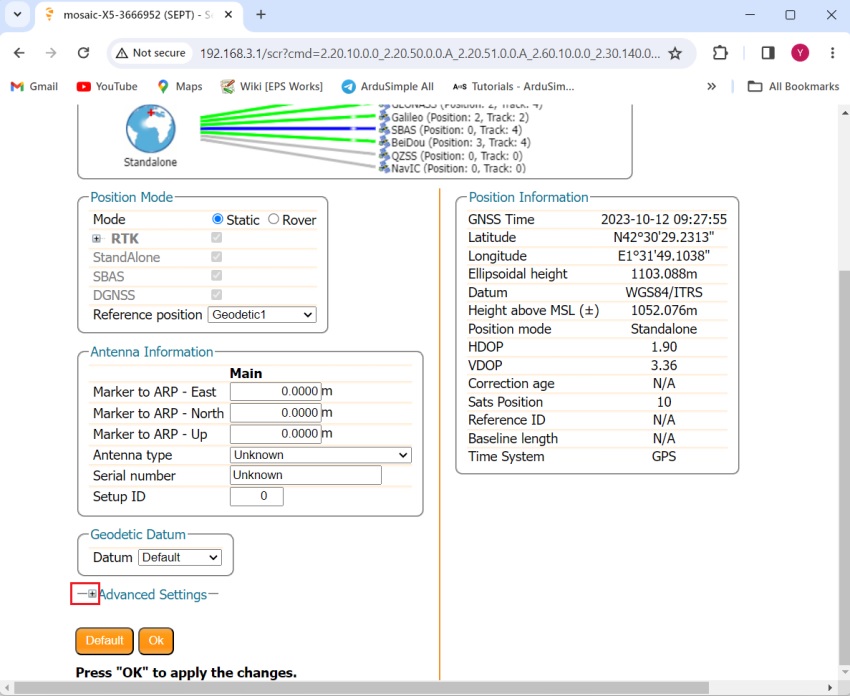
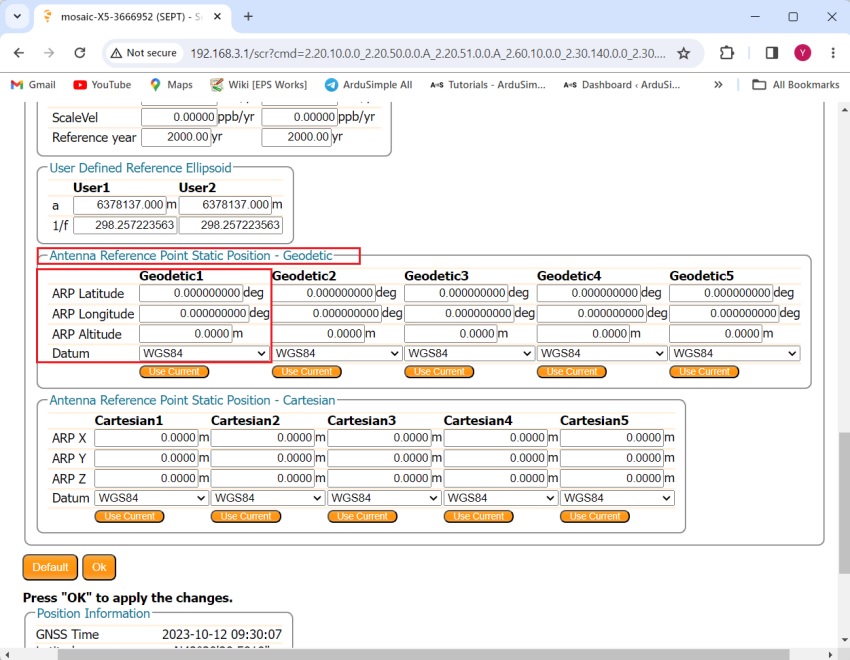
- Continue scrolling down until you find Antenna Reference Point Static Position – Geodetic. Set the latitude, longitude and altitude you obtained from previous steps. Note that the altitude to be set should be the ellipsoid altitude (if you need more info about different types of altitudes you can check out tutorial about GNSS altitudes).
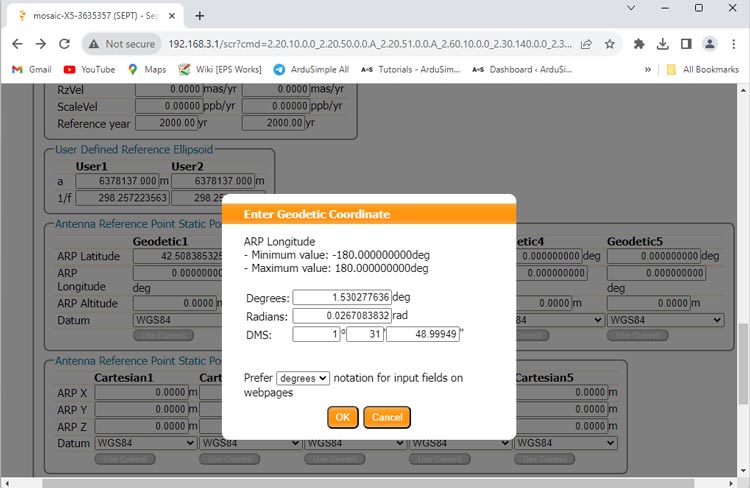
- You can set the coordinate with Degrees, Radians or DMS.
- Press Ok and Save the configuration.
Enable correction data output
- Select the interface you want to use to output correction data. If you are using one of the following plugins: Ethernet NTRIP Master, WiFi NTRIP Master, 4G NTRIP Master, you will configure RTCM3 output at COM2. If you don’t know how to do it, refer to the tutorial How to configure simpleRTK3B as static base station.
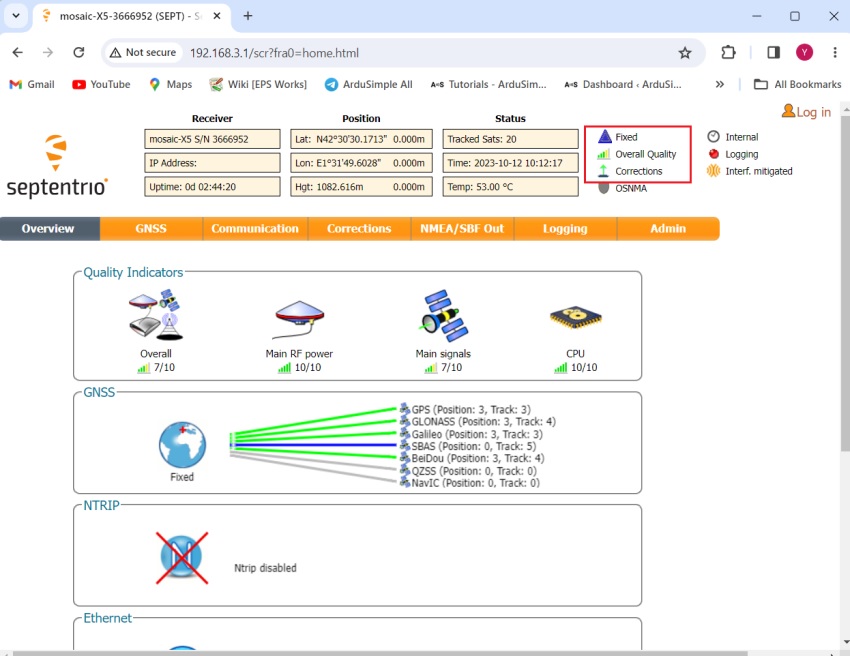
- Congratulations! Now you can use your receiver as a static base station with centimeter level absolute accuracy. On the up-right corner, you will see the position mode is Fixed and with correction output.
Still having issues?
Contact us for support from a real engineer—not AI—or request the tutorial you’re missing