 and
and 

How to set up the simpleRTK3B Compass with the Unicore UM982 in ArduPilot for high-precision GNSS heading

Table of contents
In this tutorial we will guide you through setting up the simpleRTK3B Compass (powered by the Unicore UM982 RTK module) to provide high-precision GNSS-based heading in your ArduPilot project.
Required hardware
- simpleRTK3B Compass
- 2 × Lightweight helical GNSS Tripleband + L-band antenna (IP67)
- 2 × SMA antenna RF cable extender (these items are needed particularly for helical antenna)
- USB to USB-C cable
- Pixhawk cable set
- Holybro Pixhawk 6C (you can also use your preferred autopilot)
- PC or laptop
Required software
- Mission Planner
- Uprecise (Protected zip folder password 1234)
Before start
This tutorial is based on the simpleRTK3B Compass powered by Unicore UM980, and if you are running different hardware some sections of this tutorial might not apply. Alternatively, we have prepared other tutorials for the simpleRTK2B Heading kit (u-blox) and simpleRTK3B Heading kit (Septentrio).
This tutorial has been validated with the following ArduPilot firmware versions:
- ArduRover 4.6
- ArduCopter 4.6
- ArduPlane 4.6
How to setup and connect the UM982 RTK Receiver with ArduPilot?
Configure simpleRTK3B Compass (UM982) receiver.
- Connect both GNSS antennas to your receiver. Make sure the antennas have a good view of the sky for testing functionality. Or you won’t be able to see satellites view and signal.
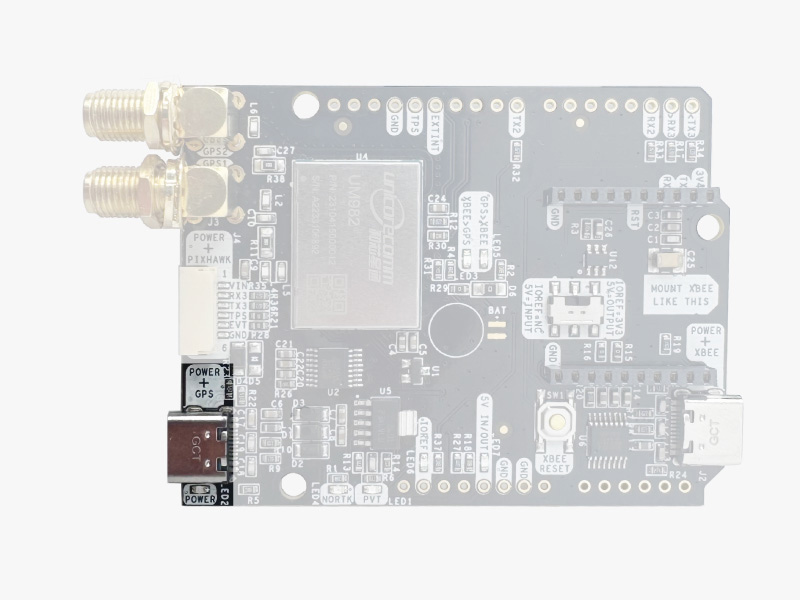
- Connect the simpleRTK3B Compass to your PC via the USB port labeled with POWER+GPS using USB-C cable.
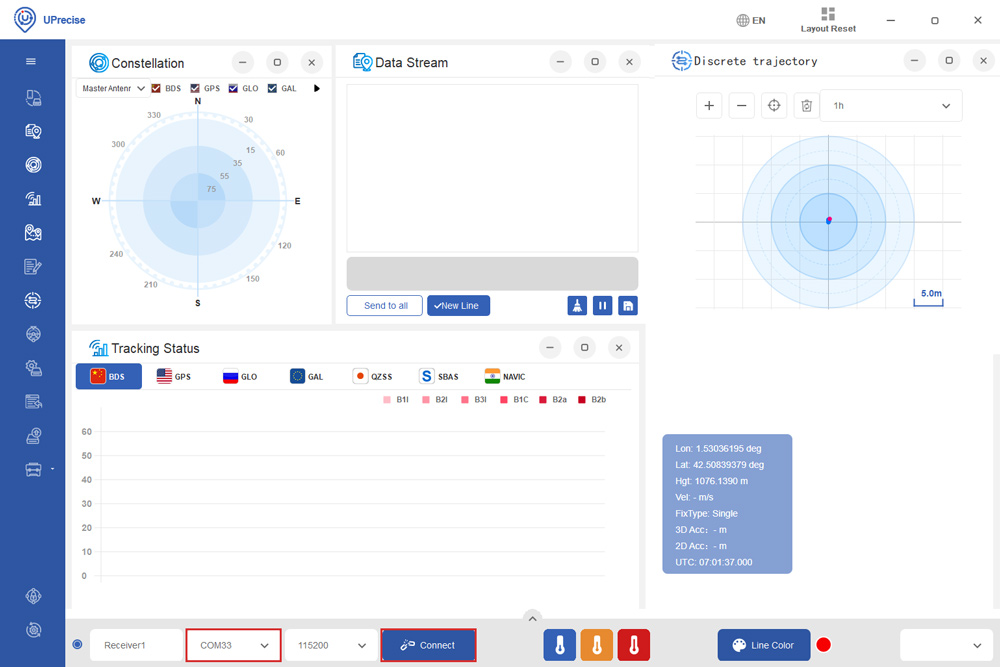
- Open Uprecise. Select the COM port (If you don’t know which COM port check the device manager of your PC). At baud rate choose 115200. Press Connect.
- Use the following commands to transmit NMEA messages to COM1 for debugging and send NMEA messages to Pixhawk via COM3 at 1HZ. If a higher frequency is needed, adjust the commands (e.g. GNGGA COM1 0.1 for a 10 Hz frequency).
- GNGSV COM1 1
- GNGSA COM1 1
- UNIHEADINGA COM1 1
- GNGGA COM3 1
- GNRMC COM3 1
- GPHDT COM3 1
- SAVECONFIG
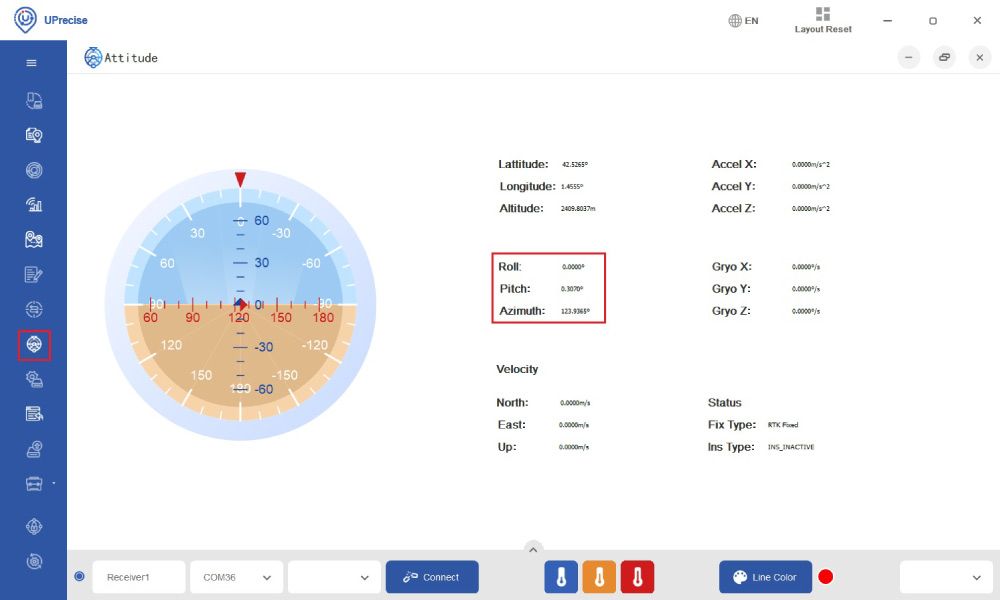
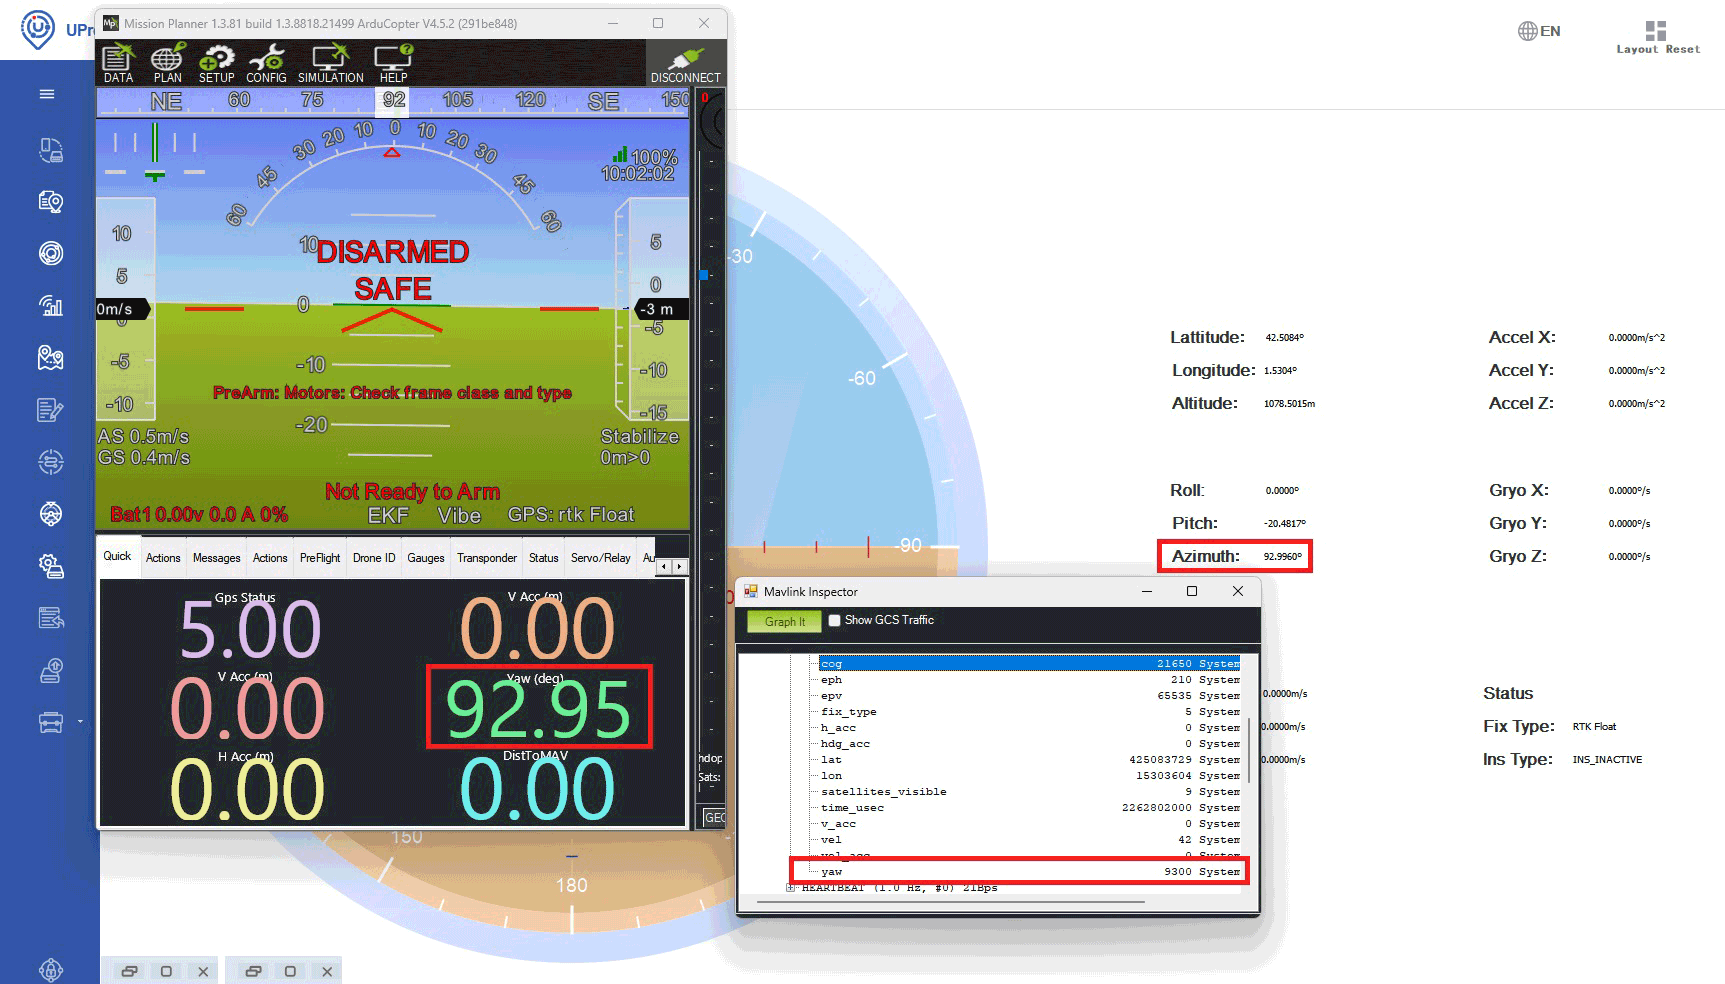
- At menu bar go to Attitude, you will see heading value shown as Azimuth.
Configure ArduPilot
- Connect your Pixhawk to your computer using a USB to USB-C cable.
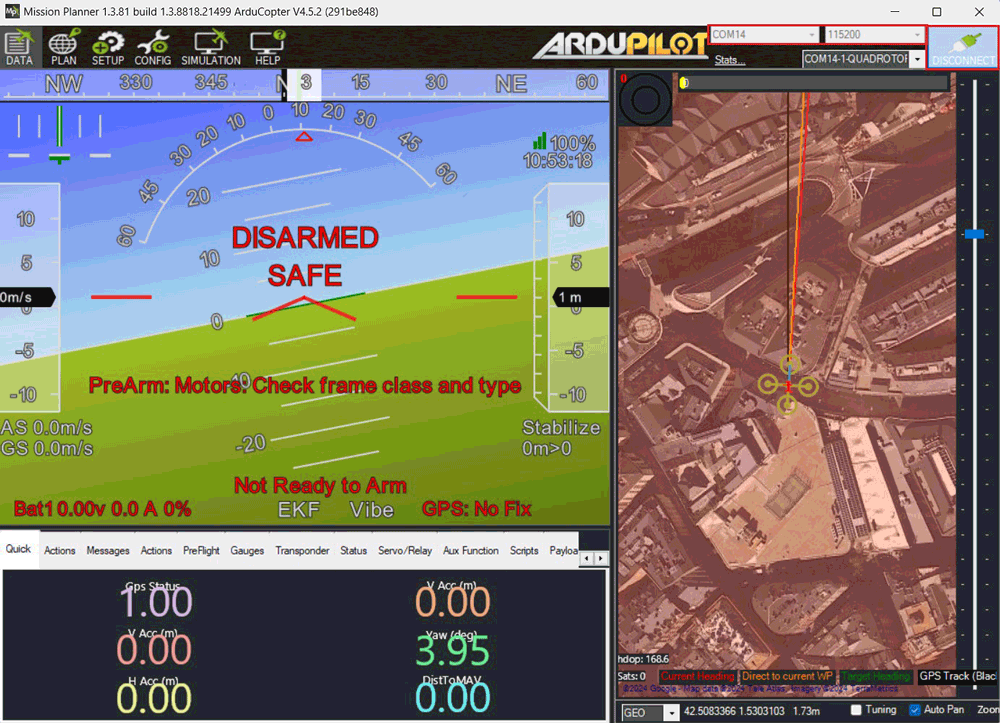
- Open Mission Planner and connect your Pixhawk to it with COM port with baud rate 115200.
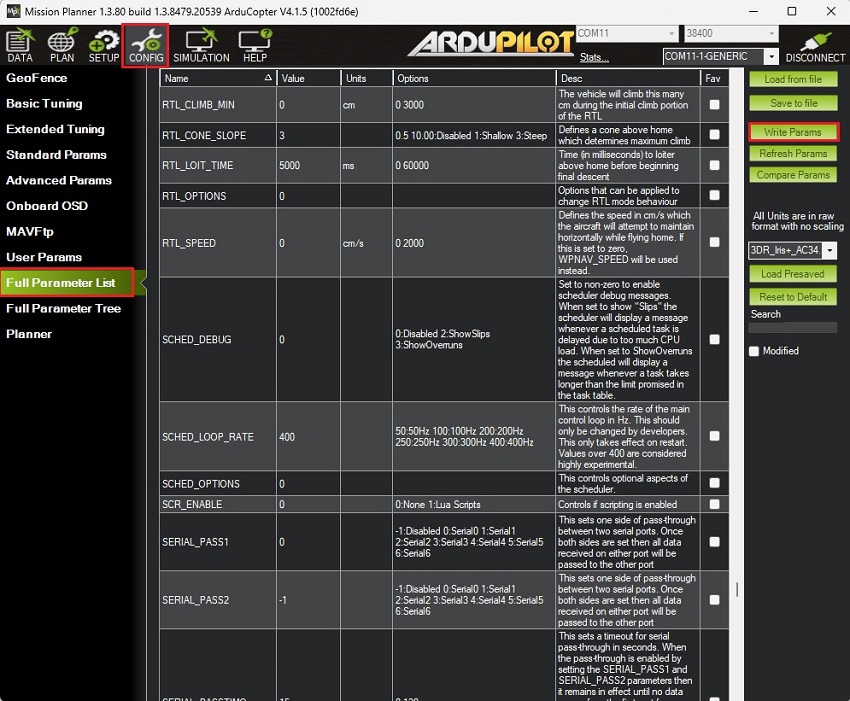
- Go to CONFIG -> Full Parameter List. Given that the firmware version might differ from yours, this is a list of all parameters that have been modified from their default values:
- COMPASS_ENABLE 1 -> 0 (Disabled)
- COMPASS_USE 1 -> 0 (Disabled)
- COMPASS_USE2 1 -> 0 (Disabled)
- COMPASS_USE3 1 -> 0 (Disabled)
- EK3_MAG_CAL 3 -> 5 (Use external yaw sensor)
- EK3_SRC1_YAW 1 -> 2 (GPS)
- GPS_AUTO_CONFIG 1 -> 0 (Disables automatic configuration)
- GPS_AUTO_SWITCH 1 -> 0 (Use primary)
- GPS2_RATE_MS 200 -> 100 (10Hz)
- GPS2_TYPE 0 -> 5 (NMEA)
- SERIAL1_BAUD 57 -> 115 (115200)
- SERIAL1_PROTOCOL 2 -> 5 (GPS)
- Press Write Params to save your settings.
- After saving all the parameters make sure you restart your autopilot by disconnecting and reconnecting the USB-C cable.
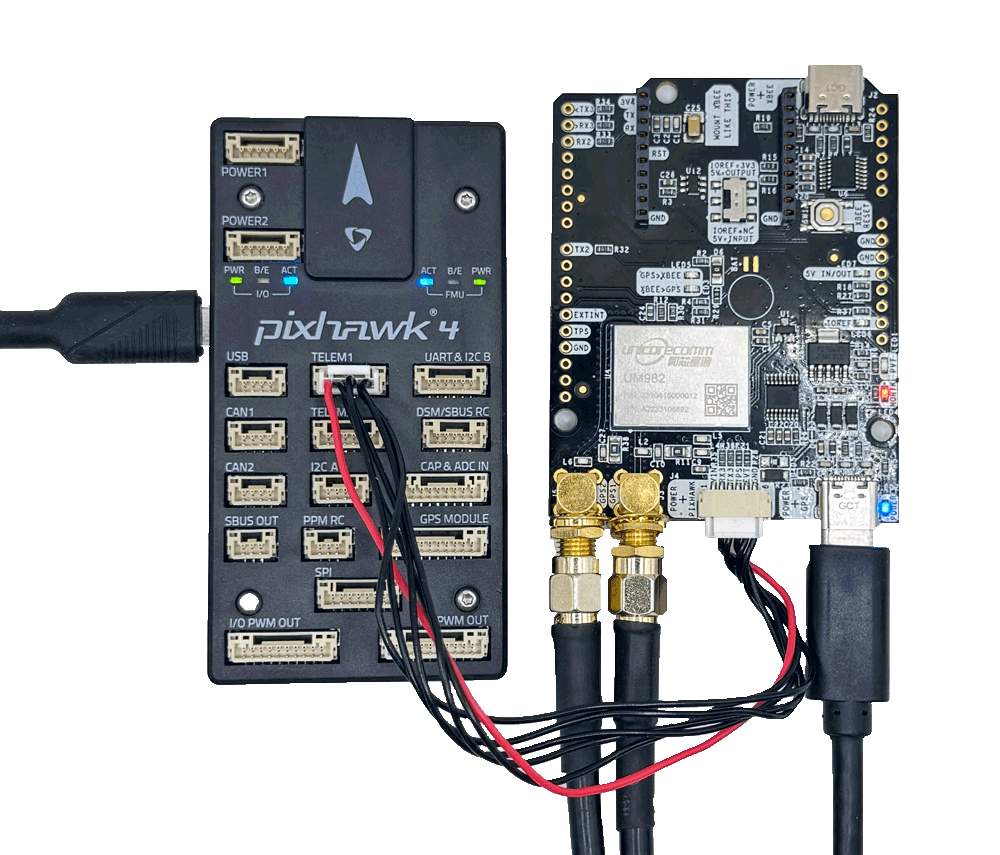
Connect the RTK UM982 heading board to your autopilot
- Use the JST connector on the simpleRTK3B Compass and connect it to the TELEM1 port.
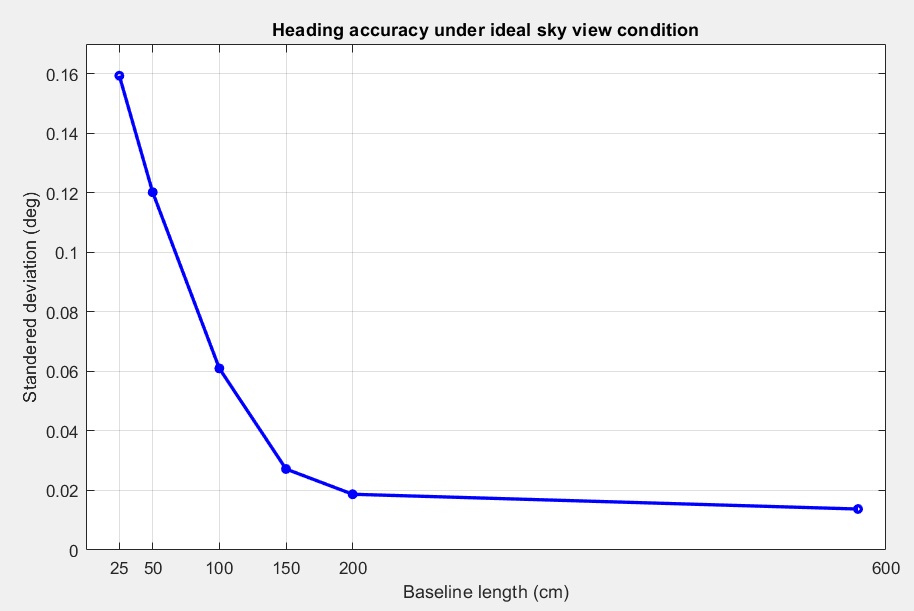
Unicore heading result is the angle from True North to the baseline of the master antenna (labelled as GPS1 on board) to the slave antenna (labeled as GPS2) in a clockwise direction. Pitch angle refers to the angle of the car or drone relative to the horizontal plane.
- Ensure that both antennas are positioned in a completely open area with a clear view of the sky, and with a baseline distance between them of minimum 0.3 meters. For further information follow the User guide: simpleRTK3B Compass Heading Configuration section.
- Power the autopilot. Open mission planner. Press CTRL+F. Go to MAVlink inspector–>GPS_RAW_INT–>yaw. The value should match the Azimuth value in UPrecise.
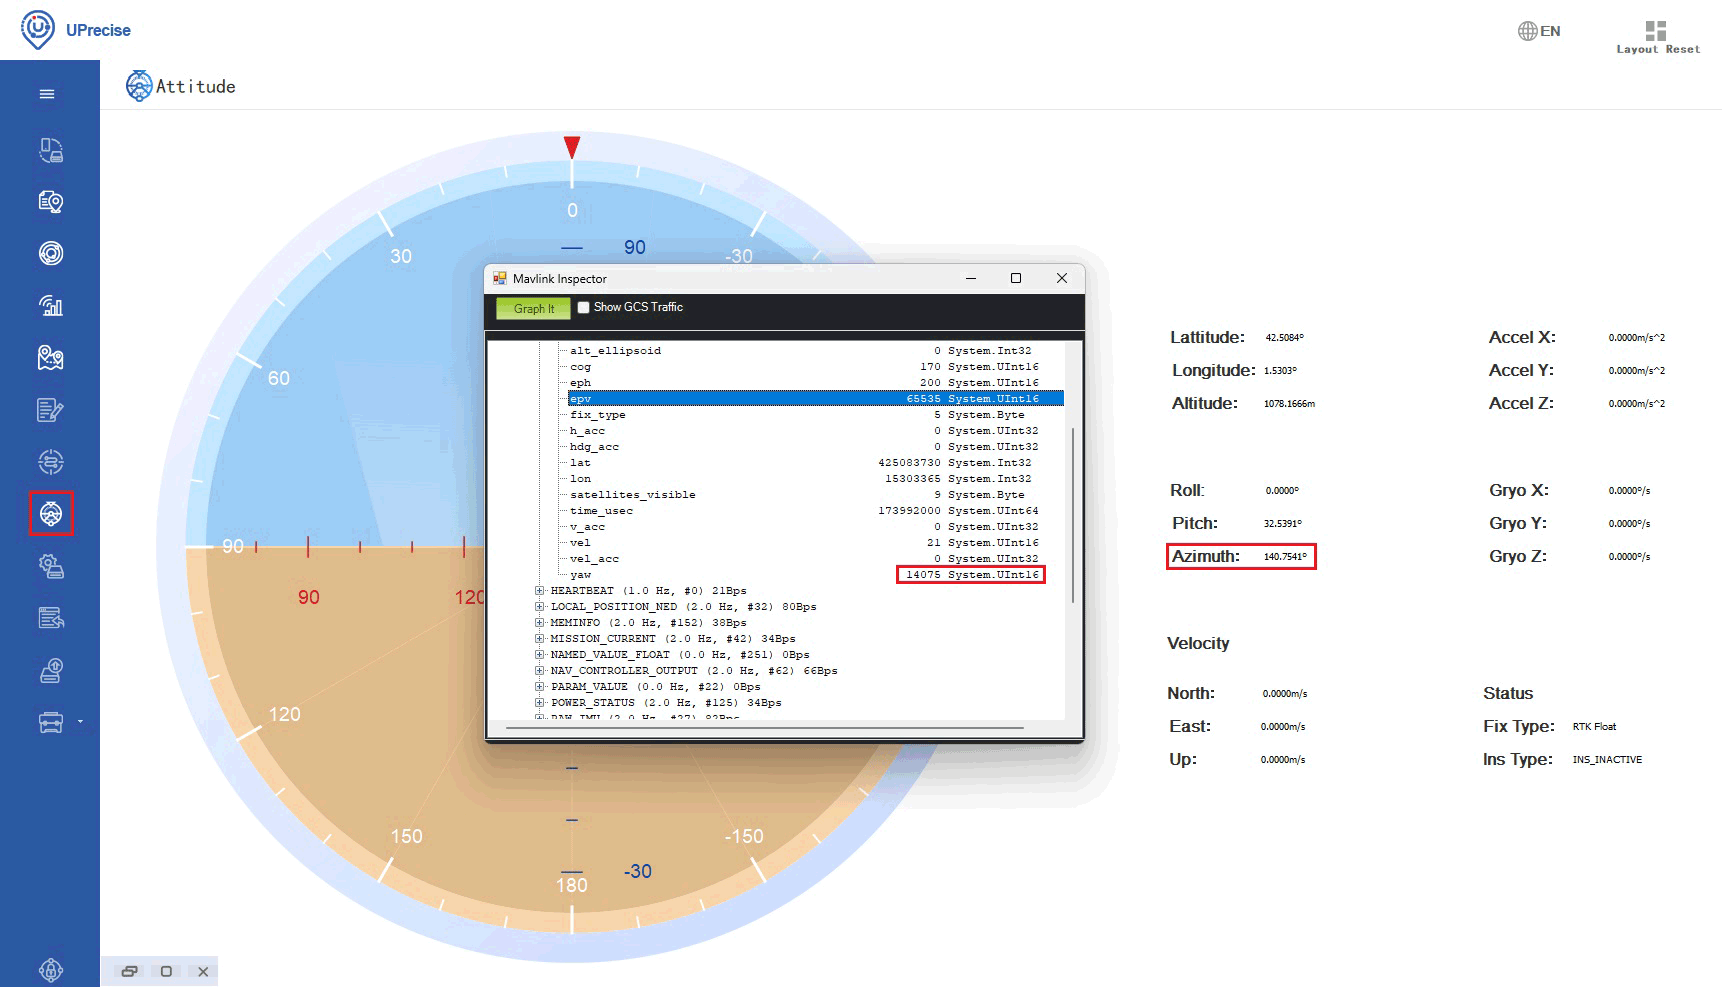
- The Yaw value of the AHRS in Mission Planner will slowly synchronize with the GPS_RAW_INT Yaw and Azimuth values in UPrecise. This process may take a few minutes.
Note that the EKF takes into account the gyroscope readings, so if you rotate the autopilot alone without turning the entire vehicle frame (where the antennas are mounted), the heading may temporarily change. However, after a few seconds, it will correct itself and align with the GNSS-calculated heading.
- For the best results during dynamic testing, ensure that both the Pixhawk and the GNSS antennas are mounted on the same device or surface.
Connect to RTK corrections
- To achieve centimeter-level precision in positioning, correction data must be transmitted to the rover. There are two main methods for delivering this correction data:
- Using online correction service (NTRIP): In this method, the rover receives real-time corrections through the NTRIP (Networked Transport of RTCM via Internet Protocol) protocol. This method is convenient for areas with reliable internet access and eliminates the need for setting up a physical base station. For guidance on integrating NTRIP corrections with ArduPilot, you can follow ArduSimple’s tutorial on sending NTRIP corrections to ArduPilot.
- Setting up a Base Station: This method is useful in areas where there is no internet access or NTRIP network available, but it requires extra equipment and setup. You can refer to ArduSimple’s tutorial on sending RTK base station corrections to ArduPilot for detailed instructions.
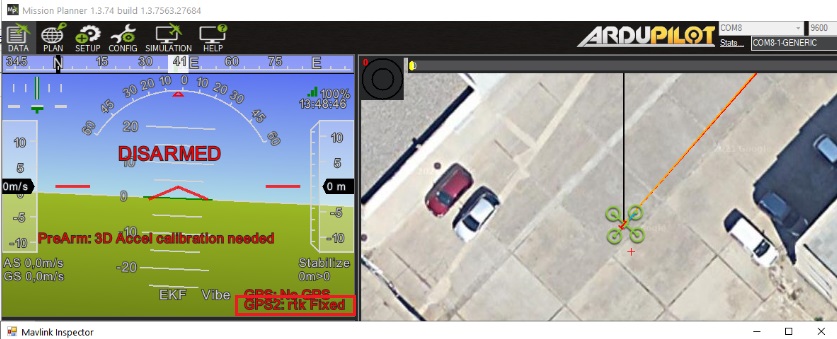
- In a few seconds, on Mission Planner you will GPS2 status change to rtk Float or rtk Fixed.
Related products
If you want to follow this tutorial, we have all the products in stock and ready to be shipped:
-

-
- Cables
SMA antenna RF cable extender
From 13,00€ This product has multiple variants. The options may be chosen on the product page -
-

RTK Assistant
Find the best products for your application in just a few questions.

