 and
and 

How to connect external GNSS/RTK receiver to QField on iOS device (iPhone or iPad)

QField is a mobile field mapping and data collection app that integrates with QGIS, allowing for efficient outdoor data gathering directly compatible with QGIS desktop. QField can run on Android, iOS, Windows, Linux and MacOS.
If you want to know how to use RTK receiver with QField on your Android device instead of iOS, check out the tutorial How to use centimeter GPS with any Android app (mock location).
In this tutorial we will guide through the steps how to use external ArduSimple GNSS RTK receiver with QField on your iOS device (iPhone or iPad). Since QField supports only TCP and UDP connection with iOS platform, we will use WiFi NTRIP Master which has a nice feature called “Socket Server” to send NMEA messages over TCP/IP.
Required hardware:
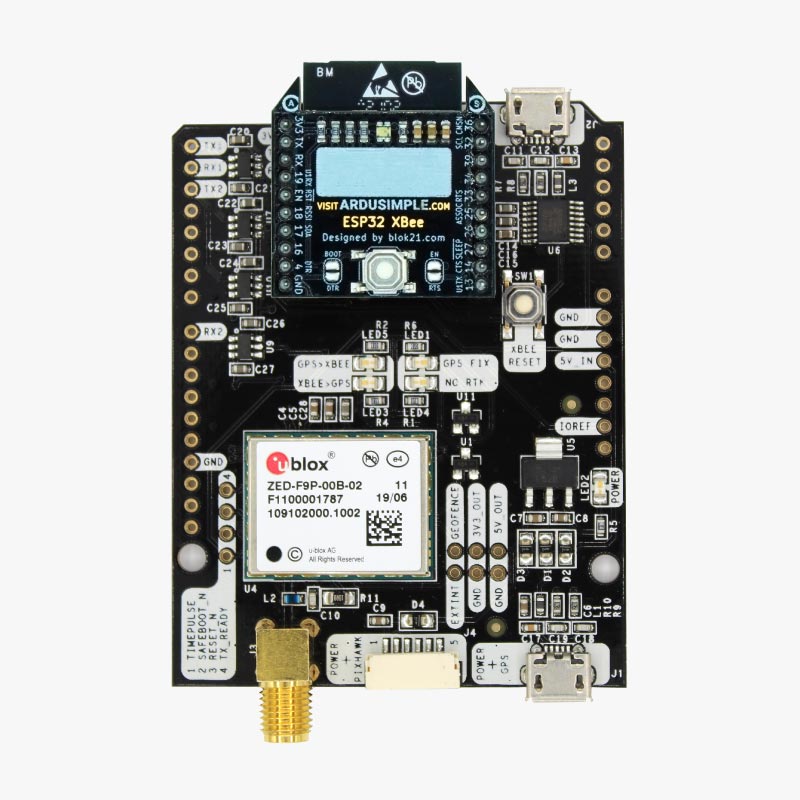
- simpleRTK2B Budget
- Budget Survey GNSS Multiband antenna (IP66)
- WiFi NTRIP Master
- USB to micro-USB cable
- iOS device (iPhone or iPad)
- a PC or laptop
Required software:
How to use RTK receiver with QField on iOS?
Firstly, configure the RTK receiver.
- Connect your receiver to the computer via the USB port labeled with POWER+GPS. Open u-center and connect your receiver via COM port.
- Configure your reciever as Rover. You can use Rover configuration file from this page. If you don’t know how to check the firmware version and load a configuration file, have a look at this tutorial.
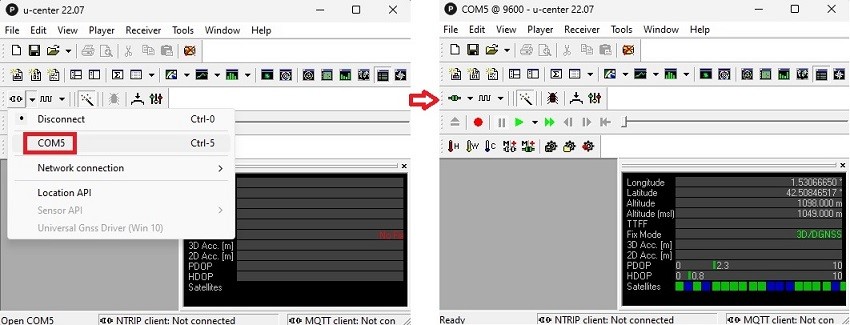
- Open u-center and go to View->Messages View in main menu.
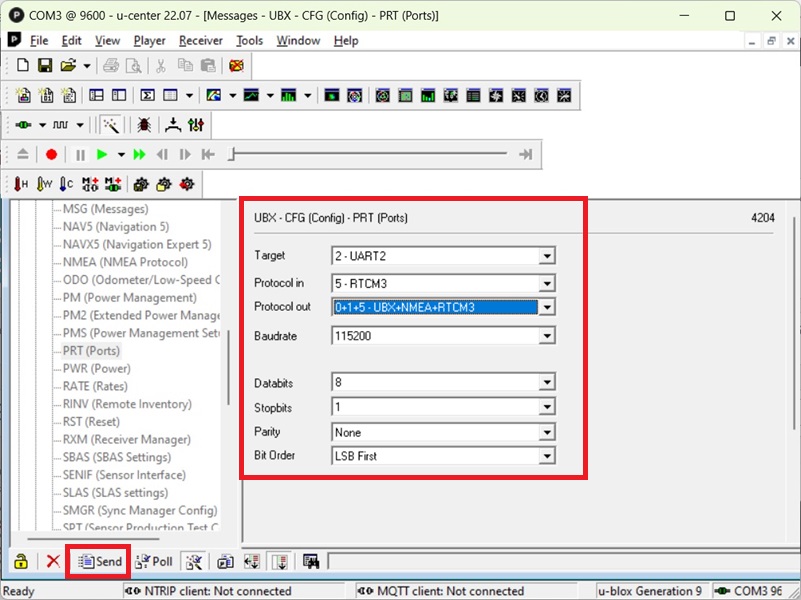
- To enable output NMEA data to the XBee socket, navigate to UBX->CFG->PRT and choose 2-UART2 in Target and press Poll.
- Choose 0+1+5 – UBX+NMEA+RTCM3 in Protocol out. Press Send.
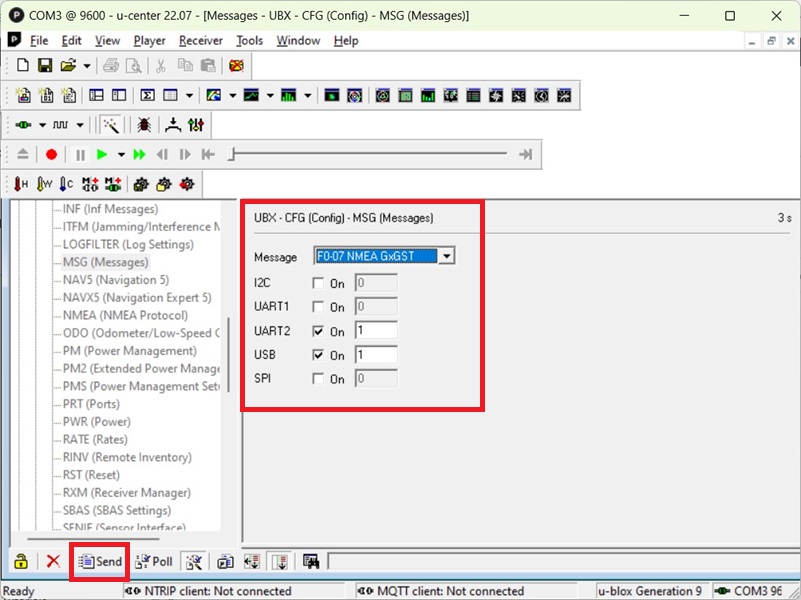
- To enable accuracy messages, go to the UBX-> CFG->MSG, press Poll and enable the UART2 and USB. Press Send.
- Save configuration of your receiver by pressing in main menu Receiver->Actions->Save Config.
Secondly, connect RTK receiver to your iPhone.
- Plug the WiFi NTRIP Master onto your receiver. Make sure it is plugged on the right side.
- Power your receiver with your prefered power supply by using USB cable via USB port marked POWER+GPS. For testing you can keep receiver powered from your PC.
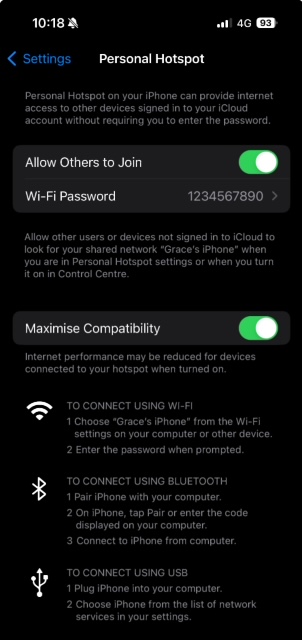
- Enable WiFi hotspot on your iOS device. The steps of enabling may differ on particular device, but there are general steps: go to Settings->Cellular->Personal Hotspot or Settings->Personal Hotspot and make sure that it’s on. Rememder or write dawn the Wi-Fi password and name of your phone, we will need this data later.
- On your iPhone go to Settings->Wi-Fi and look for the WiFi network that it created with name ESP_XBee_xxxxxx and press connect to it.
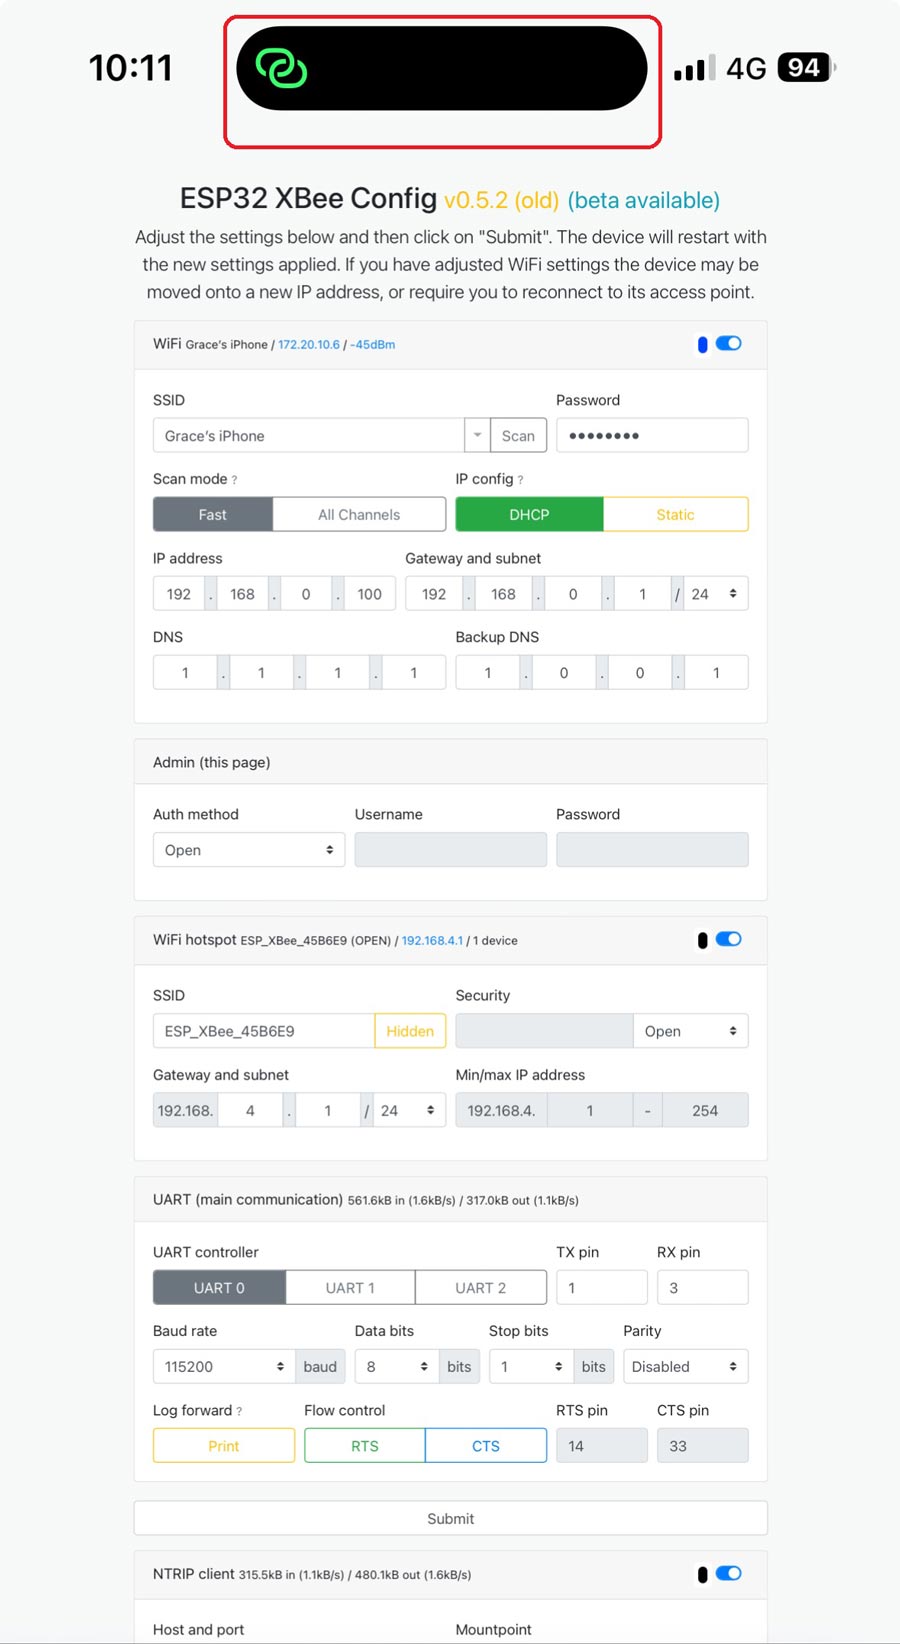
- Open a browser on iOS device and go to the configuration page that will be available at address 192.168.4.1.
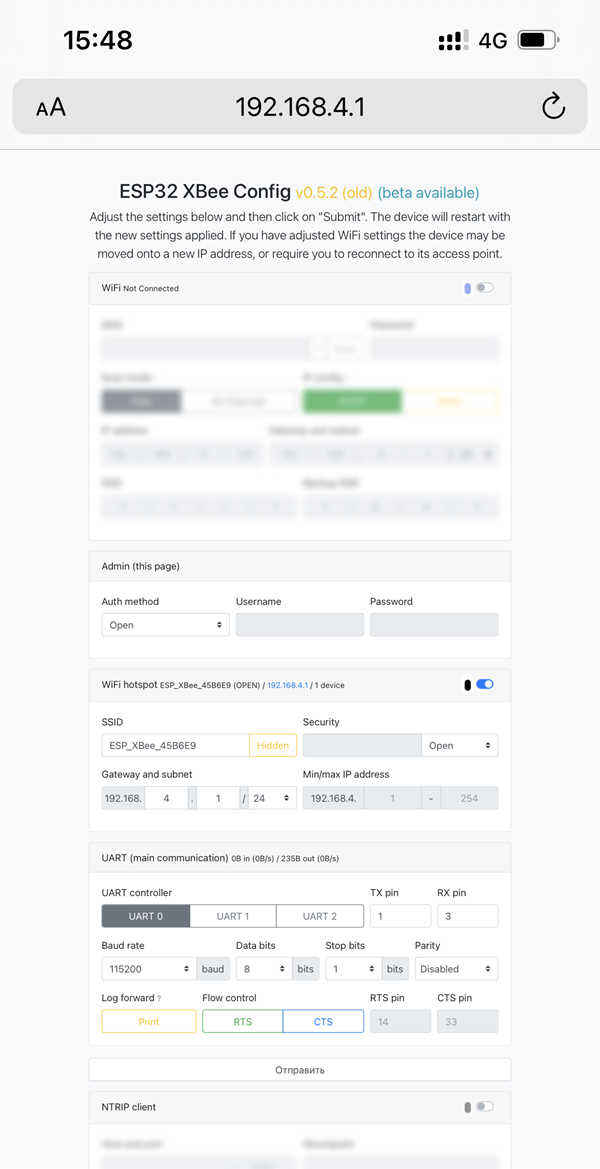
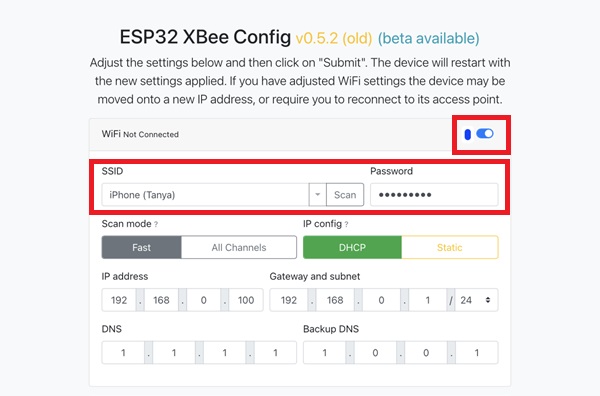
- Enable WiFi option. In the SSID type in the name and password of your personal hotspot which we wrote dawn at step #10.
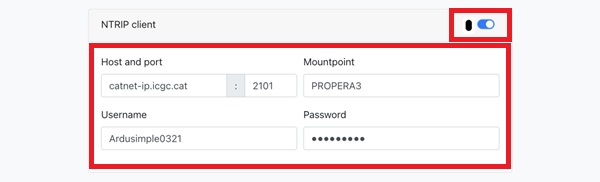
- Scroll down and enable NTRIP client option and fill in the Host and port of your NTRIP Caster, your Username and Password, Mountpoint which you would like to be connected to.
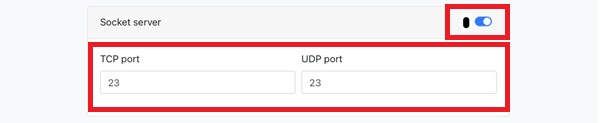
- Scroll down and enable Socket server. Write dawn the number of port, we will need it later.
- Press Submit button and wait a minute for reloading.
- Once it is reload, you will see the connection to your hotspot is setup (highlighted with green color in left top corner) and the address of your Wifi hotspot. Write it down, we will need it later.

- Note: The iOS hotspot feature may not be very stable. If you encounter difficulty connecting to both the hotspot and the WiFi NTRIP master simultaneously, simply return to the Personal Hotspot page on your phone. This action will re-establish the hotspot connection. Afterward, you can go back to 192.168.4.1.
Thirdly, connect your external RTK receiver to QField.
- Connect the RTK antenna to your receiver. Place your antenna in a location with good view of the sky, or near a window for testing.
- Open QField.
- Login to your QFieldCloud if you are already registered user. If you are new user, press QFieldCloud Projects->Register an account and go through the precedure of registration and open your project.

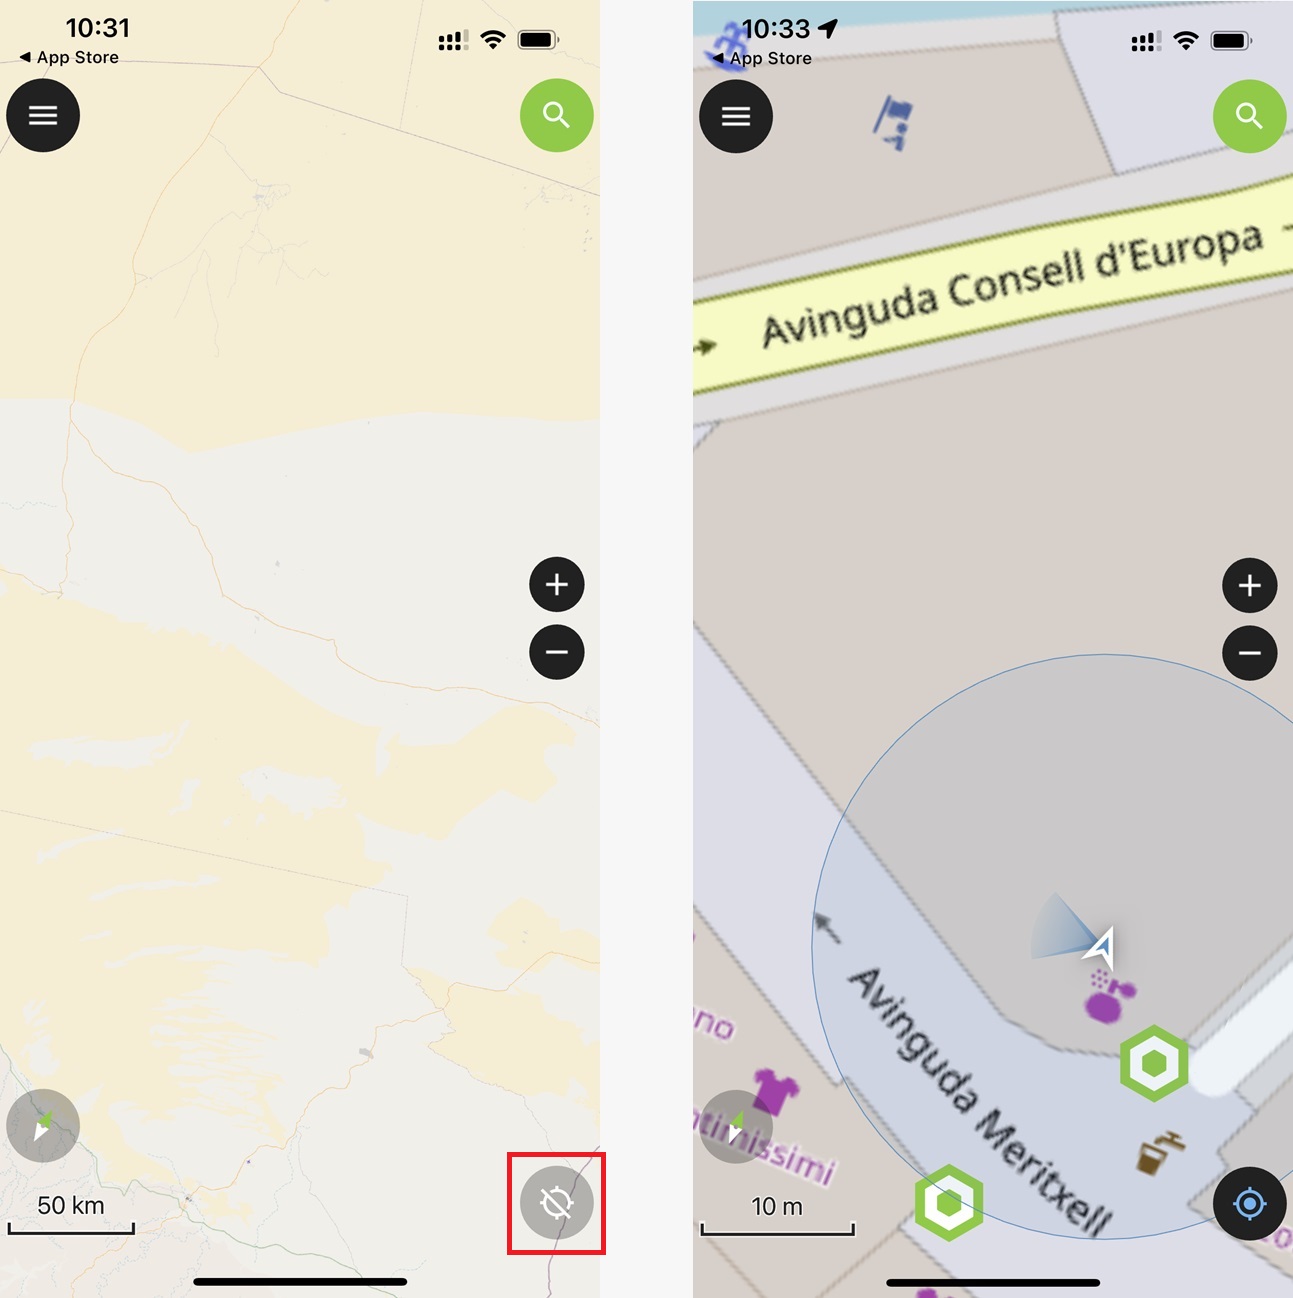
- Enable QField to use your location data by pressing on the icon in the right buttom corner. Once you enable it, you will see your current location on the screen which is provided by your internal receiver of the phone. This step neeeds to be done only once.
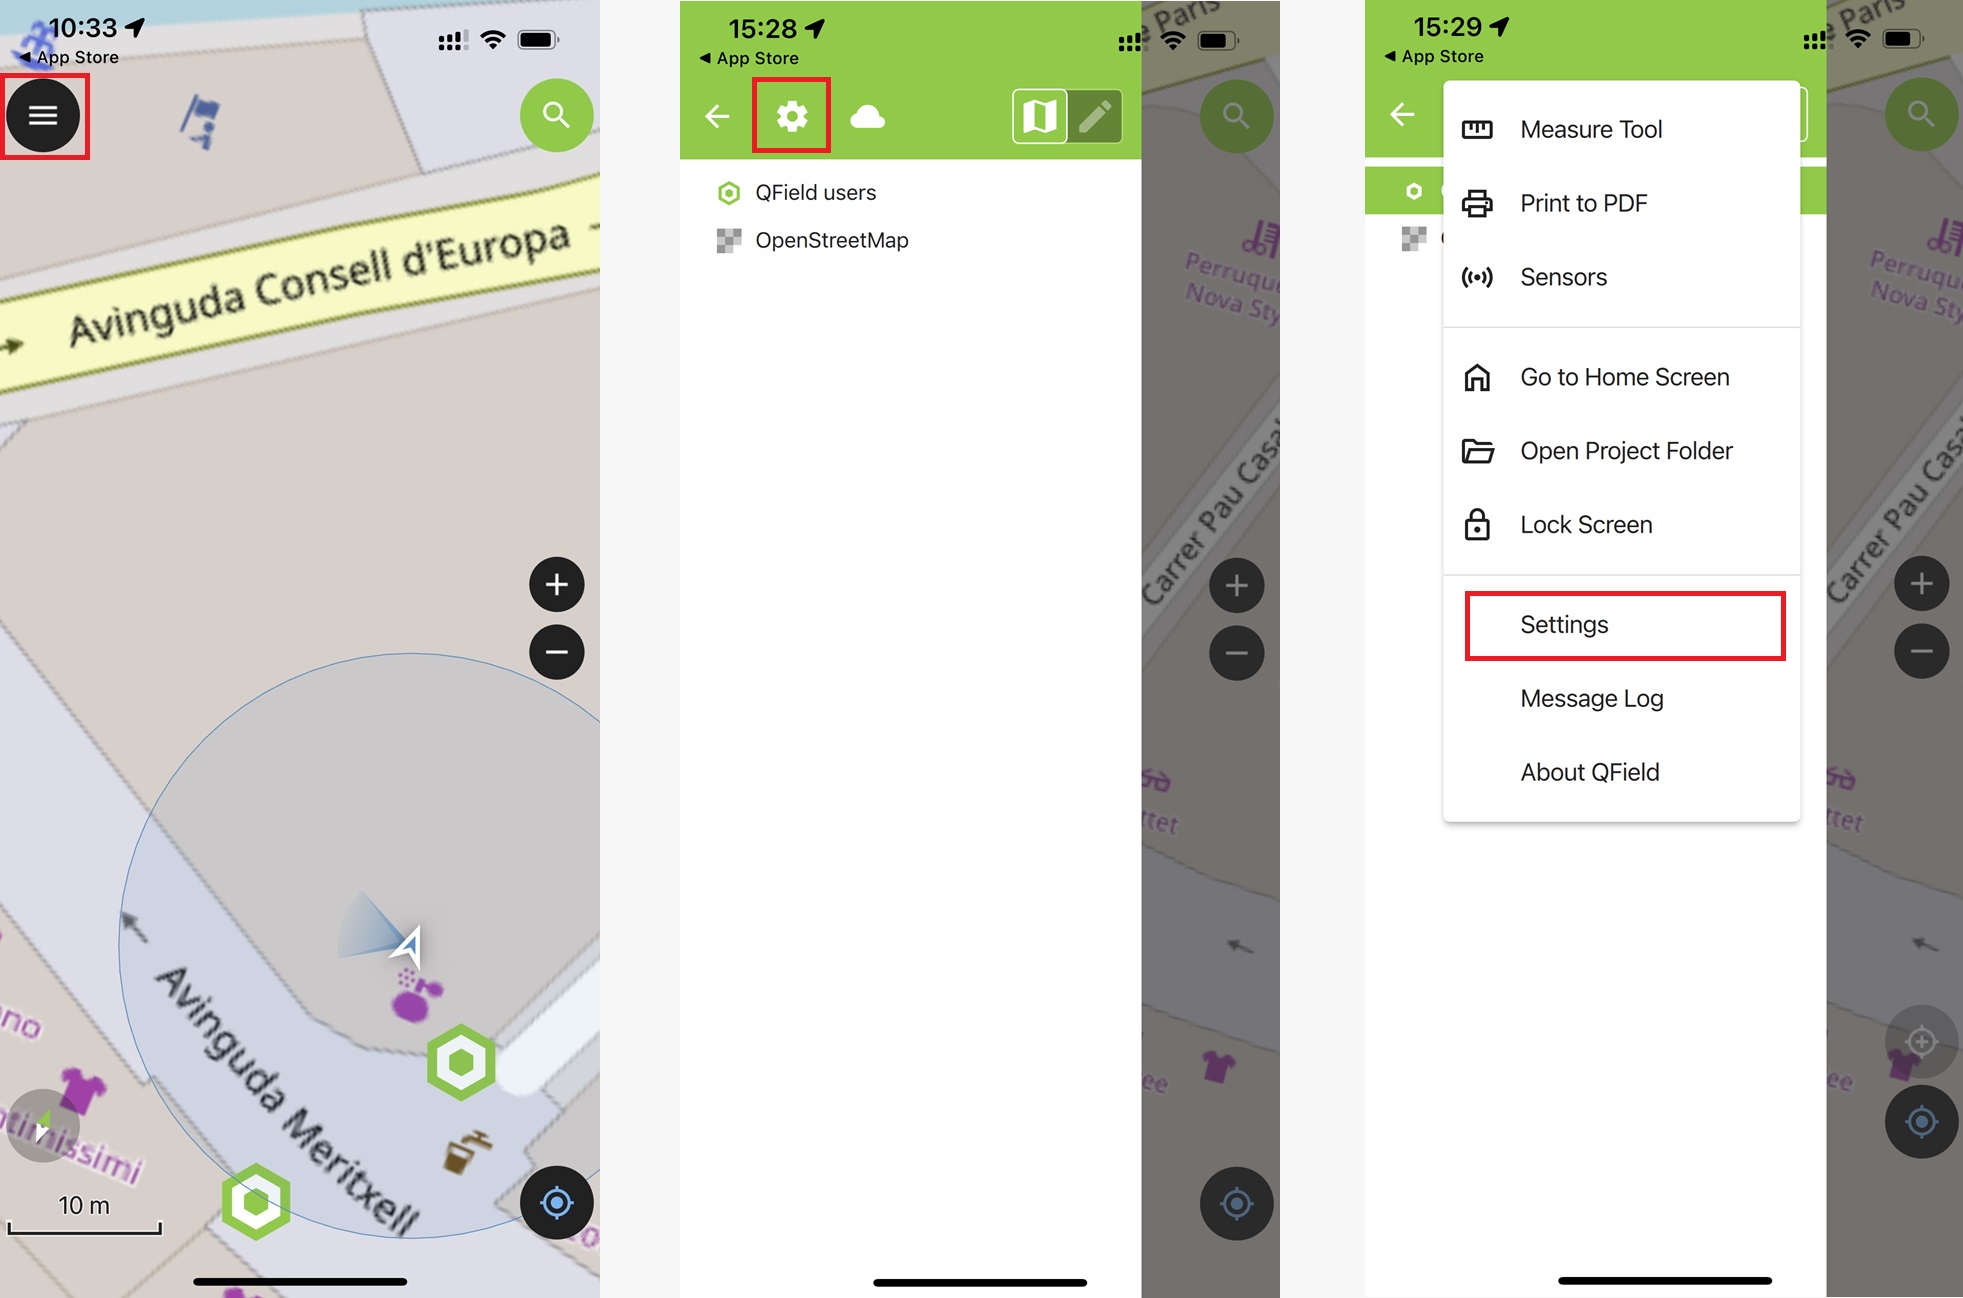
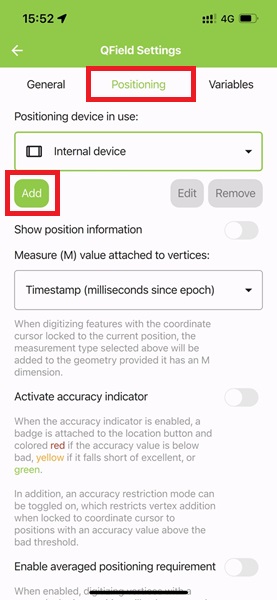
- Press GNSS button in the top left corner. Press Gear icon and go to the Settings.
- Open Positioning Tab and press Add button.
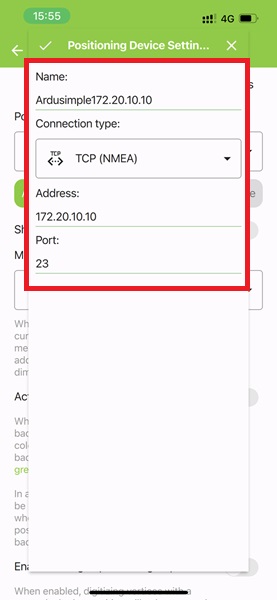
- Choose TCP or UDP as a connection type. Type Address of your Wifi hotspot (which found out at step #17) and appropriate Port (which found out at step #15). Type the Name of your external receiver or just leave the field empty to auto-fill. Press Ok.
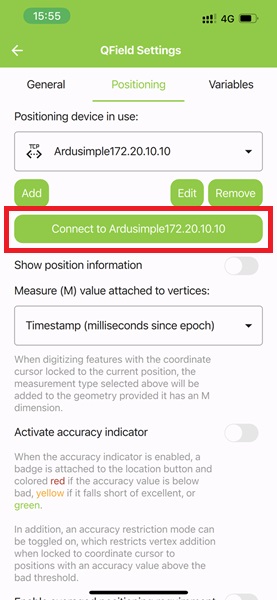
- Press Connect button.
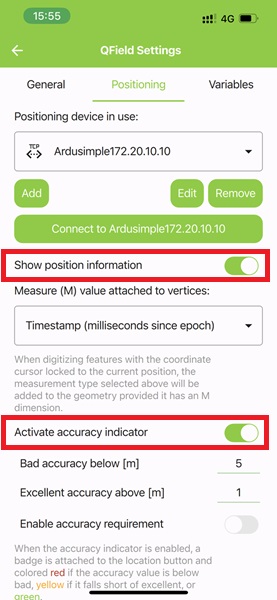
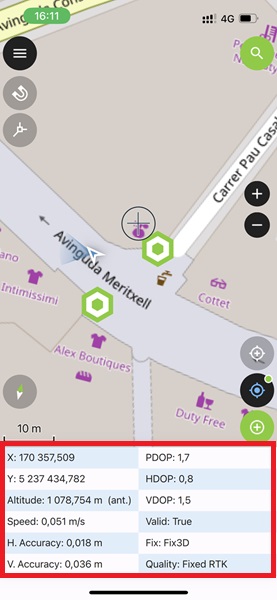
- Scroll dawn and enable Show position information and Activate accuracy indicator.
- Go back to the main screen of QField. You will see the positioning data which is provided by your external RTK receiver, the accuracy and the quality of RTK.
- Now you are ready to start your precision tasks.
If you want to do this tutorial, we have all the products in stock and ready to be shipped:


