and
and 

via USB
via Bluetooth
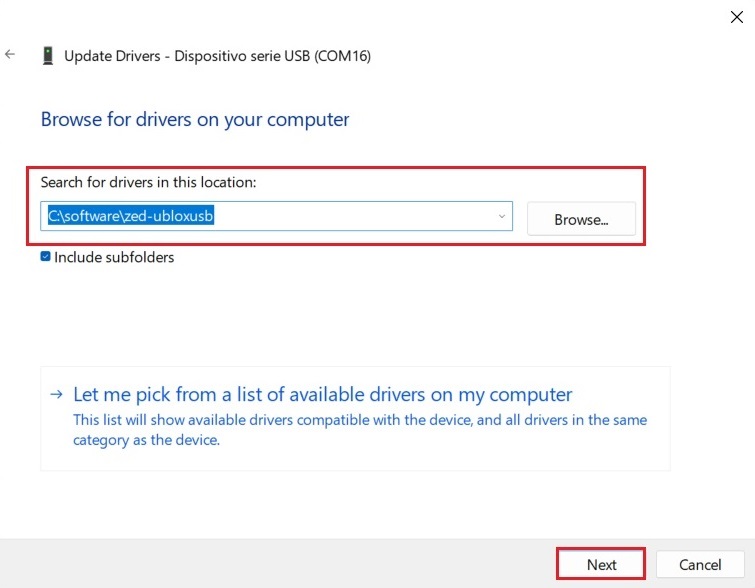
via USB
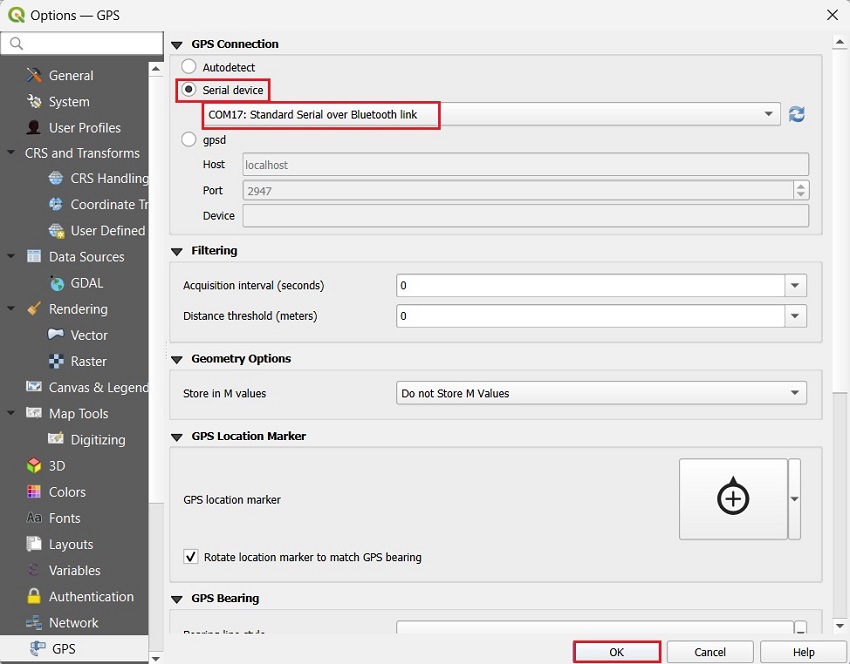
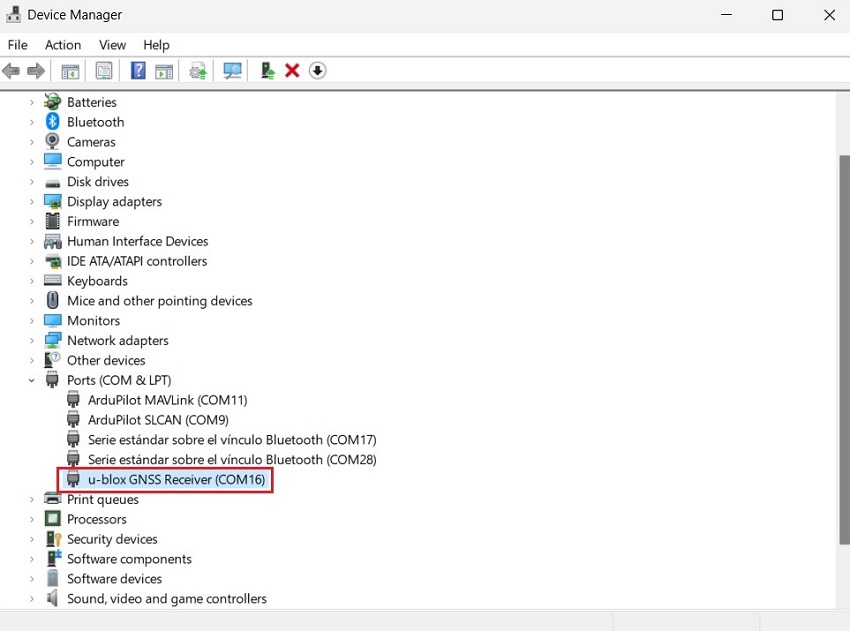
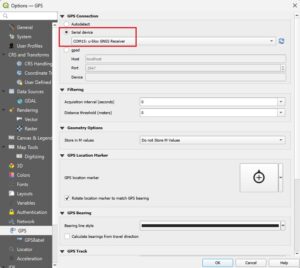
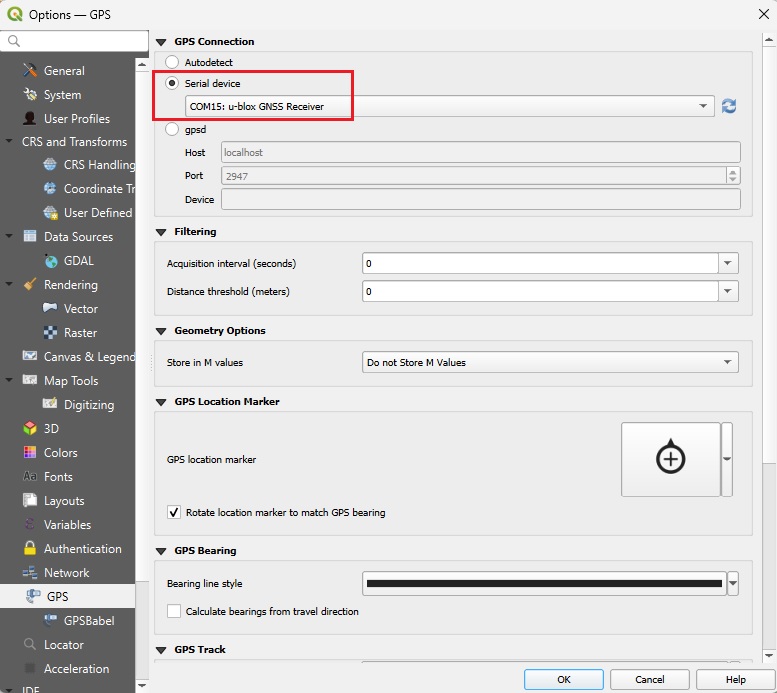
- Select Serial device. Choose the u-blox GNSS Recever. The COM port number should be the same as you connected with u-center. Press OK.
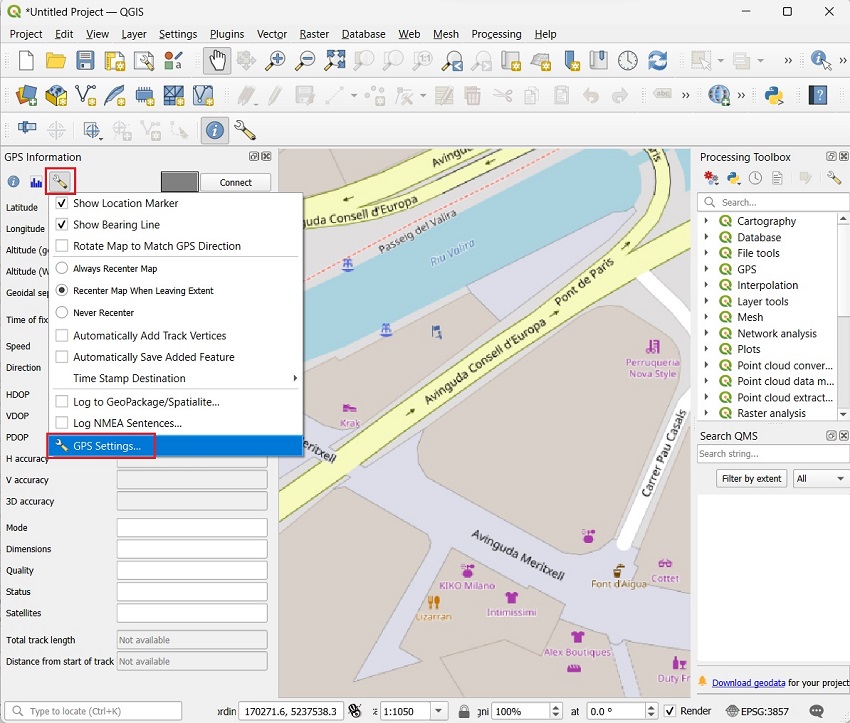
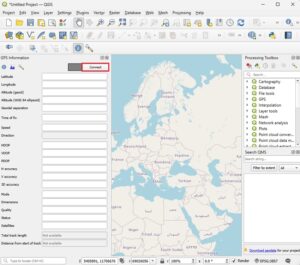
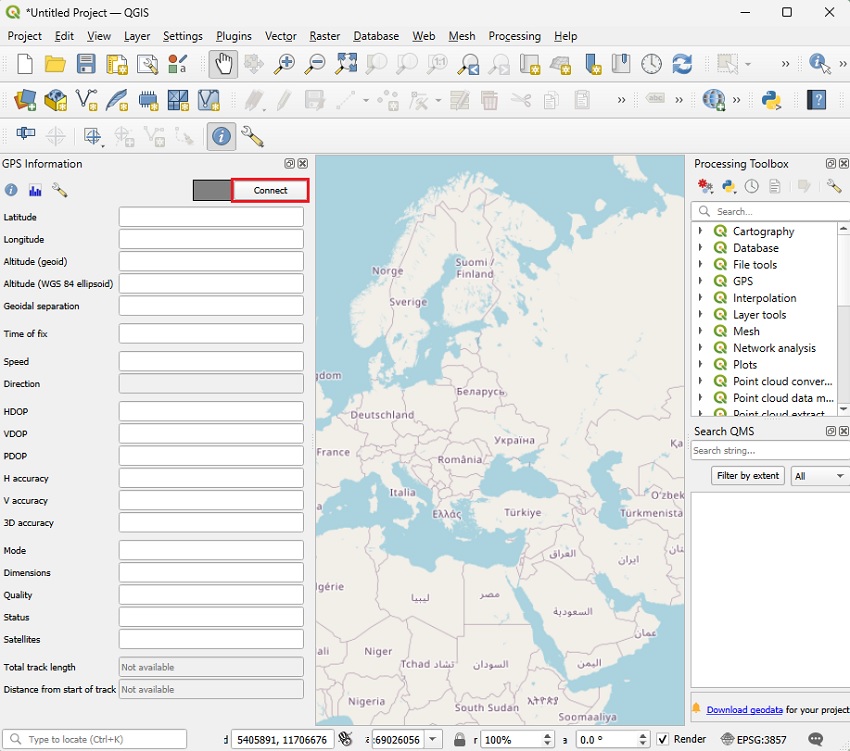
- Go back to the main screen. Press Connect.
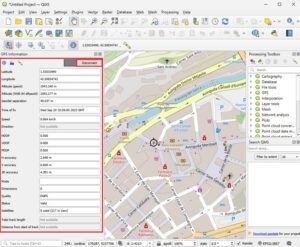
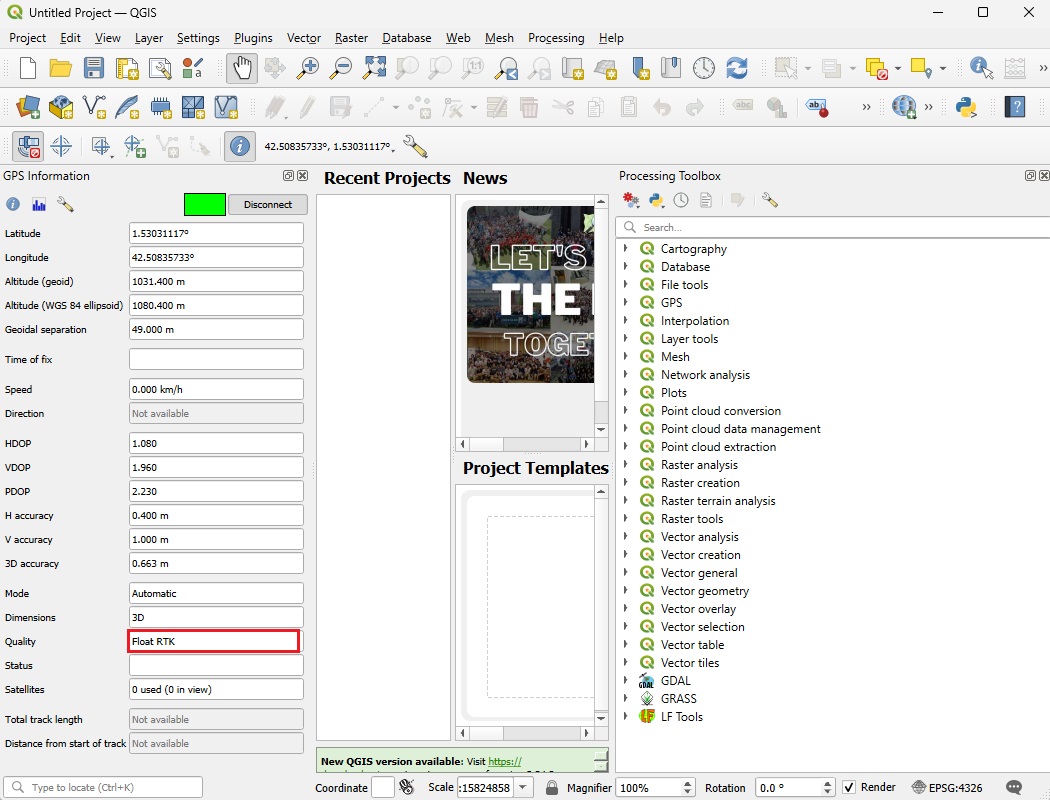
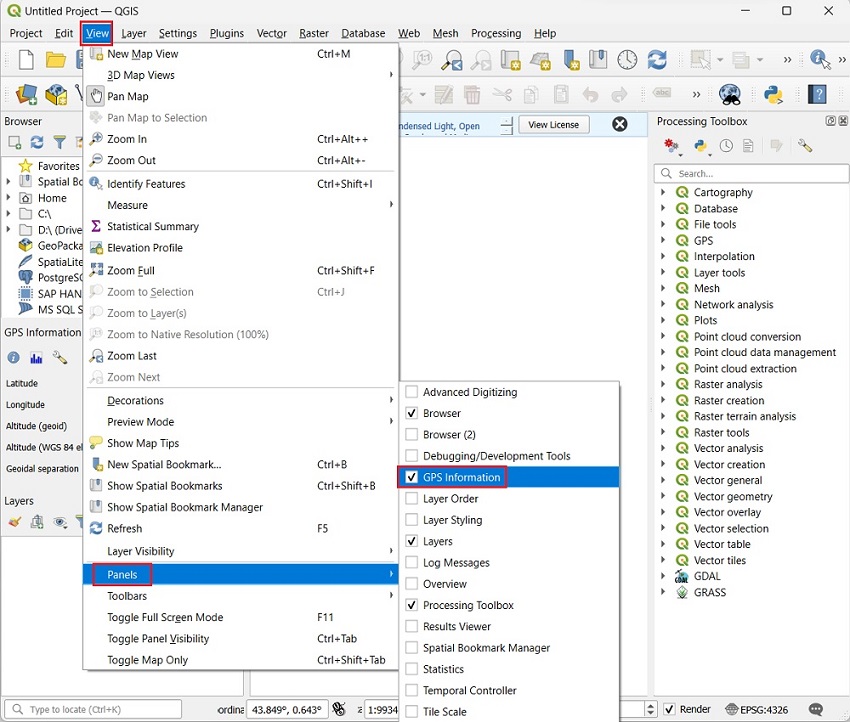
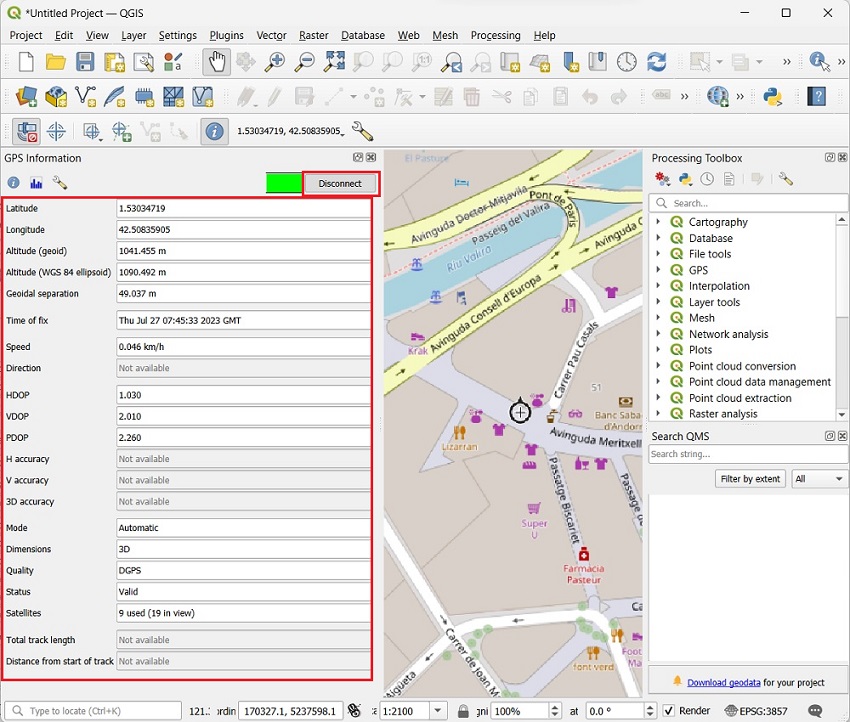
- You will see GPS information on the panel. You can now track the position with your preferred map Plugins or layers imported from other applications.
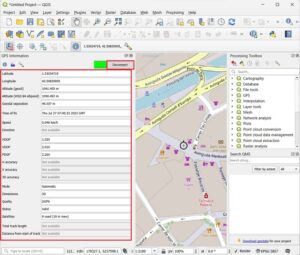
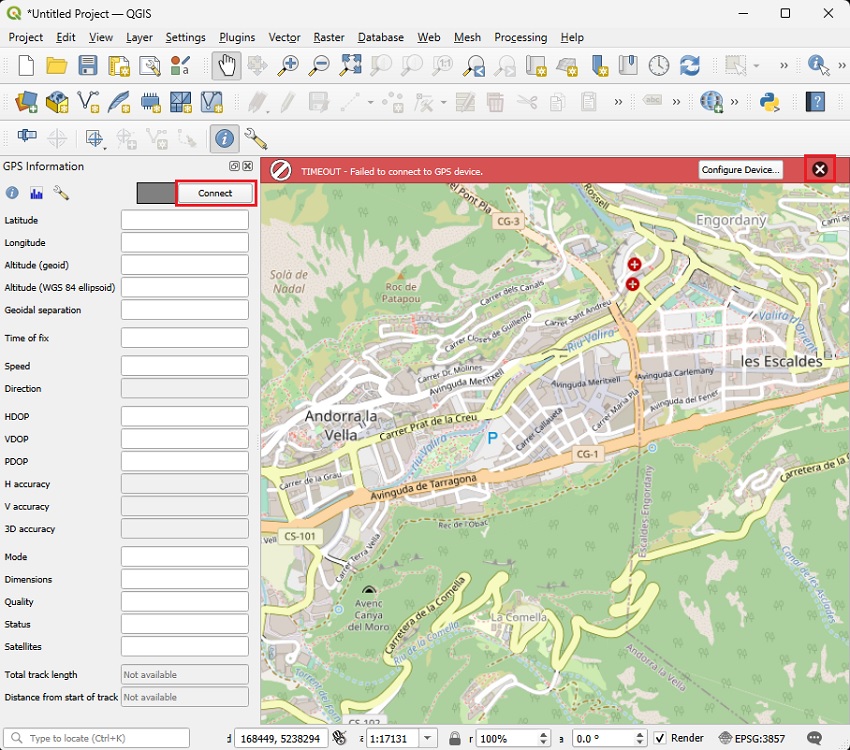
- Note that when you connect multiple times, there maybe be error message says TIMEOUT – Failed to connect to GPS devices. Don´t worry just press Connect again. Once it is connected it will work stable.

via Bluetooth
- Plug the Bluetooth Module to your receiver.
- Enable Bluetooth of your computer, and pair it with your RTK receiver.
When pairing your device, notice that it will appear as RTK_GNSS_*** The password is always 1234. The pairing only needs to be done once.
- In QGIS select Serial device and choose Standard Serial over Bluetooth link. Press OK.
Note: There will be two COM port show as Bluetooth link, one of them works. Just test between the two to check which one work.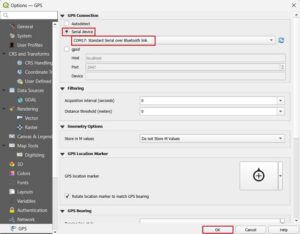
- Go back to the main screen. Press Connect.
- You will see GPS information on the panel. You can now track the position with your preferred map Plugins or layers imported from other applications.