 and
and 

How to build a portable PPK data logger with simpleRTK2B Pro receiver

Post-Processed Kinematic (PPK) is an alternative to Real-Time Kinematic (RTK) for accurate positioning. Unlike RTK, PPK uses post-processing algorithms after data collection. Both the base station and rover record raw GNSS logs, which are later processed to obtain precise positioning information. PPK offers more flexible workflow, allowing to run the processing multiple times with different settings.
Today we are going to show step by step how to build a standalone PPK (Post-
Processing Kinematic) data logger, including how to configure simpleRTK2B Pro with ZED-F9P module to output RAW measurements and store them into SD card files that can be converted to RINEX. Conversion from UBX to RINEX is not covered in this tutorial.
Note: RAW measurements are output in a native UBX format, which can later be converted to RINEX files using third party tools.
Required hardware:
Required software:
- u-center (if you don´t have it installed, you can download u-center for F9/M9 products here).
How to build a portable PPK data logger.
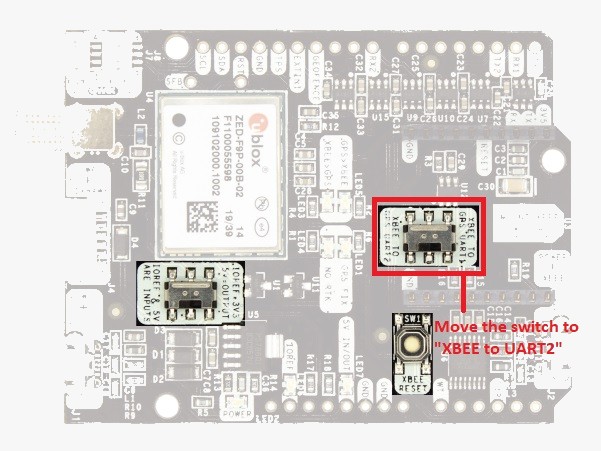
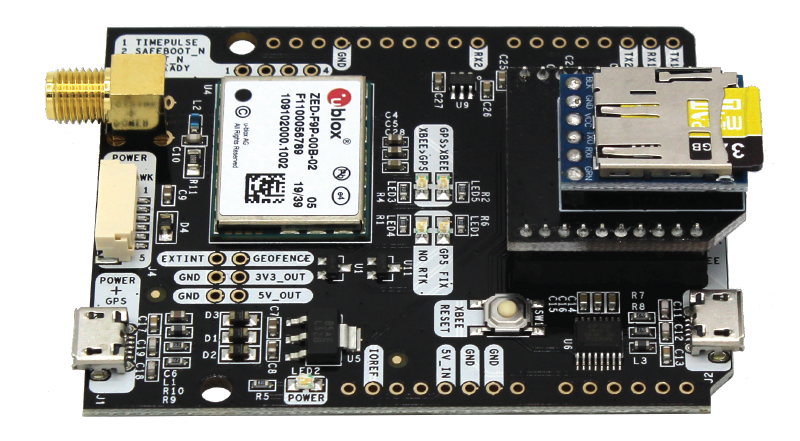
- Make sure the switch under the XBee socket is moved to “XBEE TO UART2”.
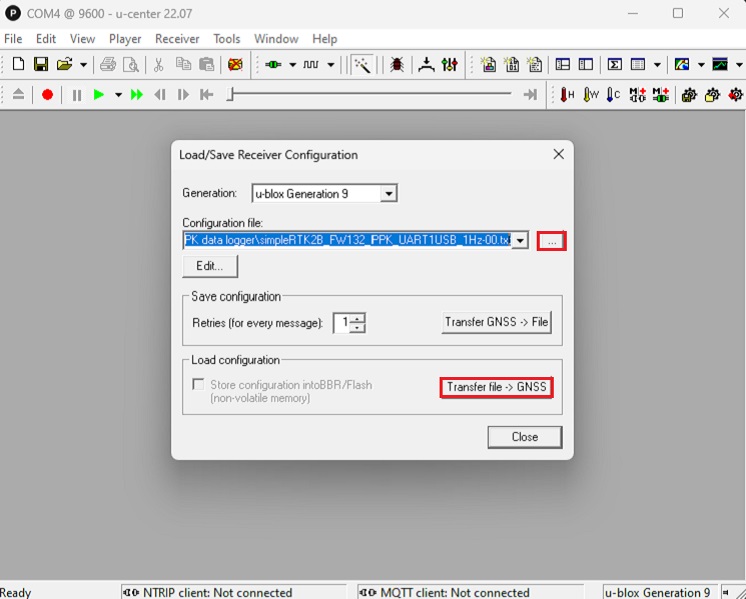
- In the Configuration file choose the one you saved in step 5.
Press Transfer file–>GNSS.
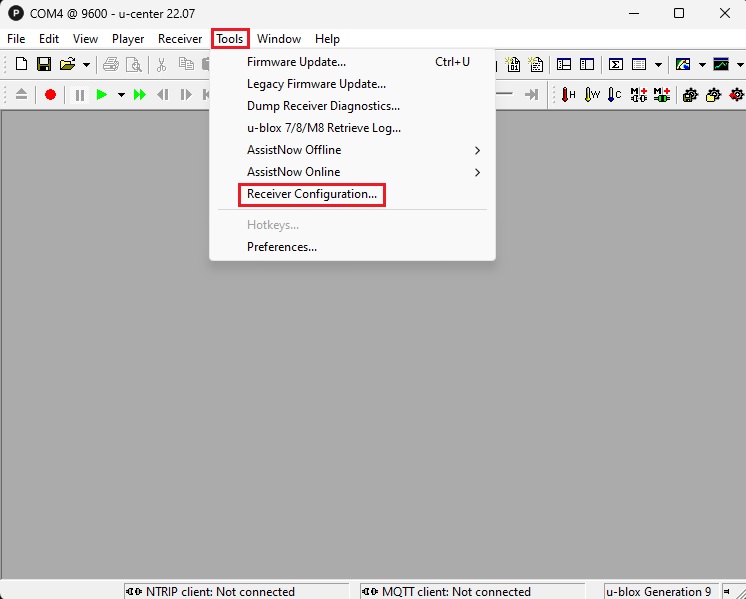
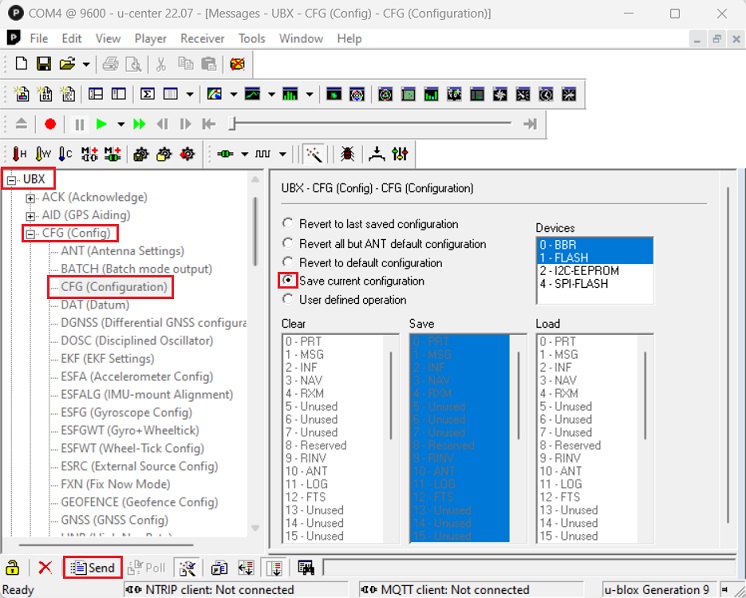
- In the tool bar, go to View–> Messages View.
Go to UBX–>CFG–>CFG. Choose Save current configuration and press Send.
So that the configuration will be stored.
- Plug the RTK antenna to your receiver. Place your antenna in a location with good view of the sky, or near a window.
- Install the SD Serial Data Logger with microSD inserted on the XBee socket.
- Now you are ready to go!
Just power up via your laptop, powerbank or mobile phone and the system will generate a new file in the SD card every time. Remove power or press RESET button on your board to start a new file. Note that the datalogger stores files in .TXT format. If you want to open them with u-center, simply rename the file, and replace the .TXT by .UBX
Good to know: If you want to use simpleRTK3B series receivers with Septentrio RTK module inside, we have good news for you. SimpleRTK3B does have onboard datalogging, so everything is easy. Check out ArduSimple tutorial How to generate RINEX files with simpleRTK3B.


