
 and


How to survey boundaries without RTK corrections using GNSS postprocessing

On this page
Products used in this tutorial

Do you need to establish the boundary corners of a property, but do not have access to an NTRIP service in your area, do not want to build your own base station, nor have access to any other type of RTK corrections.
This tutorial covers how you can achieve centimeter-level accuracy when determining static positions, as long as you can take measurements for more than 1 hour on each position.
Using a single GNSS receiver and without access to any type of RTK correction data, you can still get accurate results using a Precise Point Positioning (PPP) service, based on log files recorded from the receiver for relatively long periods of time (minimum of 1 hour and ideally 24 hours).
Required hardware
- RTK Portable 2
- Budget Survey Multiband GNSS Antenna
- Magnetic Stand for Survey GNSS Antenna
- PC or laptop with Microsoft Windows
- Android or iOS smartphone/tablet
Required software
How to survey boundaries without RTK correction using GNSS postprocessing
Configure the RTK receiver to be used with a PPP service
Before recording the log files the u-blox receiver needs to be configured using the u-center software. The configuration should produce raw data for post-processing, and at a rate of one GNSS calculation every 30-seconds. This is done by loading a specific configuration file, and setting up a custom update rate.
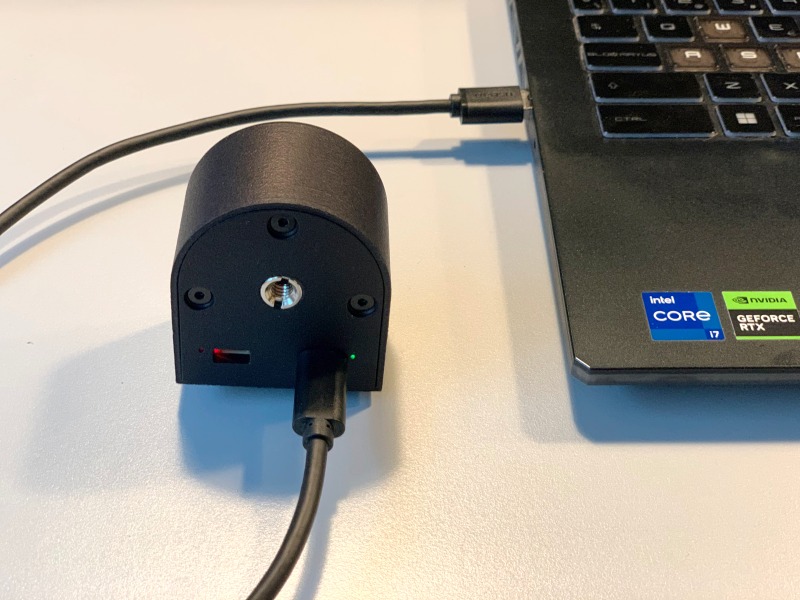
- Connect the provided USB-C to USB-A cable from the RTK Portable 2 receiver to the computer.
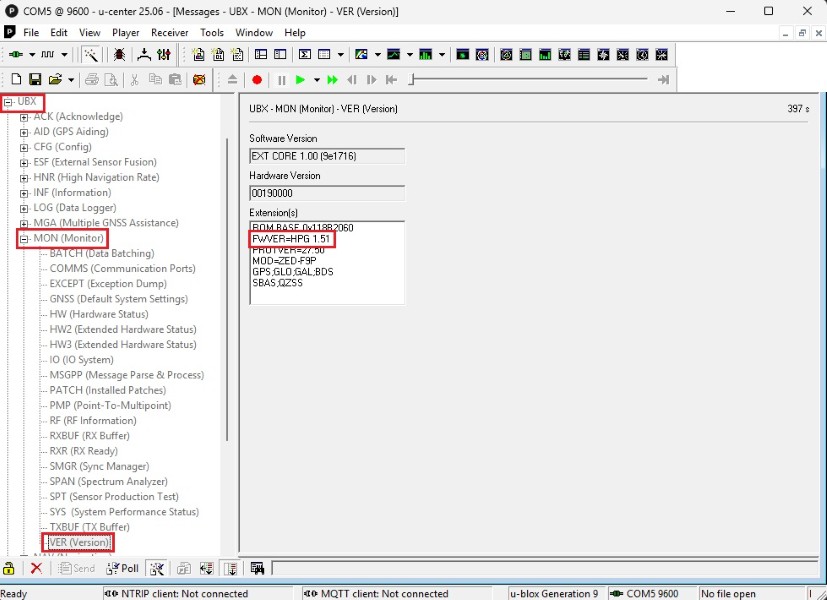
- Open u-center and connect using the appropiate COM port. Before configuring the receiver, we have to check the firmware version of the receiver. Go to View > Message View > UBX > MON > VER, and if the firmware version is below 1.51, please update the firmware.
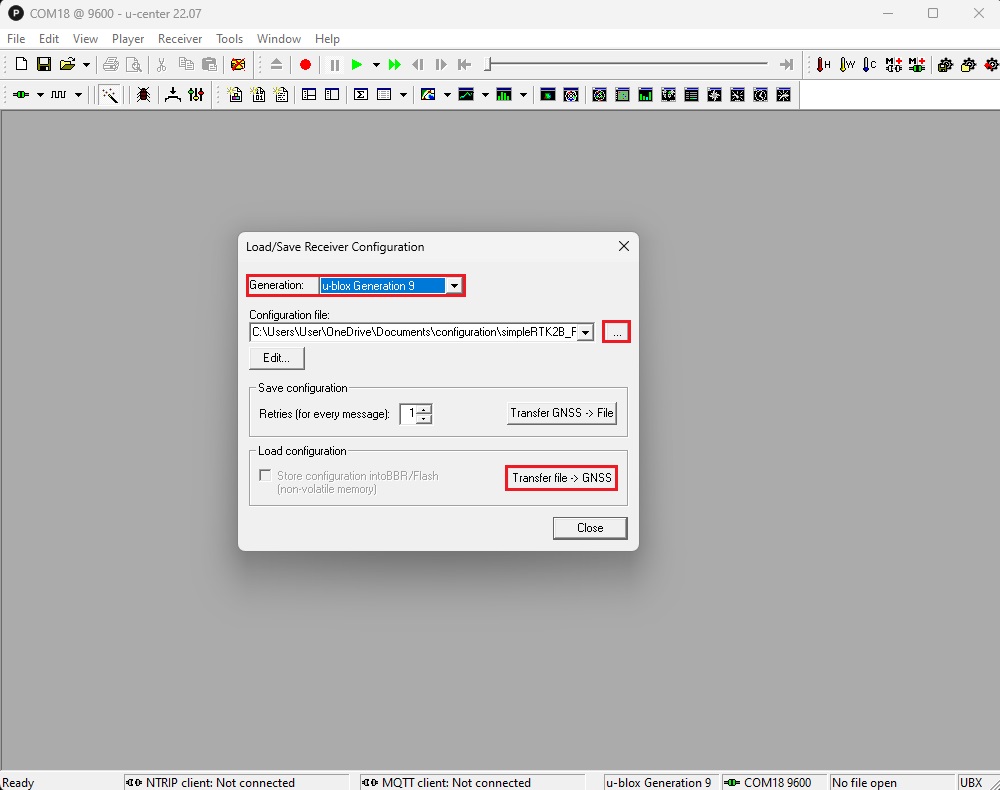
- Download the Post-processing RAW data (PPK) over UART1 & USB at 1Hz configuration file. To load the configuration file go to Tools > Receiver Configuration and select Generation u-blox Generation 9. Select the configuration file from your hard disk and click Transfer file > GNSS.
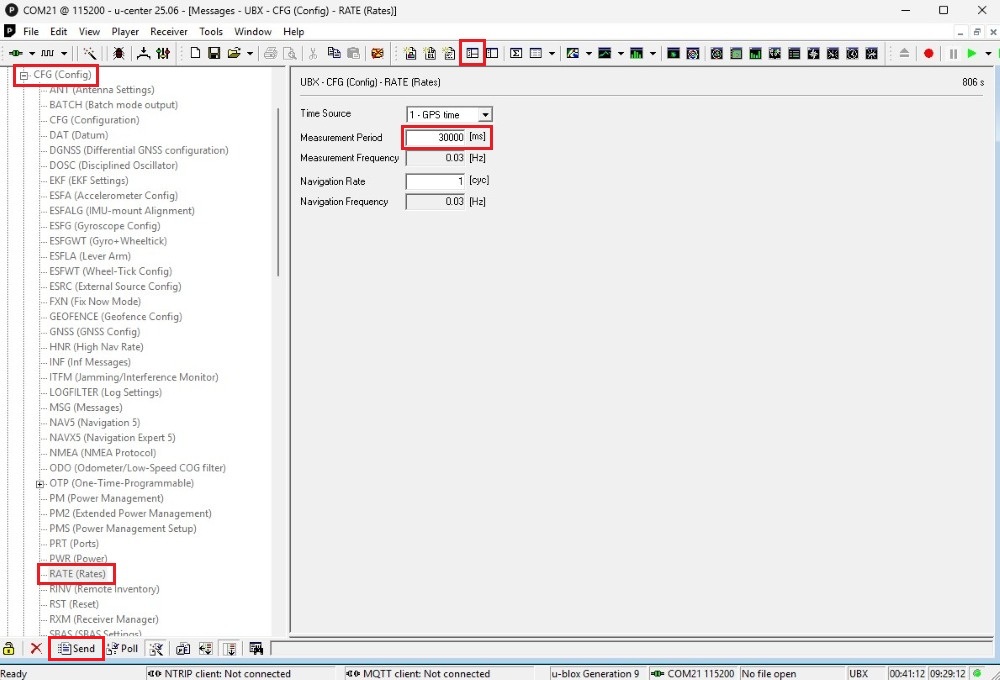
- Open the main menu View > Messages View. To set the receiver to update every 30 seconds, go to UBX > CFG > RATE and set the Measurement Period to 30000 ms, and press Send.
- To permanently store the new configuration in the boot memory, in the menu bar, go to Receiver > Action > Save Config to save your configuration.
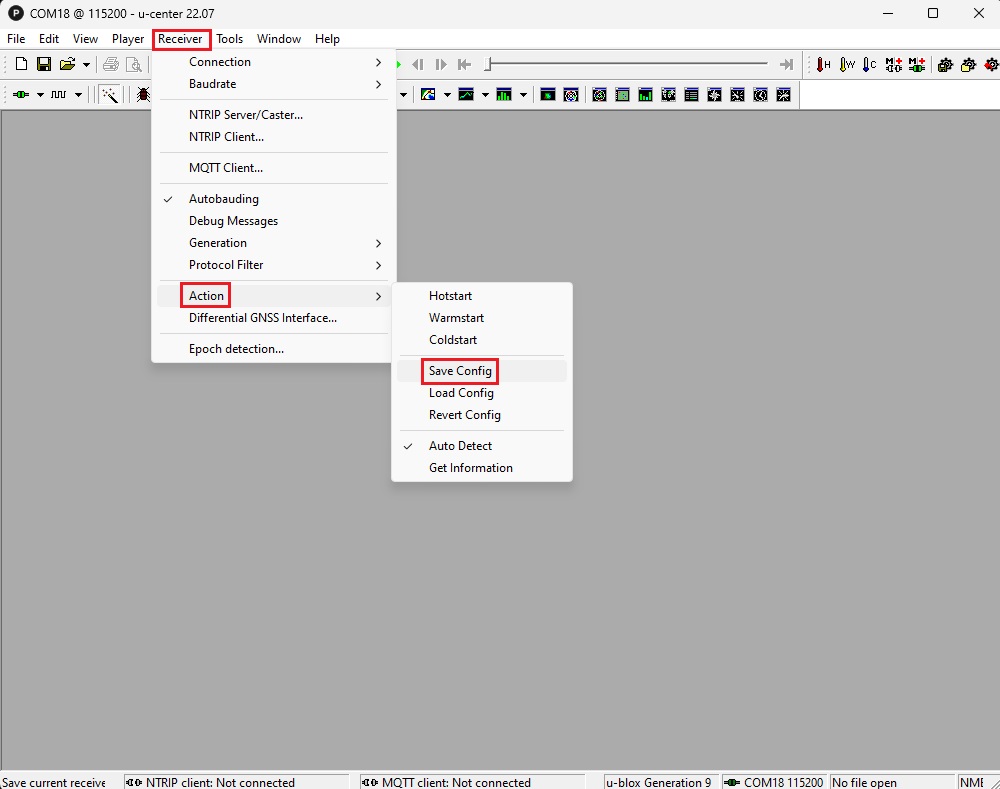
- Now your receiver is perfectly configured for GNSS postprocessing.
Record GNSS measurements
Now you can go to the field to record GNSS data. A good fixed position for our GNSS antenna is mandatory in this case, as the static positions we have to measure are going to be logged from the receiver for long periods of time and they should occur without any disturbance or variation. Remember that GNSS satellite signals are only reachable outdoors in a location with an unobstructed sky view.
- Screw the GNSS antenna onto the magnetic stand and connect the provided cable to the antenna’s TNC connector. No tools are needed. Tighten both connections firmly by hand, applying enough force to secure them without overtightening.
- Place the stand on the position you need to measure precise position.
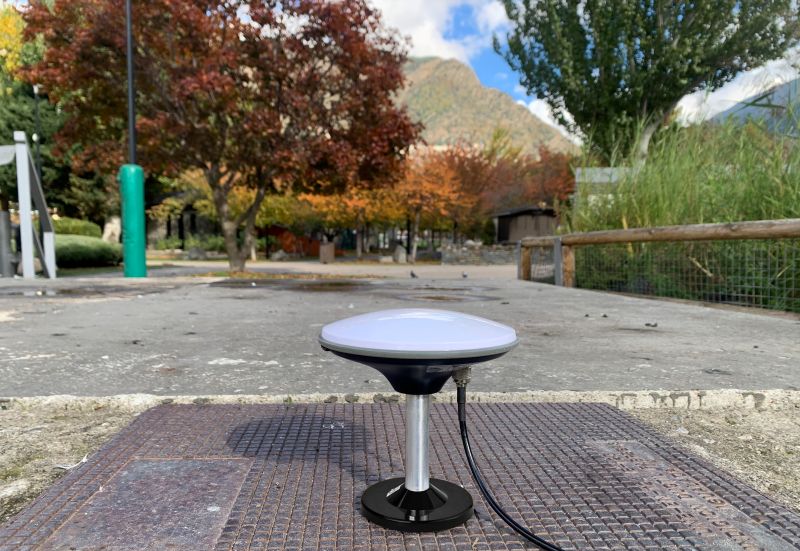
- Screw the SMA connector of the antenna cable to the RTK Portable 2 receiver connector.
- To power the RTK Portable 2 receiver, connect the provided USB-C to USB-C cable to both the receiver and the mobile device. Alternatively, you could power the receiver using a power bank.
- Open SW Maps and create a new project, if needed. Go to Main menu > External GNSS Connection. Set Connection Mode to Bluetooth LE (Low Energy) and press the refresh button.
- Select the BT+BLE_Bridge_XXXX device, check the Log to File option, and press Connect.
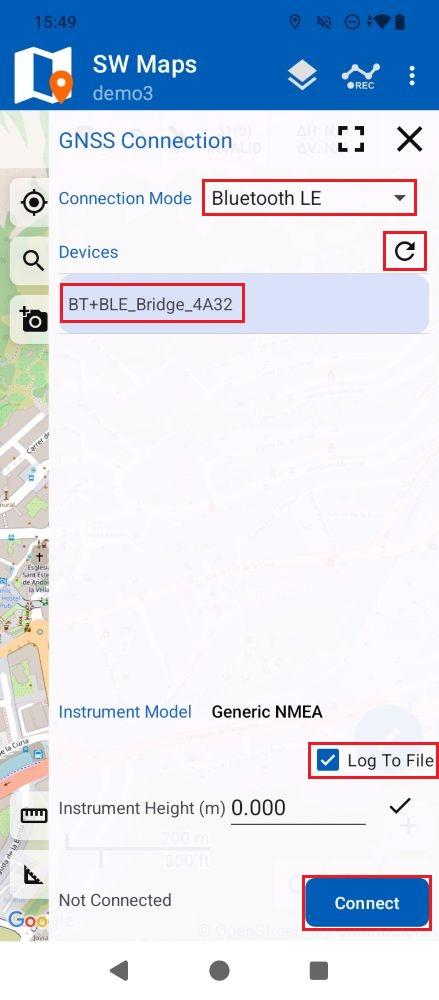
- After a successful connection, SW Maps will start recording a GNSS raw data log file to the mobile device’s memory. Make sure that the mobile device has enough battery life to record the amount of time you want to be logging this specific fixed position, and if needed add an additional power source for it.
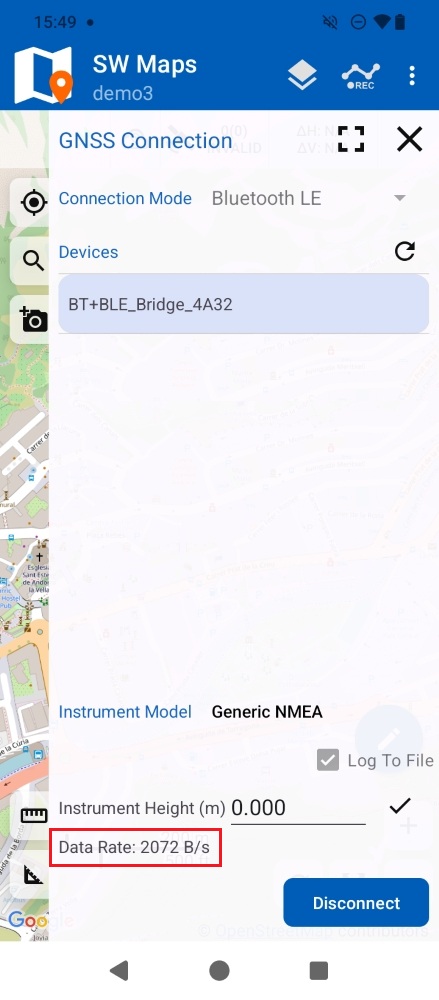
- Record GNSS data for at least 1 hour. A minimum 1-hour log file is required for reliable results, but for best results, we recommend recording data for 24 hours.
- To stop recording, simply Disconnect the device in SW Maps.
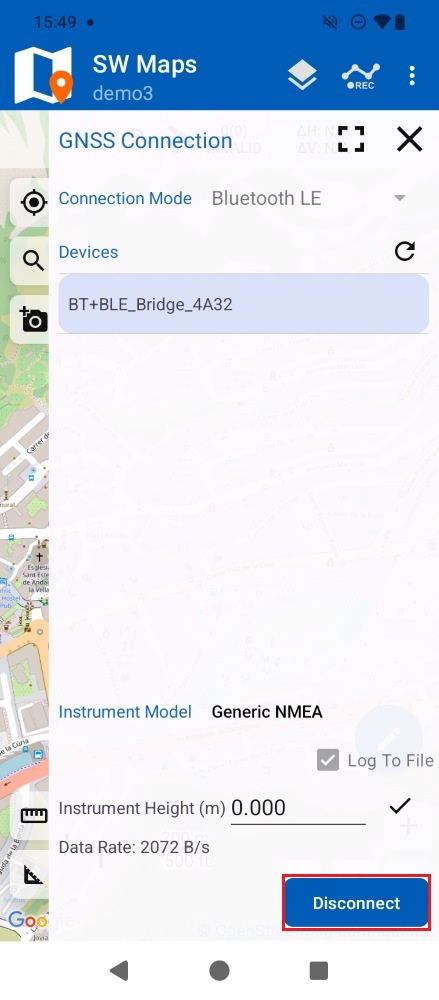
- Repeat the steps 11-15 in case you need to measure several points.
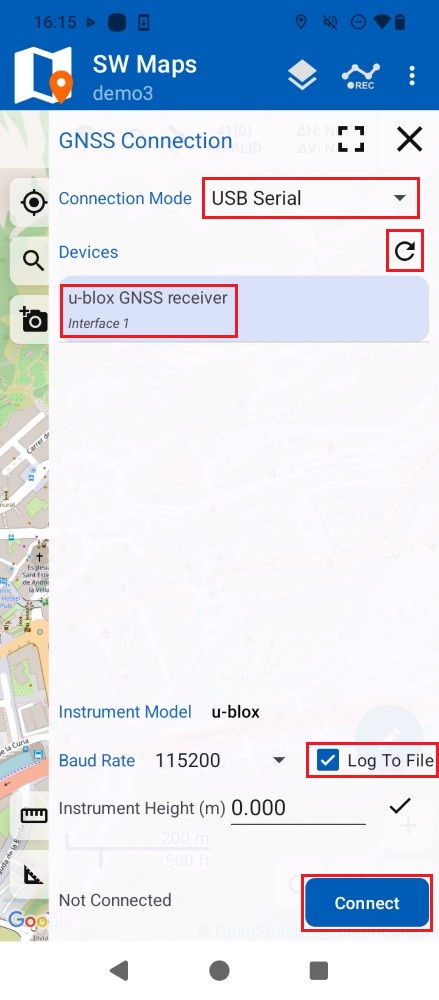
- Open SW Maps and create a new project, if needed. Go to Main menu > External GNSS Connection. Set Connection Mode to USB Serial and press the refresh button.
- Select the u-blox GNSS receiver device, check the Log To File option, and press Connect.
Postprocess your GNSS measurements to get centimeter-level accurate position
- Find the log files on your mobile device:
- On Android, the SW Maps log files are saved under Android/media/np.com.softwel.swmaps/RawData.
- On iOS, the SW Maps log files are saved under SW Maps/rawfiles.
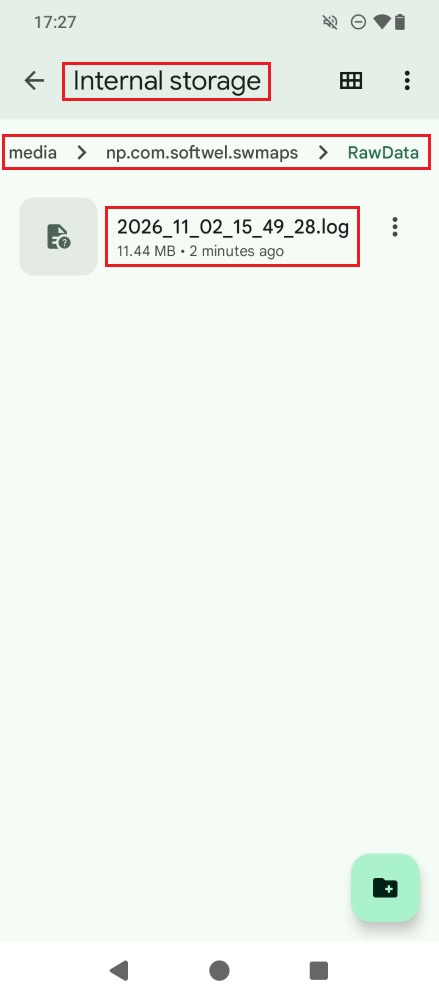
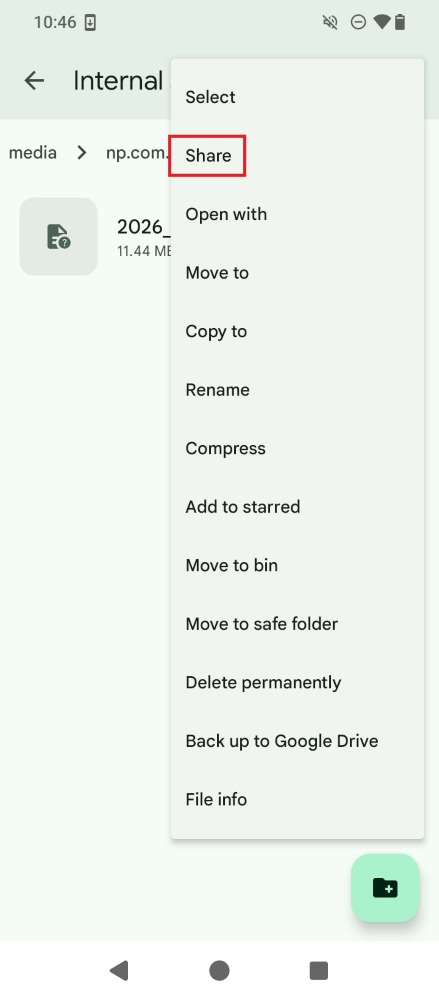
- If you want to send the log files to a post-processing service from your PC, first transfer them from your mobile device to your computer. Select **Share** from the file’s context menu and choose your preferred sharing platform (e.g. email, Google Drive, etc.). Alternatively, you can use your phone to access an online post-processing service directly from your mobile device.
- Open the PostProcessing Master online service https://postprocessingmaster.com/ and press START.
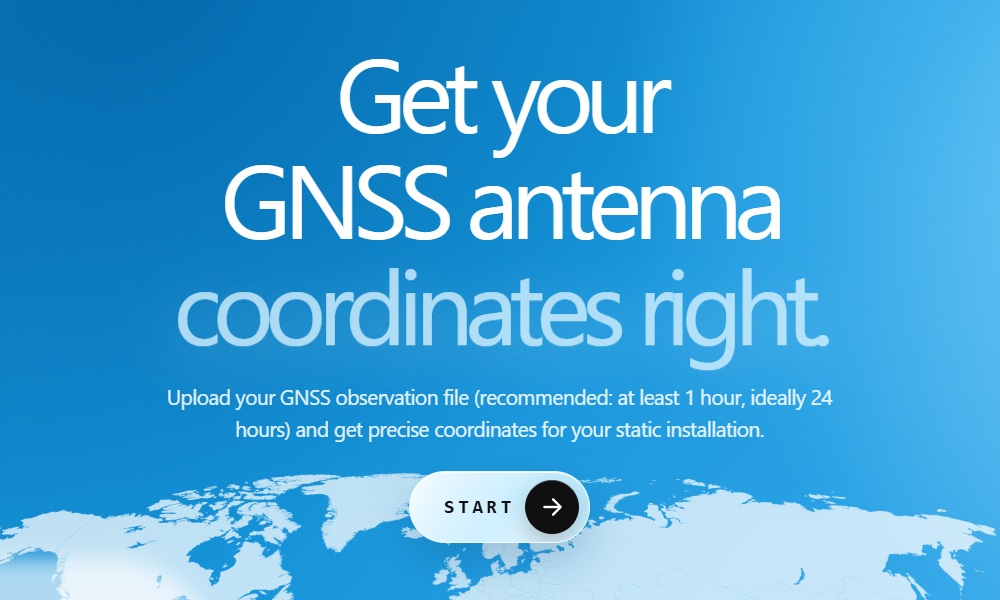
- Login to your account and upload the SW Maps log file to start postprocessing. Drag and drop the file into the web browser or browse and select it. Note that the PostProcessing Master online PPP service does not require you to convert the file to any other format before upload. It can directly handle data collected from the most common GNSS receivers in their native format, such as u-blox UBX, Septentrio SBF and Unicore OBSVM.
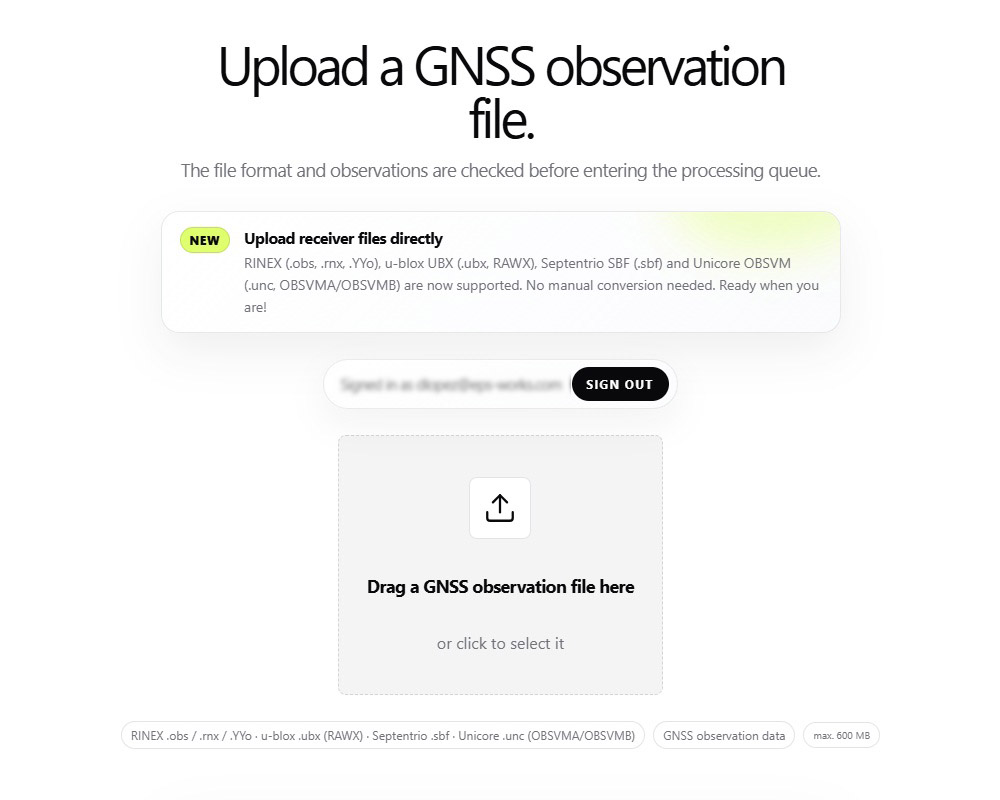
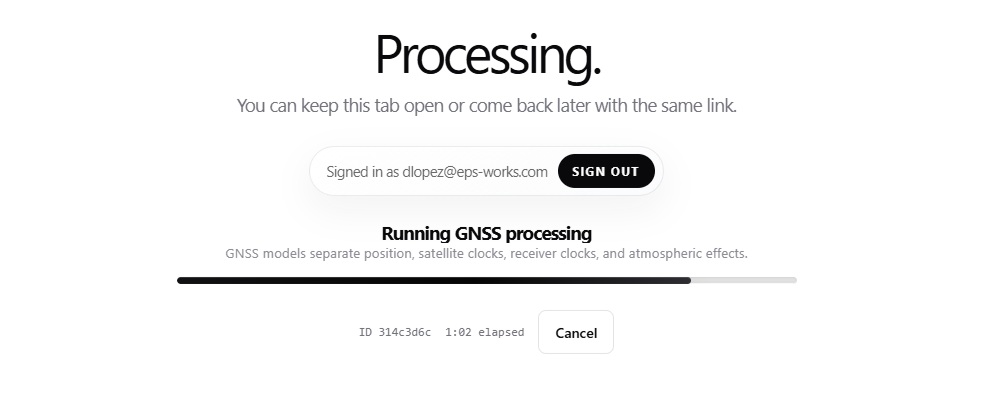
- The log file processing will start.
- Once the processing is finished, you will receive an email with the resulting coordinates. Click the Copy result button to keep the resulting coordinates in a document on your computer, or access them later by logging back into your account. The results are kept on the server for 7 days.
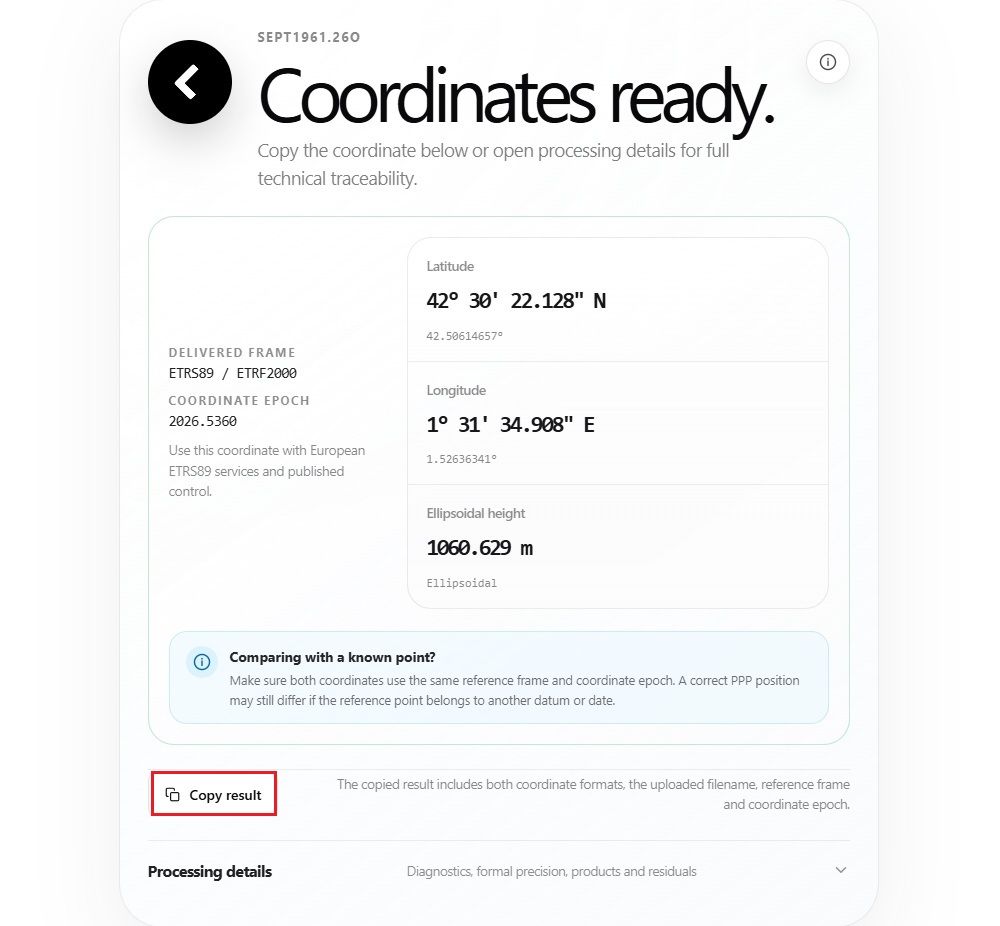
- Under Processing details, you can find the formal internal precision of the resulting coordinates.
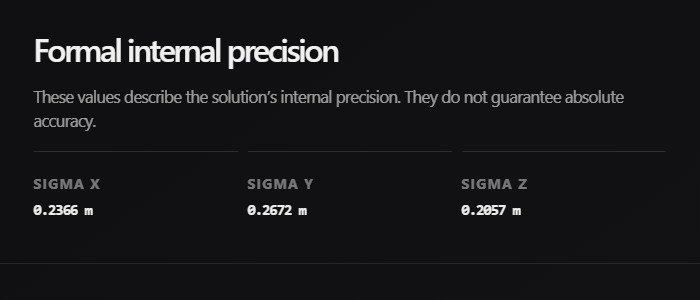
- That’s it! With your files processed, you now have your precise coordinates ready to use.
Still having issues?
Contact us for support from a real engineer—not AI—or request the tutorial you’re missing