 and
and 


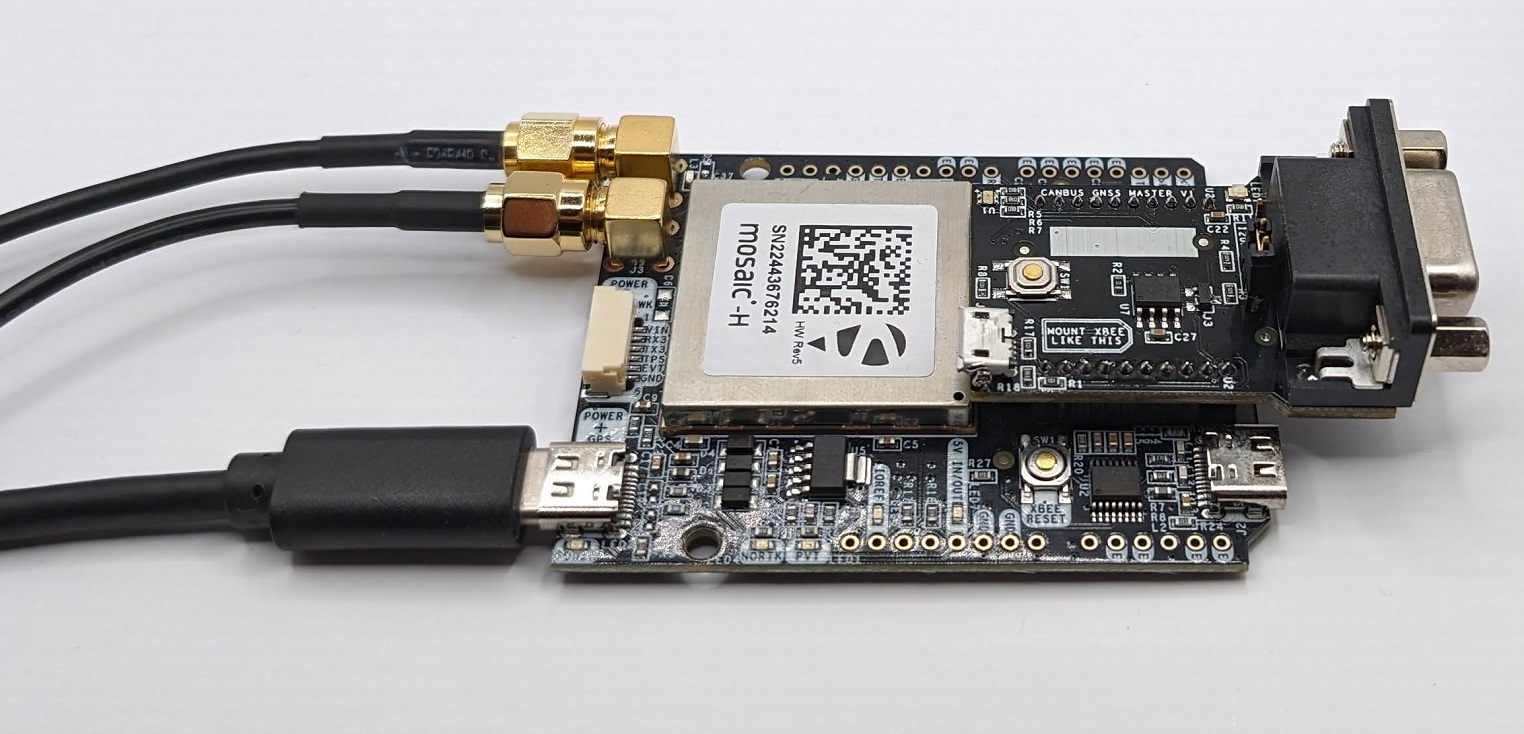
We will start by connecting the different items as in the picture below. Just be careful when plugging the CANBus GNSS Master, making sure you connect the pins without bending them.
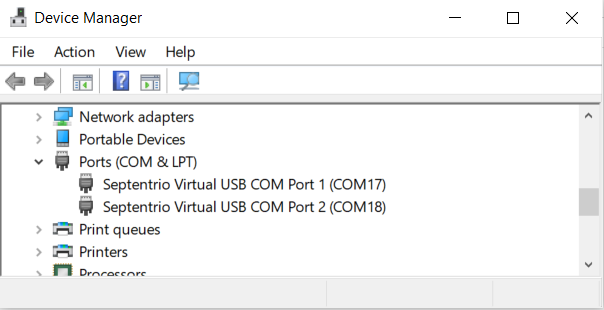
Now connect the POWER+GPS USB port to your PC. A need hard disk will appear in the Computer. Let’s open it and install the drivers inside. Once finished, disconnect and reconnect again the device to the PC. If we have done it correctly, we will see these new 2 items under Windows Device Manager.
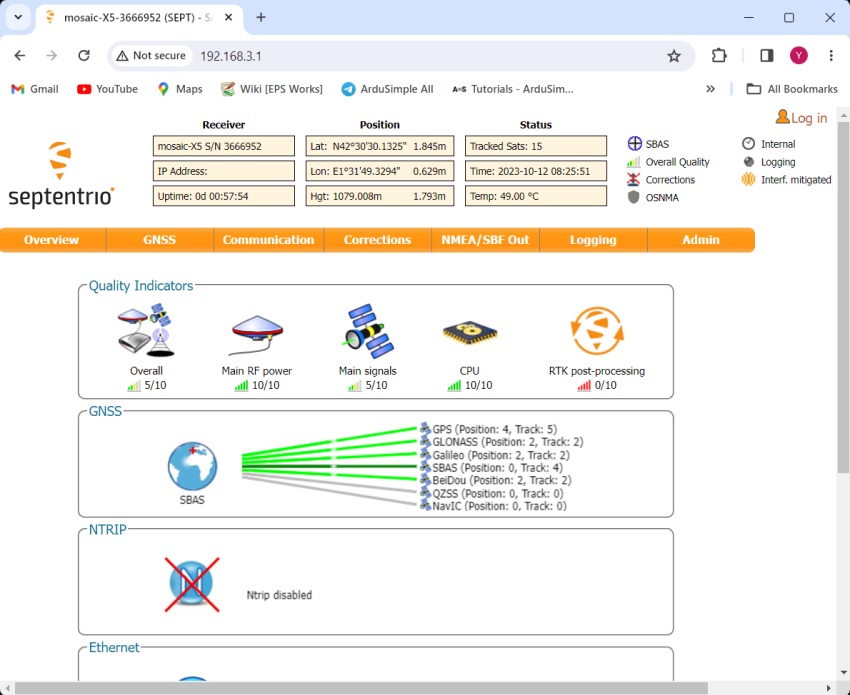
Go to your preferred browser (Chrome, Edge, Firefox, etc) and type the following address. The Septentrio web interface will appear. You will see 2 antennas as your device has 2 antennas connected.
In the Menu Bar, click on “NMEA/SBF Out” and follow these steps:
- New NMEA Stream
- Select connection type > Serial port > Next
- Select connection/port > COM2
- Select messages to ouput > Interval > 100ms. In the checkboxes select GGA, HDT and ROT. Click “Finish”
- Menu will change, don’t forget now to click “OK” to apply the changes.
- After a few seconds, a pop up will appear on the right bottom asking if you want to “Save current configuration to boot configuration”. Select “Save”.
Now it’s time to configure the CANBus plugin. Without disconnecting anything, take the Micro-USB cable included inside the CANBus GNSS Master carton box, and connect it to the Micro-USB port available. A new hard disk will appear in your PC. Copy the file delivered by our support team inside this hard disk.
The final step is to connect the DB9 connector to your NMEA2000 Canbus. You will need to wire GND, CAN_HIGH and CAN_LOW pins. Let us know if you need help, we can help you build the cable.


