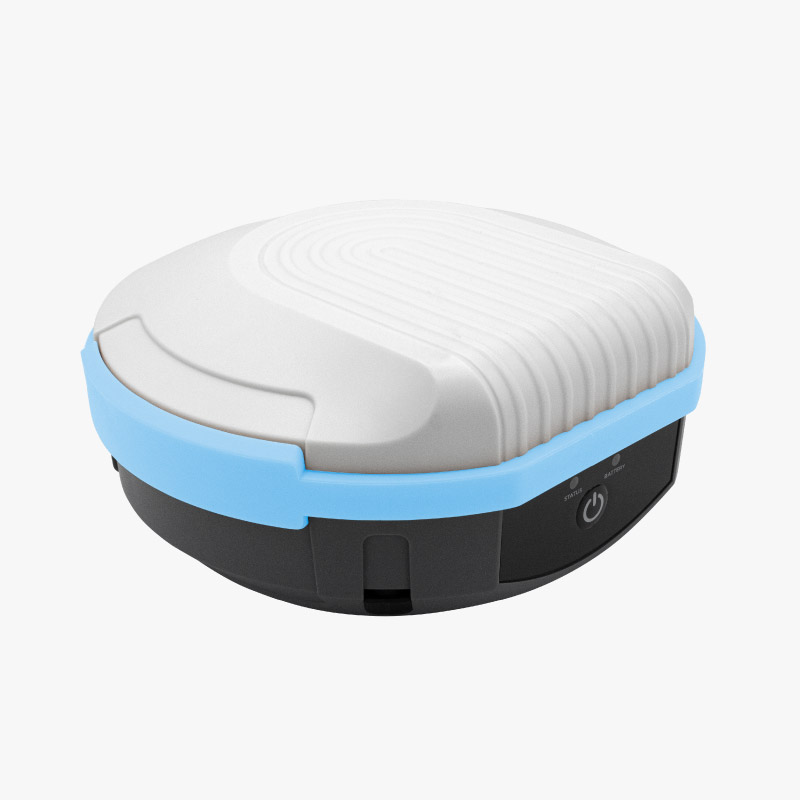
*** RTK Smart Antenna Changelog ***
2026-04-29 - FW V1.8.1
* Fix: web interface stability issue
2026-04-28 - FW V1.8.0
* Hardware revision automatic detection
* Improved battery capacity estimation as function of voltage and temperature
* Fix: stability improvements when upgrading firmware
2026-04-02 - FW V1.7.17
* Fix: Smart Antenna can be disconnected form charging on all conditions and will power off automatically
* Improvements in battery voltage reporting at UI
2026-03-09 - FW V1.7.15
* RAW messages implemented
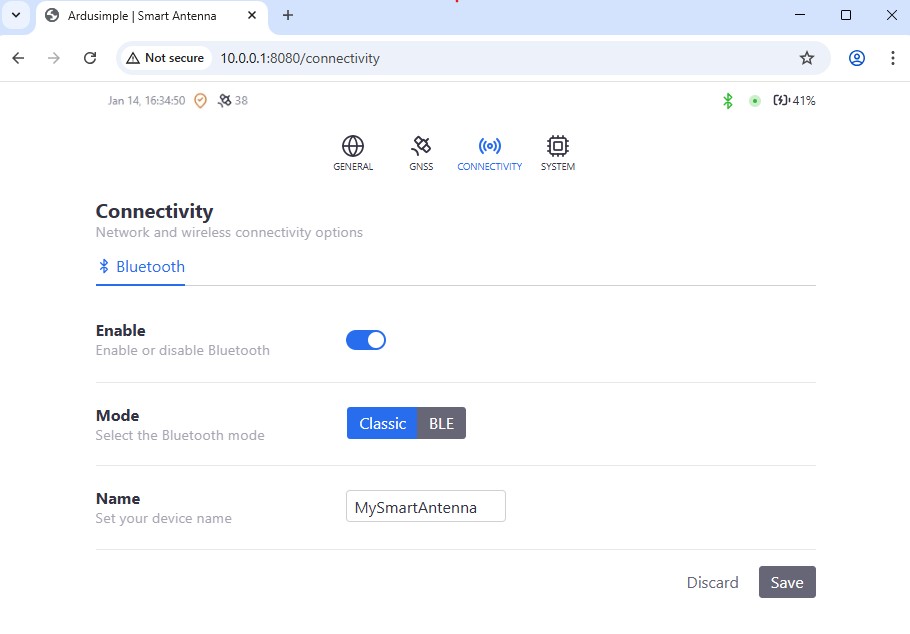
* Radio socket enable/disable in unmanaged configuration
* Stability fixes in UI
2026-02-02 - FW V1.7.10
* Intelligent battery charging x3 speed
* GNSS -> radio socket communication is optional. This is useful for base-rover setups with radiolinks, where the rover should not transmit
* Unmanaged configuration, to allow customers to use their own setups (5Hz, extra messages, ...)
* Several fixes
2026-01-21 - FW V1.6.0
* First release
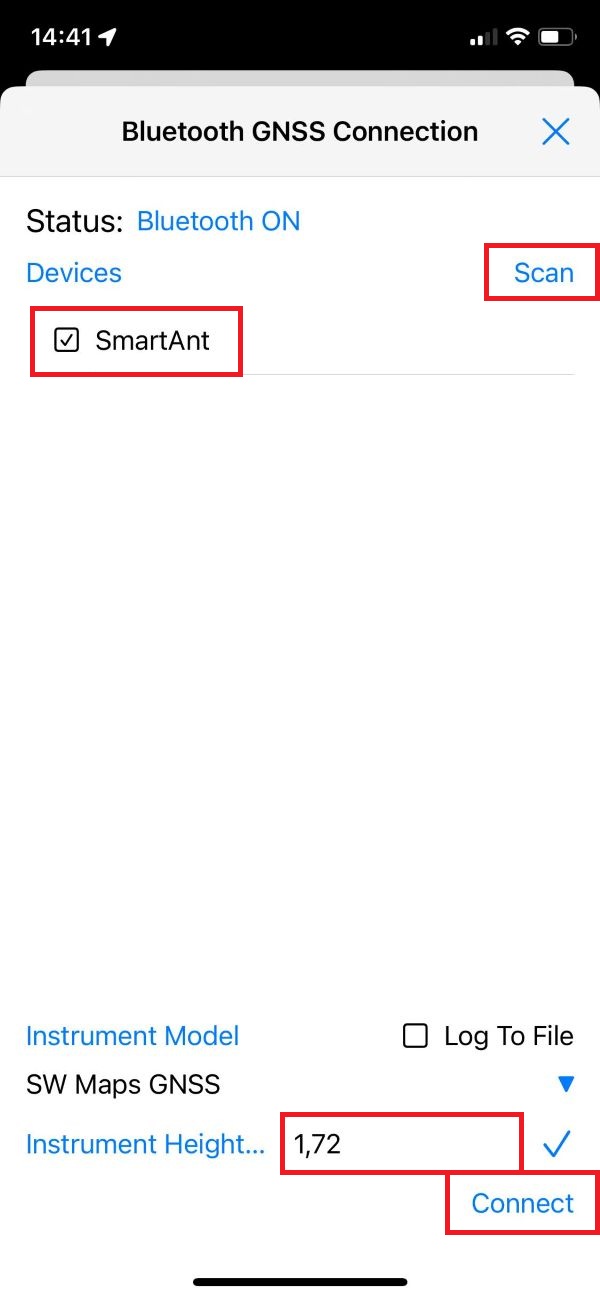
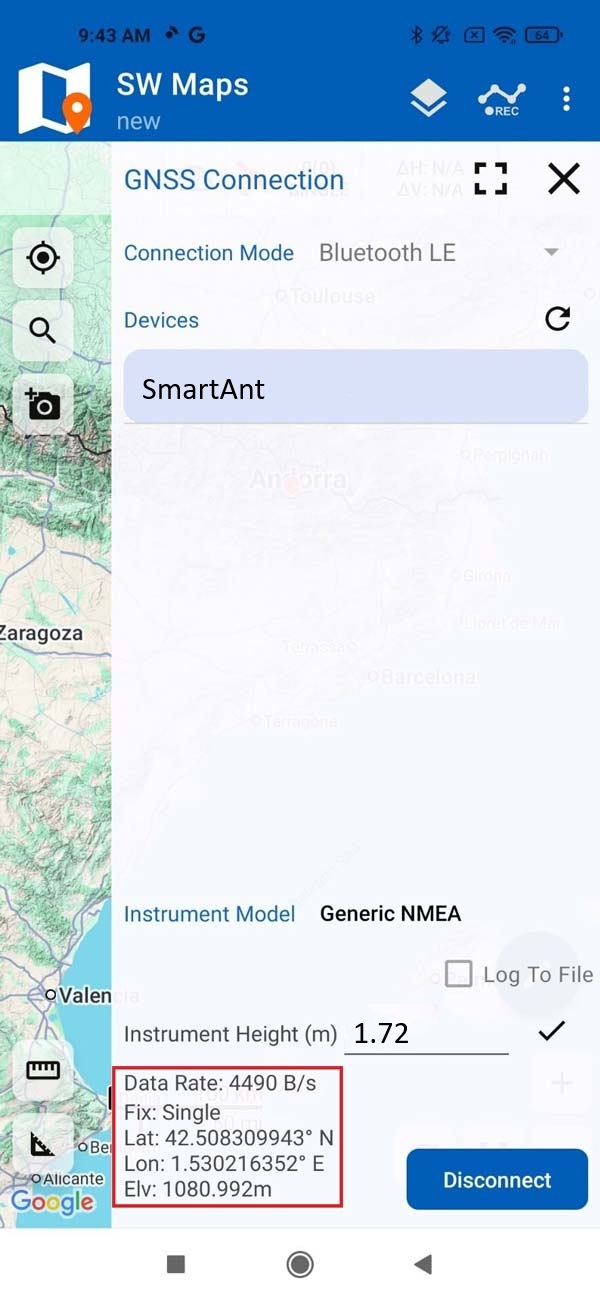
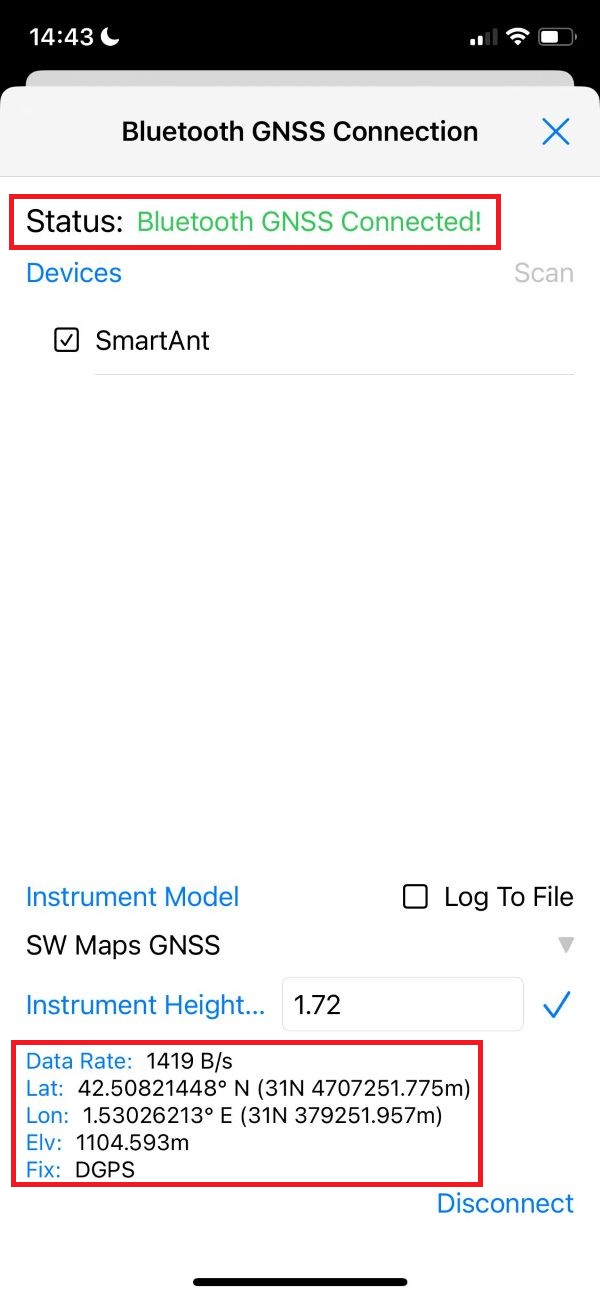
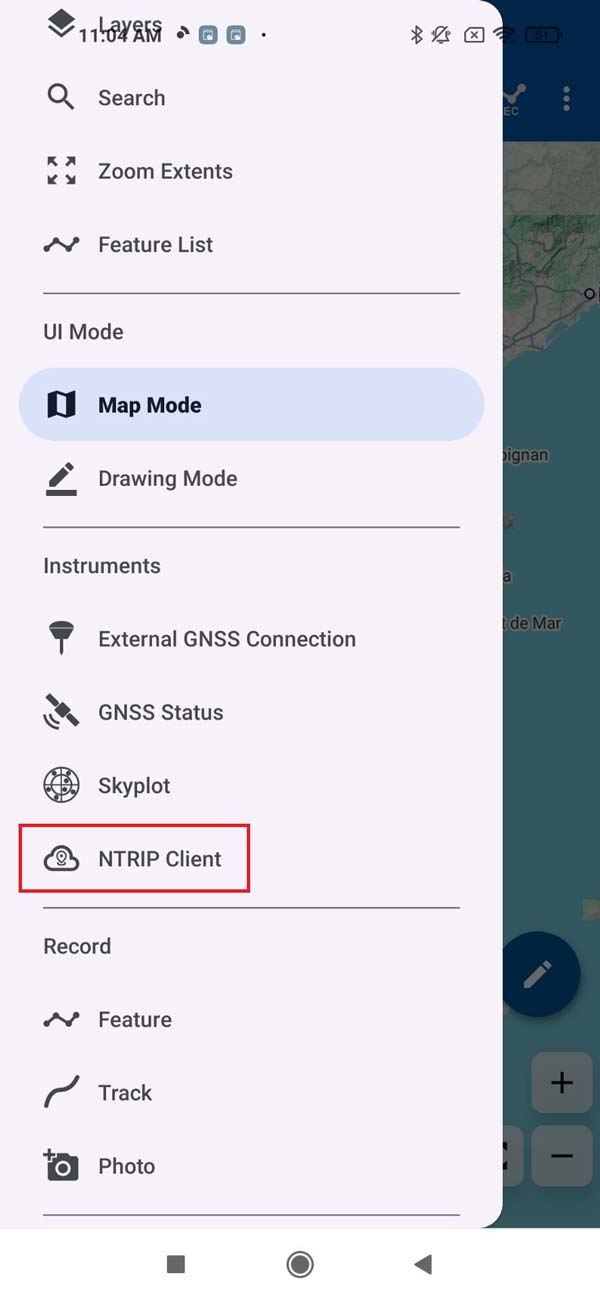
 and
and