and
and 
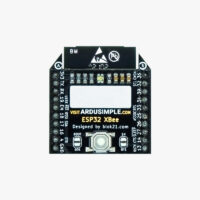
Hardware overview:
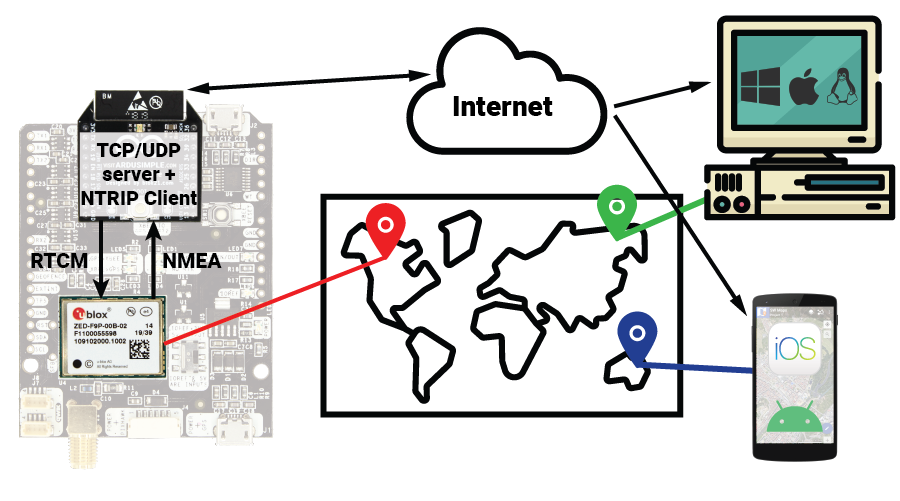
The WiFi NTRIP Master is the simplest way to setup an RTK system over an IP network with WiFi. Some of the useful features of this product are:
- Connect your base and rover through your WiFi network.
- Connect your base station to your preferred NTRIP Caster.
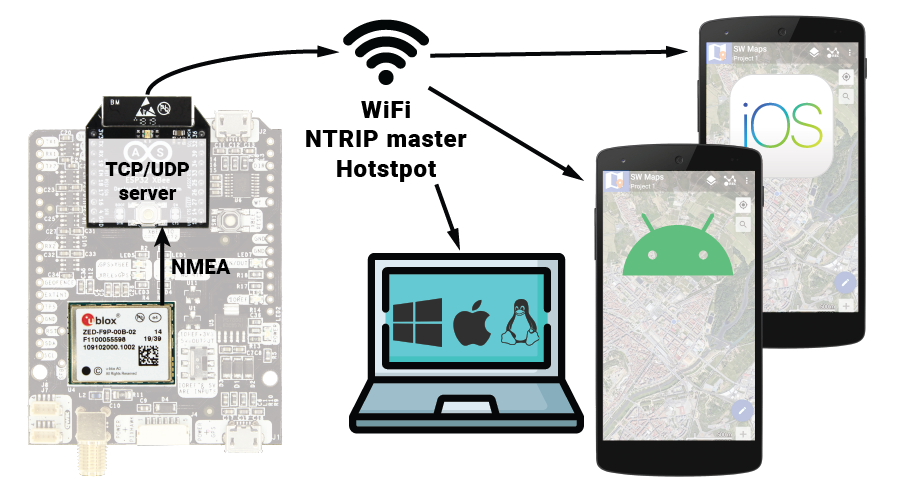
- Connect your rover to your preferred NTRIP Caster by just turning on the WiFi hotspot on your phone.
- Access your base/rover devices through the network, no need to connect physically to them.
The module has the following connections:
- XBee socket.
- BOOT button, in case you need to upgrade the firmware.
- Tri-color LED. Can help you understand what is going on without connecting to the device with your PC.
Installation:
Just plug the WiFi NTRIP Master on the XBee socket with the right orientation, the LED will start blinking.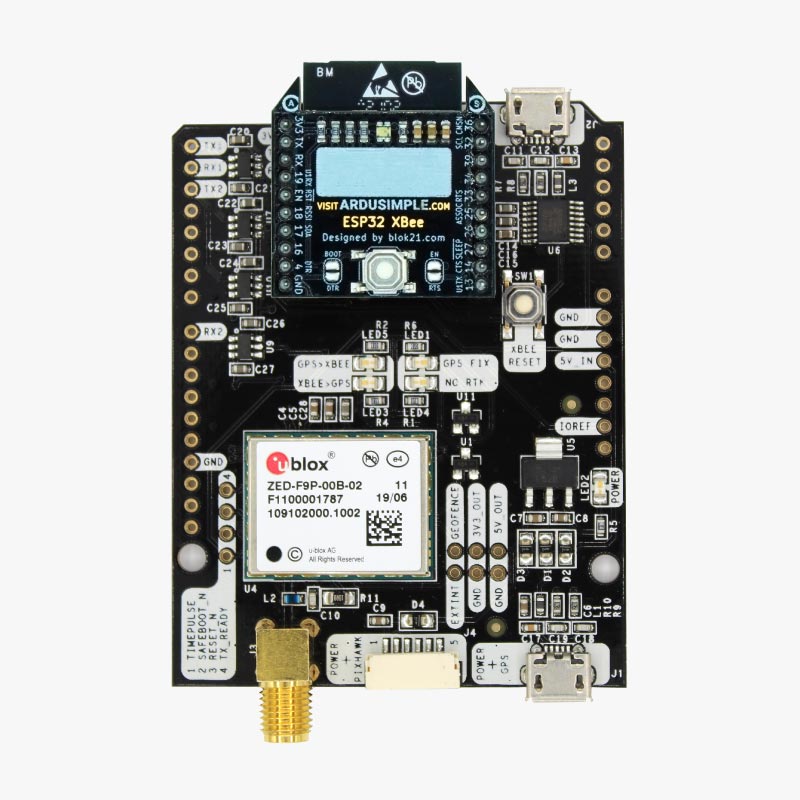
Configuration:
Once powered, the WiFi NTRIP Master will create its own WiFi network called ESP_XBee_xxxxxx where xxxxxx are some random numbers/letters unique to your device. Just connect to it using your mobile phone or PC, open your web browser and type the following address: http://192.168.4.1/
Each configuration box has a colored small box, next to the enable/disable button. You can set the color that the LED will blink when that function is working. For example, you can set:
- Blue for WiFi client, Red for NTRIP Client. If the 3 of them are blinking it means: Device successfully connected to your WiFi, successfully connected to the NTRIP Caster.
Every time you do changes, you will have to click the “Submit” button to store.
![]()
And if at any time you lose communication with the WiFi device or you don’t know what you did, you can always:
- Revert back to default configuration, by pressing the BOOT button for more than 5 seconds.
- If still doesn’t work, you can always do a firmware upgrade to ultimately recover the unit.
UART:
The only thing useful in this section is the “Baud rate”. The default 115’200bps is a good baudrate for its functionality, just set the same baudate on your ZED-F9P.
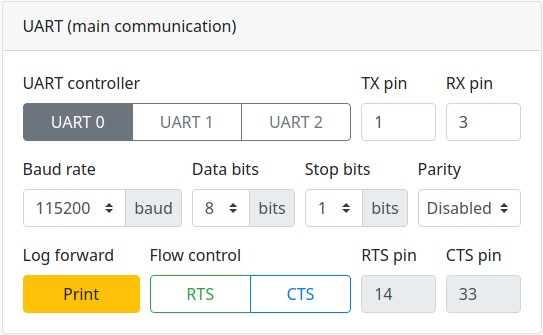
There’s a lot of parameters in this section and might look confusing. The UART0/UART1/UART2 has nothing to do with the ZED-F9P UARTs, just leave it as per default to UART0.
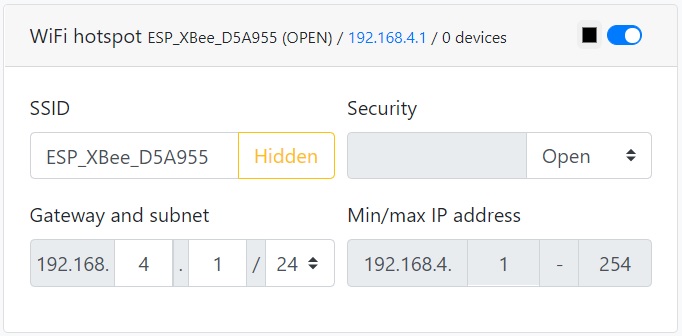
WiFi hotspot:
By default you connected to the configuration page by connecting to the ESP_XBee_xxxxxx and 192.168.4.1 address. You can customize the hotspot with your own name or even disable.
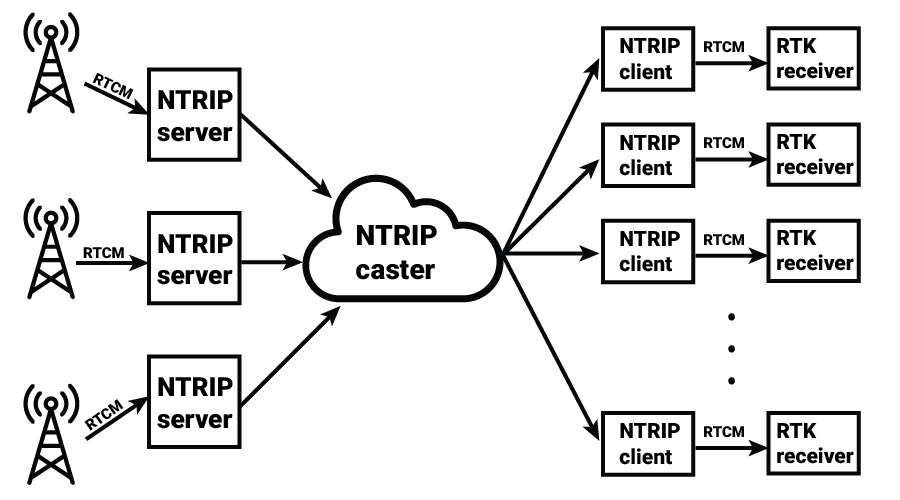
NTRIP Client / Server / Caster:
You can configure the NTRIP credentials. To understand the difference of each, a diagram is worth a thousand words.
Socket server:
This is an interesting feature. You can also connect remotely to read the position of your device using WiFi NTRIP Master. Remember to enable data output on your GPS receiver which usually is disabled by default, otherwise you will not receive anything when connecting to the socket.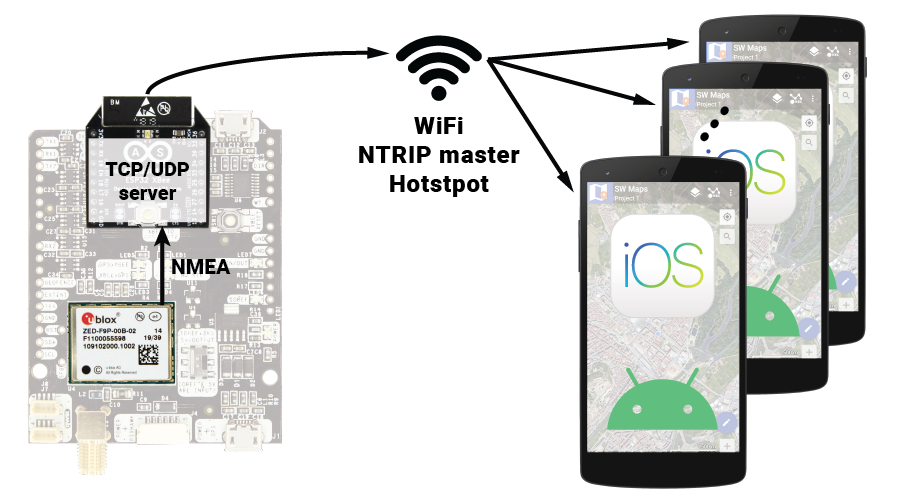 You can also use your PC with u-center and connect to your device remotely. From the menu bar, go to “Receiver” > “Connection” > “Network Connection” and use the ip address and port configured in the WiFi configuration page.
 Combining features:
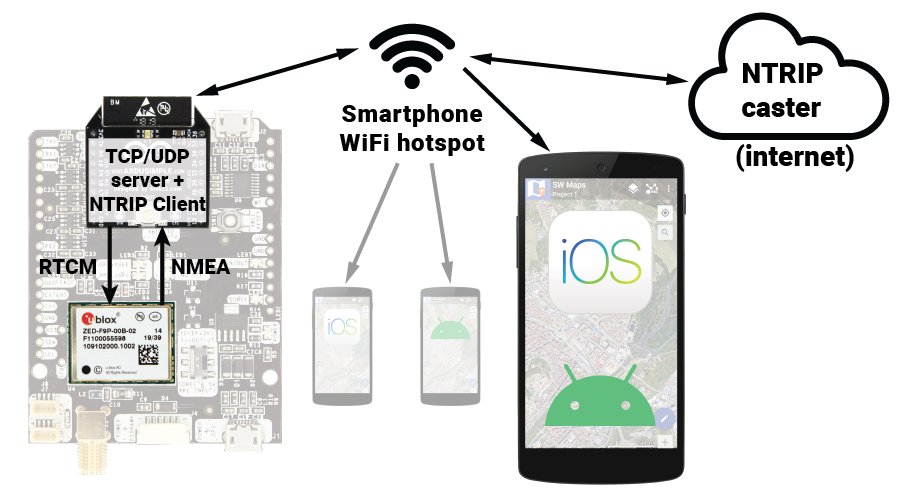
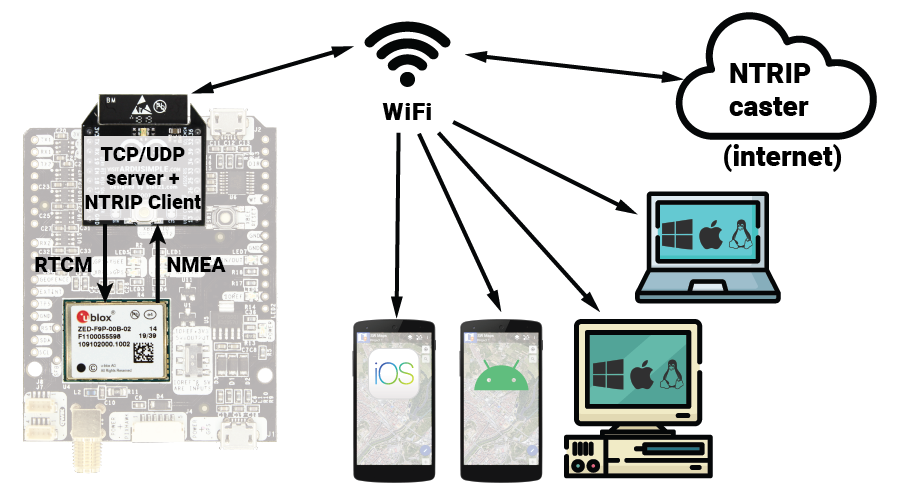
And all above feature can be used simultaneously! Your imagination is the limit (and the WiFi bandwidth). Here we try to give you some ideas:
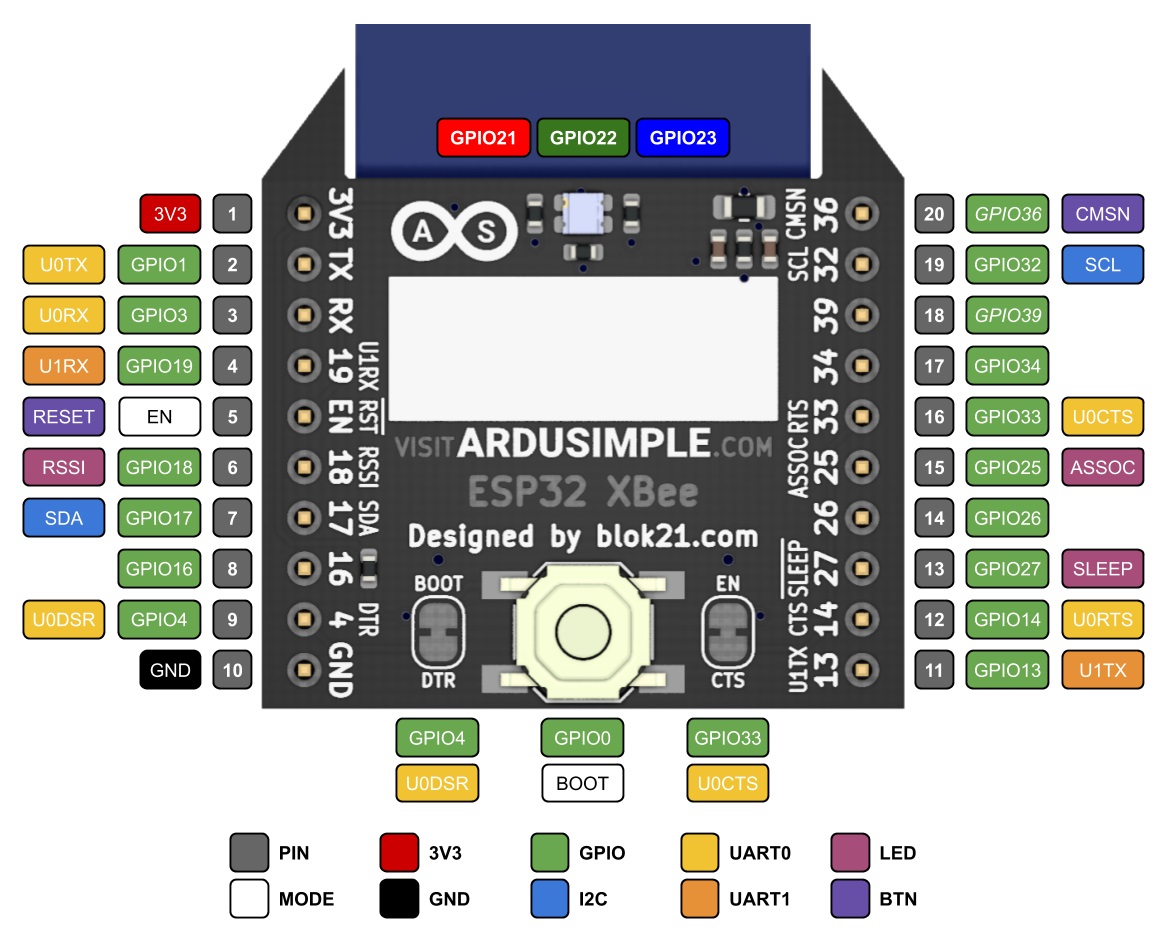
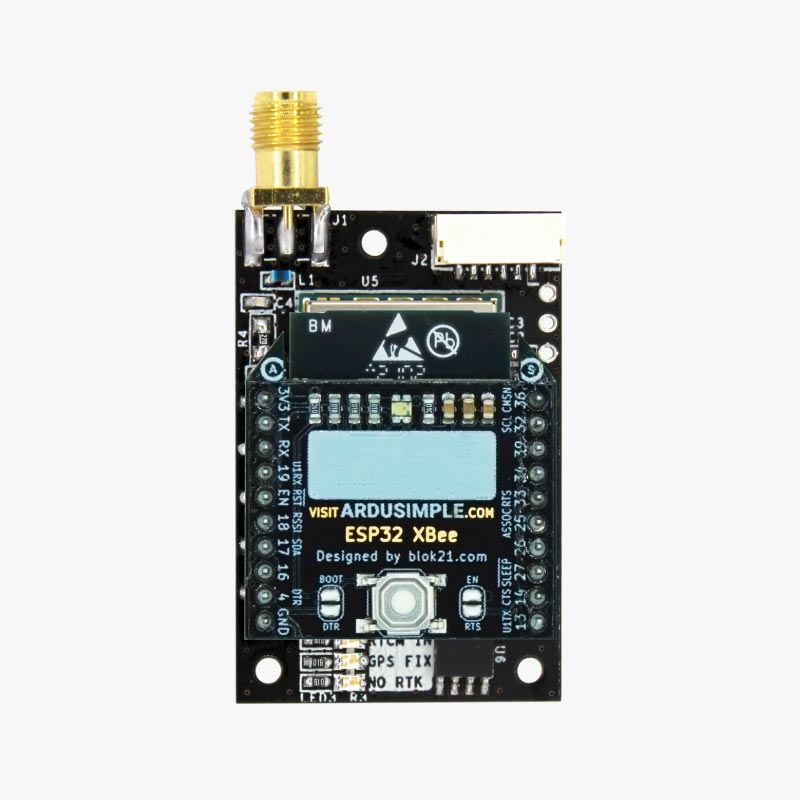
(Optional) Pinout for PCB integration
If you want to use WiFi NTRIP Master in your own PCB, or maybe with your own software, the pinout will be useful for you. Note that the footprint is the standard XBee.