On this page
Products used in this tutorial
If you work in construction, you may already use SitePlan on your smartphone to measure areas and distances, locate existing features, mark points, or document your work with GPS photos. Your smartphone can do all of this, but its built-in GPS is usually accurate only to a few meters. For construction work, you may need much better accuracy.
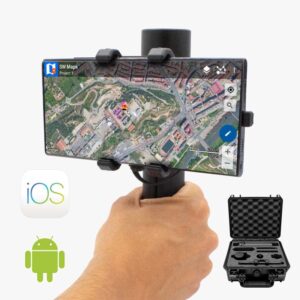
The RTK Handheld 2 Mapping Kit can provide centimeter-level positioning to SitePlan. This allows you to use your Android smartphone or tablet as a more accurate surveying tool, without changing the way you use SitePlan. You don’t need previous experience with RTK or GNSS. We will explain each step and the few technical settings you need to configure.
This tutorial focuses on Android devices, as Android allows the use of mock location apps to provide high-accuracy GNSS positioning to SitePlan.
Required hardware
- RTK Handheld 2 Mapping Kit
- Smartphone running on Android
Required software
- SitePlan for Android
- GNSS Master (installed on Android to use mock location)
Before start
To achieve centimeter-level accuracy, you will need accesa to an NTRIP service to receive RTK corrections. If you need assistance finding one, consult our prepared list of RTK correction services in your country.
How to use RTK Handheld 2 with SitePlan for construction mapping
Enable Mock Location in your Android Device
This step only needs to be done once. Turn on your RTK device and wait for the LED indicators to confirm it is powered and searching for satellites. Place it outdoors in a place with a good sky view; for testing purposes, you could place it near a window.
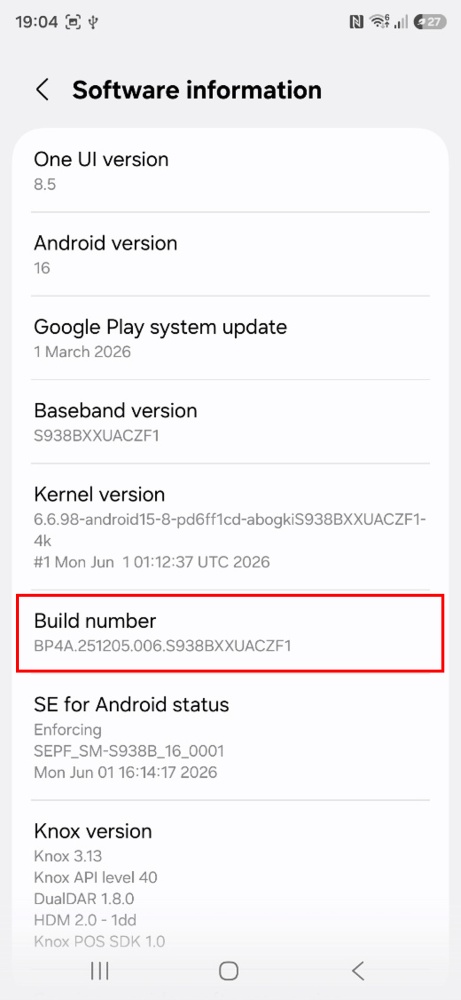
- Activate Developer options on your Android device. Go to Settings > About phone > Software information and tap the Build number 7 times in a row.
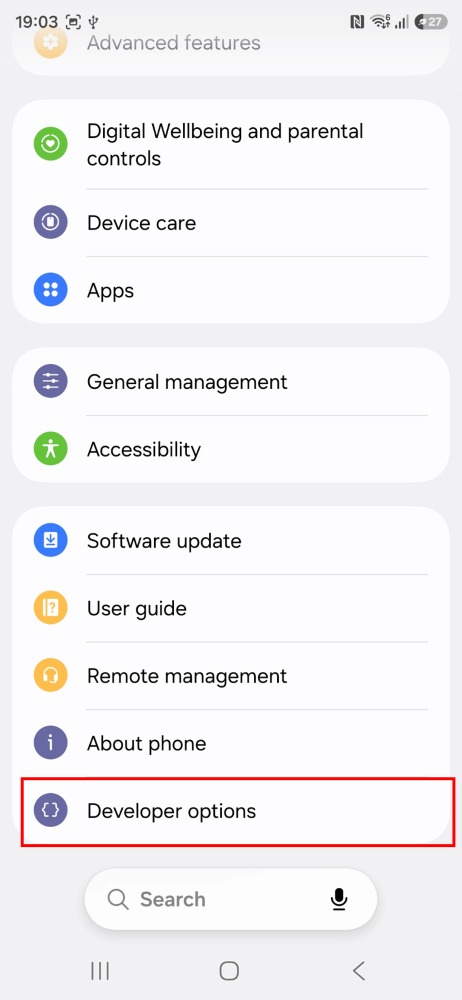
- Tap Developer options, which now shows under Settings > System.
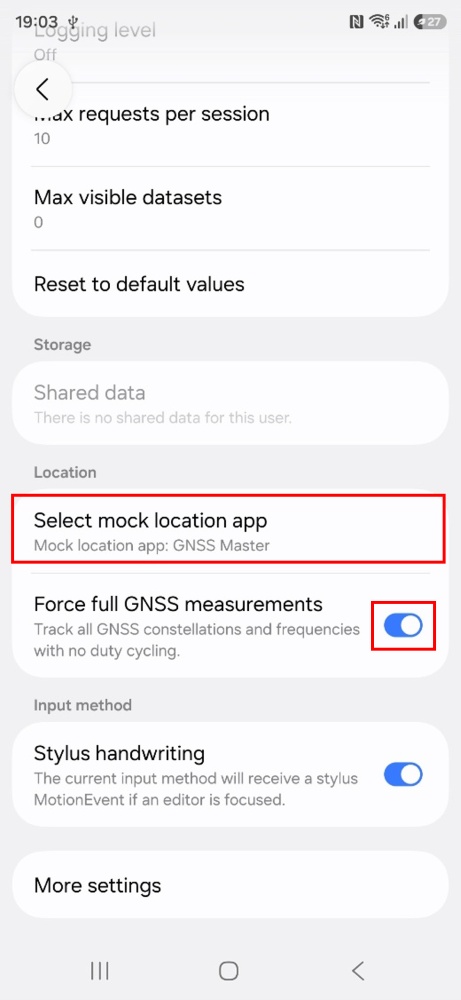
- Once you have access to Developer options, you can go to Settings > Additional Settings, and at the bottom you will find Developer options. In the Location section, tap Select mock location app and select GNSS Master from the list.
Connect the RTK receiver to your Android device
There are two options for connection: via USB OTG and via Bluetooth LE. When connecting the GNSS antenna to your device, it is recommended to be in a location with a good view of the sky, or near a window for testing functionality.
If you are connecting via USB OTG, be aware that the OTG cable should be directly connected to your smartphone.
The best option (if your device supports it), since you can power and communicate with it at the same time.
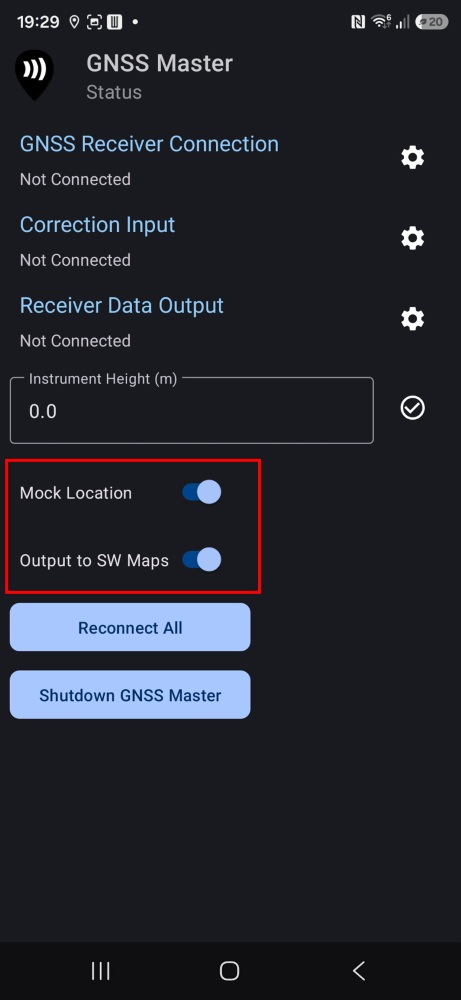
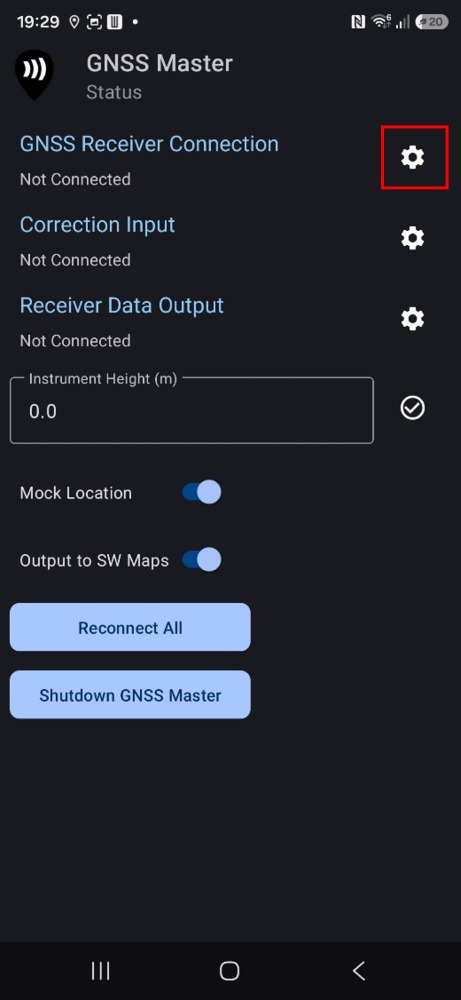
- Connect the RTK receiver to your Android device with a USB OTG cable and open the GNSS Master app. Check Mock Location and Output to SW Maps.
- Click the gear icon on the right side of GNSS Receiver Connection to enter the setup menu.
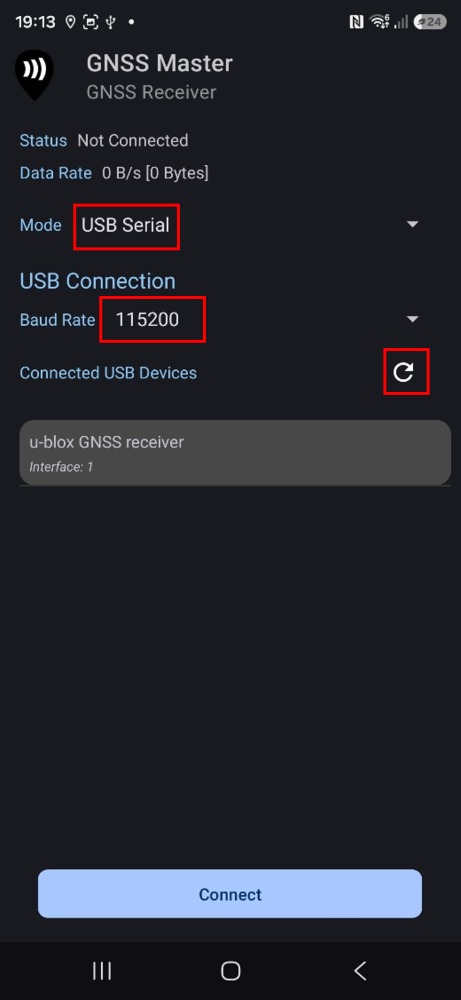
- Choose USB Serial as Mode and press the Refresh icon. Set Baud Rate to 115200 bps (if you ordered your ArduSimple Professional kit before 09.10.2023, set Buad Rate to 38400 bps). If you use a different receiver, the Baud Rate should match your receiver configuration.
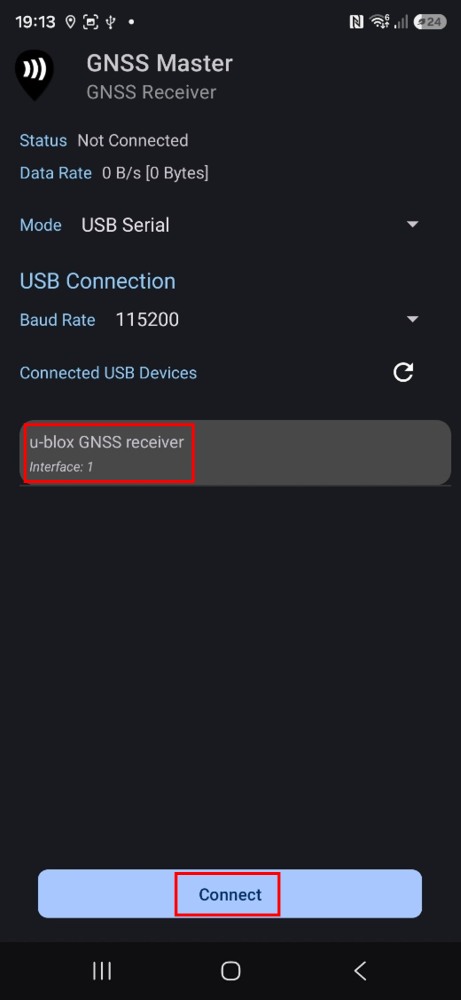
- Select the GNSS receiver device from the list and press Connect.
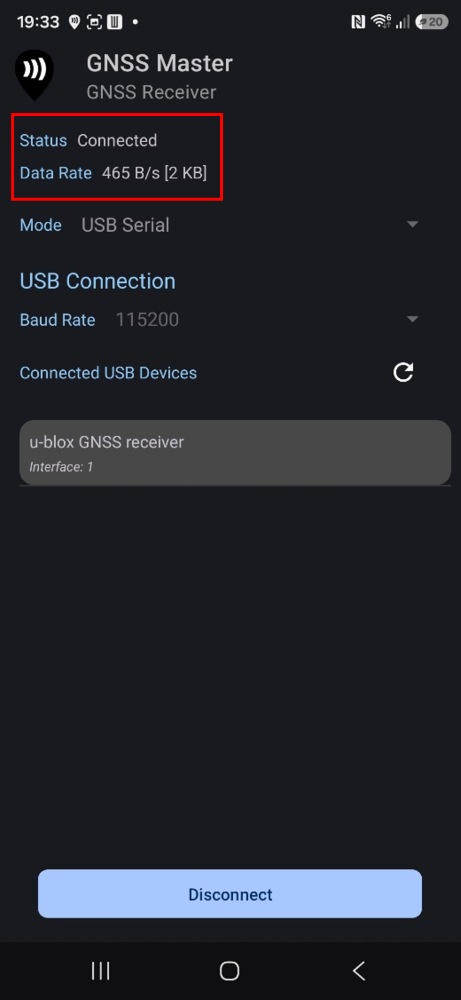
- Check that the Status is set to Connected. After a few seconds, the GNSS receiver should find enough satellite signals and start sending data.
- Open GNSS Master app. Check Mock Location and Output to SW Maps.
- Click the gear icon on the right side of GNSS Receiver Connection to enter the setup menu.
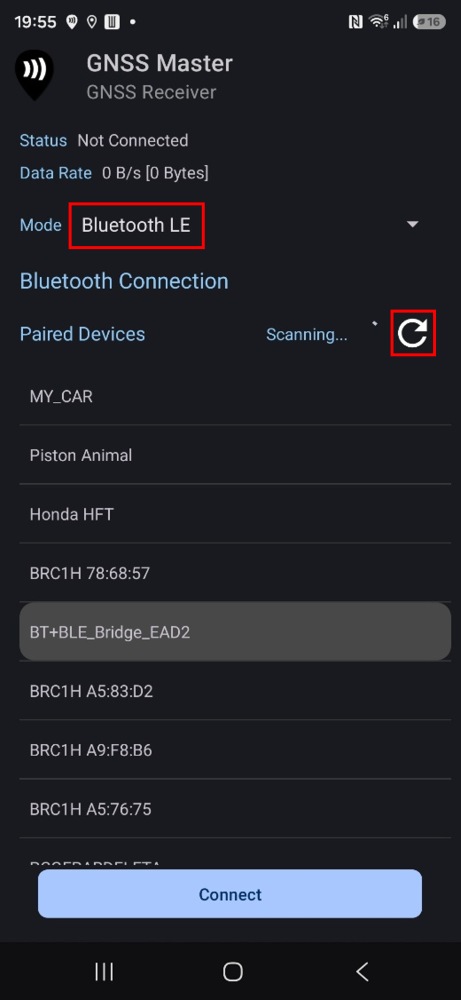
- At Mode expand the drop-down menu and select Bluetooth LE. Press Refresh icon.
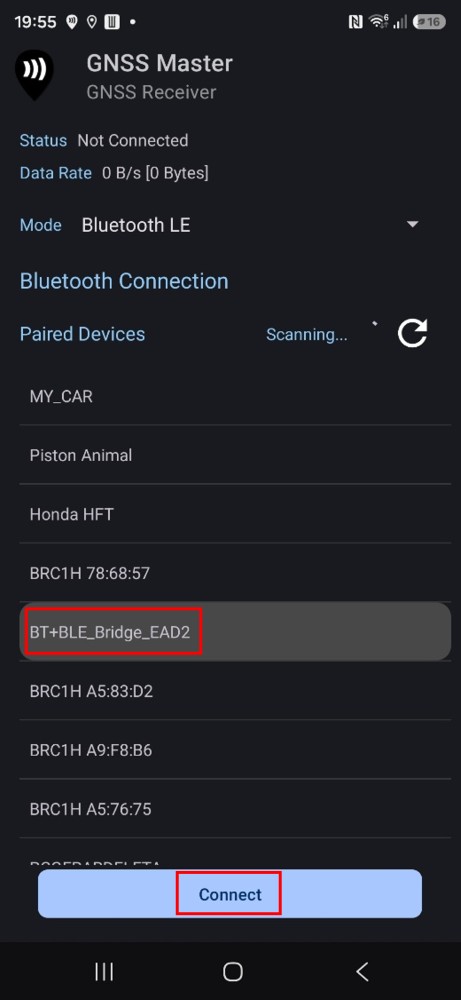
- When searching for the GNSS receiver, look for the device named BT+BLE_Bridge_XXXX, where XXXX is a random number. Select the device and press Connect.
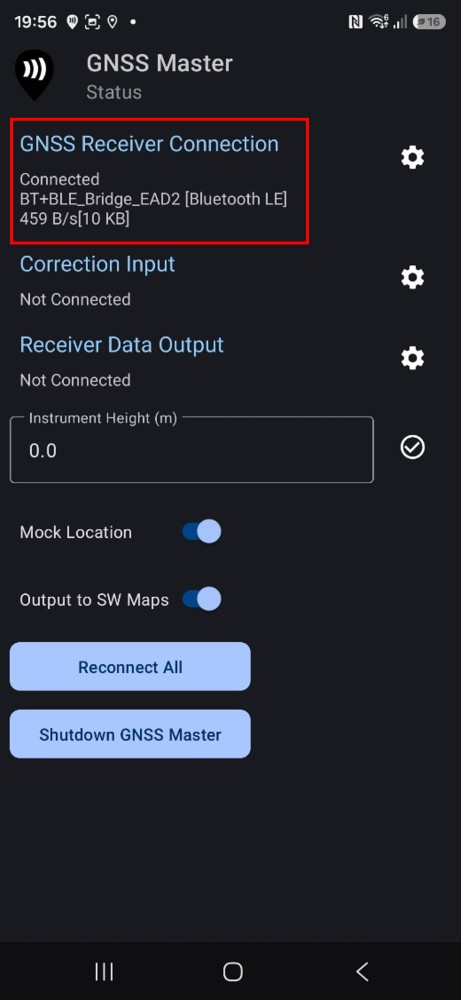
- Check that the Status is set to Connected. After a few seconds the GNSS receiver should find enough satellite signals and start sending data.
Get RTK corrections
To achieve centimeter-level accuracy, you must connect to an NTRIP service to receive RTK corrections. If you need assistance finding one, consult our prepared list of RTK correction services in your country. GNSS Master app does include a built-in NTRIP client, so you can achieve centimeter-level accuracy on your Android smartphone or tablet for free.
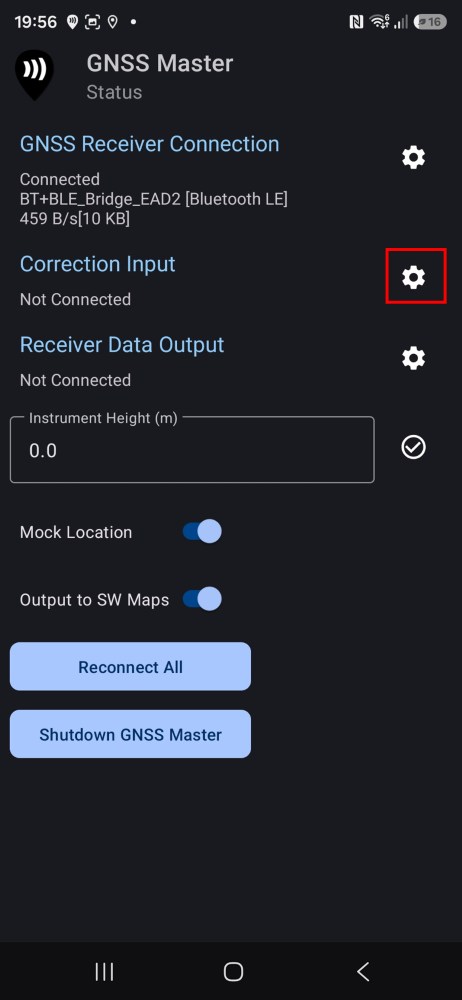
- Go back to GNSS Master Status and press the gear icon for Correction Input.
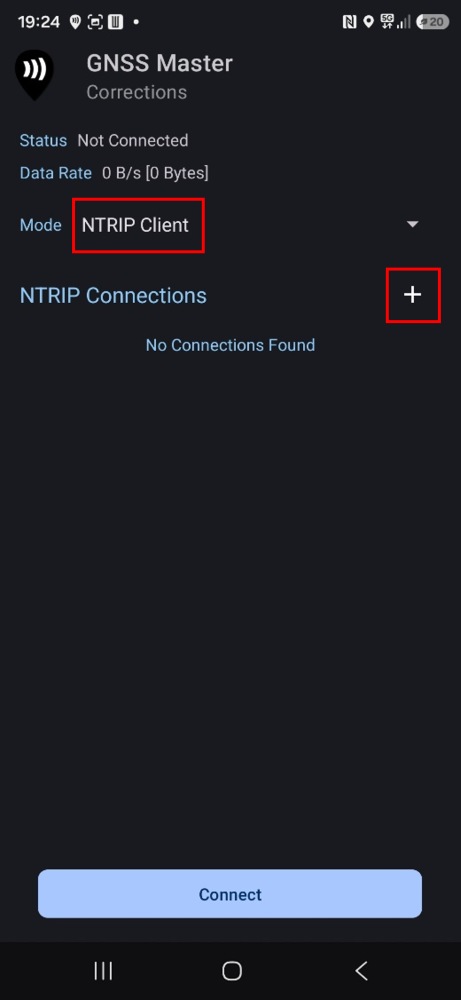
- In Mode, choose NTRIP Client and press the + button next to NTRIP Connections.
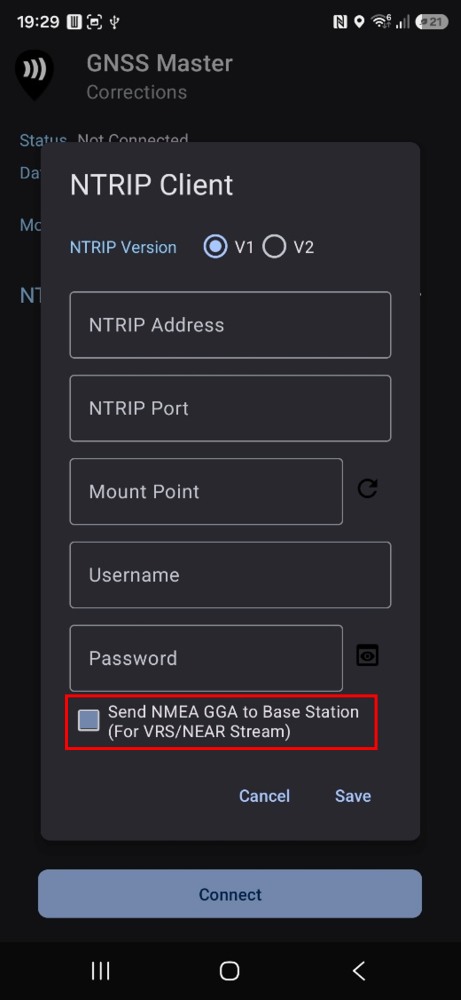
- Input your NTRIP correction service credentials and enable the Send NMEA GGA to Base Station option. Press Save and Connect.
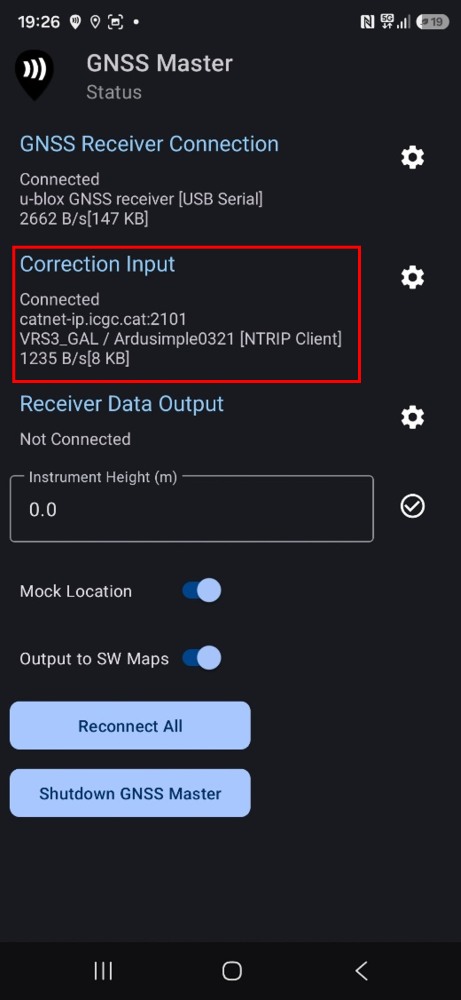
- In Status, you will see GNSS Receiver Connection and Correction Input showing Connected and with data communication. Now, the output data should be at centimeter-level accuracy.
Create a SitePlan free account
Before using SitePlan, you will need to create a SitePlan account. If you do not already have one, you can start with the 30-day free trial, which provides full access to all the application features. You can create your account either directly from the Siteplan app or through the Siteplan login page. This only needs to be done once.
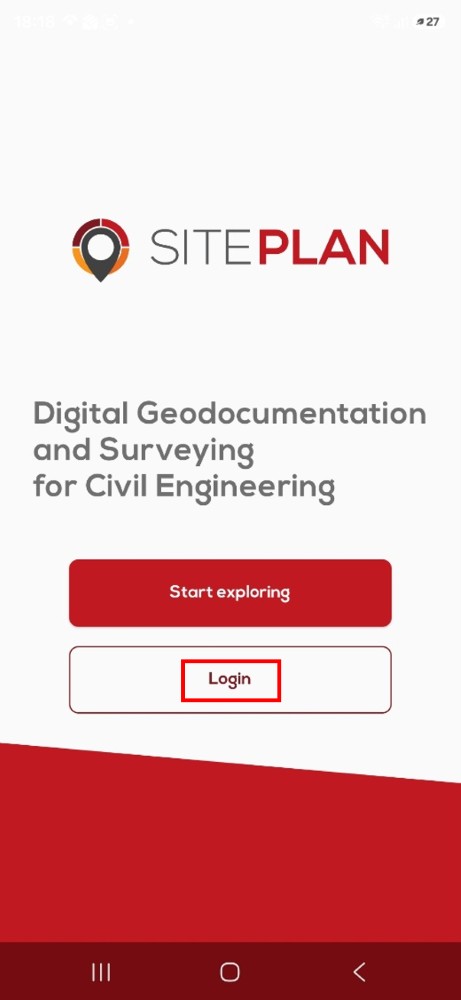
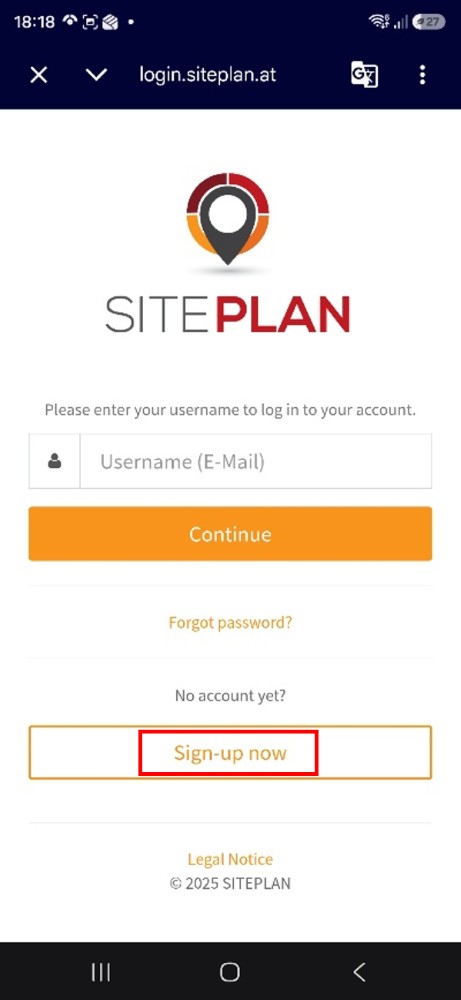
- Open the Siteplan app and press Login.
- Once in the Login screen, press Sign-up now.
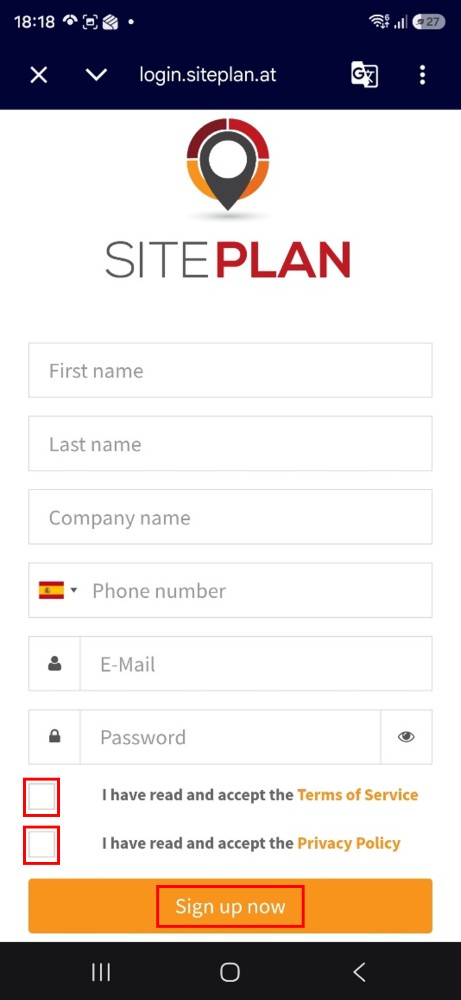
- Fill in the form with your personal and company information, accept the Terms of Service and Privacy Policy, and press Sign up now.
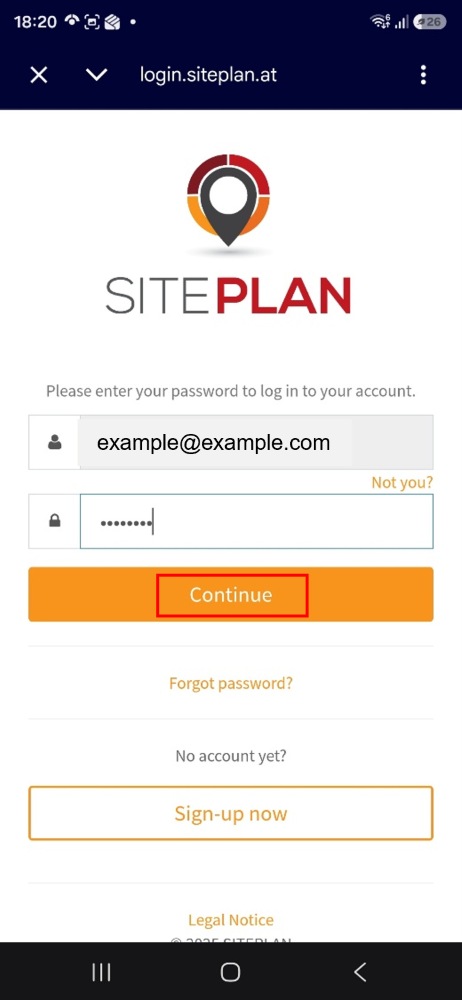
- You will receive a confirmation email to verify your email address. Once your email has been confirmed, you can sign in to the SitePlan app using the credentials you created in the previous steps. Press Continue.
Use Siteplan with centimeter-level GNSS positioning
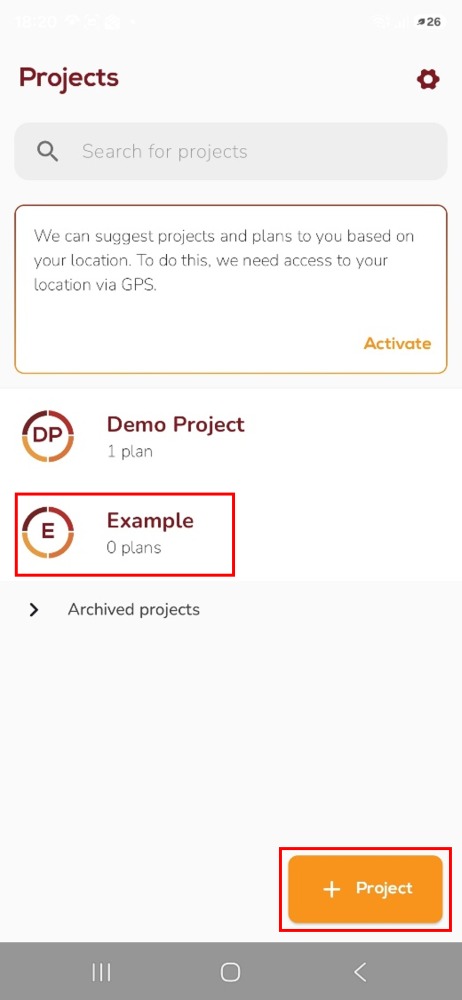
- Once signed in, all the projects assigned to your account will be displayed. To create a new project, tap the + Project button in the bottom-right corner.
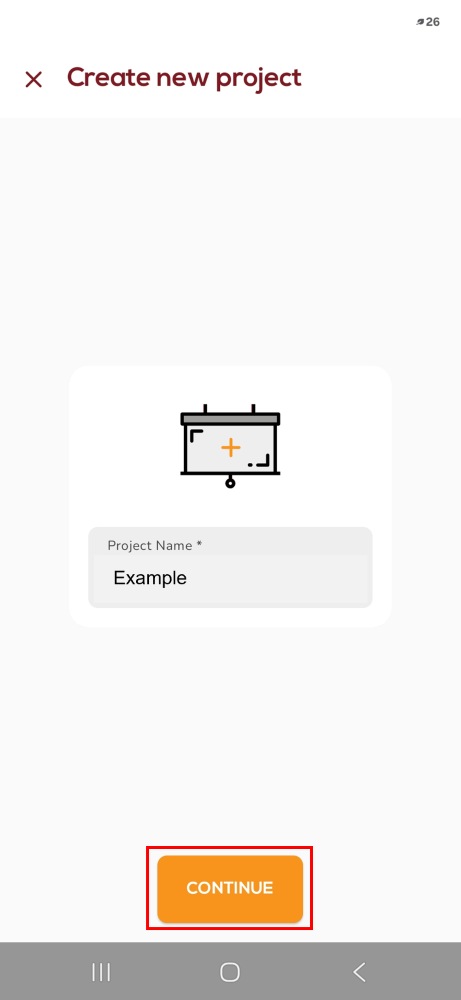
- Enter the desired project name and press Continue.
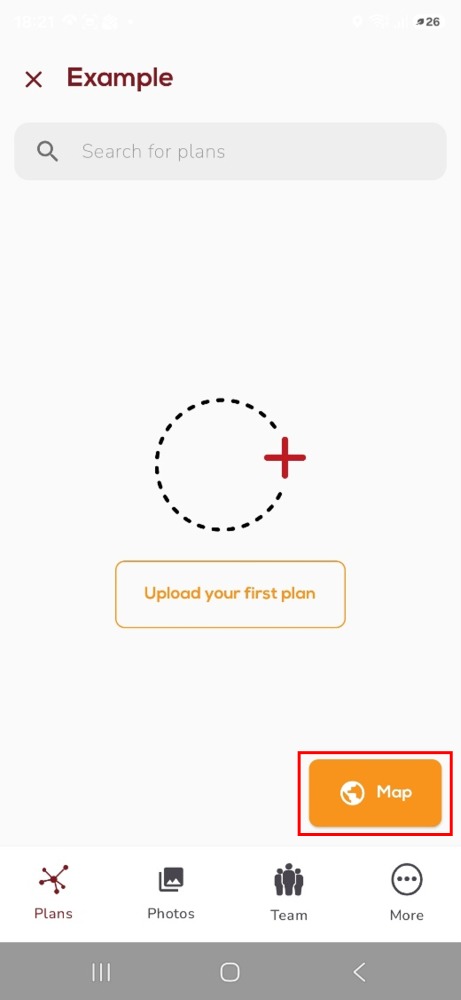
- Inside the project, you can work either with an uploaded plan (drawing) or directly on the map. Select Map.
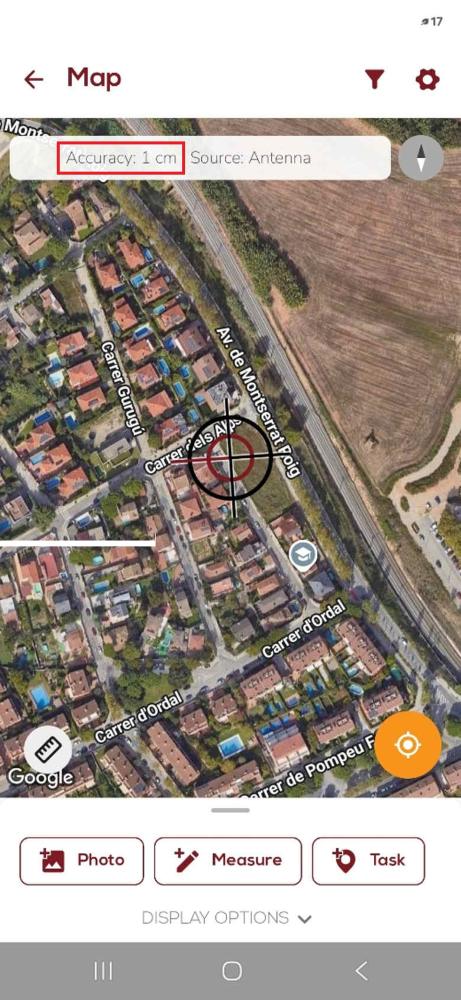
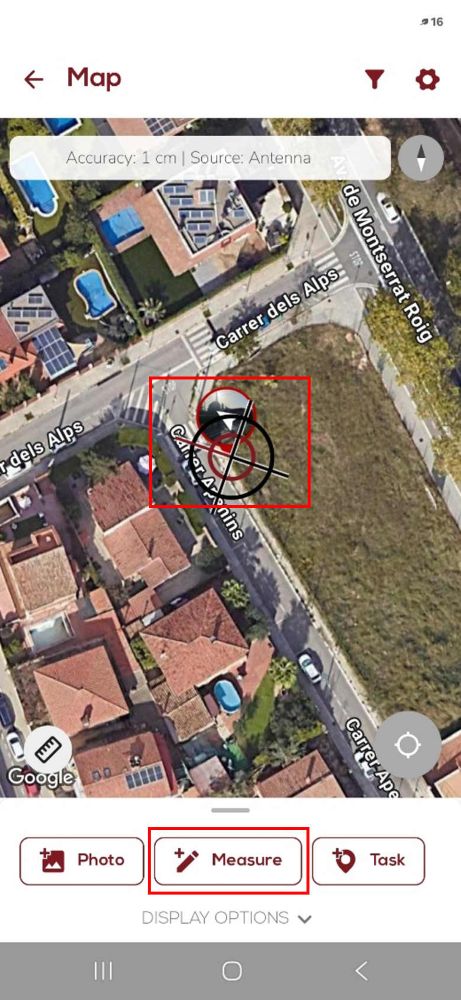
- You will be presented with the map view. Because we previously activated mock location using the GNSS Master app, the location shown is already at centimeter-level accuracy, as shown at the top of the map.
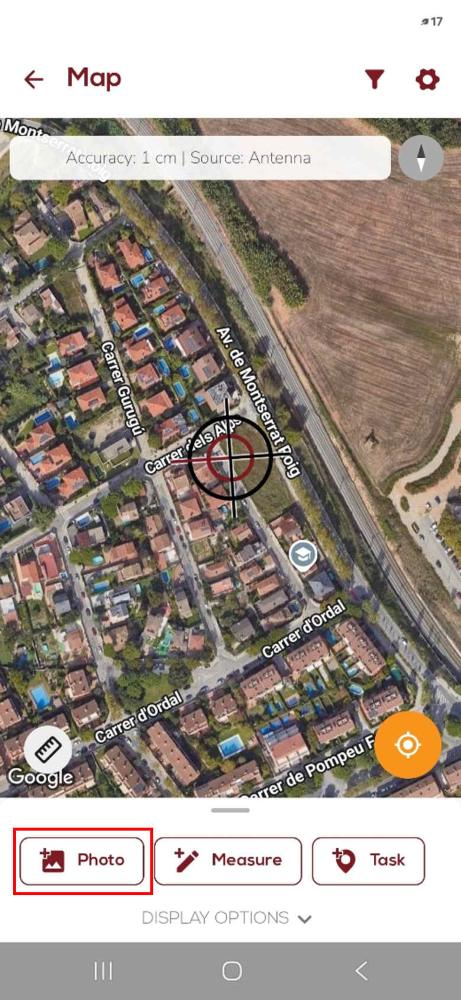
- You are now ready to start documenting your construction site with the Siteplan app. As a first step, we will create a GPS-tagged photo associated with a specific location. Press the Photo icon.
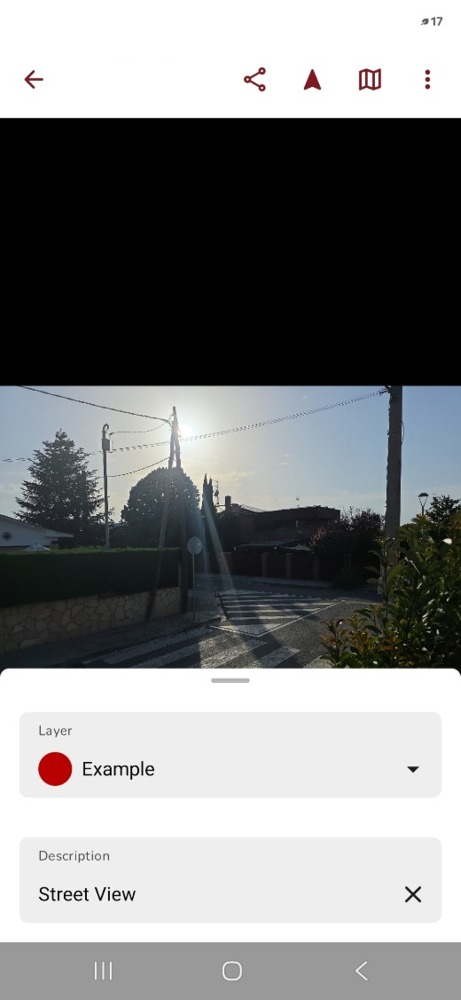
- Take a photo at the desired location. You can also assign it to a specific layer for better project organization and add a brief description.
- Once saved, the photo will appear on the map at its recorded location with centimeter-level accuracy. Next, we will mark a specific point on the map. Press Measure.
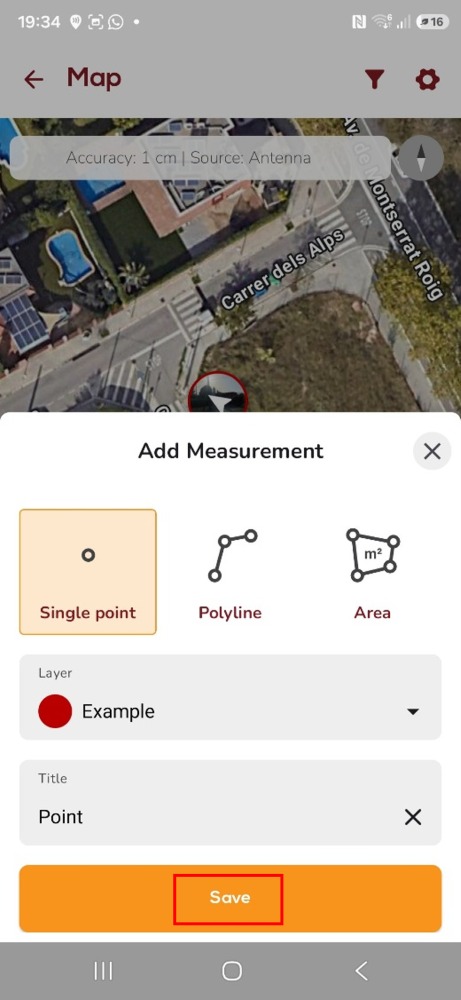
- Select Single Point. Enter a name, select the desired Layer and press Save.
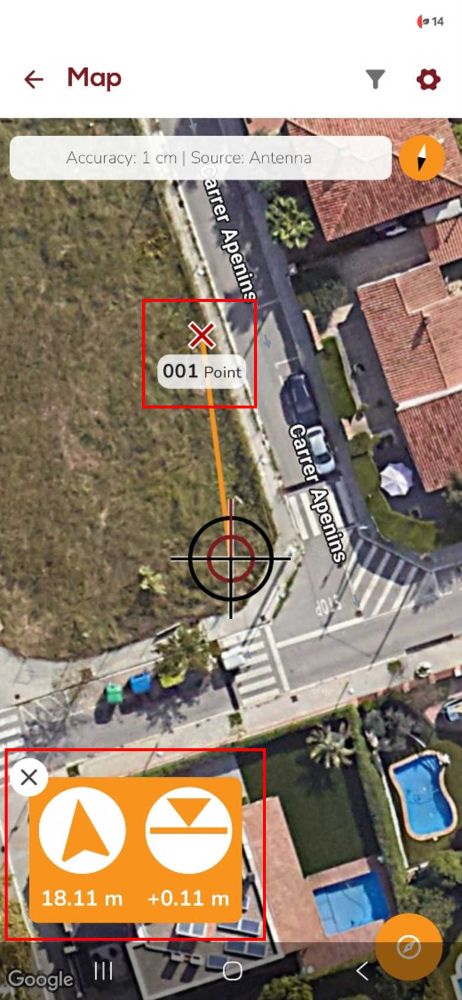
- Once the point has been saved, select it on the map and press Navigate To. SitePlan will guide you to the selected point and display the remaining distance with centimeter-level precision.
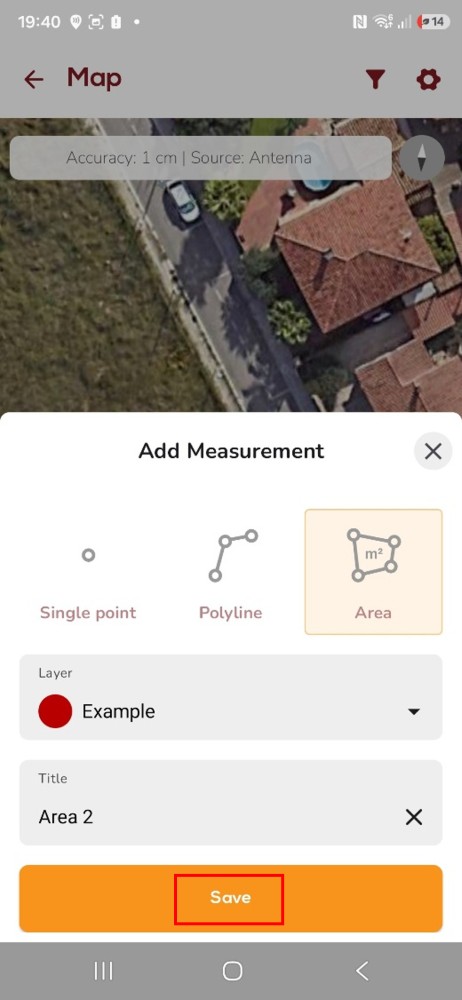
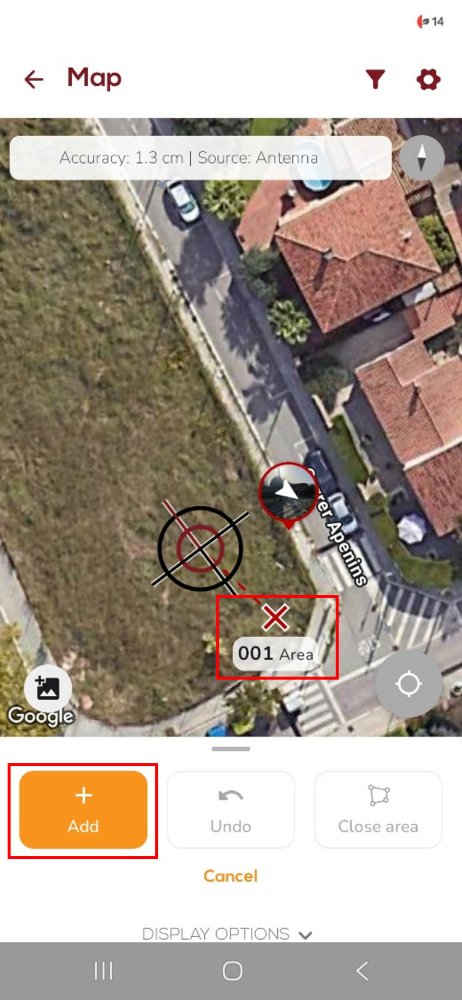
- Another useful feature is the ability to calculate areas. To do so, select Area from the Measure menu. Enter a name, assign the area to the desired Layer and press Save.
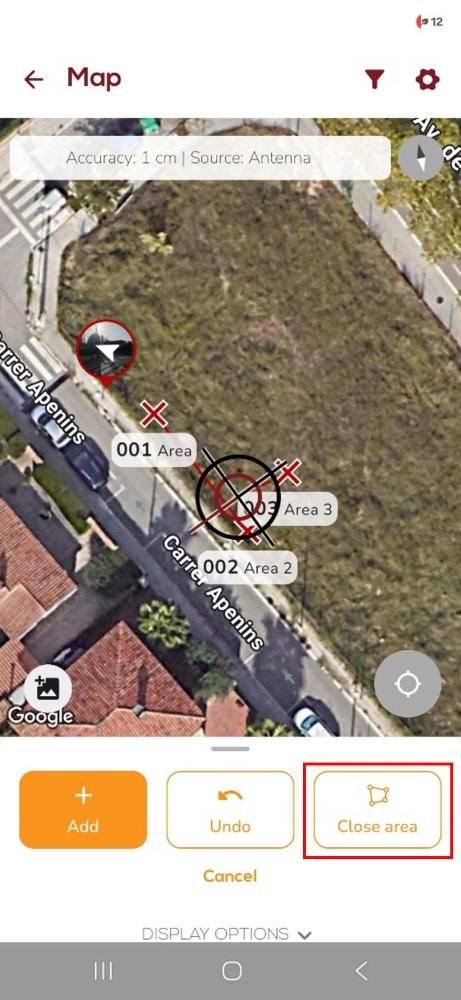
- You can add as many points as you want by pressing the Add button.
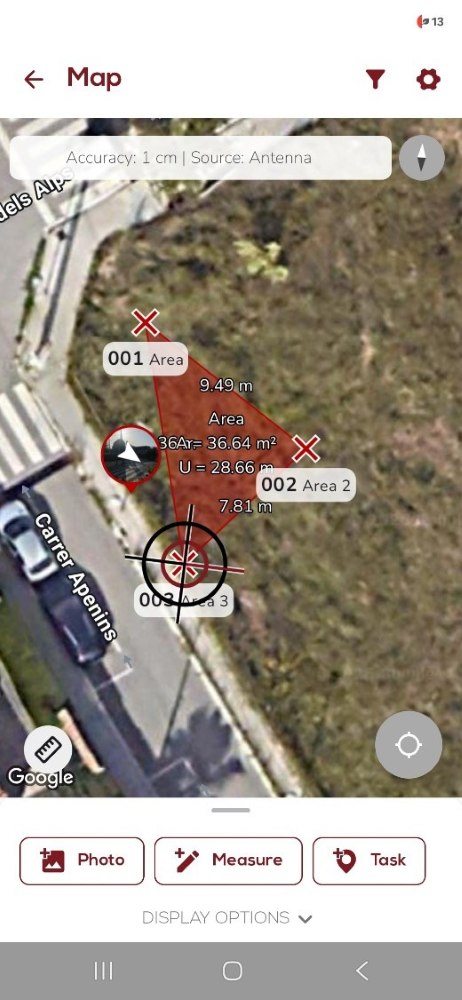
- Once you have added at least three points, you can press Close Area to complete the area measurement.
- The measured area will now be displayed on the map. Select it to view all its calculated properties, including the area, perimeter and other measurement details.
For further information, you can contact the Siteplan team.
Still having issues?
Contact us for support from a real engineer—not AI—or request the tutorial you’re missing
and