 and
and 

How to install a low cost base station for your DJI RTK drone

Are you using a DJI RTK drone but struggling with expensive original base stations or working in areas without internet?
If you need centimeter-level accuracy for drone mapping, surveying, or agriculture, but want a more affordable and flexible setup, this guide is for you.
DJI RTK drones rely on correction data to achieve high precision, but the official base station can be costly. With a simple setup using the ArduSimple RTK Smart Antenna, you can create your own base station at a fraction of the cost—without sacrificing accuracy.
In this tutorial, you will learn how to build a local RTK system that works even without internet connection. The correction data is generated by your base station and sent directly to your DJI controller via WiFi NTRIP Master, allowing your drone to operate with centimeter-level precision anywhere.
Whether you’re working on mapping projects, land surveying, or precision agriculture, this step-by-step guide will help you get a reliable and cost-effective RTK setup running quickly.
Required hardware
- RTK Smart Antenna
- WiFi NTRIP Master (we recommend adding Configuration service to your purchase too in order to receive your Smart Antenna with the plugin pre-assembled)
- Pole for survey gnss antenna
- Tripod for surveying pole
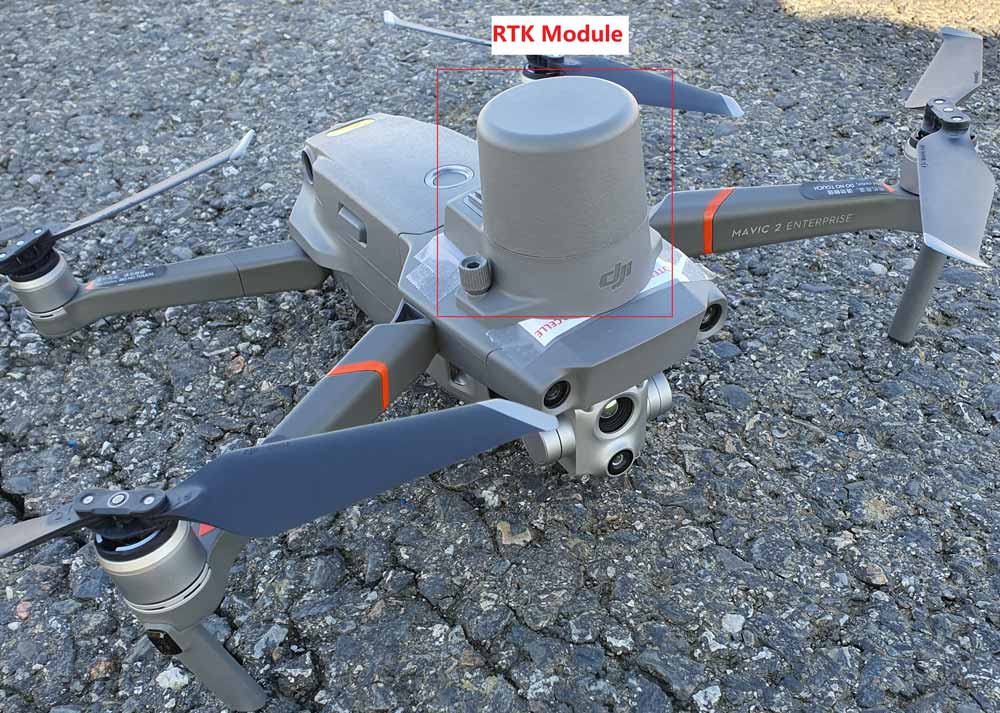
- RTK Drone (in this tutorial we use DJI MAVIC2 Enterprise Advanced) and its Smart Controller (Ground Control Station)
- PC or laptop
Required software
- DJI Pilot (If using other drone model, you may need another ground control app)
Important things to know before start
- This tutorial is based on both Ardusimple RTK Smart Antenna and DJI RTK Drone. Objective is to set-up the DJI Controller (also called UAV Ground Control Station) with the ArduSimple WiFi NTRIP Master that supports NTRIP local corrections.
- Unlike common usage of NTRIP where corrections are transmitted through internet, this tutorial explains how to configure a base station to provide RTK corrections locally over a WiFi network. We will show you a step by step process to configure and connect a DJI UAV Smart Controller in order to receive the RTK corrections.
- The RTK Smart Antenna with additional WiFi NTRIP Master plugin shall be configured as a base station that sends correction to the drone (rover) via the Remote Controller.
- As the base station is supposed to be located in an area without internet connection, it will be configured in Survey-In mode. However, in case the base station is installed on a known location, its coordinates (Lat, Lon, Alt) could be input manually.
- To ensure optimal performance of the WiFi NTRIP Master (transmission range of 20–30 meters with a clear line of sight in urban environments) make sure to use the UAV Remote Controller close to the RTK Smart Antenna to avoid connectivity issues.
How to set low cost RTK Smart Antenna as a base for DJI RTK drone
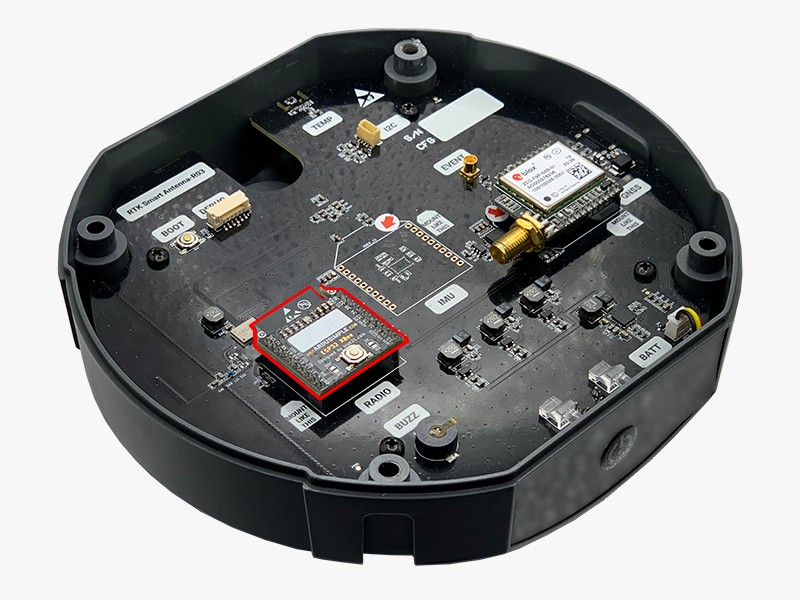
Install the WiFi NTRIP Master plugin (optional)
If you ordered the RTK Smart Antenna together with the WiFi NTRIP Master and selected the configuration service “Insert into smart antenna,” the module has already been installed inside the device before shipping, and you can skip this step.
If you ordered the RTK Smart Antenna and the WiFi NTRIP Master separately, you will need to install the module yourself by plugging it into the XBee socket on the antenna’s motherboard. If you need help opening the enclosure or installing the module, feel free to contact us—we’ll be happy to guide you through the process.
Configure WiFi NTRIP Master
- Turn on your RTK Smart Antenna by pressing the Power button.
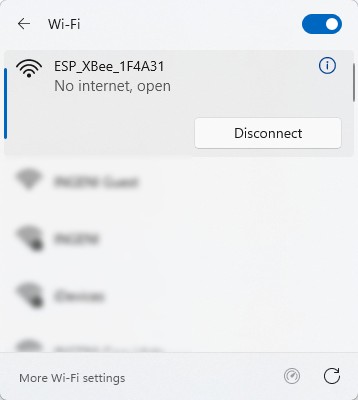
- The WiFi NTRIP Master module will create its own WiFi Network called ESP_XBee_xxxxxx (xxxxxx are some random numbers/letters unique for each device). Connect to the WiFi Network using a PC.
- On your PC or laptop open a web browser and enter http://192.168.4.1. The configuration web interface of the Wifi NTRIP Master plugin will open.
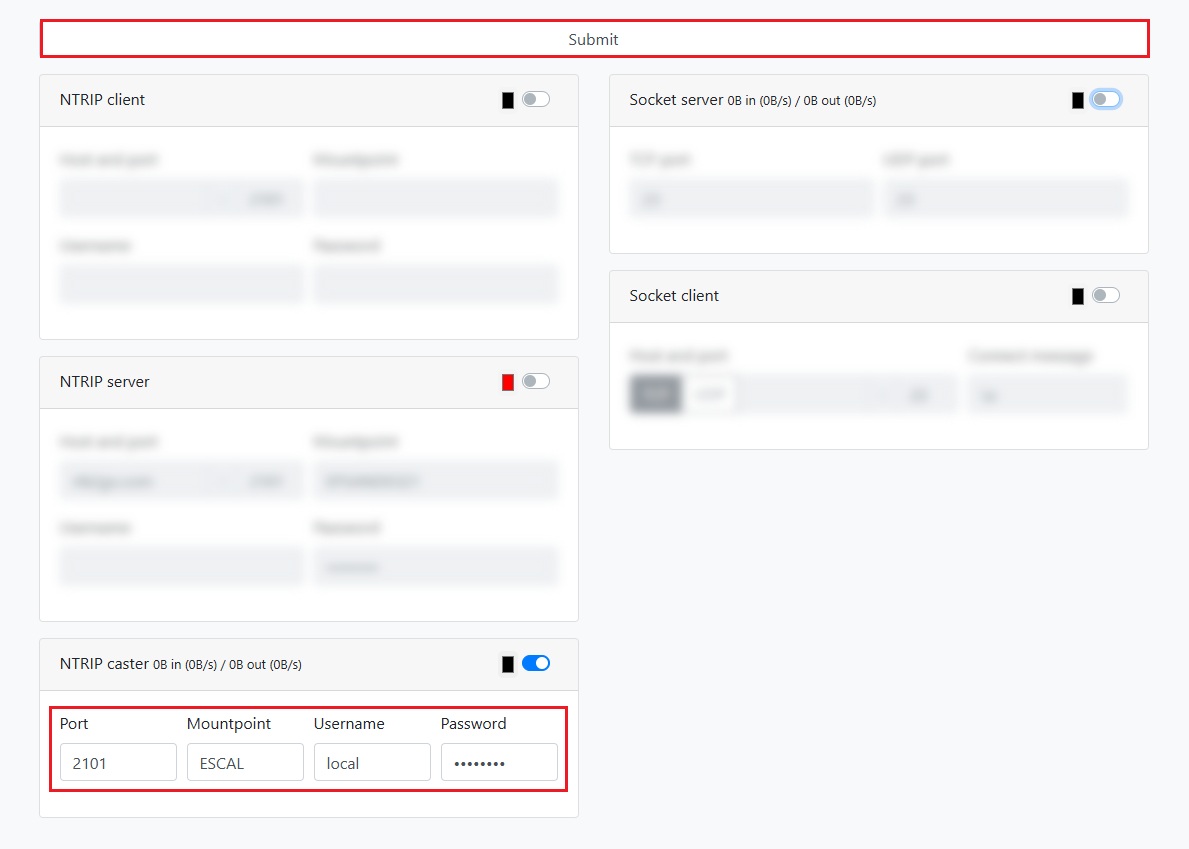
- At NTRIP Caster set Port to 2101 and enter your preferred Mountpoint, Username, and Password. Click Submit to apply the changes.
Configure the RTK Smart Antenna as a RTK Base
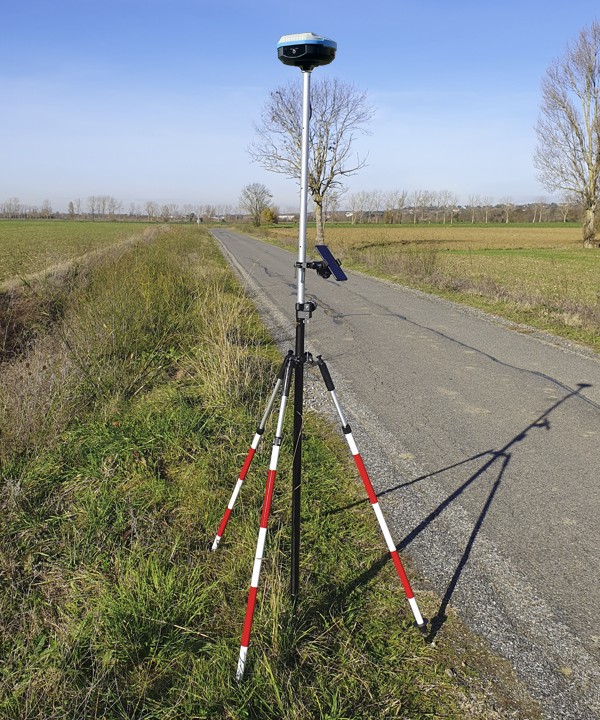
- Now go outside to the place where you are going to set your drone flight. Place it at an open area with a clear sky view, otherwise it will not be able to receive satellites signals. For testing purposes you could place it near to a window.
- Power the RTK Smart Antenna and mount it onto a surveying pole and tripod.
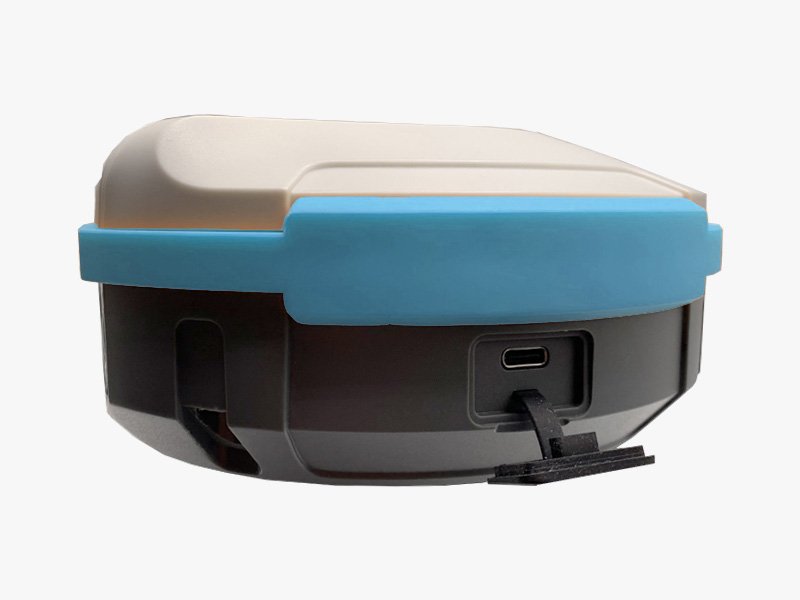
- Remove the rubber cover from the USB port located on the right side of the device.
- Connect the RTK Smart Antenna via the USB-C port to a laptop PC.
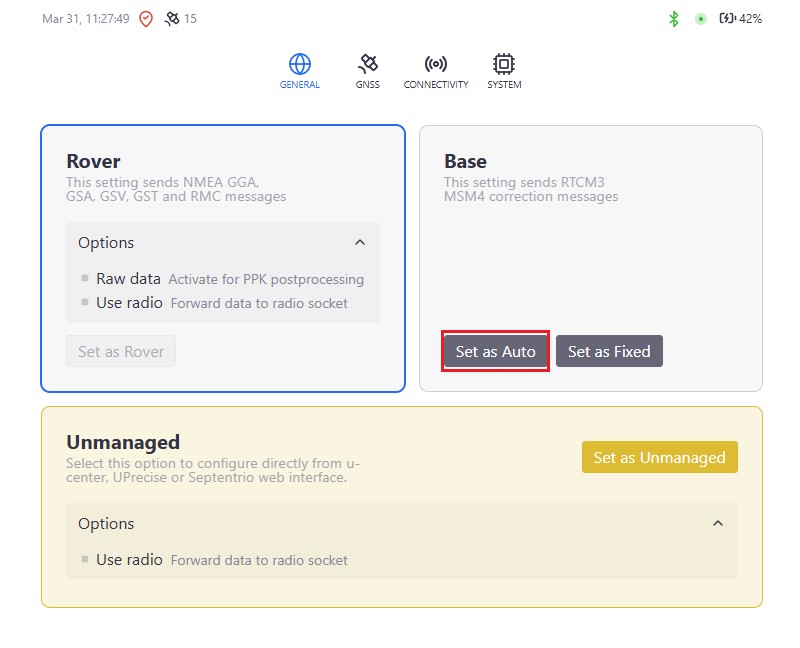
- Open a web browser and navigate to http://10.0.0.1:8080 to open the RTK Smart Antenna web interface.
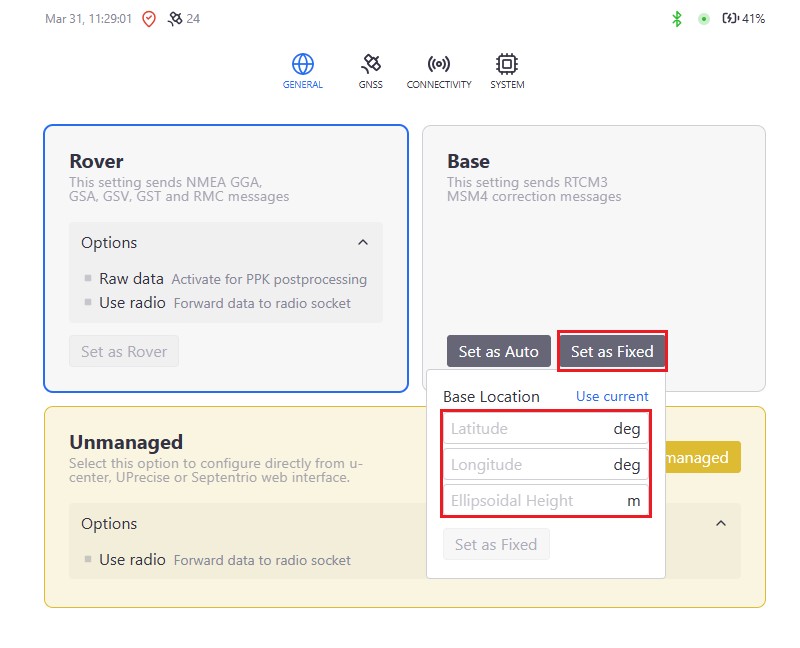
- Now we will configure your RTK Smart Antenna as an RTK base station. If you know the precise coordinates of your base station (for example, when it is placed on a geodetic reference point), you can enter them manually by clicking Set as Fixed. This option provides absolute, survey-grade accuracy.
If you do not know the exact coordinates of your location, click Set as Auto to let the RTK Smart Antenna automatically determine the base position. In this tutorial, we will use Set as Auto mode, which provides high relative accuracy between the base and the drone.
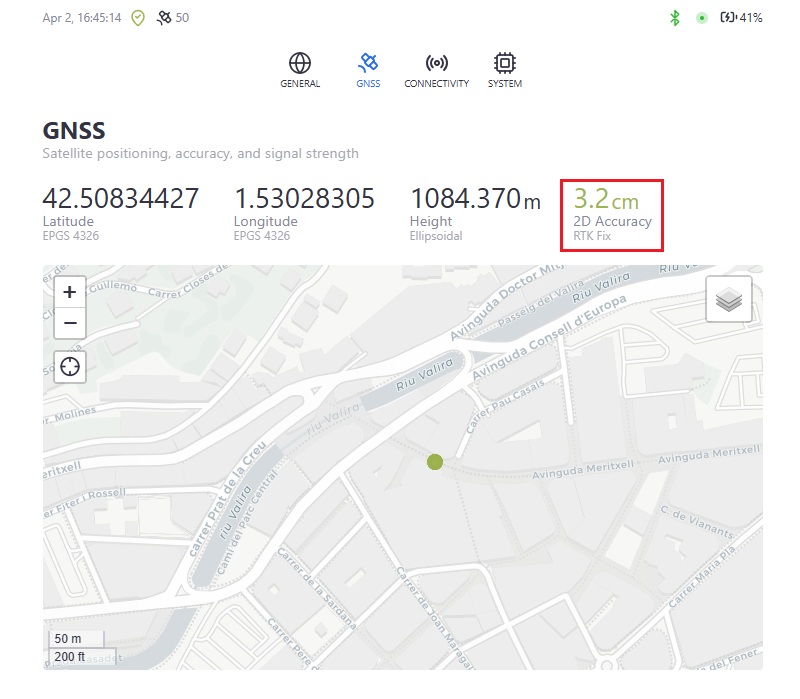
- Switch to the GNSS tab of the web interface.
- You can find the accuracy of the corrections sent by the base station beside its current coordinates.
- To improve the accuracy up to centimeter-level follow our guide on How to configure ZED-F9P. After connecting to an NTRIP service the accuracy will switch to RTK Float/Fix.
Configure the remote controller to receive RTK corrections
- Switch on the Remote Controller, and connect to the WiFi NTRIP Master WiFi. It will show as ESP_XBee_xxxxxx.
- Switch on the RTK enabled drone, and the connection to its remote controller is established instantly.
- In RTK menu of the Remote Controller, go to RTK. Enable the RTK position so that converge process can start.
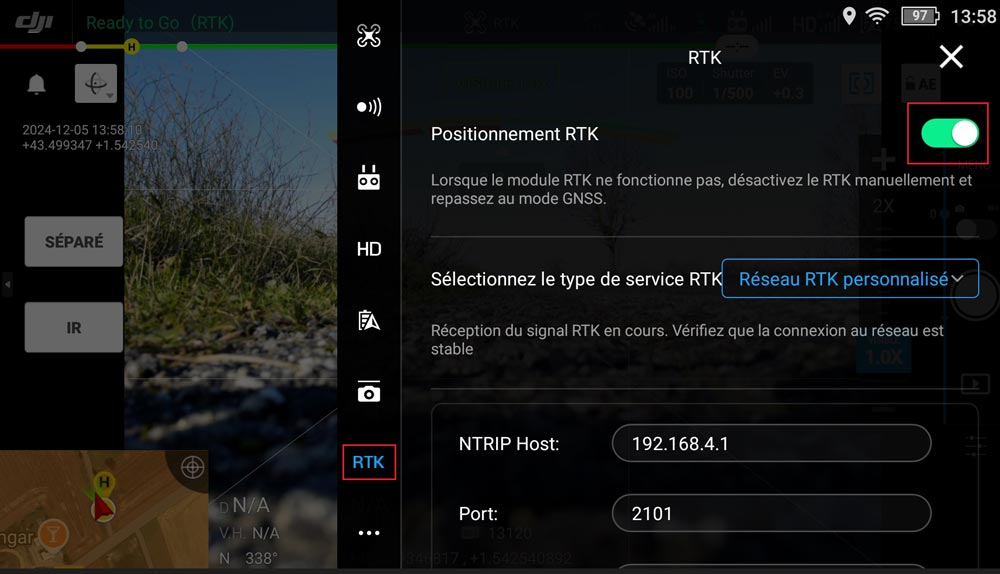
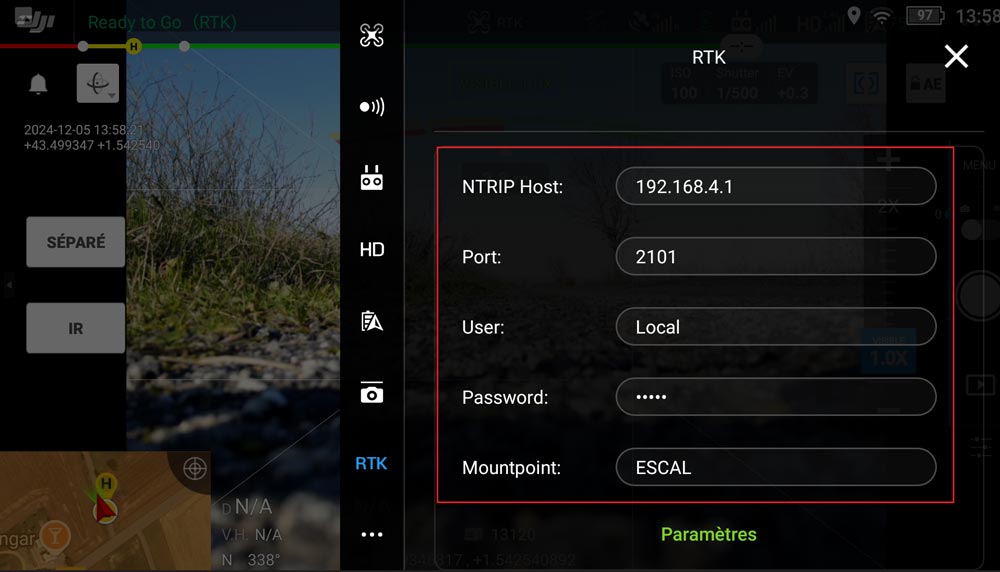
- Fill in the NTRIP information as you set it up in step 4.
- NTRIP Host : 192.168.4.1
- Port : 2101
- Mountpoint : your mountpoint name
- Username : your username
- Password : your password
- After few seconds you will see that RTK is connected. Status is set to FIX, and position (Lon, Lat, alt) is computed accordingly.
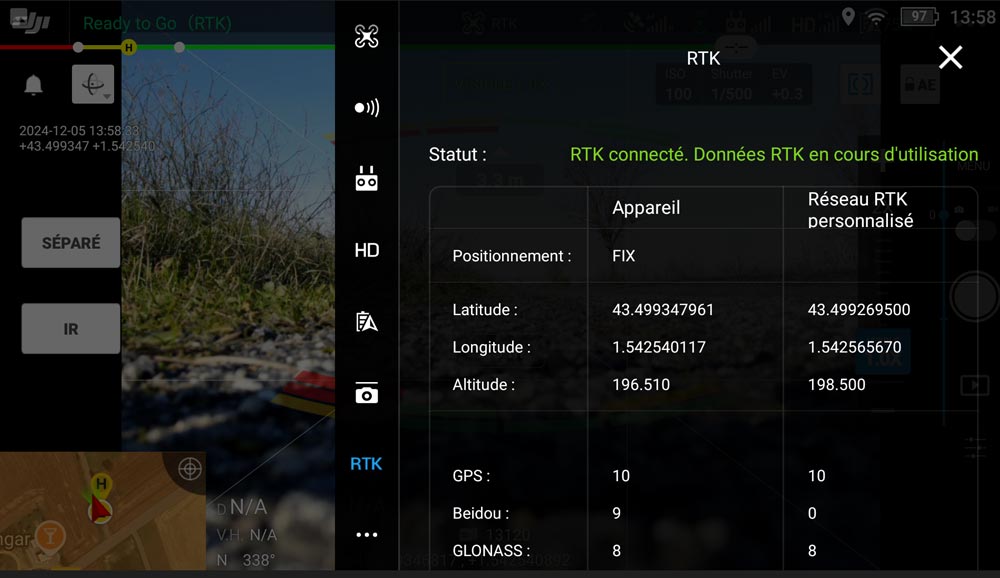
- Deviation shows centimeter level
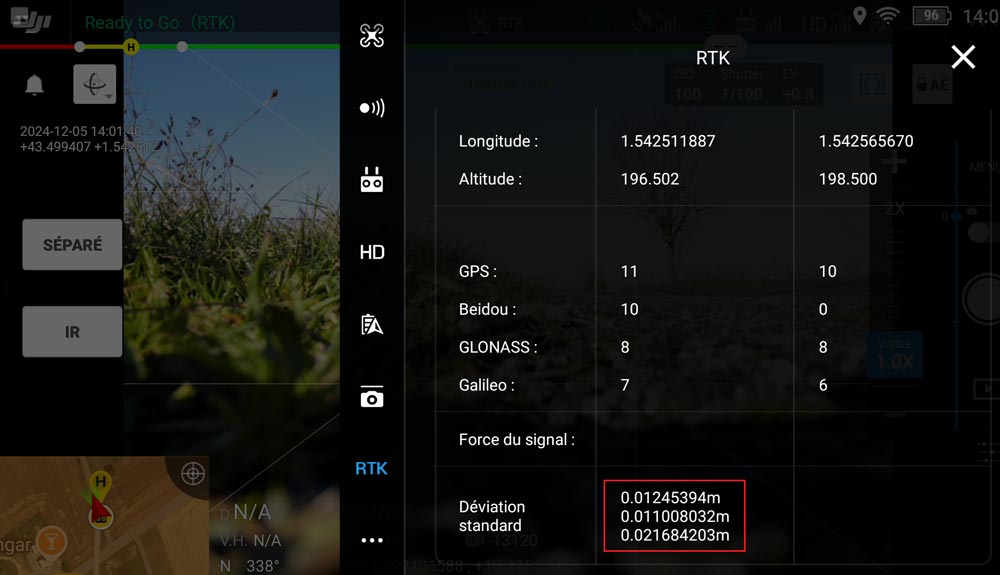
- Position is shown on Remote Controller, and RTK status is displayed.
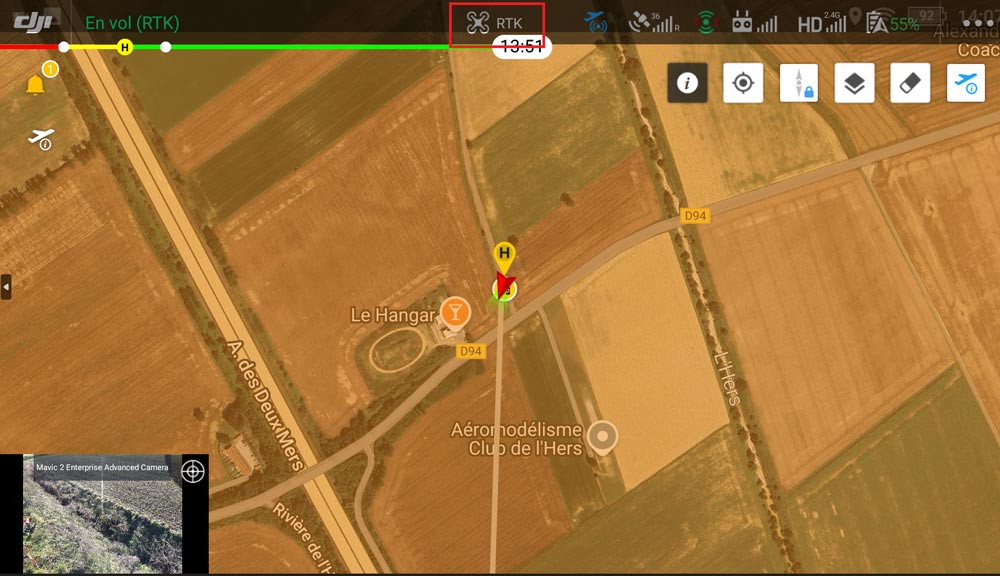
Now you can enjoy centemeter-level accuracy for your DJI drone using cost-effective RTK technology.
Related products
If you want to follow this tutorial we have all the products in stock and ready to be shipped worldwide within 1-3 days.


RTK Assistant
Find the best products for your application in just a few questions.
