 and
and 

How to generate RINEX files with simpleRTK2B (ZED-F9P) for PPK

Post processed kinematic (PPK) is a GPS correction technology used in surveying that corrects the location data after it is collected and uploaded.
The RINEX (Receiver Independent Exchange) format is a data exchange format for raw data from satellite positioning stations that allows the user to post-process the data received to produce a more accurate result.
In this tutorial we will show you how to log raw data from your base and rover receivers without real time link between them, so you can use this data for PPK analysis.
If you have only one receiver, you can log data from your rover receiver, and download the RINEX file from an online base station in your region for PPK.
You can find the free correction service in your area here.
If you have a simpleRTK3B Pro receiver, check the tutorial How to generate RINEX files with simplertk3B.
Required hardware:
- simpleRTK2B – Basic Starter Kit
- USB to micro-USB cable
- a PC or laptop
Required software:
- u-center (download version for F9, not u-center 2)
- RTKLIB GUI apps (version used in this tutorial: 2.4.3 b34)
How to generate RINEX files with simpleRTK2B for PPK?
Firstly, configure your receiver.
- Set up your receivers with one configured as the base and the other as the rover. You will find configuration files here.
If you don’t know how to do this, check our video tutorial u-center made simple – Configure your GPS receiver. - Connect your rover receiver to your PC via the USB port labeled as POWER+GPS.
- Open u-center. Connect your receiver to u-center via COM port.
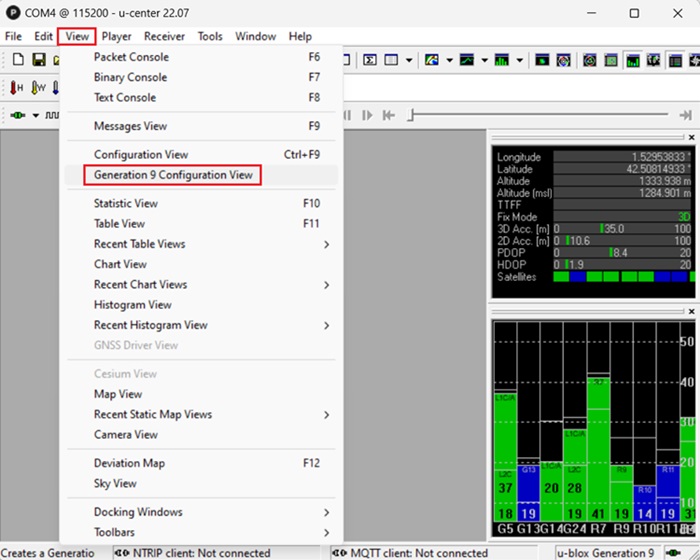
- In the menu bar go to View–>Generation 9 Configuration View.
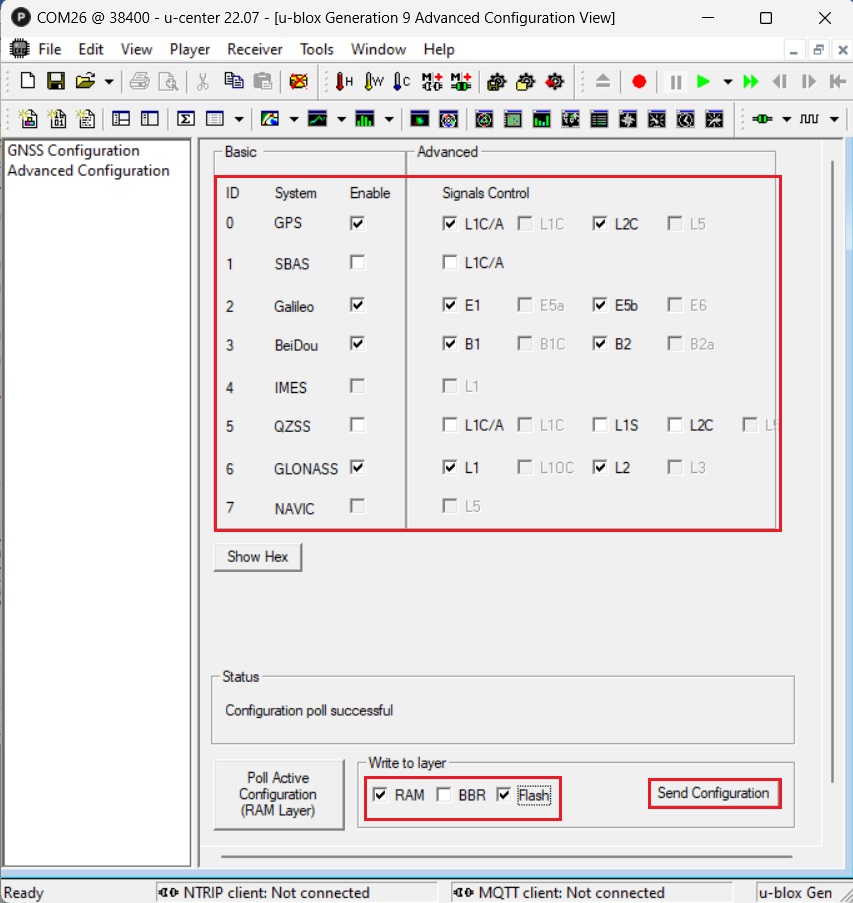
- Enable the desired constellations and signals, usually GPS, Galileo, GLONASS and BeiDou depending on your location. Under Write to layer check RAM and Flash. Press Send Configuration.
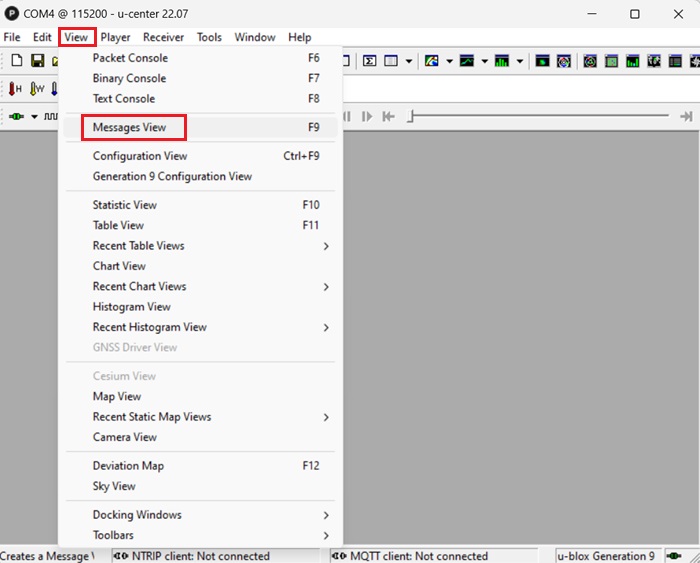
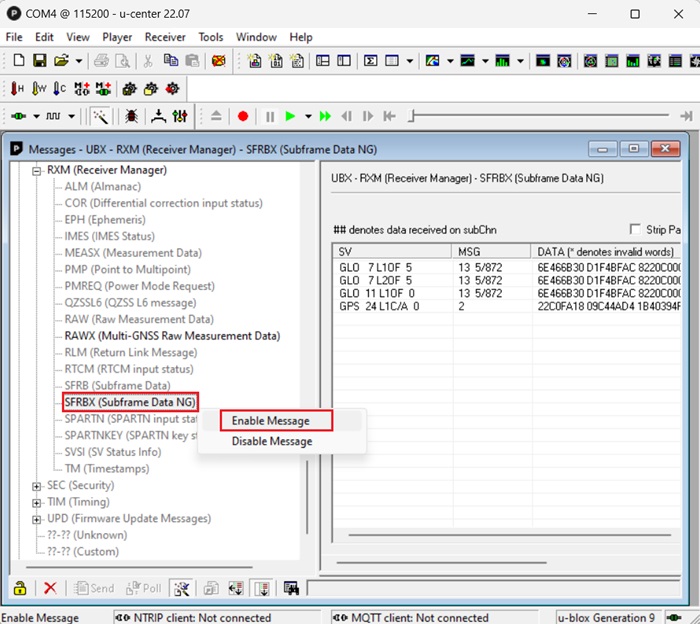
- Go to View–>Messages View.
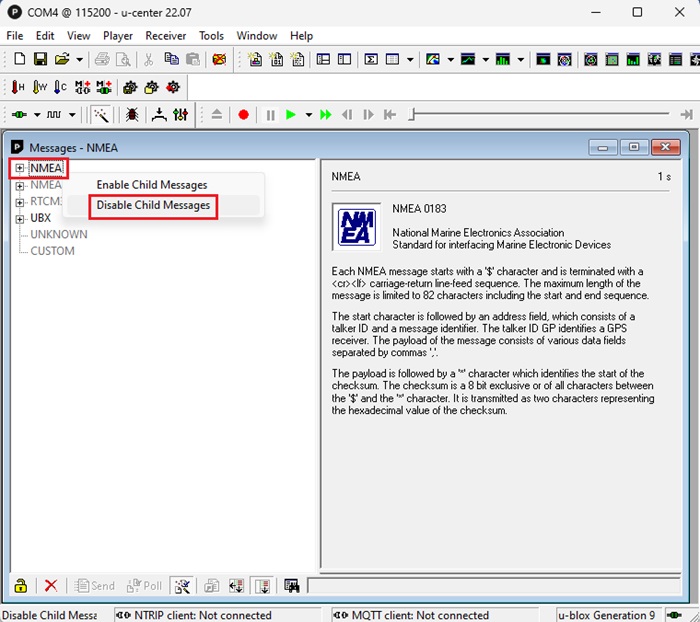
- Right click NMEA, choose Disable Child Messages.
- Go to UBX–>RXM–>RAWX. Right click and choose Enable Message to enable raw observation messages.

- Right click SFRBX, and choose Enable Messages to enable navigation messages.
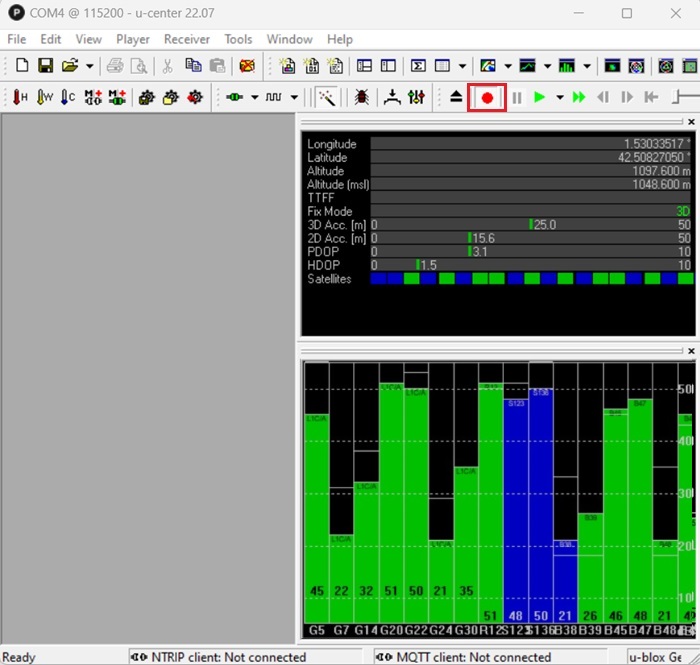
- Connect the antenna to you receiver and place it in a position with a good view of the sky.
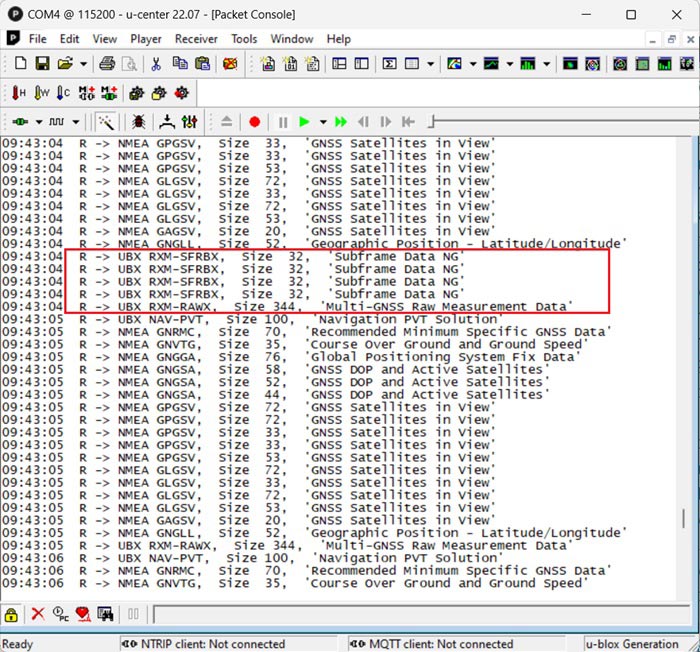
- Go to View–>Packet Console. Verify that you see RAWX and SFRBX
- Go to Receiver–>Action–>Save Config to save your configuration.
- Repeat the steps 1-11 for your Base receiver.
- Log data from both of your receivers by pressing the red dot on tool bar.
Secondly, convert your log file into RINEX format.
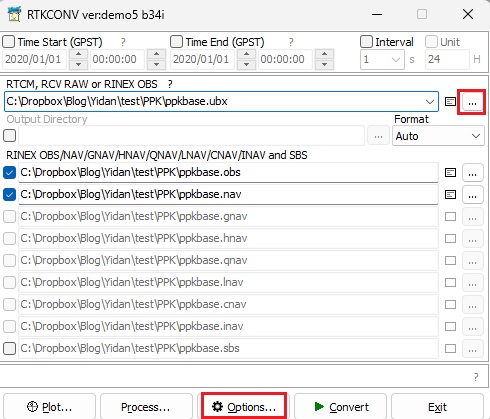
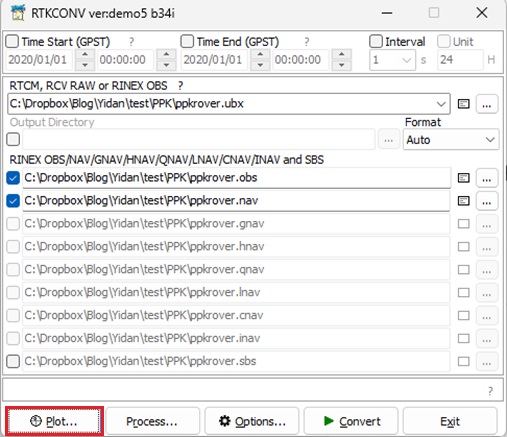
- Open RTKCONV app in your downloaded RTKLIB package. Click the … button on the right of the RTCM, RCV RAW or RINEX OBS field and select log file you save in step 13.
- It will generate Output Directory automatically for observation (.obs) and navigation (.nav) files. If you want to modify the output folder or file name, click the … button under Output Directory.
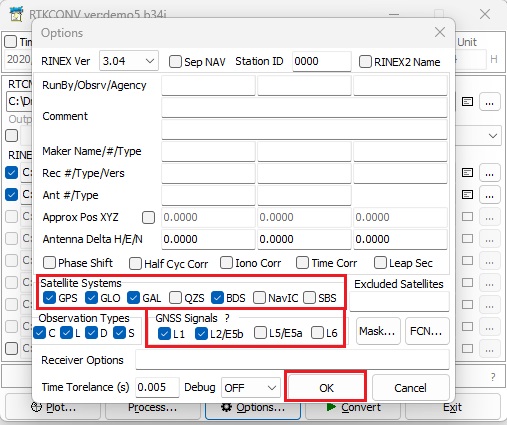
- Click Options….
- At Satellite Systems choose the GNSS constellations collected in step 4 (usually GPS, GLO, GAL and BDS). At GNSS Signals select L1 and L2/E5b. Press OK.
- Press Convert to convert from binary to RINEX format. Repeat the steps 14-16 for log files of both Rover and Base.
Finally, review the observation data.
Before processing the solution, it is a good idea to look at the data first and make sure it is complete, of reasonable quality, and at the right sample rate.
- From the RTKCONV main window, click Plot to plot the observations you just converted.
- Verify that there are observations from all constellations. Green indicates dual frequency measurements, yellow is single frequency. The GPS observations will be a mix of single and dual frequency since only about half of the satellites currently support L2C used by the F9P. Depending on your location you may have only single frequency from BeiDou. Other constellations should be nearlly all dual frequency.
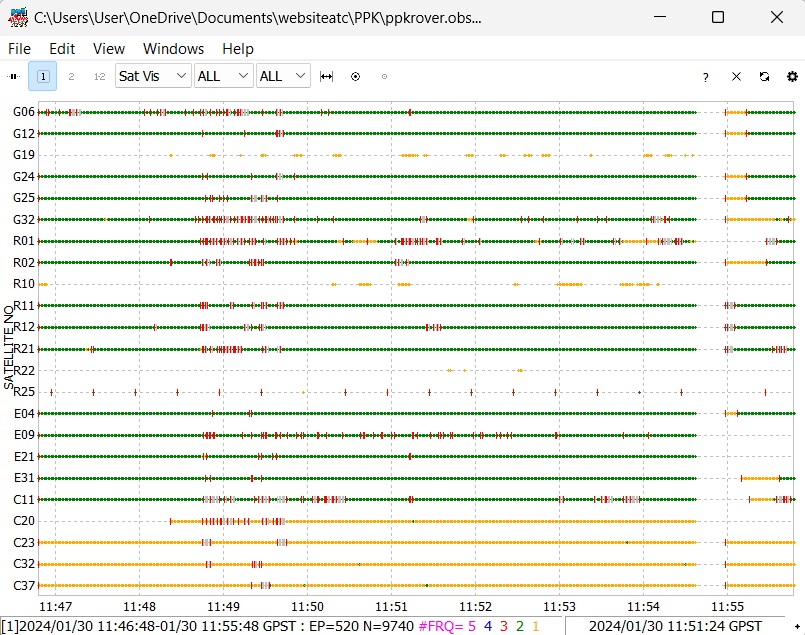
- Red ticks indicate cycle slips. Too many of these will make it difficult to get a decent solution.
Gaps in the data usually indicate the receiver lost lock and these are not good unless they are in the low elevation satellites. - If all the satellites are in gray, this usually indicates you are missing the navigation data. The previous step should have generated a “.nav” file as well as a “.obs” file. If just a few satellites are in gray, this normally indicates that they are below the elevation threshold.
If many satellites are in gray, that means you have low quality data and it is better to record the logs in a location with better view of the sky. - Check both rover and base observations.
Now you have the observation and navigation RINEX files from your Base and Rover ready for PPK!
Check ArduSimple tutorial How to do Post-Processing Kinematic (PPK) with free software RTKLIB.


