and
and 
How to connect simpleRTK2B RTK receiver to STM32 Nucleo
In this tutorial you will see how to connect the simpleRTK2B series receiver with a STM32 Nucleo L152RE board for a debug session.
If your project needs multiband RTK technology, we want to make things easy for you. We have uploaded in our Github site an example code to parse the UBX messages from the u-blox ZED-F9P, so you don’t need to spend nonproductive time writing code that is not related with your project.
Required hardware:
- simpleRTK2B series receiver with headers (we used simpleRTK2B Budget receiver)
- simpleANT2B antenna
- STM32 Nucleo board (we used STM32 Nucleo L152RE)
- 2 x microUSB to USB-A cable
- Arduino Headers and soldering iron (optional, in case your RTK receiver has no headers soldered)
Required software:
How to debug with simpleRTK2B series receiver and STM32 Nucleo?
Watch this video or just follow the steps below to see how to connect the simpleRTK2B with a STM32 Nucleo L152RE board for a debug session.
First, connect the hardware.
- Before connecting your receiver and STM32, make sure that your receiver has headers soldered. If not, you can do it by yourself with the help of soldering iron.
- Connect simpleRTK2B receiver in to the STM32 Nucleo board. The headers are not symmetric so you cannot do it wrong. Just be careful do not bend the pins.
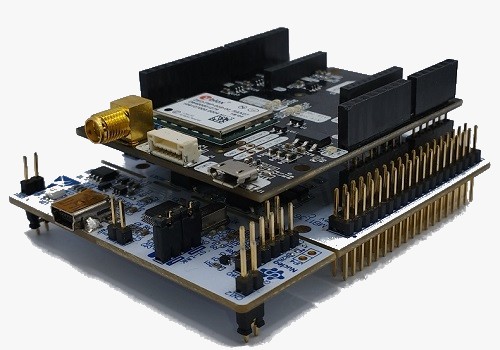
Plug the GNSS antenna to your ArduSimple receiver, place your antenna in a location with good view of the sky, or near a window for testing the functionality.
- Connect STM32 Nucleo board to your computer using microUSB to USB-A cable.
- Connect your receiver to your computer using microUSB to USB-A cable.
Note: Your receiver may have 2 microUSB connectors, so that you need to use connector marked as “POWER+GPS”.
Secondly, get the example code.
-
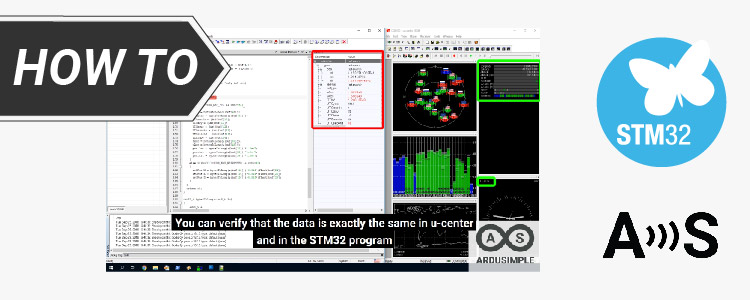
In this tutorial we show that the data read by STM32 code is the same as the one read by u-center. For this we will show side to side both data.
- Downlodad the example code from the ArduSimple Github site. Click Code and copy the repository url, and clone the repository onto your PC.
- Open u-center software and connect to your receiver by pressing Receiver —>Port —>COM3 or just press Ctrl+3 to connect to simpleRTK2B series receiver via COM3.
- Open IAR EWARM project.
Download and debug the project to the STM32 Nucleo board.
And that’s all! We are now debugging.
By the default, the program hits a breakpoint in the main function. Press the button or F5 to continue the execution.
Thirdly, debug.
- Now we want to make sure that the code reads the same values as u-center. We will open the gnss.c file and place a breakpoint in the message parcer. Since the program was running, it hits the breakpoint and stops.
- Add a watch window by pressing View — >Watch —> Watch1 and type in “expression” field “sensors”.
- You will see the values of the variable “sensor”. It contains a structure with GNSS information.
- In this example only a few messages are parsed. It shows a comprehensive way to help you add other messages.
By pressing F5, the code will run until hitting the breakpoint again. In this example, messages are sent at 1Hz.
You can verify that the data is exactly the same in u-center and in the STM32 program.
- You can see the veriables values by placing the mouse over the variable. By pressing F10 you can advance step by step in the program execution.
- And that’s how easy it is to get RTK GNSS variables to use on your own application.
Enable RTK!
We have prepared all the products you need to turn on RTK in your STM32 related project. You can enable RTK by ordering products from ArduSimple.