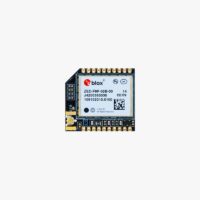
User Guide: simpleRTK2B Micro
Variants:
This product comes in 3 different flavors to try to meet all your needs:
- Through Hole with uFL connector
- Through Hole with extra long SMA for direct panel mount
- SMD with uFL connector. The cheapest option for the most cost-sensitive.
Product briefing:
This product uses a very popular footprint: 2 rows of 10 pins each with a pitch of 2mm between pins. You can integrate this product into your PCB in 3 ways:
- Installing receptacles on your PCB so you can connect and disconnect the board at your wish. This option is more flexible but is not very rugged for vibrating environments. Another recommendation that we can give you is to not use cheap receptacles. Cheap receptacles (especially popular from unknown chinese suppliers) use very contaminated metals for the contacts, which leads to sporadic failures in the field and early death of the socket. We can recommend the top quality Samtec MMS-110-01-L-SV.
- Soldering directly to your PCB with through hole option. This is the easiest and also the most robust way to use this product to avoid reliability issues in the field. And because of the through hole footprint, if another component in your PCB design fails, with a bit of skills you can still recover this expensive component. Or if you decide to make a new PCB design you can always remove from old PCB this component and mount it in the new one.
- Soldering directly to your PCB with SMD option. This is the cheapest option. It is more complex than option 2 (through hole), but this is also the most robust way to use this product to avoid reliability issues in the field.
Either way you will need the footprint dimensions. As there are tons of different softwares for PCB design, we decided to use a 3rd party service to generate a footprint compatible with all possible softwares. You will have to register but then you will have access to thousands of footprints.
PCB Footprint:
As there are so many softwares, we used an external company to develop footprint libraries for all possible software. You can download them from this link. If you face any problem just contact us.
Integration considerations
The one peculiarity of a GPS system is that the RF signals it works with, are extremely weak (down to -170dBm!). For this reason, GPS systems are especially delicate and not immune against noise.
Between the GPS receiver and the GPS antenna, the GPS antenna is by far the one with the most critical installation. We want to give you some tips to make sure you integrated your ArduSimple receiver and it works at the first attempt:
- GPS receiver. This part of the system doesn’t like airflow, vibration and sudden temperature changes. Just try to avoid that: pick the location in your vehicle with the lowest vibration, try to use it inside a box and far away from any fan, and don’t place the board next to an electric engine that can go from cold to very warm in a matter of seconds.
- GPS antenna. The onboard connector provides 3.0V up to 100mA for active antennas. For optimal antenna selection and installation we recommend you to follow our GPS/GNSS Antenna Installation Guide.
Configuration and Software Integration
With this product you have direct access to ZED-F9P functionalities, it will help you to read the extensive u-blox documentation. Nevertheless you can use our configuration files as a starting point for your project. And if you need help at any point just contact us, we always answer.
-
Bulk
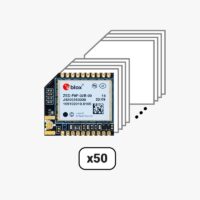
simpleRTK2B Micro (Bulk Pack 50 units)
From 152,00€ Select options This product has multiple variants. The options may be chosen on the product page -
Sale!
 Made in EuropeRTK2B Boards
simpleRTK2B Micro
From 189,00€ Select options This product has multiple variants. The options may be chosen on the product page
 and
and 


