 and
and 

Unboxing the kit:
The kit comes already pre-configured and pre-assembled, you just need to connect the two 4G antennas as shown in the picture. You can use the self-adhesive if you are going to use the kit inside a box. It is recommended to place both antennas as far away as possible, to improve the signal reception.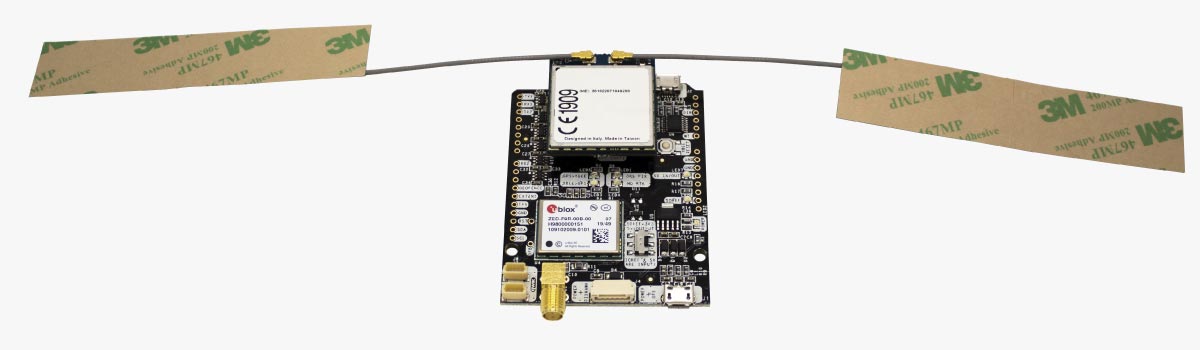 Connect the GPS/GNSS antenna to the SMA connector and place it in a location with good view of the sky.
 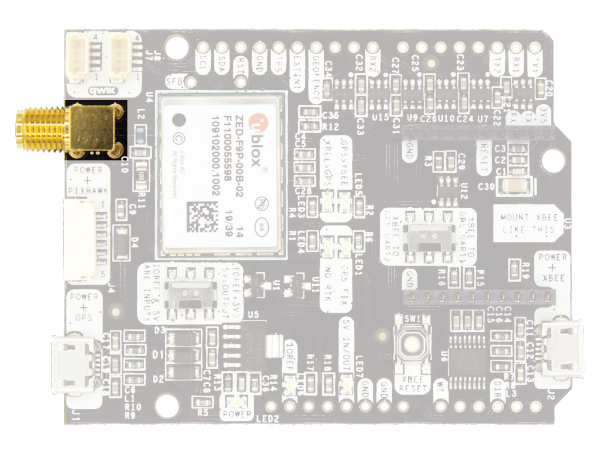 Now connect a micro-USB cable to GPS+XBEE connector. Make sure you use a good USB cable as the board requires good power. Also don’t connect it to a USB hub, they usually can’t deliver much power.
If you only have one COM port in your PC, u-center will connect automatically to your kit and you will start seeing data on the screen right away. If it doesn’t, go to the menu bar to Receiver->Connection and select the right COM port. If you selected the right COM port, you should immediately start seeing data displayed on your screen.
Let’s now do a couple of checks together.
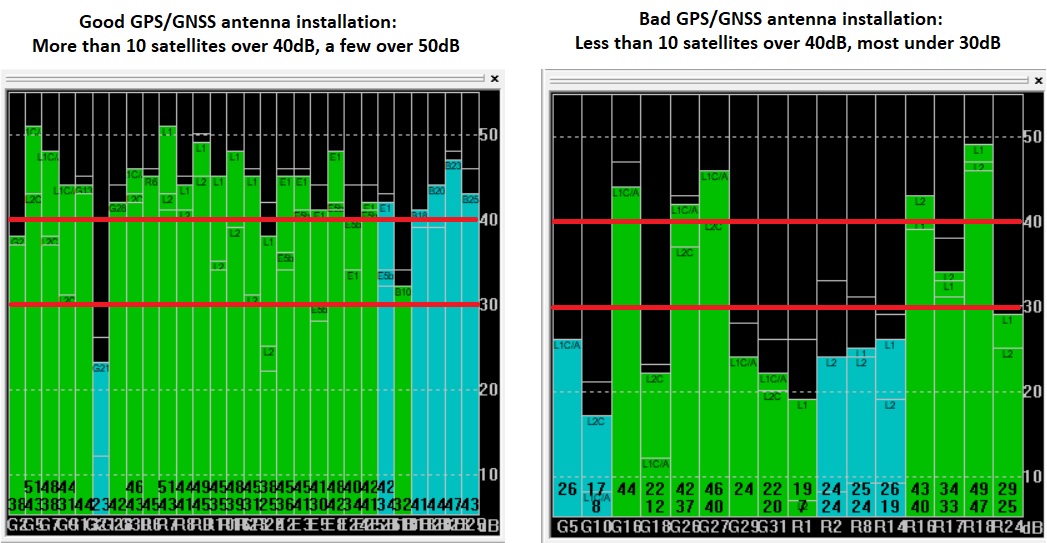
In order to achieve RTK, we need good GNSS signals:
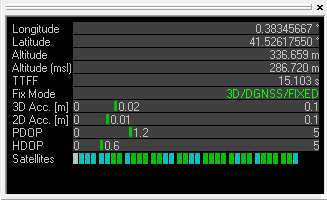
If you don’t find this diagram or you closed it by accident, you can reopen it going at the menu bar to View->Docking Windows->Satellite Level. Once you are confident that the signal levels are good enough, just wait to see RTK FIX and enjoy 🙂 If you don’t know how to install the GPS/GNSS antenna better, have a look at our simpleANT2B GNSS antenna installation guide. A second interesting window is the Data window, that you should find at the top right, otherwise at the menu bar go to View-> Docking Windows-> Data. It will show you information like GPS FIX and accuracy estimate.
Let’s now do a couple of checks together.
In order to achieve RTK, we need good GNSS signals:
If you don’t find this diagram or you closed it by accident, you can reopen it going at the menu bar to View->Docking Windows->Satellite Level. Once you are confident that the signal levels are good enough, just wait to see RTK FIX and enjoy 🙂 If you don’t know how to install the GPS/GNSS antenna better, have a look at our simpleANT2B GNSS antenna installation guide. A second interesting window is the Data window, that you should find at the top right, otherwise at the menu bar go to View-> Docking Windows-> Data. It will show you information like GPS FIX and accuracy estimate.
- RTK-SSR products
simpleSSR – Starter Kit incl. 1 year unlimited RTK corrections
799,00€ Select options This product has multiple variants. The options may be chosen on the product page


