and
and 

Introduction:
The ZED-F9R module combines different sensor data to provide high accurate positioning where GNSS alone would fail:
- GNSS measurements
- IMU data (accelerometer+gyroscope)
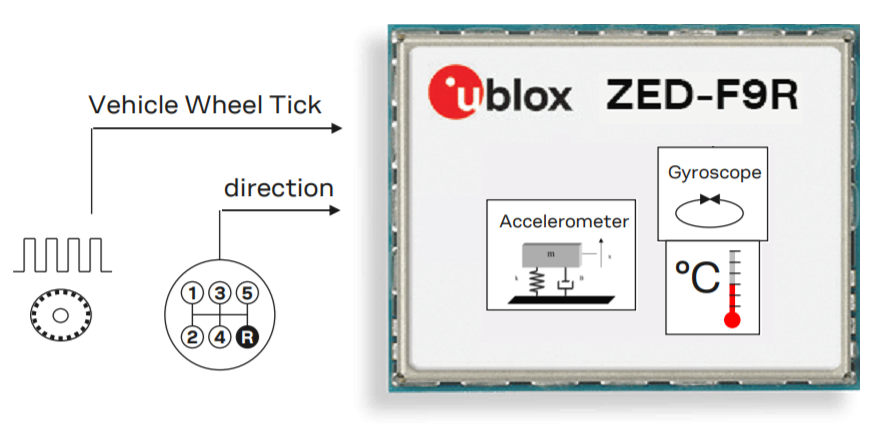
- (Optional) vehicle wheel sensor or speed information by software
- A dedicated dynamic model
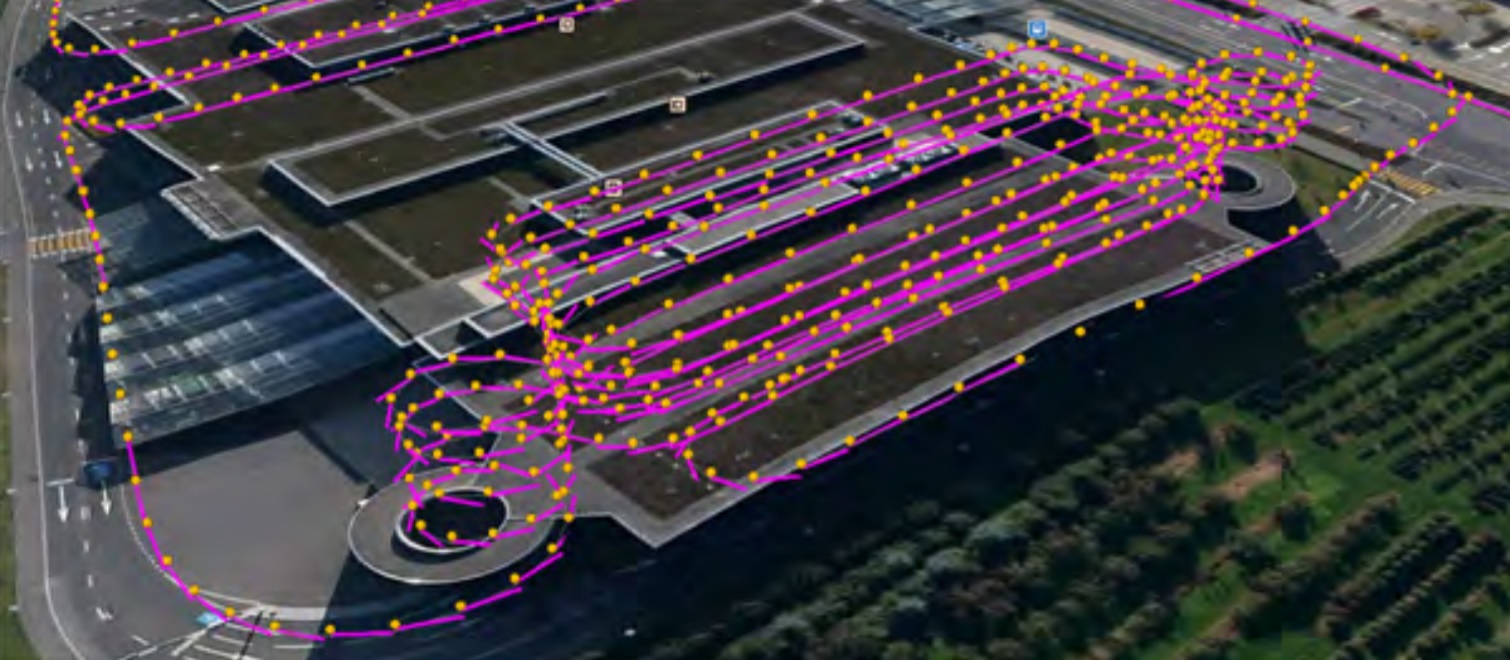
But the amazing thing of F9R is that is able to keep centimeter precision where ZED-F9P cannot: driving under trees, next to high building, or even in tunnels!
Let’s see how we can try this with simpleRTK2B Fusion.
Fix types and use modes:
In addition to the traditional 2D, 3D, FLOAT RTK, FIX RTK, the ZED-F9R has 2 additional fix types:
- DR+GNSS or “fusion mode”. The mode we want to be in: both GNSS and IMU are used together.
- DR or “Dead Reckoning mode”. The module has lost GNSS signals and is relying solely on the IMU. Every extra second in this fix type the position will just get worse and worse.
ZED-F9R has many new configuration parameters that can make it overwhelming to set up. For this reason, in this hookup guide we are going to explain 2 different installation types and 2 different usage modes:
- Basic mode: you will not reach datasheet values, but with minimum effort you will get to see already incredible performance. You only need this hookup guide.

- Advanced mode: get to see the datasheet values in your tests. You will have to read a few pages of the u-blox Integration Manual. We will use the “wheel tick” and “direction” pins of the module.
Installation:
simpleRTK2B Fusion must be fixed to the vehicle, it can’t be used hanging from the cable. This is because we need the IMU data to be consistent.
There are options to mount ZED-F9R in different orientation but this requires some extra calibration. For this reason we recommend to just mount the ZED-F9R in the default direction.
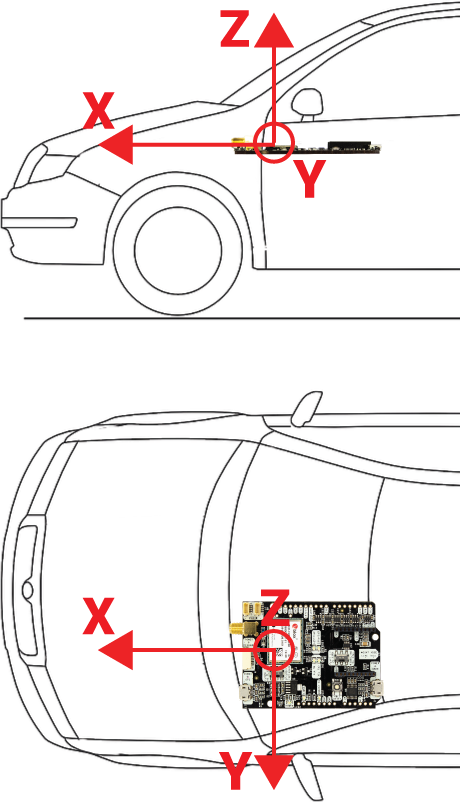
If you want to mount ZED-F9R in a different orientation it’s also possible, but it’s more complex. You can have a look at the sections IMU-mount alignment and Automatic IMU-mount alignment in the Integration Manual.
To get the most out of F9R, the easiest is to place the RTK board and the GNSS antenna as close as possible from each other.
Basic use mode:
The basic use of F9R is only making fusion of GNSS data and IMU data, but is not using speed information from the vehicle. This mode doesn’t require to use the WT or DIR pins, also doesn’t require to send speed to the F9R. Performance will be slightly worse than F9R datasheet, but good enough for many use cases.
Make sure both GNSS antenna and simpleRTK2B are fixed to the car and power up the receiver.
Select the correct “Dynamic Model” under CFG-NAVSPG-DYNMODEL:
- Automotive
- Robotic Lawn Mower
- E-Scooter
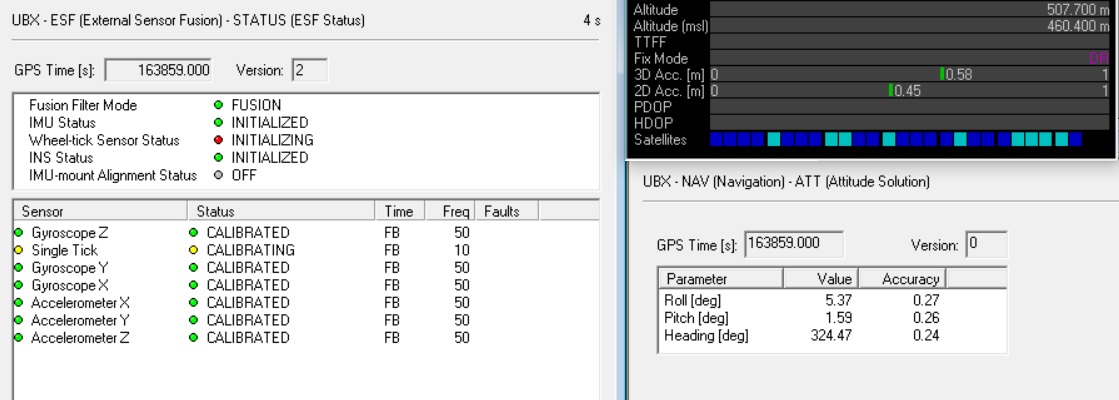
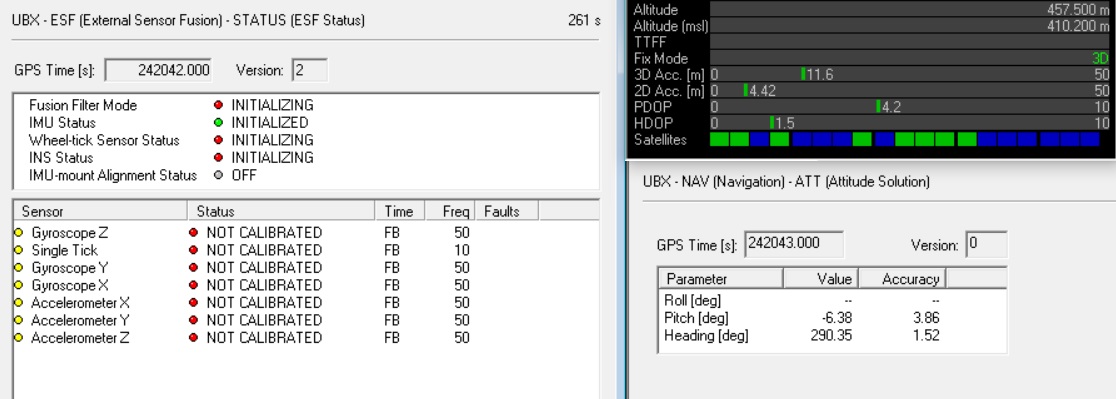
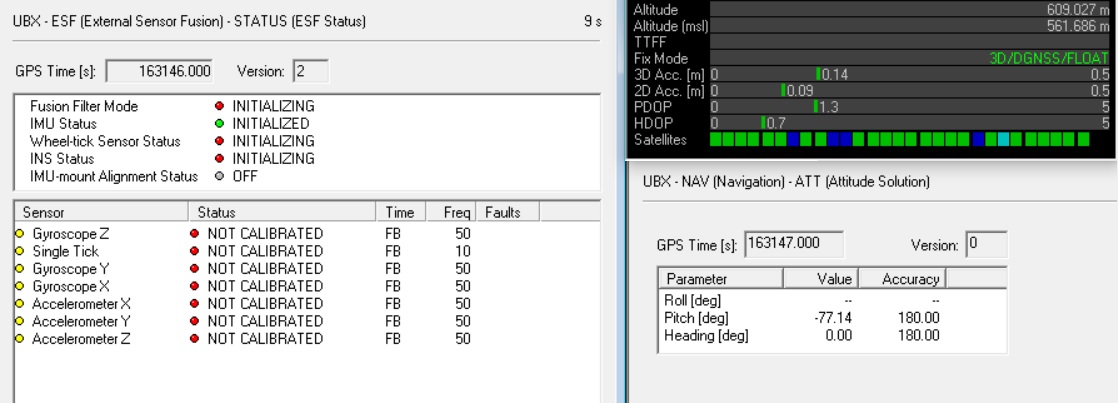
Enable the following messages which will provide useful information about:
- UBX-ESF-STATUS: IMU calibration status, we want everything to be in green.
- UBX-NAV-ATT: the attitude of the vehicle: roll, pitch, yaw.
- UBX-NAV-PVT: fix type and position.
At the beginning it will behave like a normal ZED-F9P with a 3D fix:
If you input RTK corrections, you will get also an RTK FLOAT fix and finally RTK FIXED mode.
After a few minutes of driving the sensors will get calibrated and you will finally see the new fusion mode (3D+DR)!
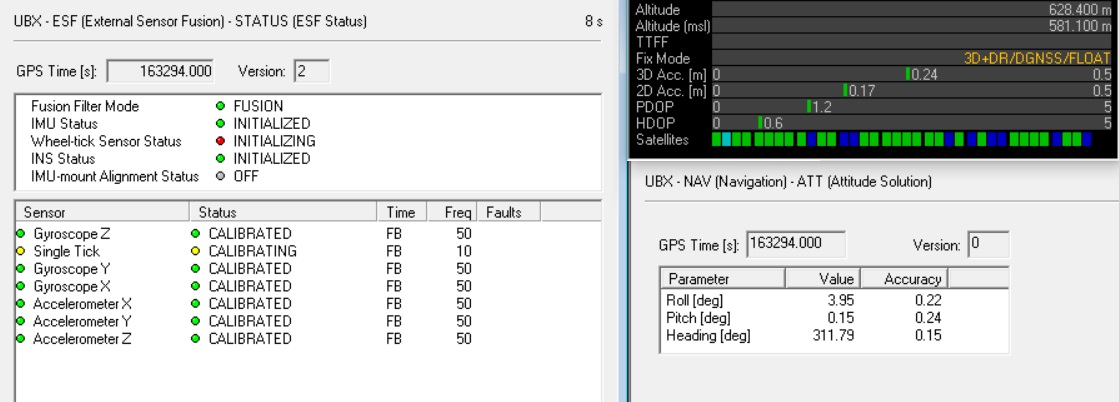
Once we are in fusion mode, this also enables us a new use case: we can enter short tunnels and garages and keep accurate position. Try it, and check how F9R goes into “DR” fix type. Note that accuracy in “DR” mode will get worse and worse every second.