 and
and 

How to survey the boundaries of your land to verify cadastral maps


Use this practical, step-by-step tutorial to compare your real-world RTK GNSS field measurements with official cadastral boundary data — using free, open-source tools like QGIS and QField.
You don’t need to be a professional surveyor to follow along. This guide is built for farmers, landowners, gardeners, homesteaders, and also GIS technicians and surveyors who want to verify property boundaries, resolve disputes, or simply understand their land with centimeter-level accuracy.
Whether you’re working on a legal land verification or simply planning a fence or garden, this tutorial will walk you through everything — from downloading cadastral data to collecting precise field measurements, and comparing them side by side on a digital map.
Required hardware:
- RTK Calibrated Surveyor kit
- an Android smartphone or tablet with internet access
- a laptop
Required software:
- QGIS
- 7-ZIP (or any other app to create ZIP files)
- GNSS Master
- QField
How to compare terrain measurements of the field and cadastral data?
Get cadastral data
- To get cadastral coordinates of your field, contact the government agency which manages cadastral data in your country (e.g., land registry, cadastral or mapping office). Many of them has opened online cadastral map, where you can search by your parcel number or address to find your field in the cadastral register. You can download this data in different formats.
Shapefile format is widely used and should be available on your geoportal. It stores geometric shapes (like points, lines, and polygons) for land parcel boundaries. It is not a single file — a Shapefile consists of at least three files:
.SHP — geometry (shapes)
.SHX — shape index
.DBF — attribute table (like a spreadsheet)
We are interested in .SHP files. In the video below we demonstrated how to download cadastral coordinates of your parcel in Baden-Württemberg, Germany.
We will use flurstueck.shp (contains information about parcel of the land) and grenzpunkt.shp (contains information about boundary point) files.
Create a project in QGIS and import cadastral data
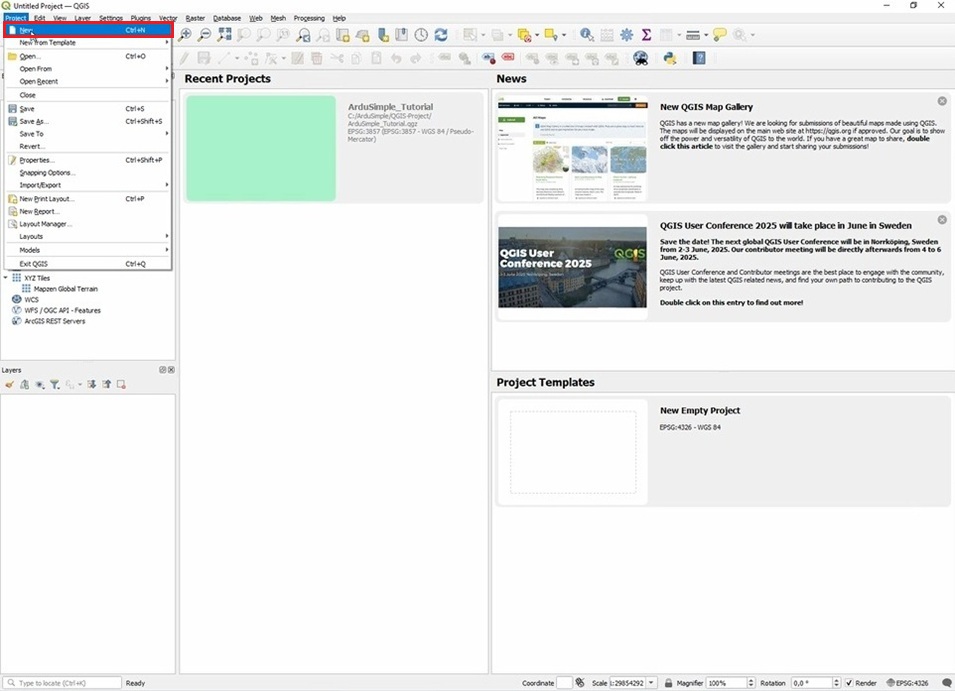
- Open QGIS on your PC. To create a new project in QGIS, go to the menu Project and select New.
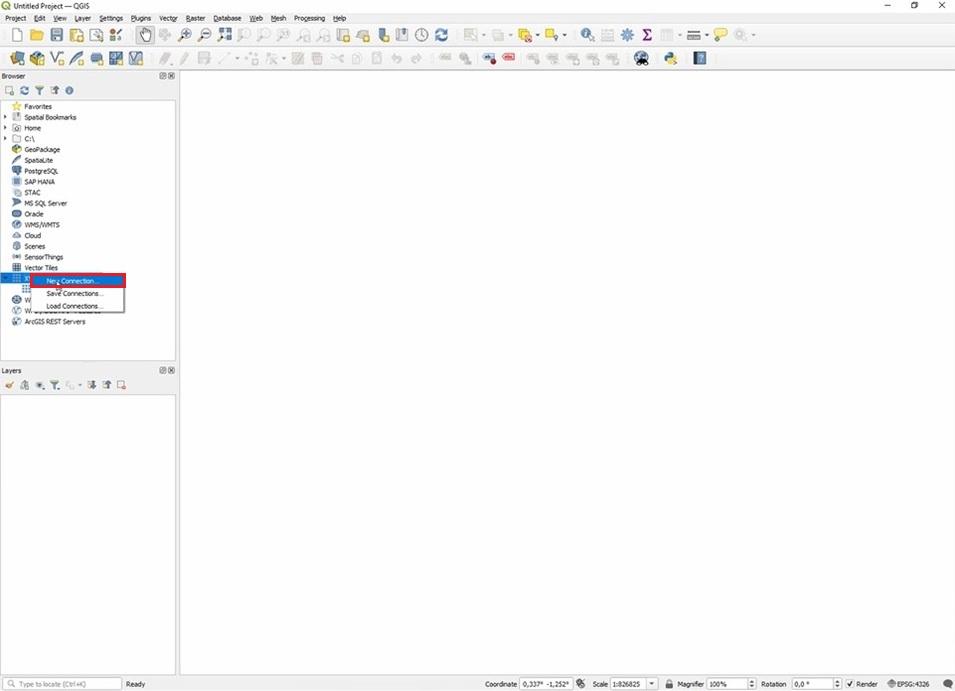
- If this is the first time you are using QGIS, you need to create some more XYZ Tiles layers to be able to use maps from Google and OpenStreetMap. To do this, in the Browser pane on the left side of the window, right-click on XYZ Tiles and select New Connection.
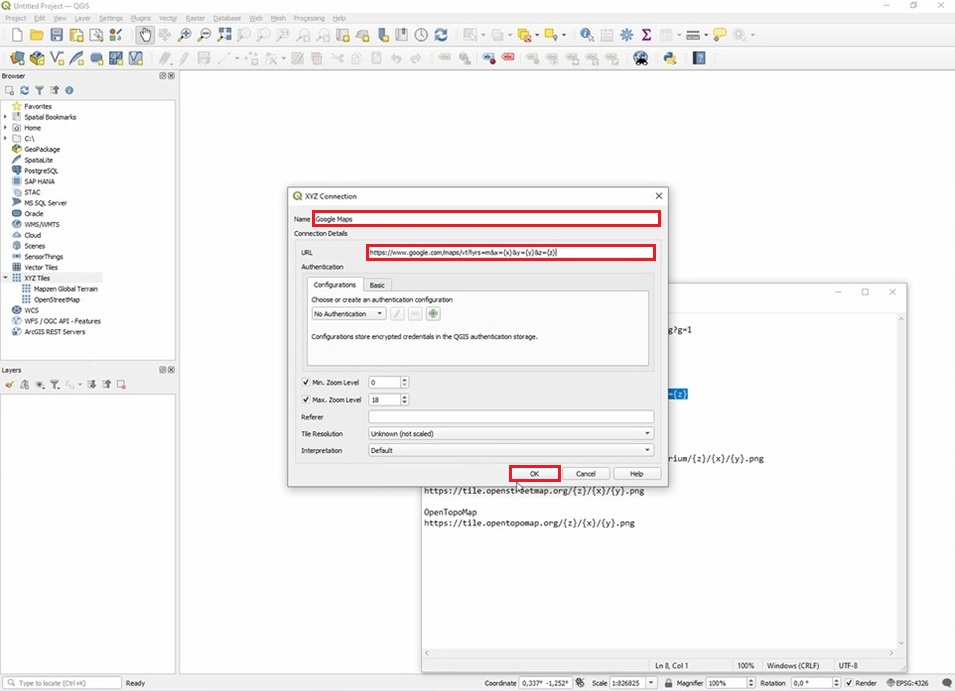
- Fill in the Name and the URL and save the settings by clicking on OK. The required settings for the different map providers are:
- Bing Aerial: http://ecn.t3.tiles.virtualearth.net/tiles/a{q}.jpeg?g=1
- Google Hybrid: https://mt1.google.com/vt/lyrs=y&x={x}&y={y}&z={z}
- Google Maps: https://www.google.com/maps/vt?lyrs=m&x={x}&y={y}&z={z}
- Google Satellite: https://mt1.google.com/vt/lyrs=s&x={x}&y={y}&z={z}
- OpenStreetMap: https://tile.openstreetmap.org/{z}/{x}/{y}.png
- OpenTopoMap: https://tile.opentopomap.org/{z}/{x}/{y}.png

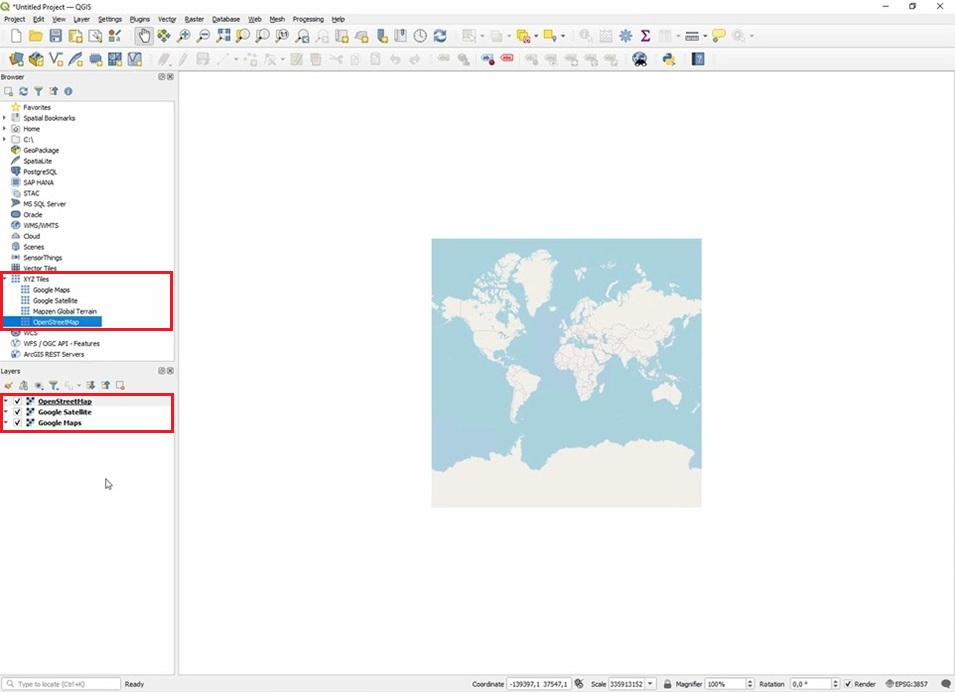
- Once XYZ Tiles are created, add the maps to the project by dragging a tile to the Layers pane on the bottom left side of the QGIS window. The order of the layers can be re-arranged by drag & drop.
Each layer can be made visible/invisible by toggling its checkbox.
- To add the previously downloaded shapefiles of cadastral data, which were downloaded at step #1, drag and drop both shape files „flurstueck.shp“ and the „grenzpunkt.shp“ into the Layers pane, similar how it was done before with the XYZ Tiles.
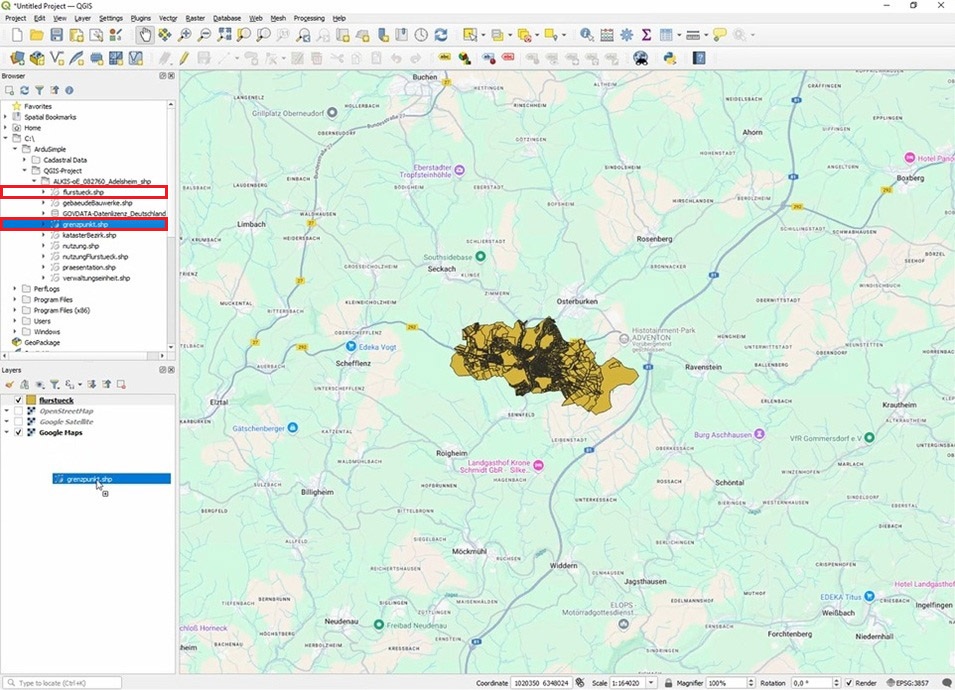
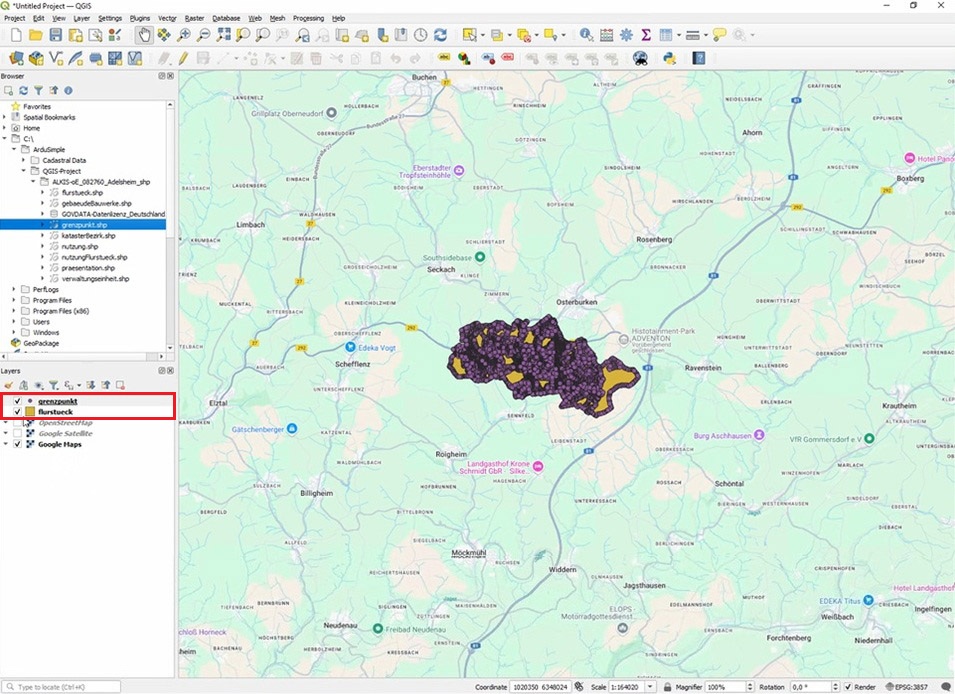
- Using Google maps view, find your filed on the map and enable cadastral layers be visible.
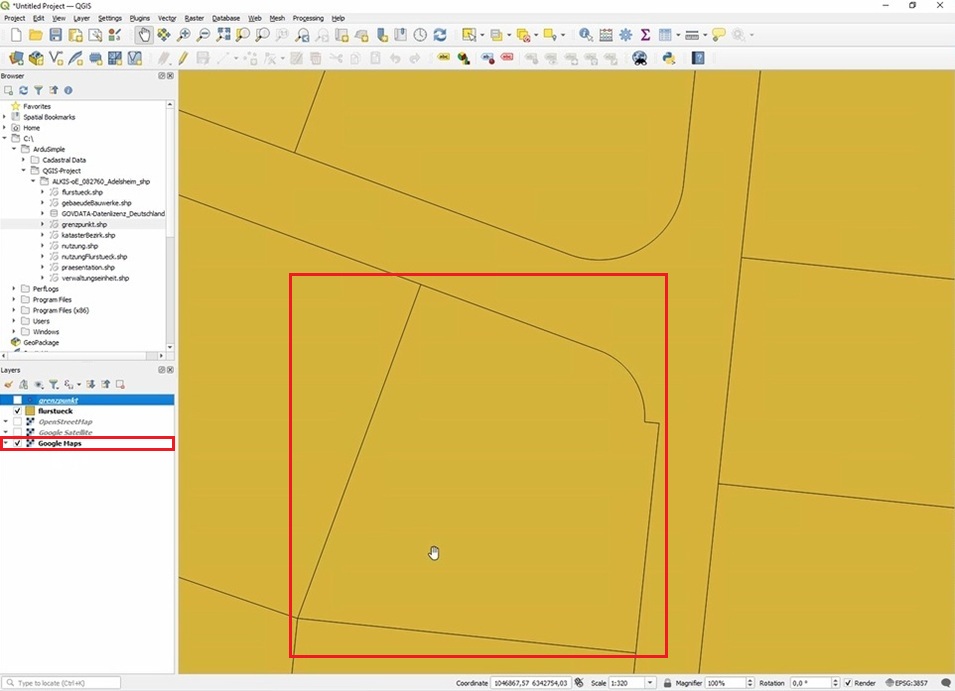
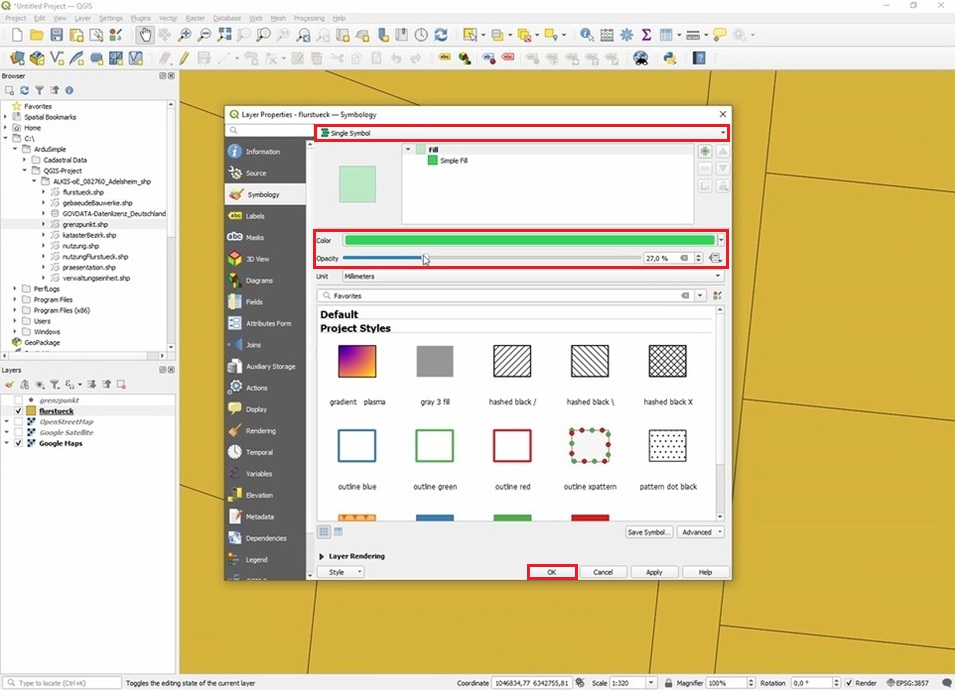
- By default, the „flurstueck“ layer does not have any transparency which makes navigation hard, as underlying map layers cannot be seen. To make these layers visible, make a right click on the layer name and select Properties.
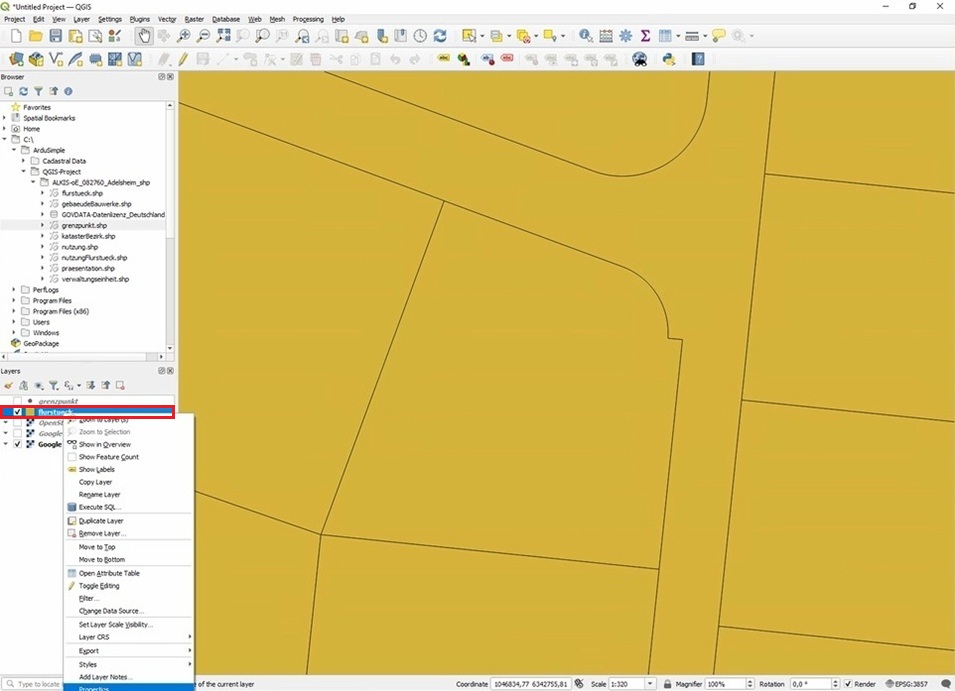
- In the Layer Properties window, select Symbology on the left menu and adjust the Color and Opacity to your needs. We suggest to set the opacity to a value around 30%.
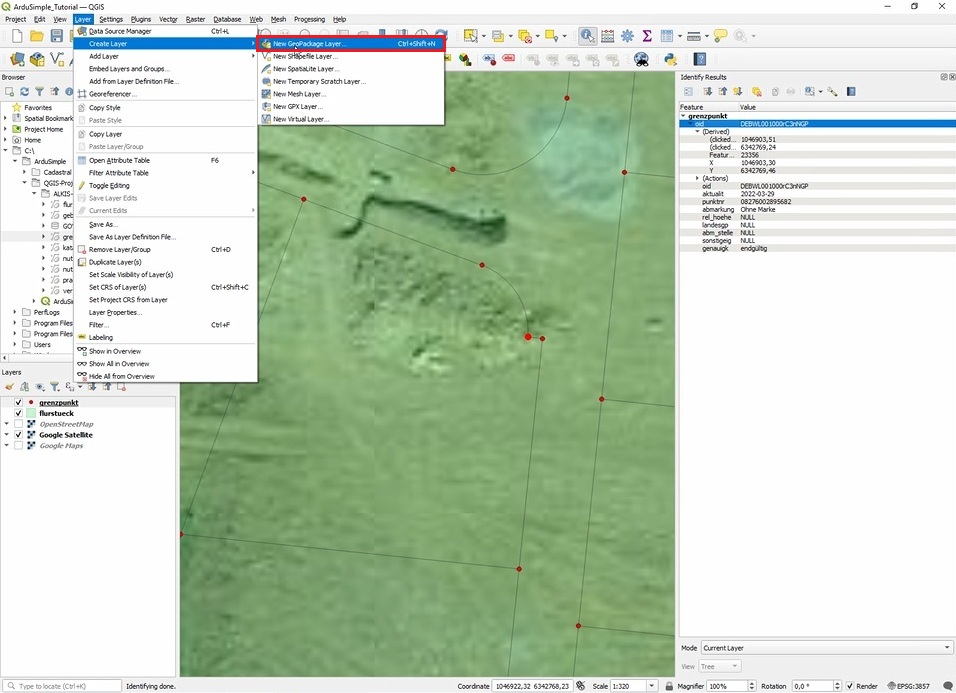
- To be able to store the GNSS measurements later in the field, create a new layer in the project that will hold the measured points. Go to the menu Layer, select Create Layer and New GeoPackage Layer.
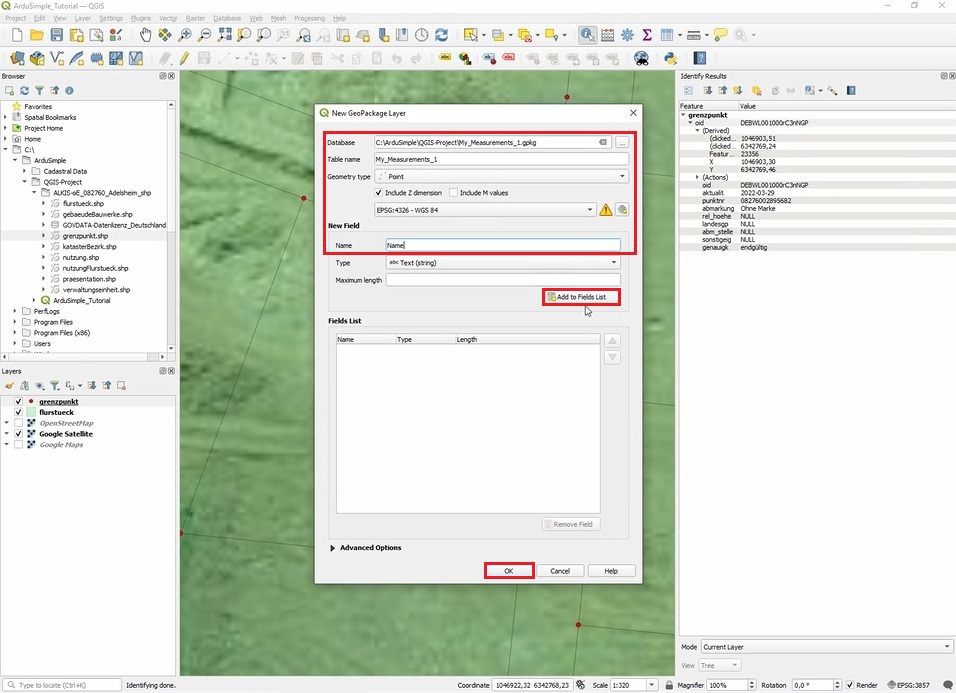
- Set the Database filename and location (store it within your QGIS project folder) and set a Table name. Set the Geometry type to Point. Check Include Z dimension to store altitude and (this step is important because otherwise QGIS will not be able to store altitude information of your measurements). If you want you can add a New Field which will be shown and can be edited when you create a measurement. Click OK to close the window. The new layer will appear in the Layers pane.
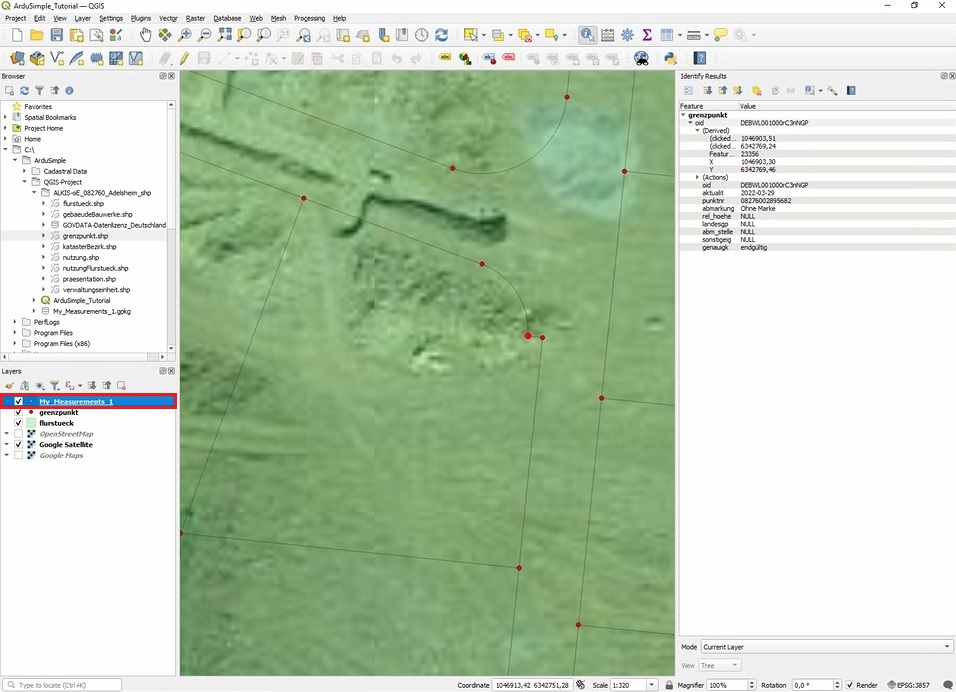
- The new layer for the future measurements will appear.
Export the project from QGIS
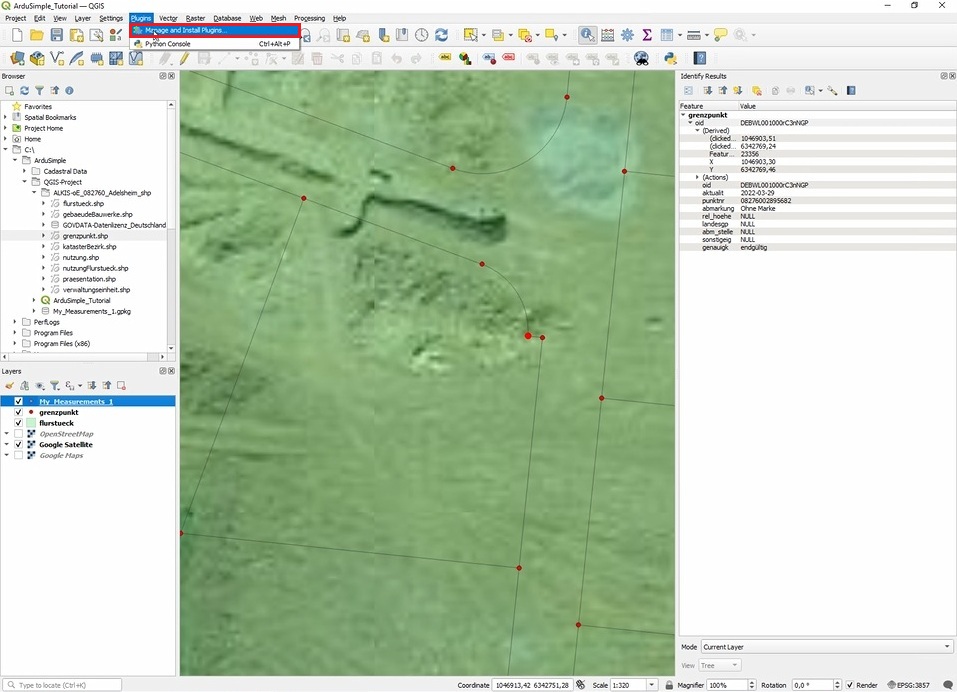
- So far, we have created a new project in QGIS, added layers for cadastral data and a layer for our own future measurements. The next step will be to do the real GNSS measurements in the field, but before that we have to transfer the QGIS project to a smartphone (or a tablet). There are multiple ways to transfer the project. In this tutorial we will export it as a zip file and transfer it manually. Another smart way is to use QFieldCloud if you want to try out. To manually transfer the file, install a QGIS plugin. Go to the menu Plugins and select Manage and Install Plugins.
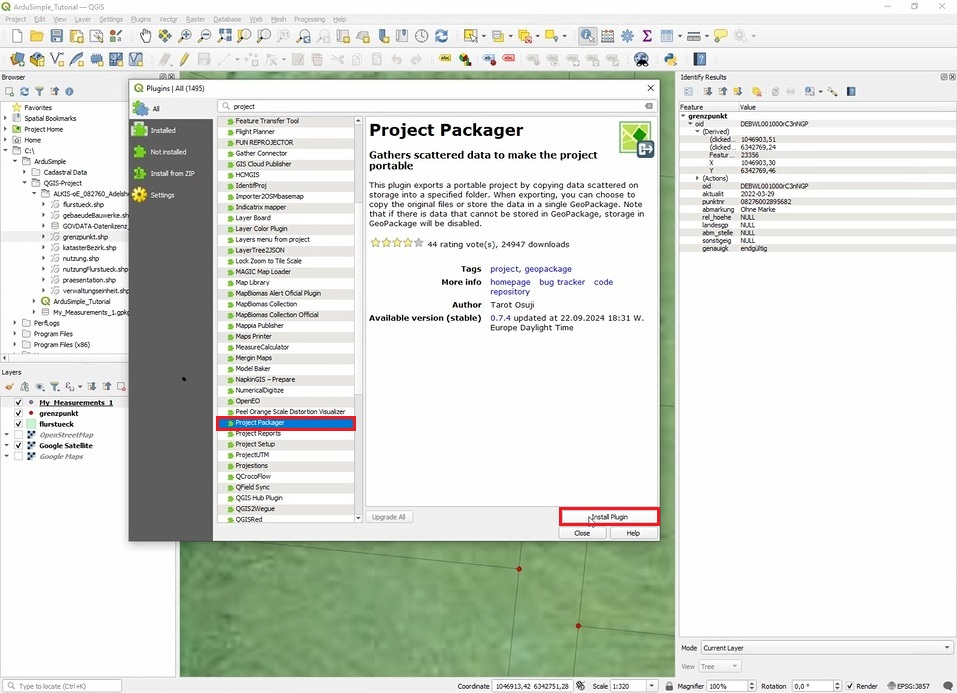
- Search for the package Project Packager and click on Install Plugin.
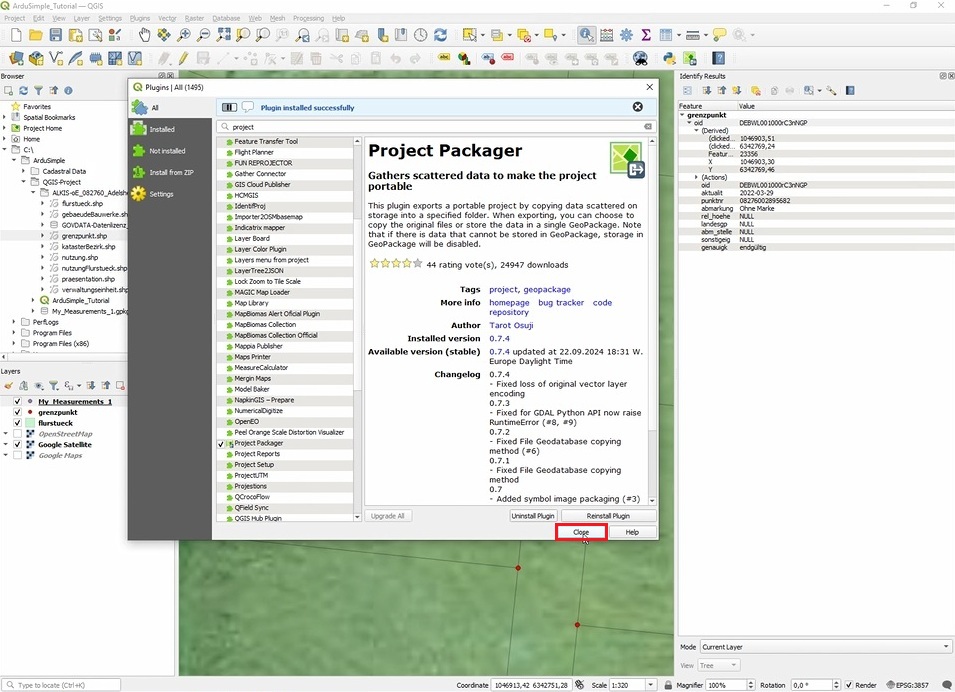
- After a successful installation, press Close.
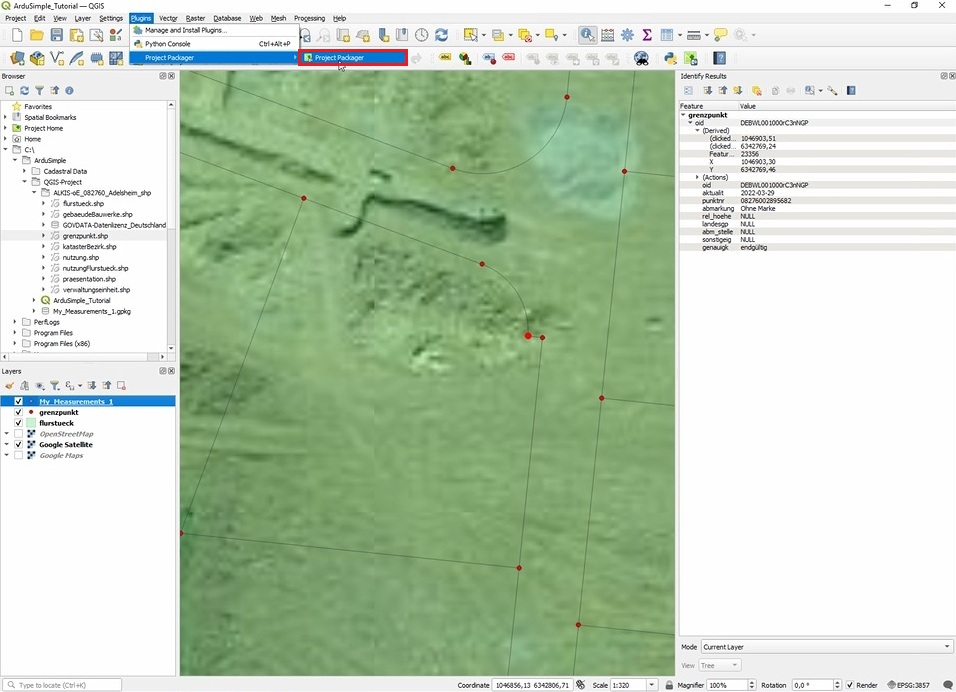
- To start the plugin, go to menu Plugins─>Project Packager─>Project Packager.
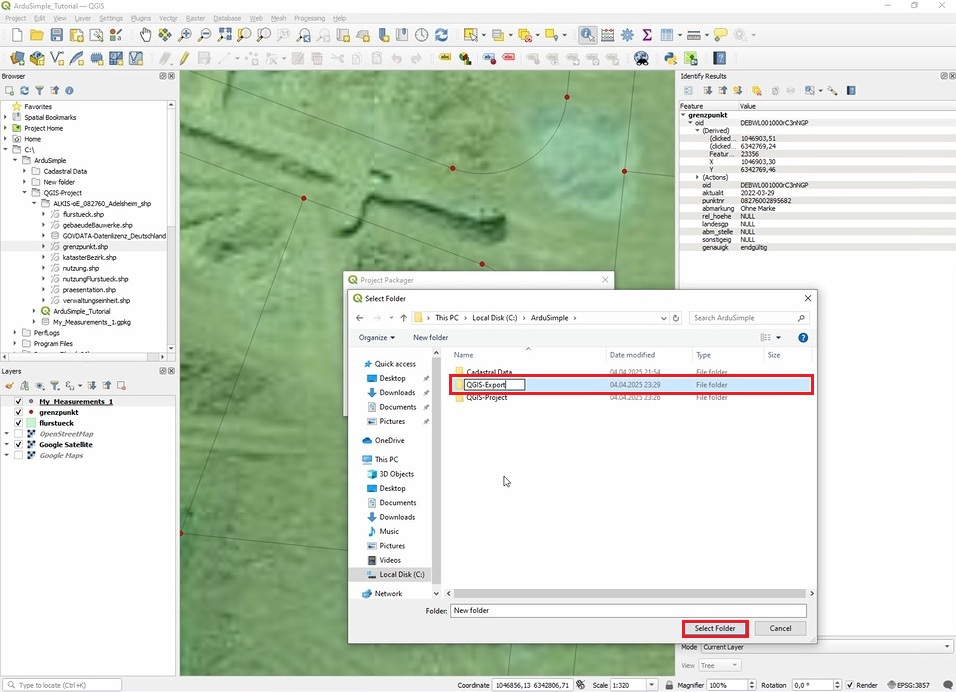
- Select the output folder (e.g. a folder named „QGIS-Export“) to which you want to export the project and click on OK.
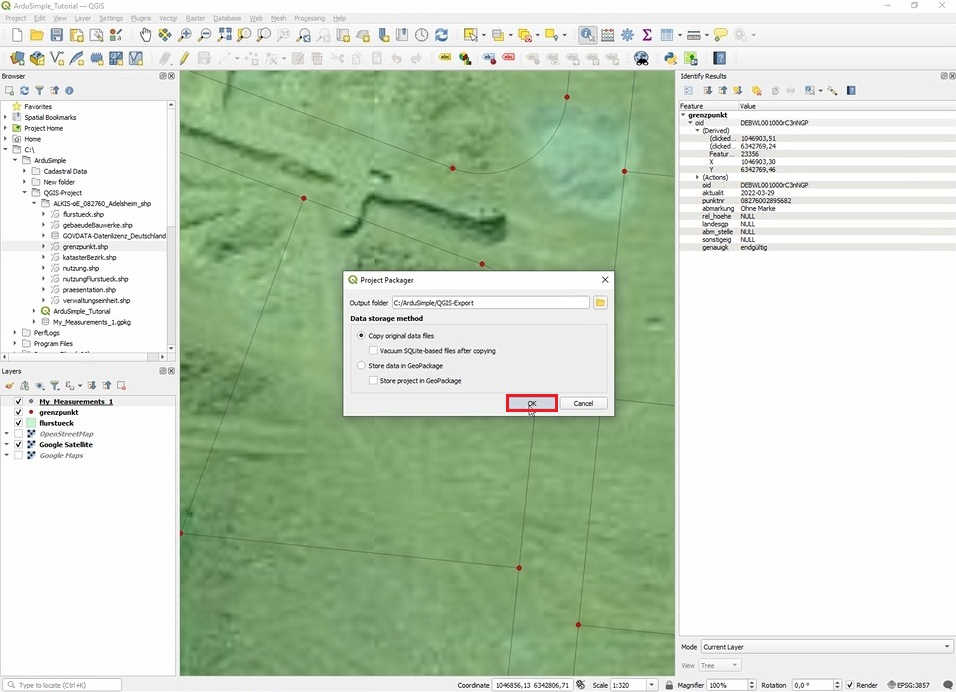
- Press OK to confirm project export.
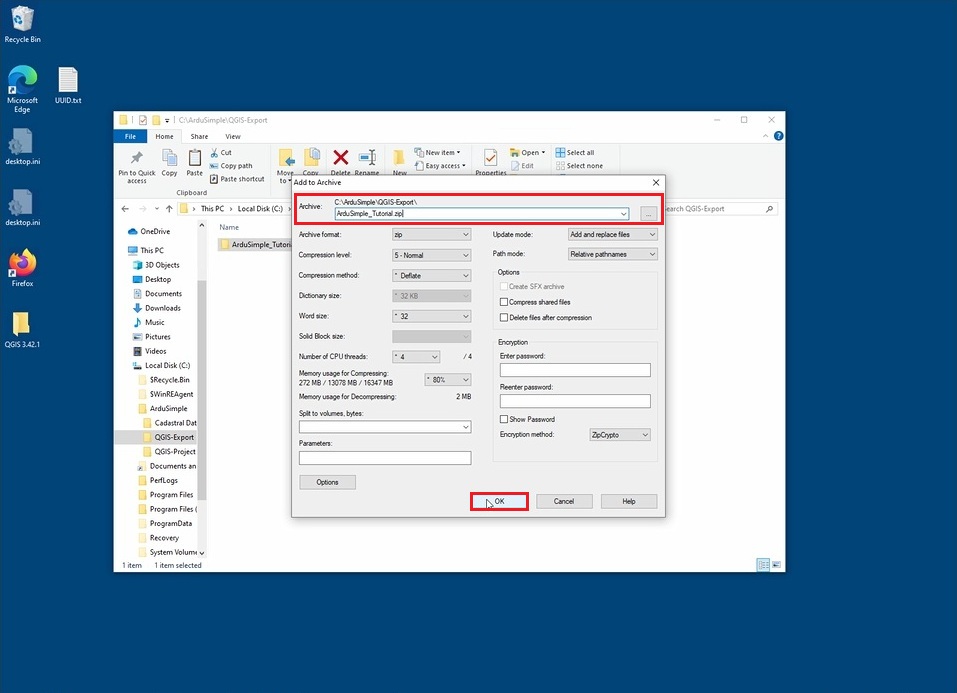
- For an easy transfer of the project from PC to your phone, pack the exported data as a zip file using free tool 7-ZIP.
- Use your preferred method to transfer ZIP file from your PC to your phone or tablet.
- To save the QGIS project, go to the menu Project, select Save As… and select your QGIS project folder as storage location.
Note: Take care that all your project files are stored in the same directory, otherwise QGIS only stores references to your files and it gets hard to backup or move the complete project.
Connection to NTRIP service
- To achieve centimeter-level accuracy in your field measurements, you need to use RTK corrections. In this tutorial, we will get correction data from the Germany’s SAPOS NTRIP service, which has a calibrated base station located near our field. If you are located in Germany too, follow our tutorial how to register and access the SAPOS NTRIP service in Germany.
If you’re located in a different country and need help finding an NTRIP correction service, see our List of RTK Correction Services in your Country.
When choosing a NTRIP service, make sure it uses calibrated base stations. This is important for cadastral work, where absolute accuracy is required. Free services like RTK2GO are not suitable, as their base stations are often uncalibrated and only provide relative accuracy, which is not suitable for comparing with official cadastral data.
Before going to the field, make sure that you have credentials to connect to NTRIP service, like: NTRIP Address, Port, Mount Point, Username, Password.
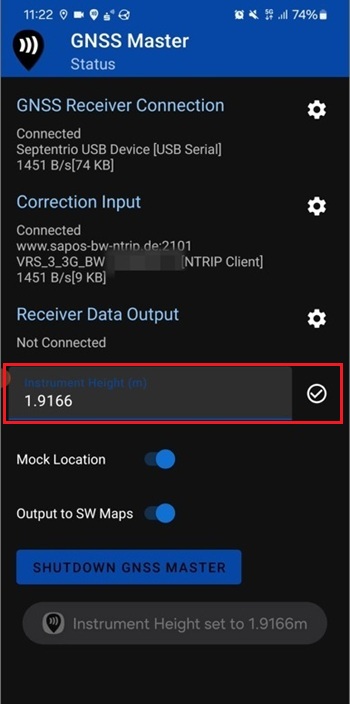
- Now it is time to go to your field. To connect your RTK Calibrated Surveyor kit to your phone following its User Guide and connect to NTRIP service using GNSS Master.

- Make sure that you set Instrument Height in meters. The instrument height is the exact height between the tip of your survey pole on the ground to the antenna’s receiving plane and it is used to calculate the exact height of the point on the ground. After inserting the height value, click on the checkmark button right beside the field.
Import the project to QField on the phone
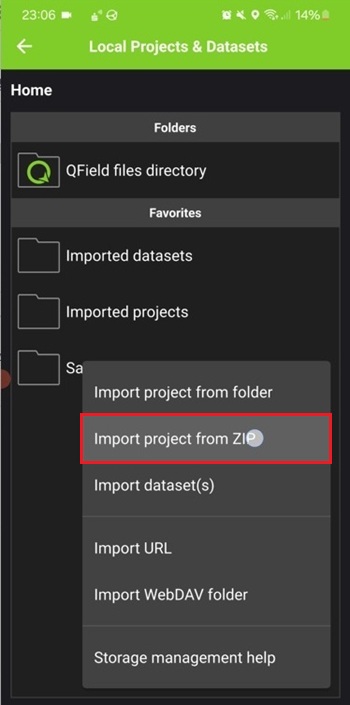
- QField is an Android app that is an counterpart for QGIS on PC. Now import your project in ZIP file. Click on Open local file and then on the + button and Import project from ZIP.
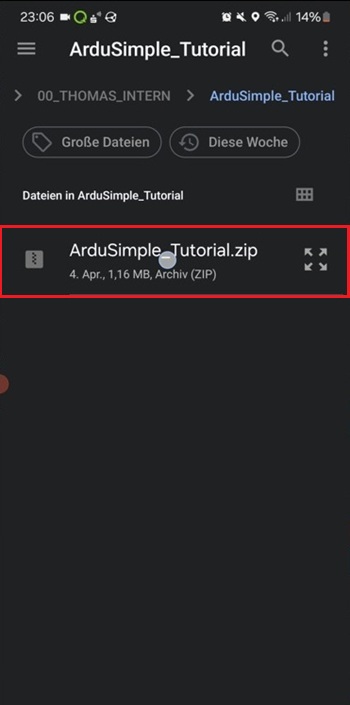
- Click on ZIP file name.
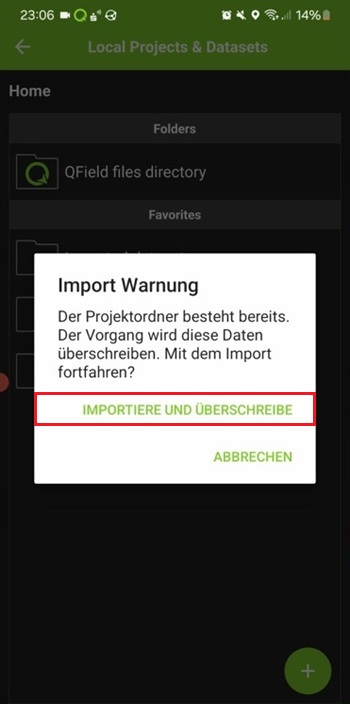
- Press Import and Transfer.
- Press on your project name.
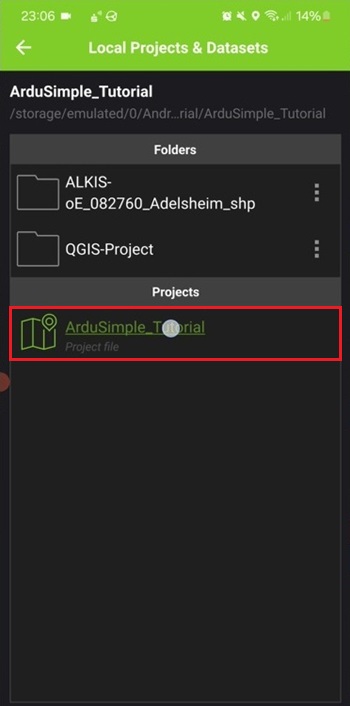
- The project will be loaded with all the layers including cadastral data.
Take measurements in the field
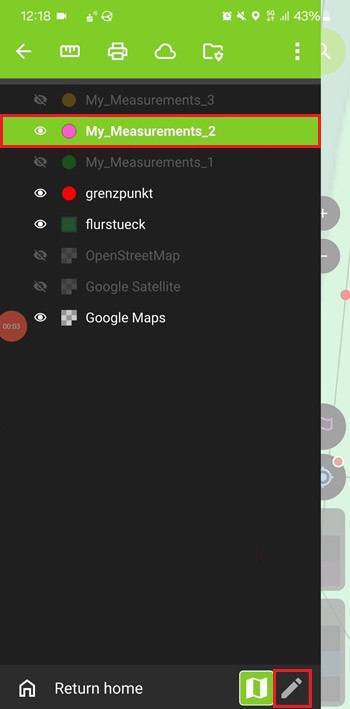
- In QField open the Burger menu in the top left corner and set the visibility of the layers as you prefer. Set the active layer by clicking on its name and set QField into the edit mode by toggling the button in the bottom right corner.
- Now you can start with navigating to points on your terrain and adding your measured points. To select a destination to navigate to, click on an element on the map.
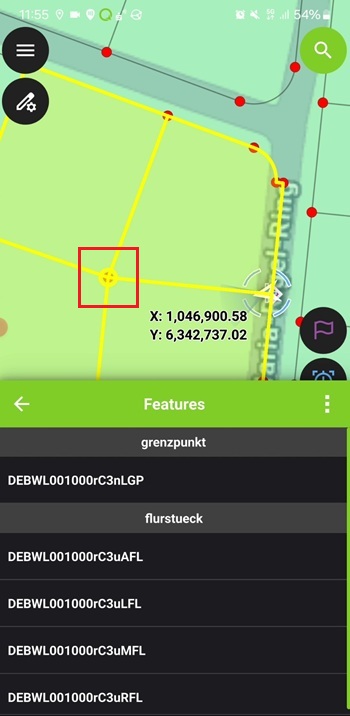
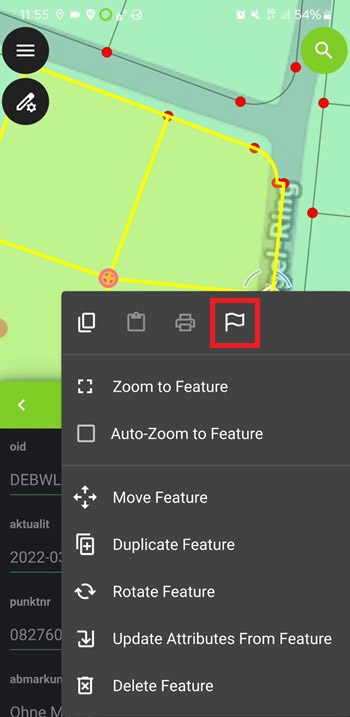
- This will open the Features menu where you can select the exact feature you want to use.
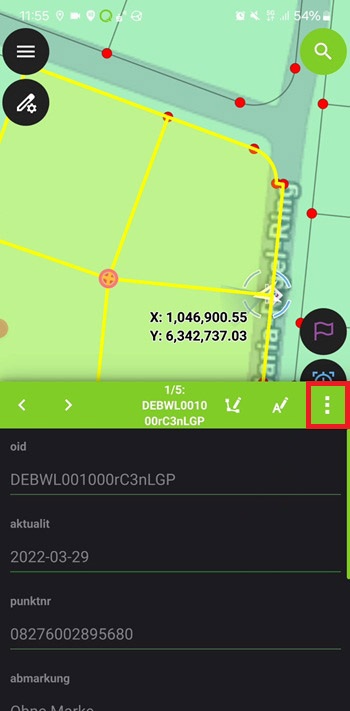
- After clicking on your desired feature, QField will change into the details page of the feature where you can select the menu (three dots) and click the flag icon to start the navigation.
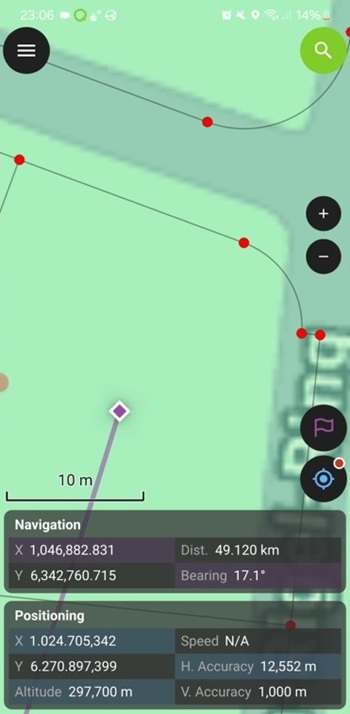
- Now you can navigate to the feature and when you get close to the destination the Precise view window might pop-up to help you navigate exactly.
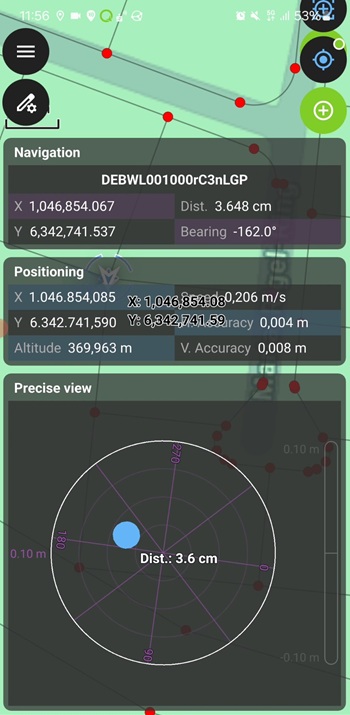
- The exact behavior of QField when getting closer to the destination can be controlled by long pressing the flag button and selecting Precise View Settings where you can define the distance to the destination when the Precise view windows shall pop-up and an Audio Proximity Feedback (alarm sound) shall be played. Note: If you are using a smartphone with a small display the Precise view window will consume a lot of space on the screen. To hide the Precise view, simply move your survey pole a bit away from the destination point and the window will automatically disappear.
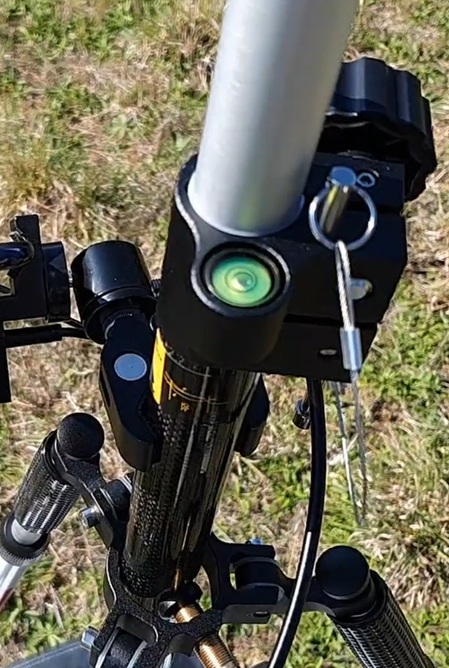
- At this point it is important to monitor the surveyor’s level (bubble) to ensure that the survey pole is oriented exactly vertical so that the GNSS antenna’s position exactly matches the survey pole’s tip position.
- If you have leveled your survey pole, click on the + button to add a new measurement point.

- In this way take measurements of all points of your field.
- After all measurements in the field are taken, stop the editing. To leave the editing mode, go to the burger menu again and disable the editing in the bottom right corner.
Export measurements for analysis
- To export the measurements, click on the folder icon with the gear symbol on the top to open the menu for exporting files.
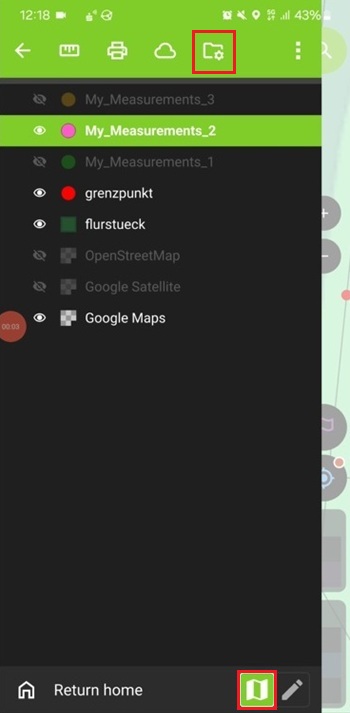
- Click on the menu (three dots) beside the folder containing your file of the measurement layer and select Export to folder to save the file to your desired location.
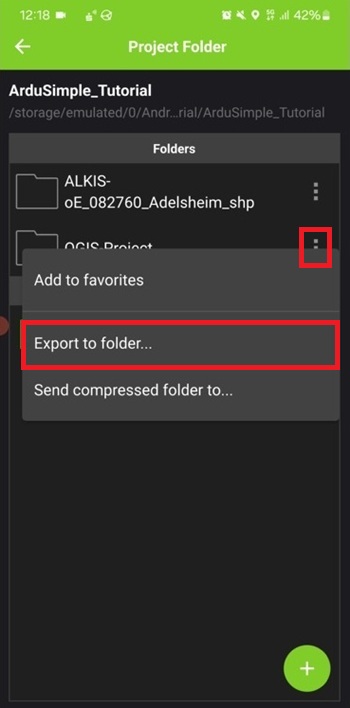
- The selected directory will contain a *.GPKG file for each exported layer. These files need to be transferred back to your PC, so that the files can be analyzed in QGIS.
- Copy the exported *.GPKG files back into your QGIS project folder on your PC and overwrite the old files. If you open QGIS, afterwards, it will use the updated version of your files.
Analysis in QGIS
- Open your recent project in QGIS.
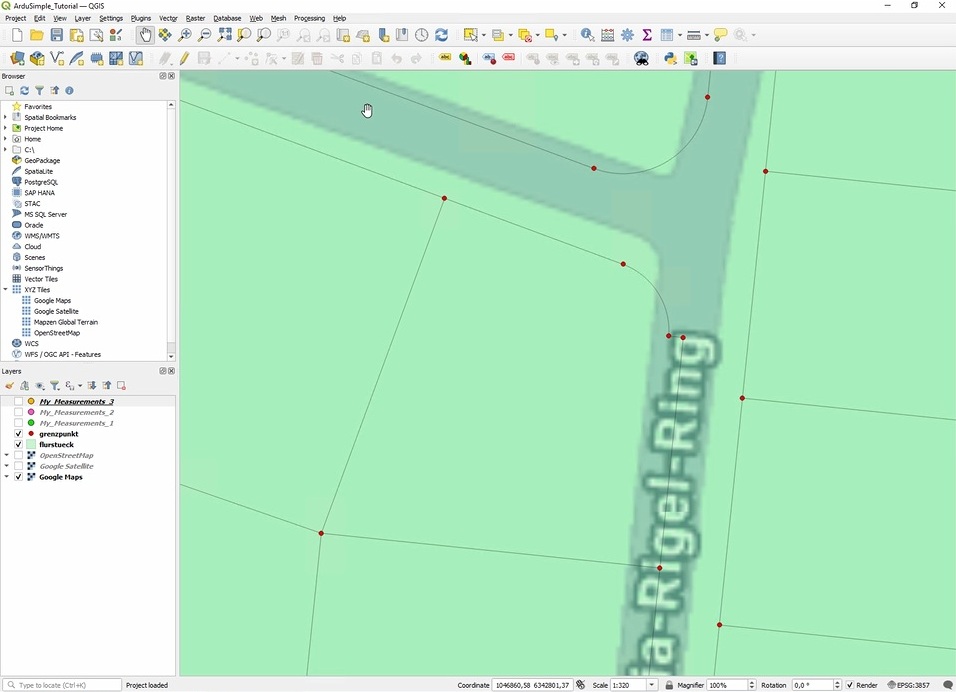
- To measure the distance between our own measurements and the official points which were downloaded from the cadastral data, make both layers grenzpunkt and My_Measurements visible.
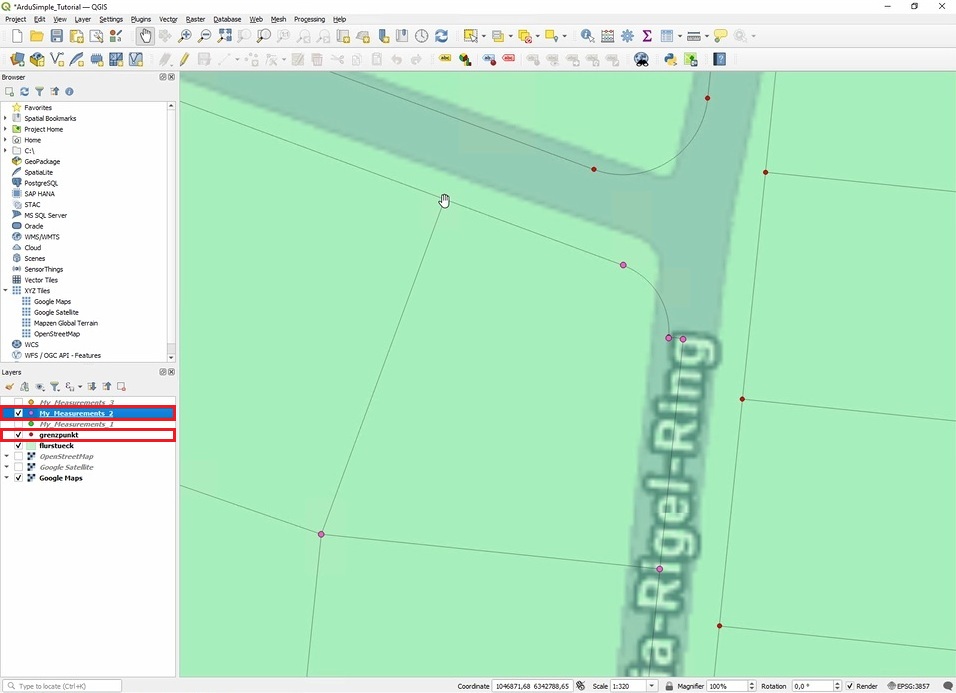
- Zoom in, until you can clearly see both points you want to compare on your screen.
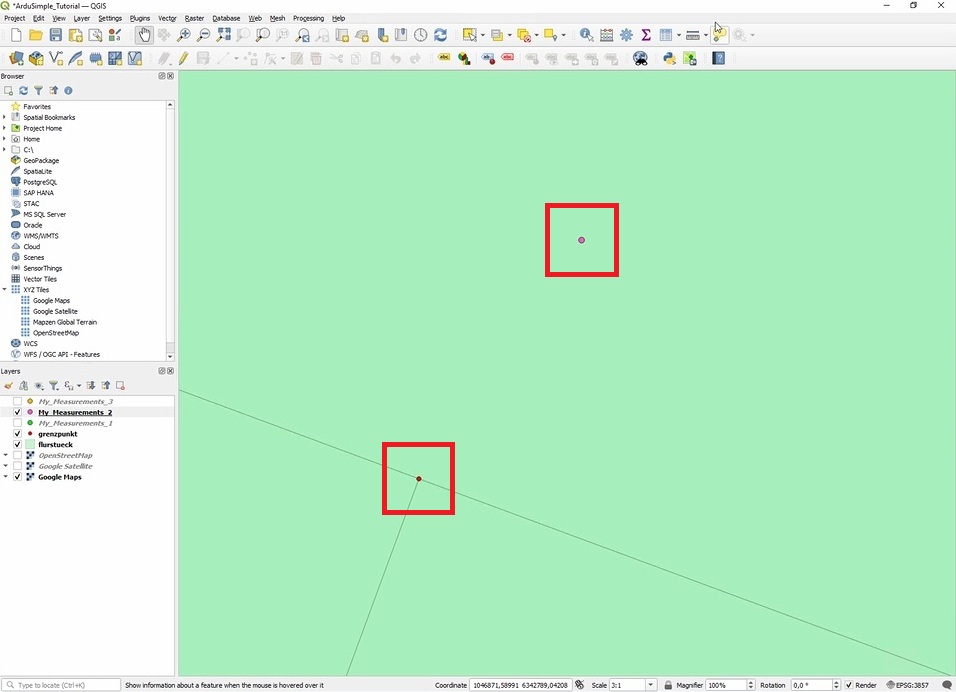
- To measure the distance between cadastral point and your measurerent point, select the Measurement tool from the toolbar.
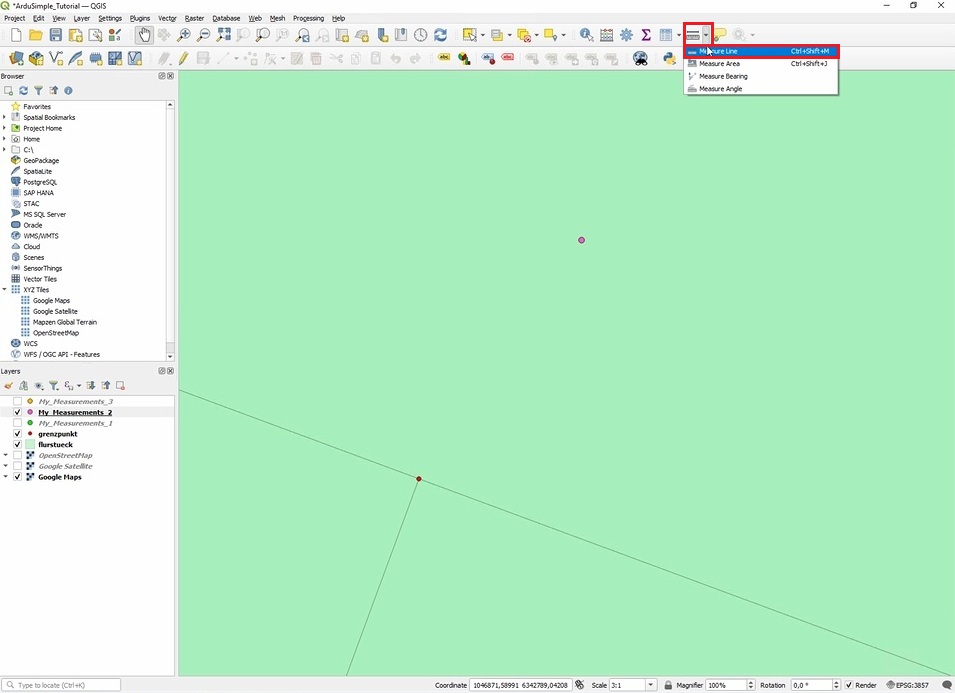
- Draw a measurement line from the first point to the second point. The tool will show you the distance (you can select the physical unit). In this way you can compare the cadastral data and your data.
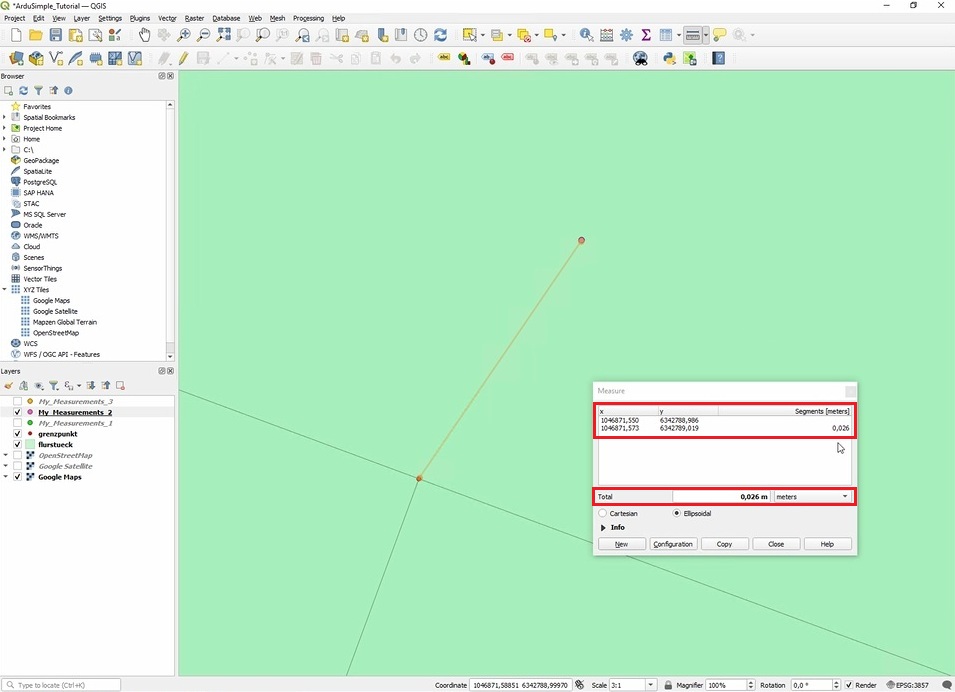
- And this is all! In this way you can compare and validate cadastral measurements of your field.
If you want to follow this tutorial, we have all the products in stock and ready to be shipped:


