
 and
and 

How to export ZWCAD coordinates for RTK staking out in the field

On this page
Products used in this tutorial

Have you received a building or site plan in ZWCAD and need to transfer the designed positions to the field for staking out with centimeter level of GPS accuracy?
This tutorial shows how to take the coordinates of a building from a ZWCAD drawing, prepare the required staking-out points in QGIS, and import them into SW Maps. You can then use an ArduSimple RTK Smart Antenna to locate these points in the field with centimeter-level positioning accuracy.
This workflow is useful when, for example, a building, structure, road, fence, or other designed feature needs to be physically marked on the ground according to its coordinates in a CAD drawing.
In this example, we use the corners of a building as the staking-out points, but the same workflow can be adapted to other features that need to be positioned in the field.
The tutorial assumes that you already have a ZWCAD drawing containing the design and its coordinates, and that the drawing uses a known Coordinate Reference System.
Required hardware
- RTK Smart Antenna
- Pole for survey GNSS antenna
- Android/iOS smartphone or tablet
- Windows PC or laptop
Required software
How to stake out building coordinates from ZWCAD using RTK
Exporting data from ZWCAD
After receiving the base drawing from the designer, it is necessary to determine the points for staking out — in this case, we are going to use the outer edges of the building.
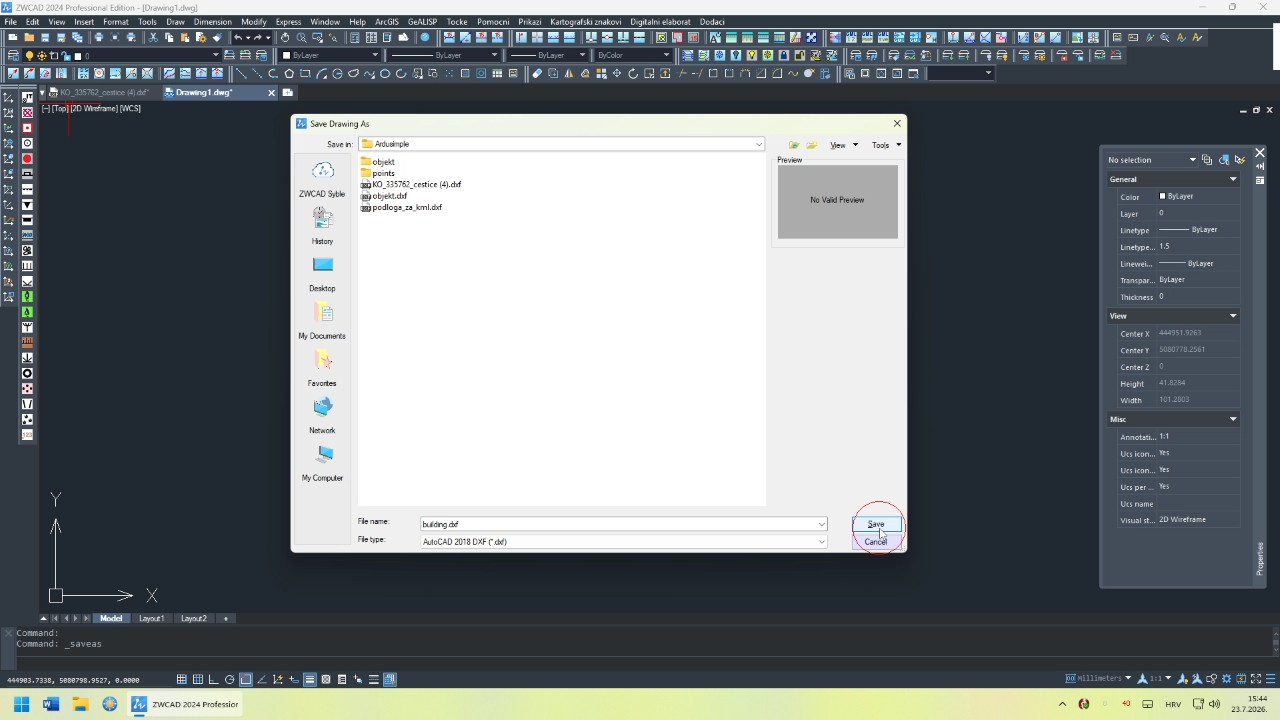
Since we intend to carry out the staking-out using the SW Maps mobile app, the outer edges of the building must first be isolated as a polyline. This polyline should then be exported as a separate drawing, preserving the exact same coordinate system as the original main drawing. The resulting file needs to be saved in DXF format.
- Select the building outline and copy it by pressing Ctrl-C.
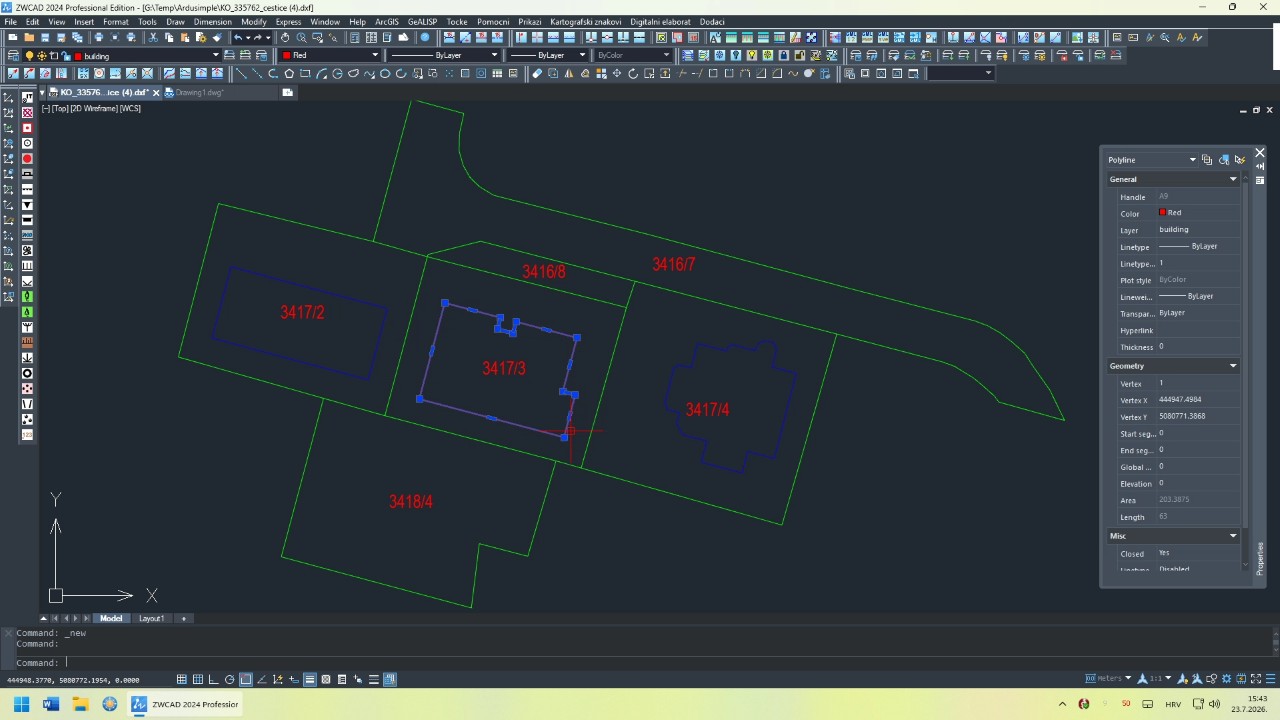
- To create a new drawing go to File > New.
- Paste the copied building outline in its original coordinates, go to Edit > Paste to Original Coordinates.
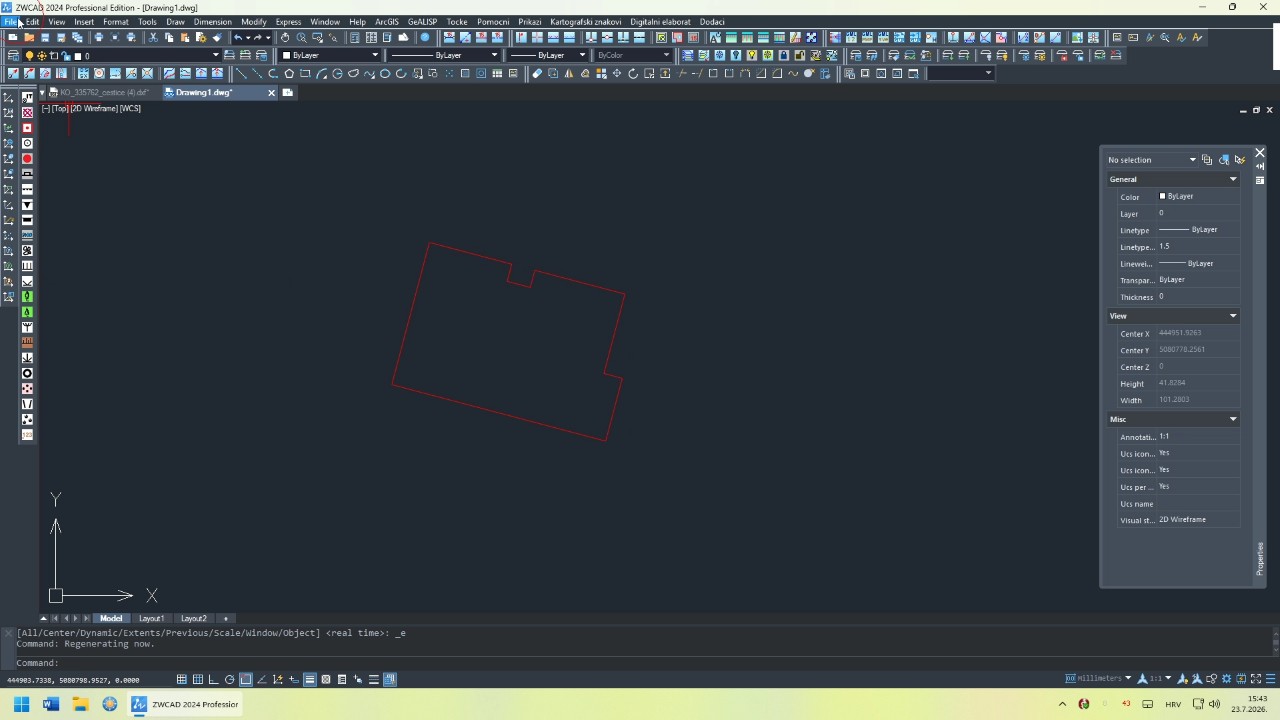
- Save the new drawing file in DXF format.
Creating staking points in QGIS
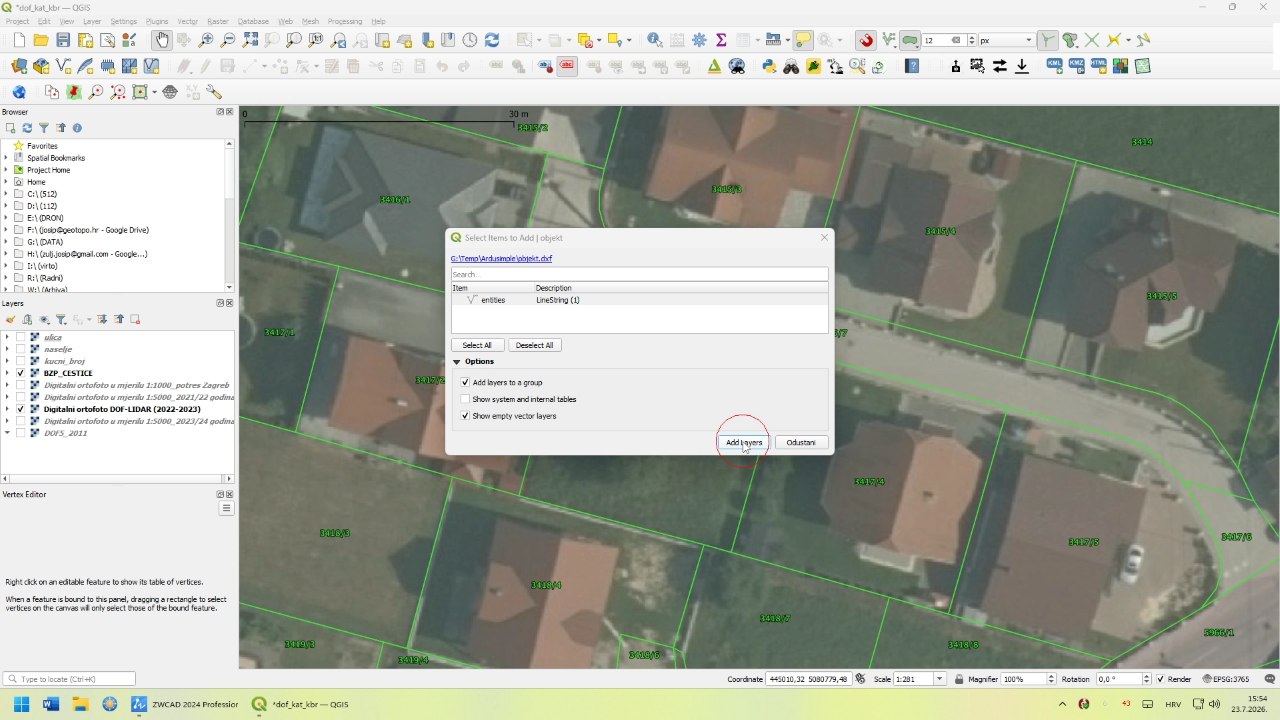
- Open QGIS, and drag and drop the DXF file to import it.
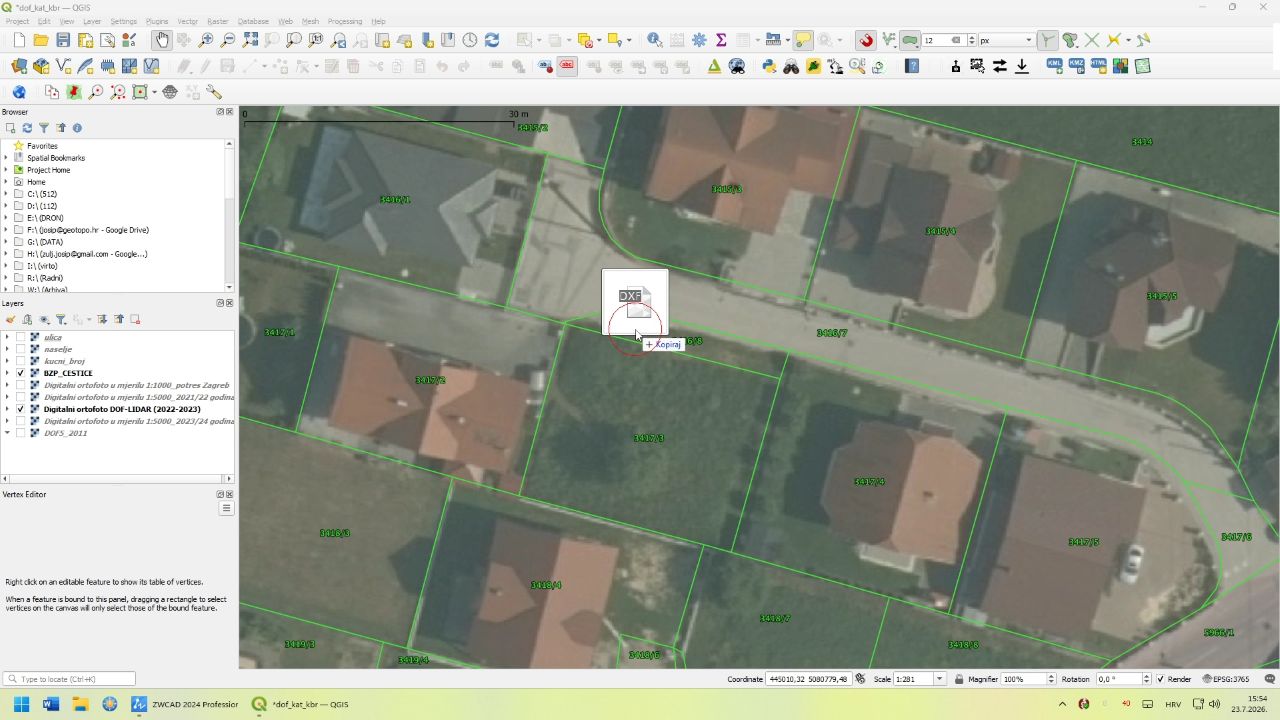
- A pop-up window will appear showing the import options. Press Add Layers.
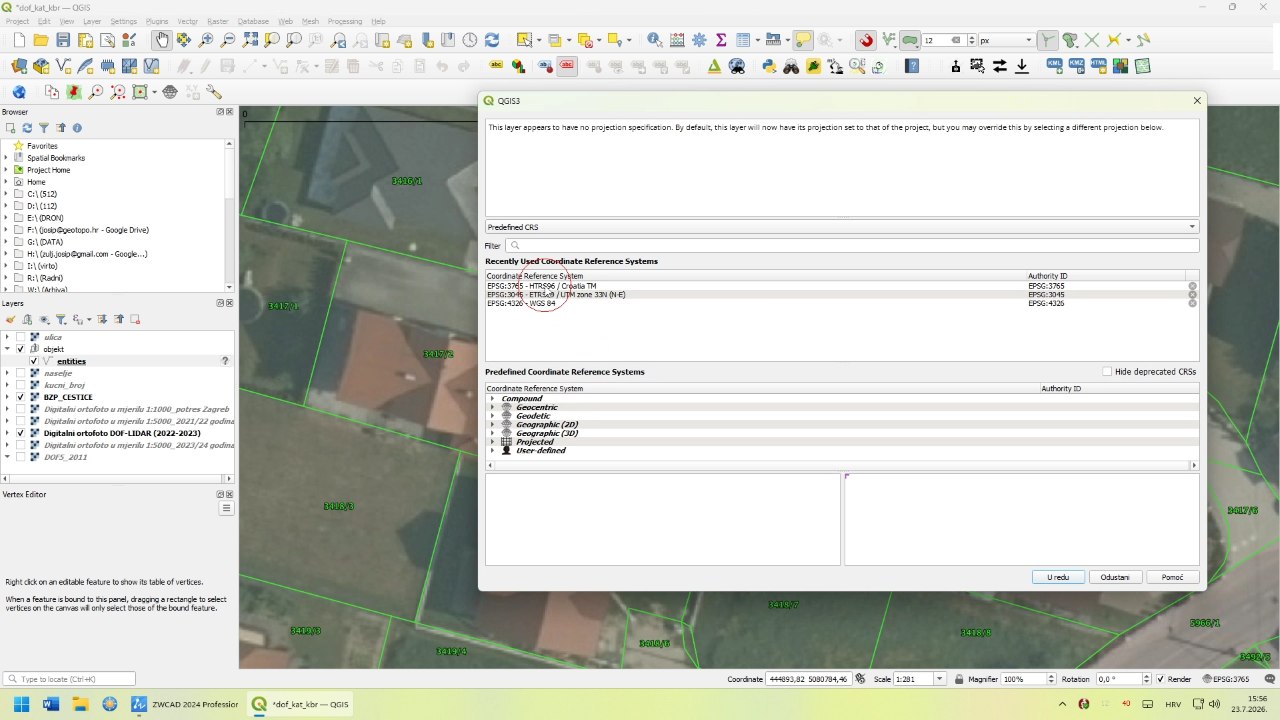
- To set the coordinate system to the same one used in the original base drawing, press the question mark beside the newly created layer and choose the Coordinate system.
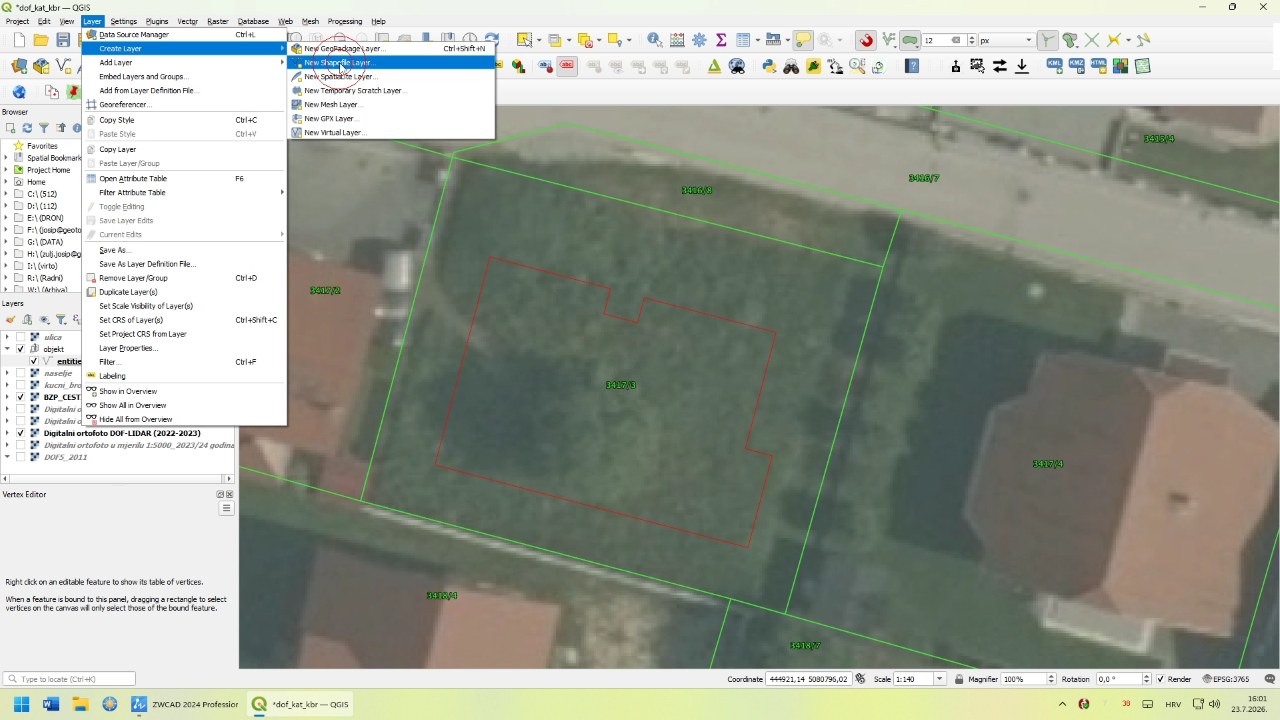
- Now we will define the staking-out points that we are going to survey in the parcel afterwards, and collect them in a new shapefile layer. Go to Layer > Create Layer > New Shapefile Layer.
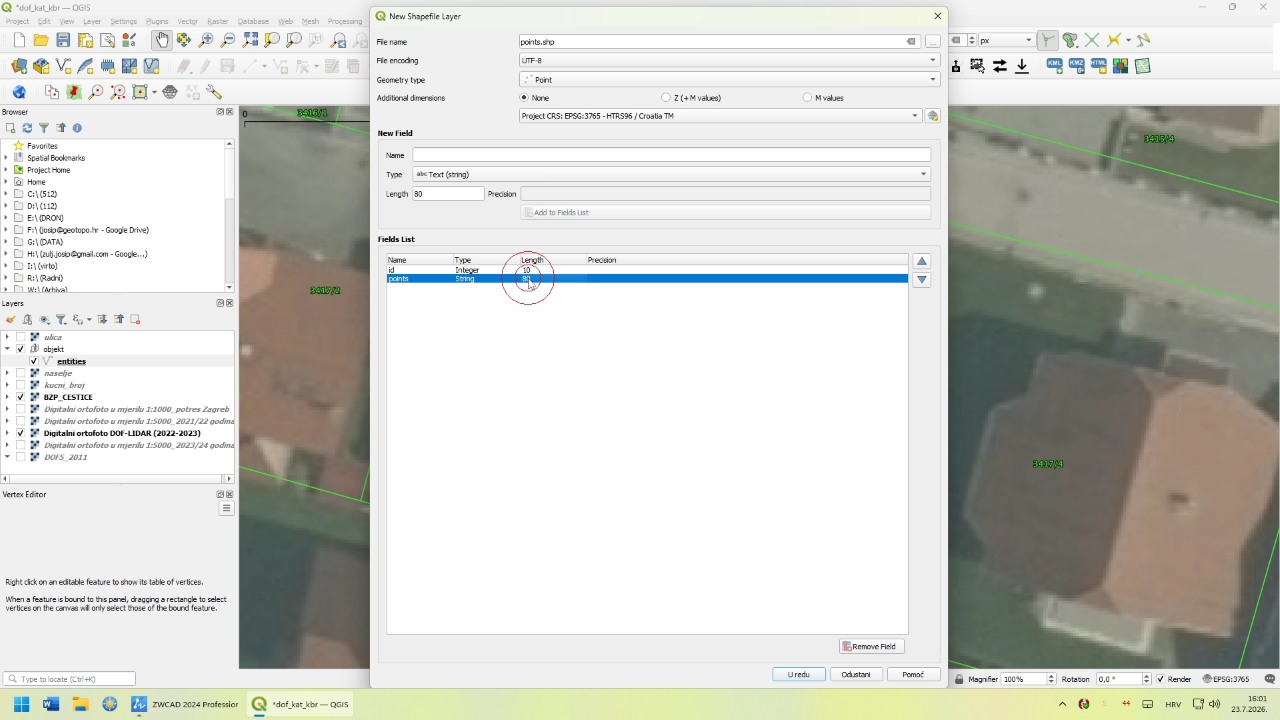
- When creating the new layer, set the File name, New field name and Geometry type to points, and again use the original Coordinate system.
- We can now place the staking-out points at every corner (break point) of the building outer edges.
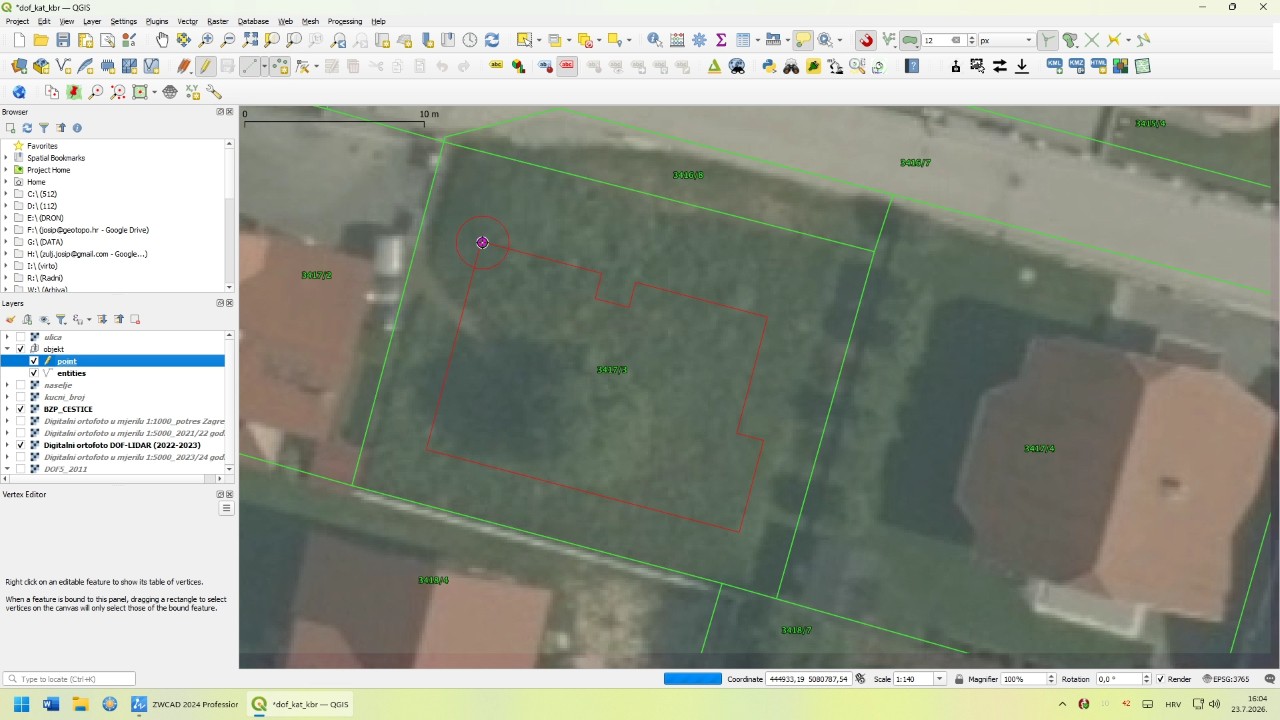
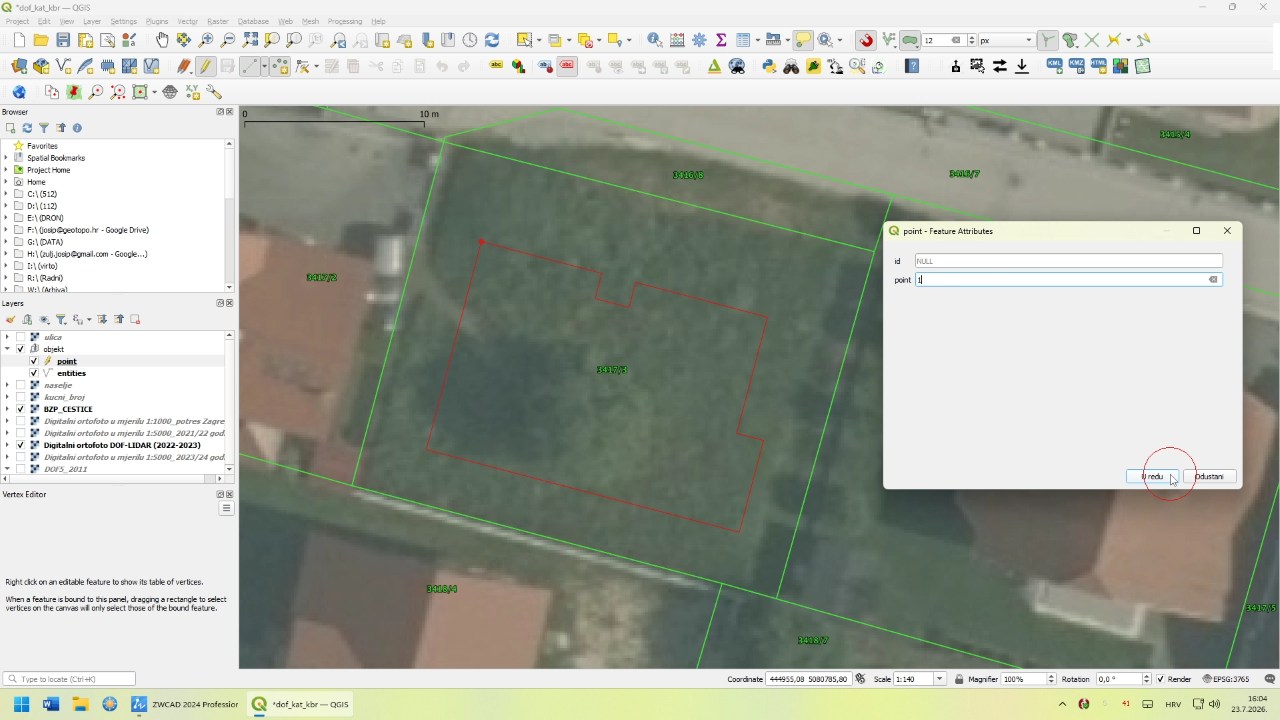
- A pop-up window will appear… assign an ordered point number to each new point you create.
- Go through all the corner points of the building’s outer edge.
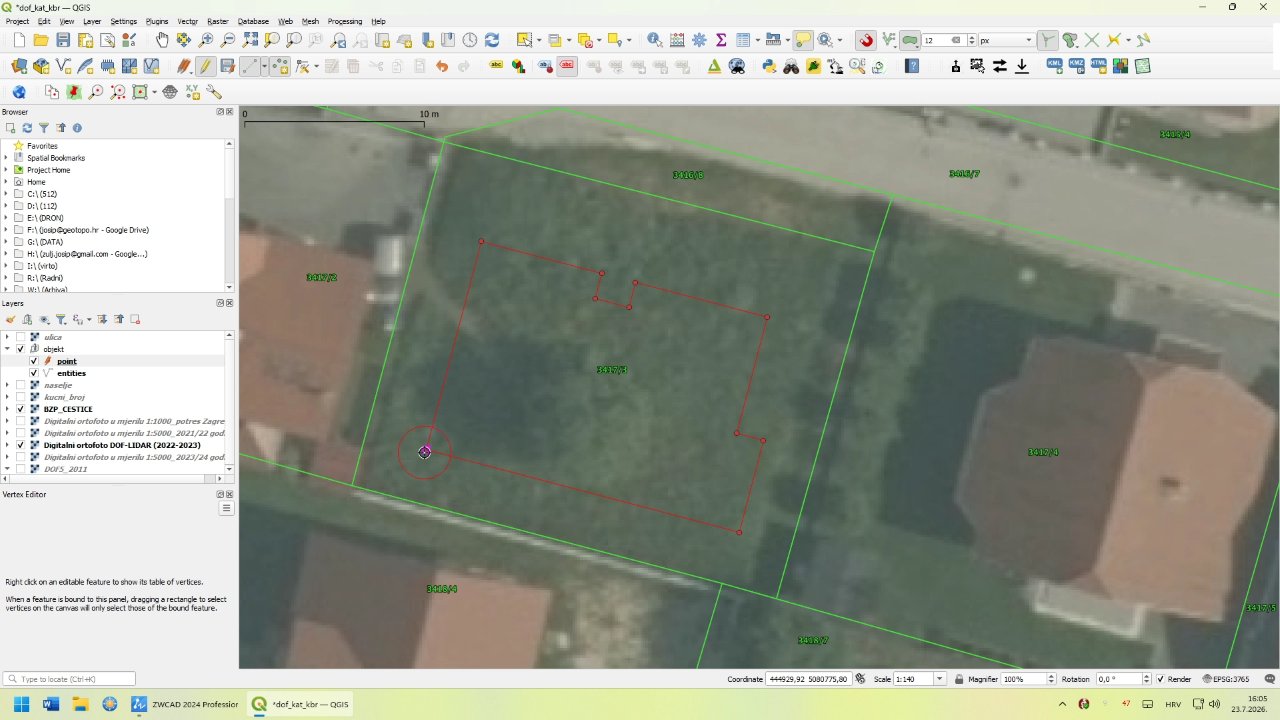
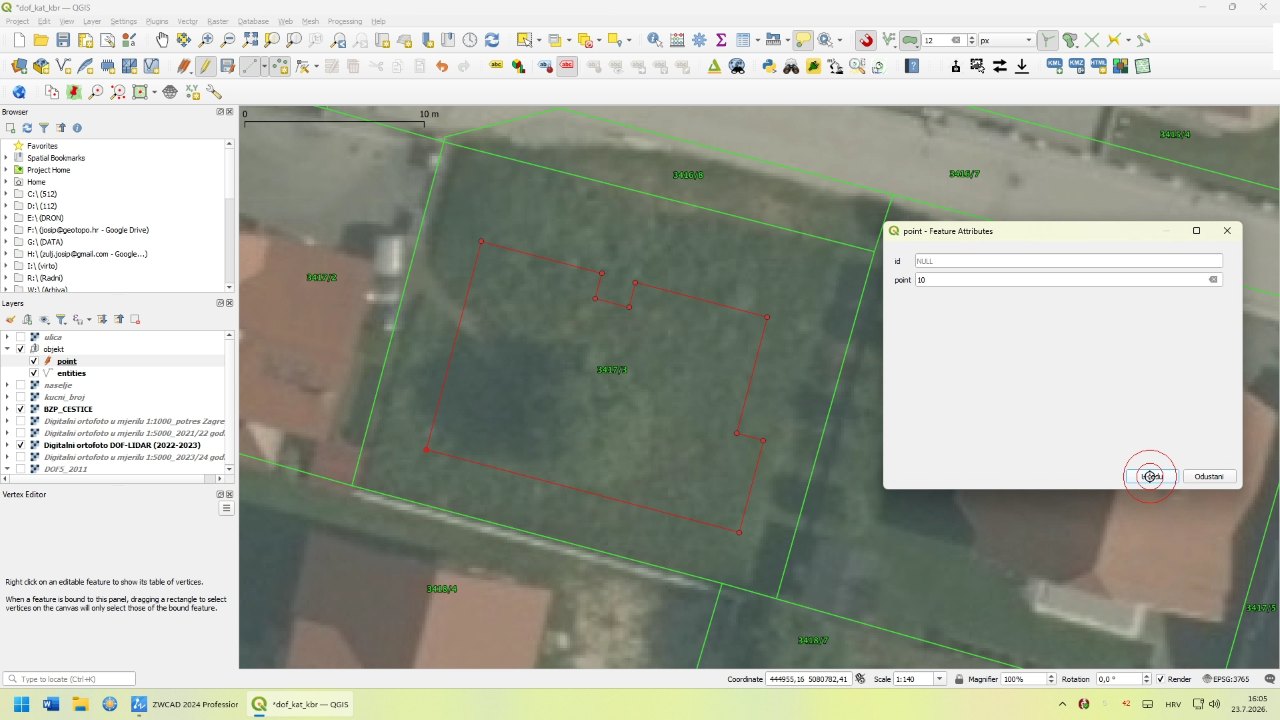
- Giving an ordered point number to each new point you create.
- Enable labels to see the point numbers you just assigned. Press the yellow label icon in the toolbar.
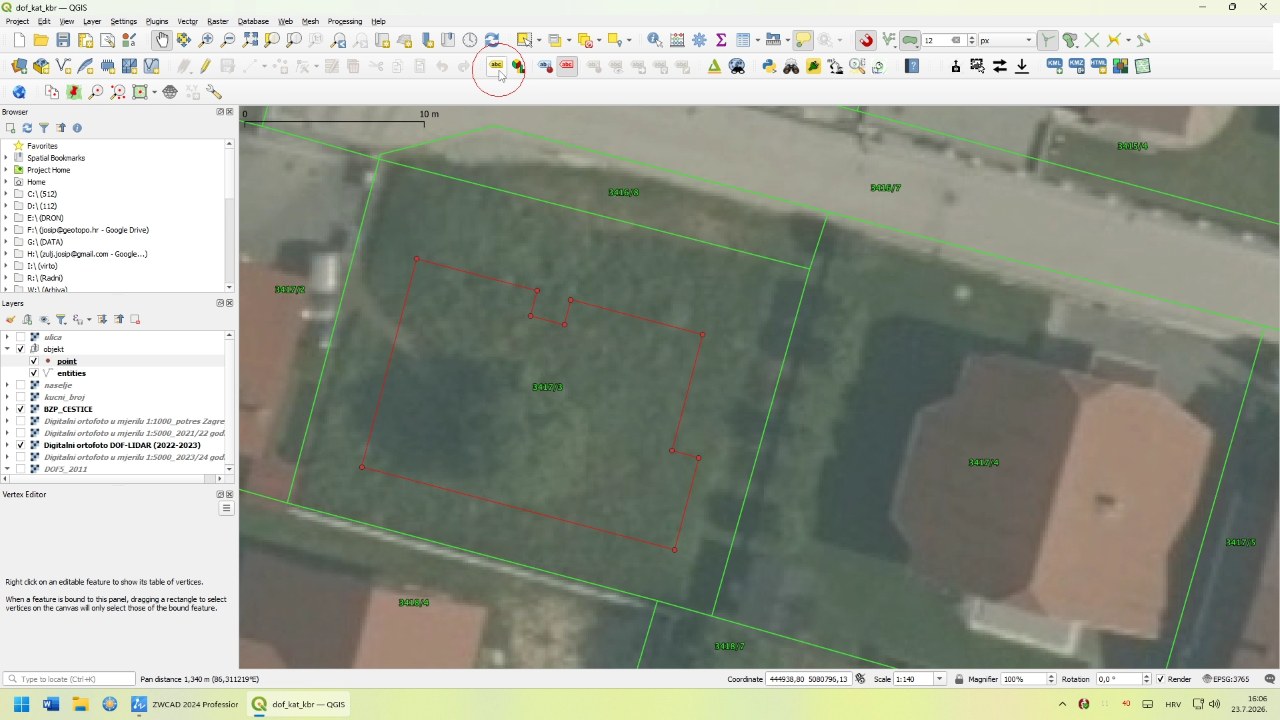
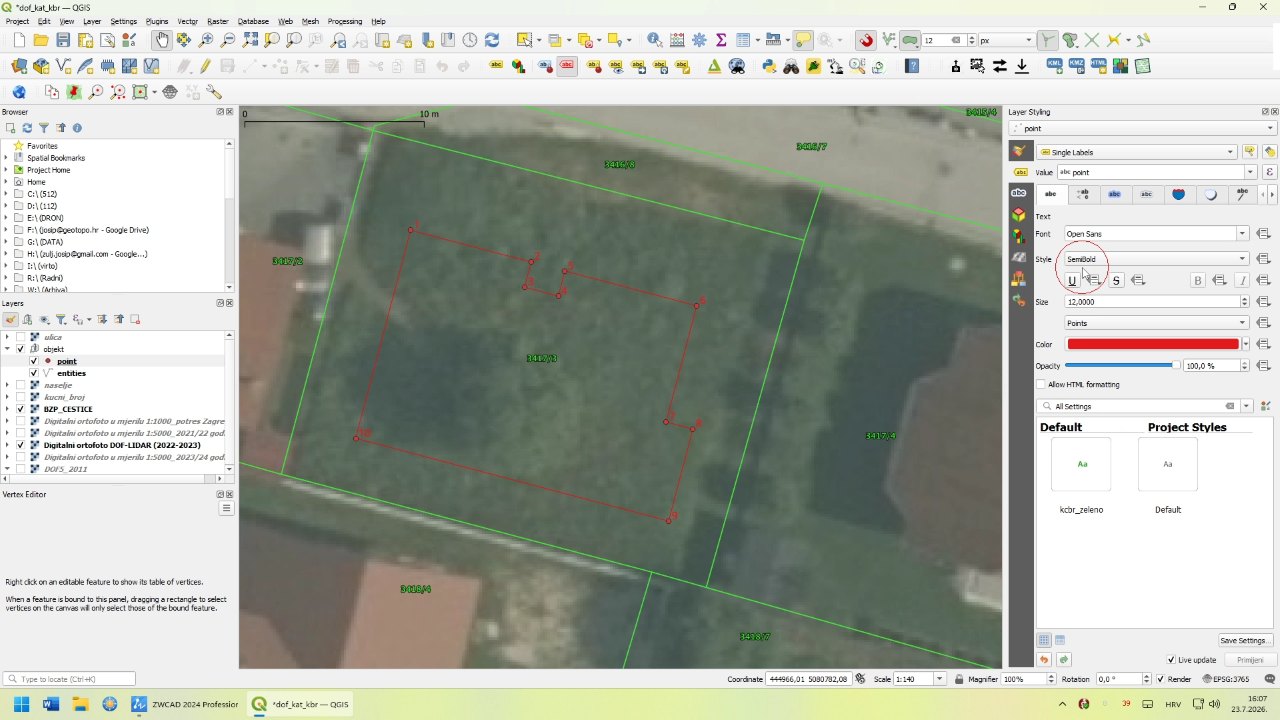
- In the Layer Styling options choose Single Labels, set Value to point and choose a font Size and Color for the displayed point labels.
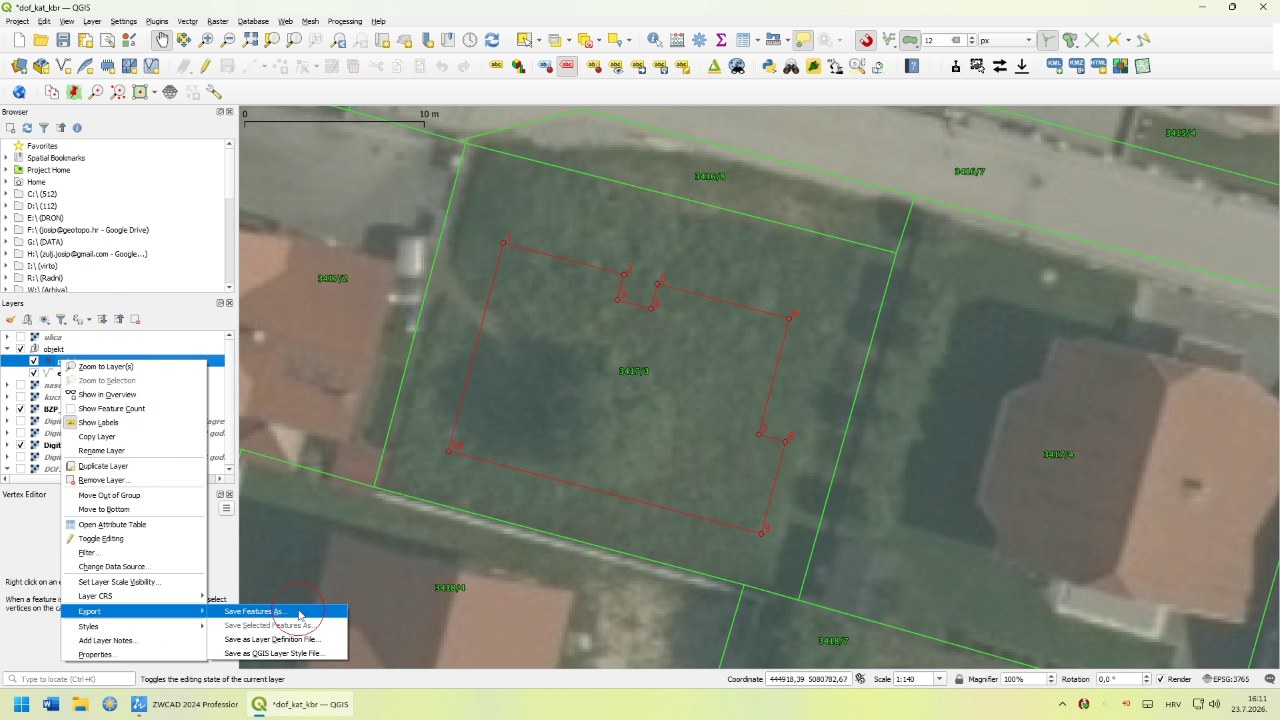
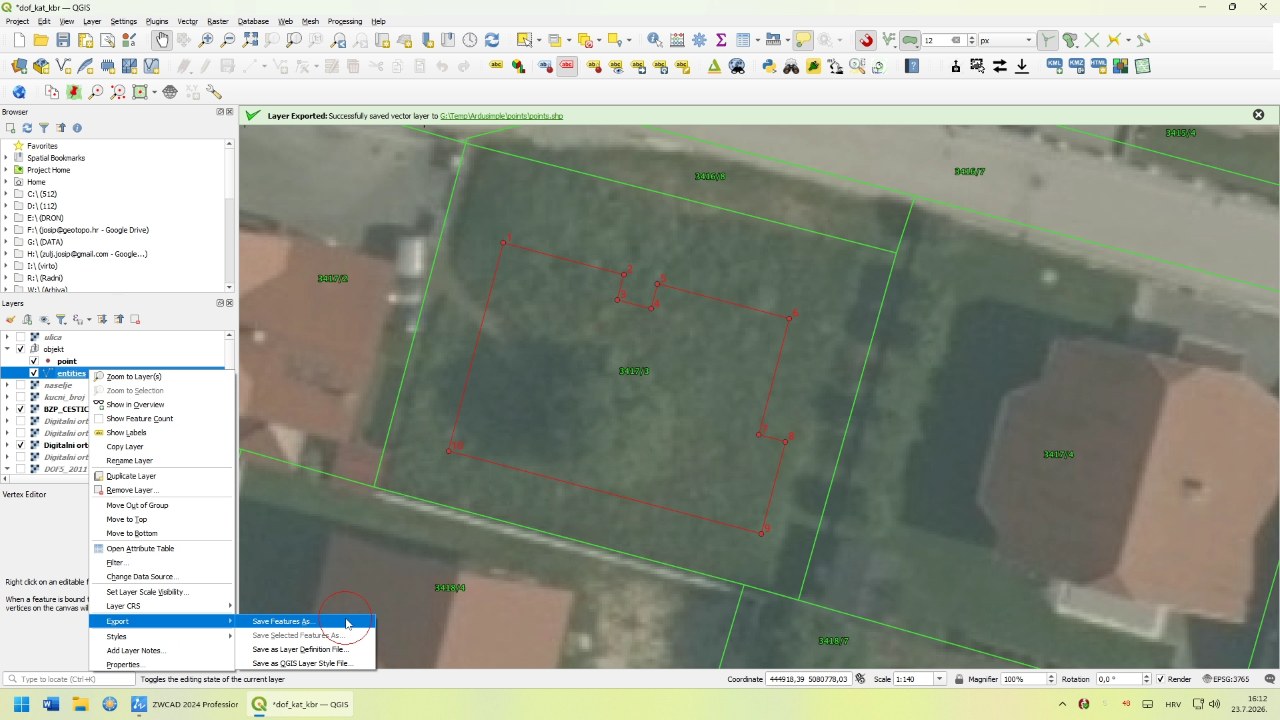
- Now we will export the points layer, select it and in its context menu go to Export > Save Features As.
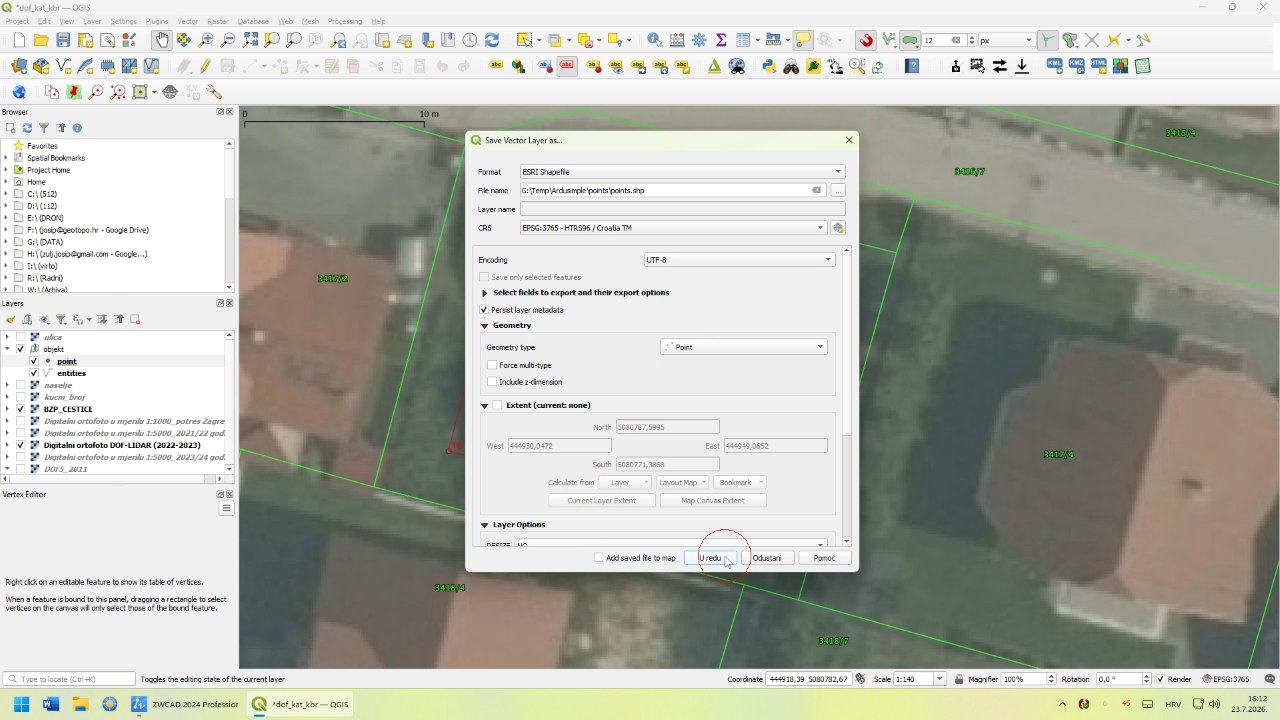
- Set Format to ESRI Shapefile, choose a File name for the saved file, use the original Coordinate system and set Geometry type to Point.
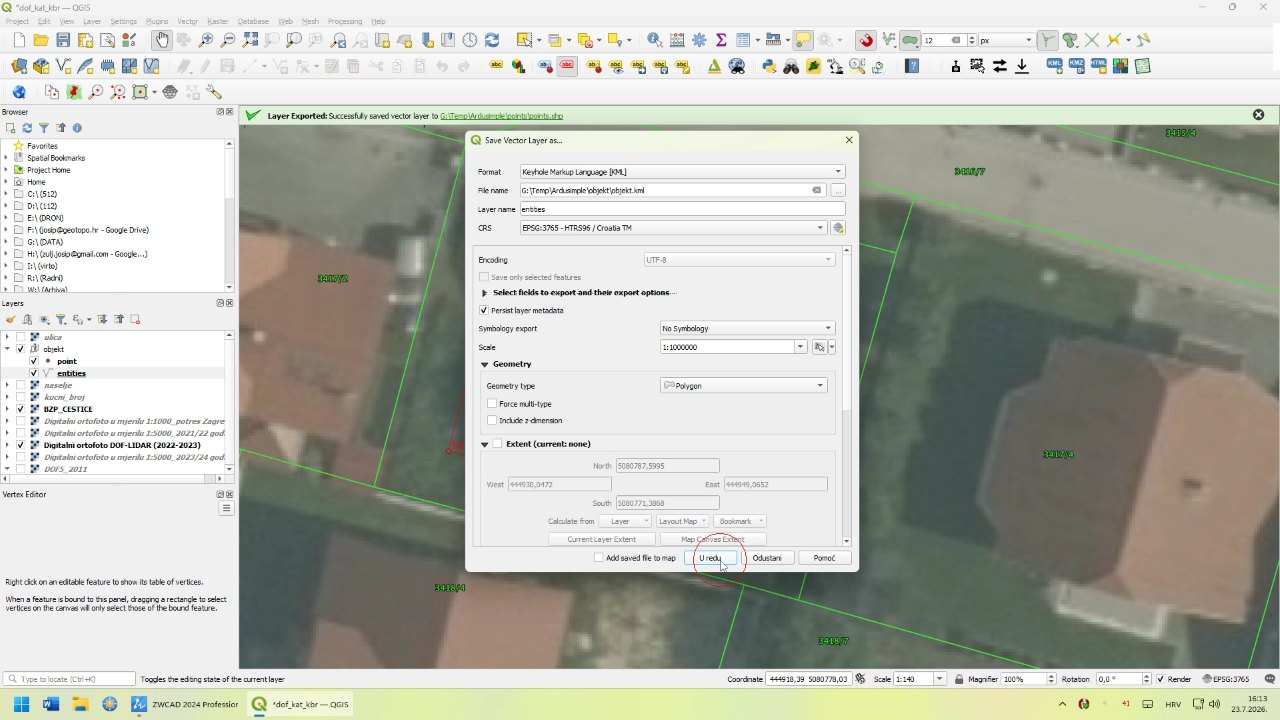
- We will also export the building outline, select the layer and in its context menu go to Export > Save Features As.
- Set Format to KML, choose a File name for the saved file, use the original Coordinate system and set Geometry type to Polygon.
Transfer the exported files to the mobile device
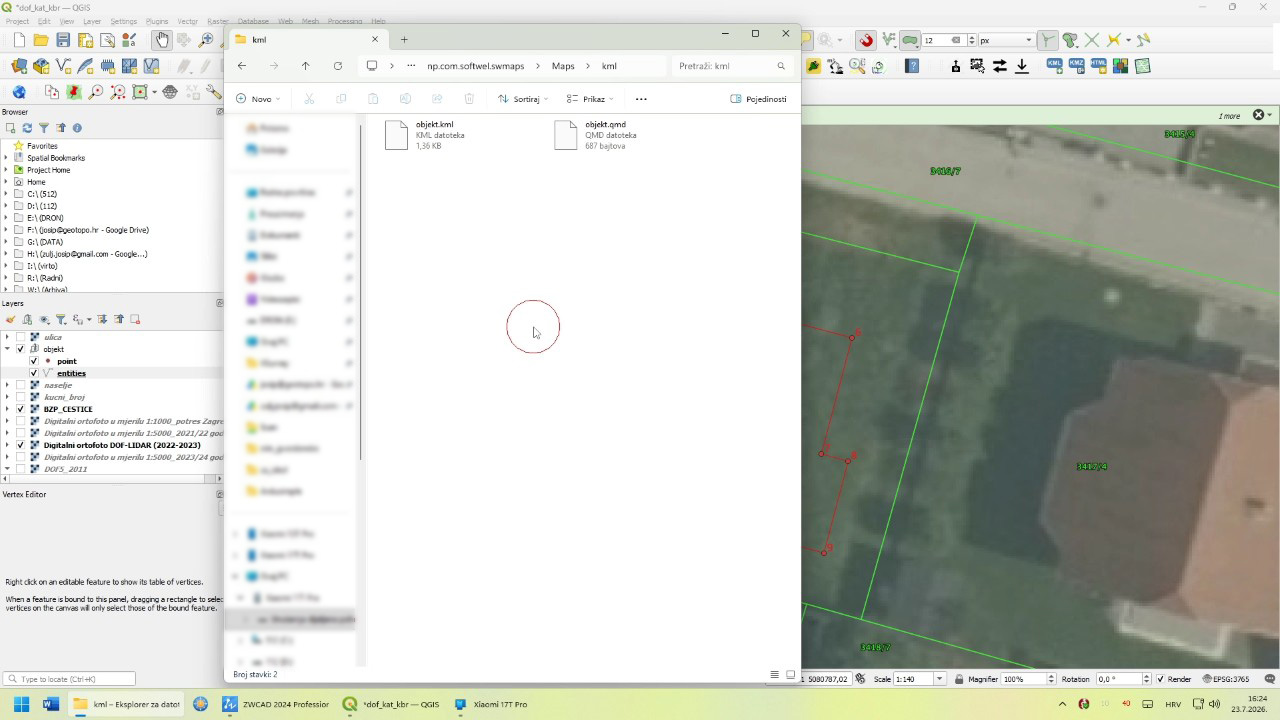
- Once we have exported the building points and outline object files, they need to be transferred to the mobile device with SW Maps app installed. The destination folder of the files may vary depending on the Android or iOS version, but in our case they go into Android/media/np.com.softwel.swmaps/Maps.
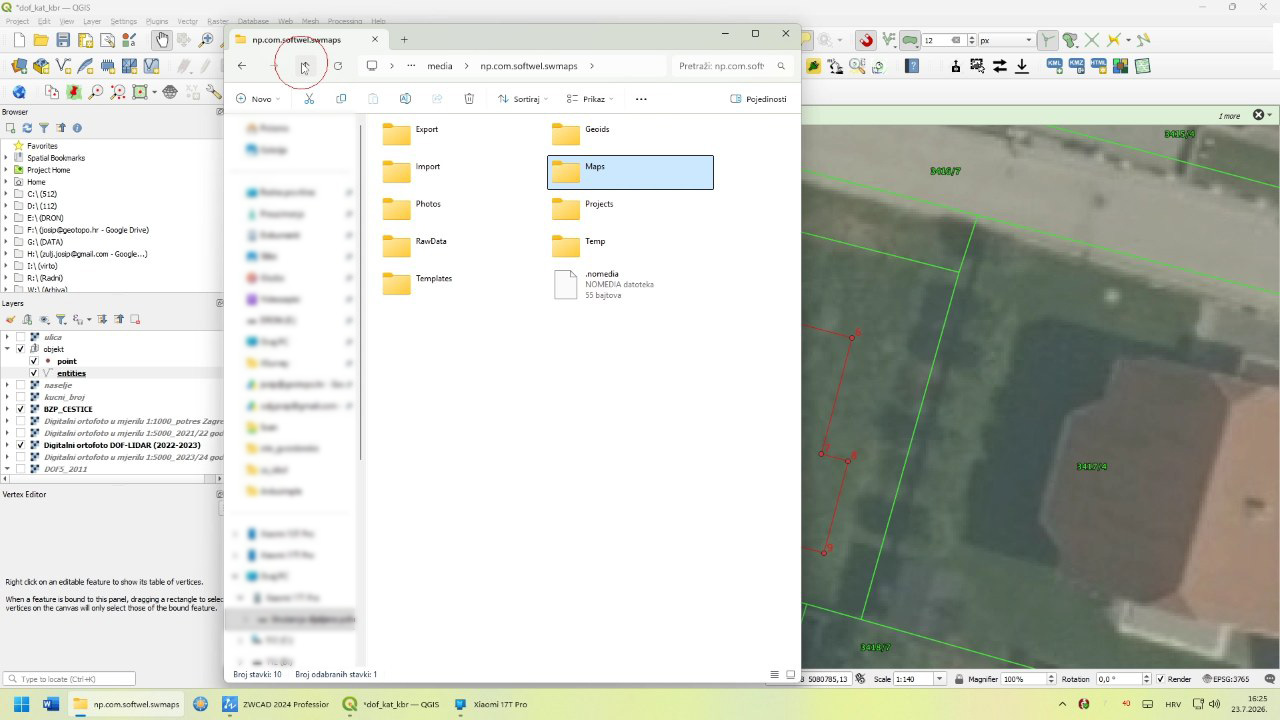
- Points files go under the shapefiles subfolder.
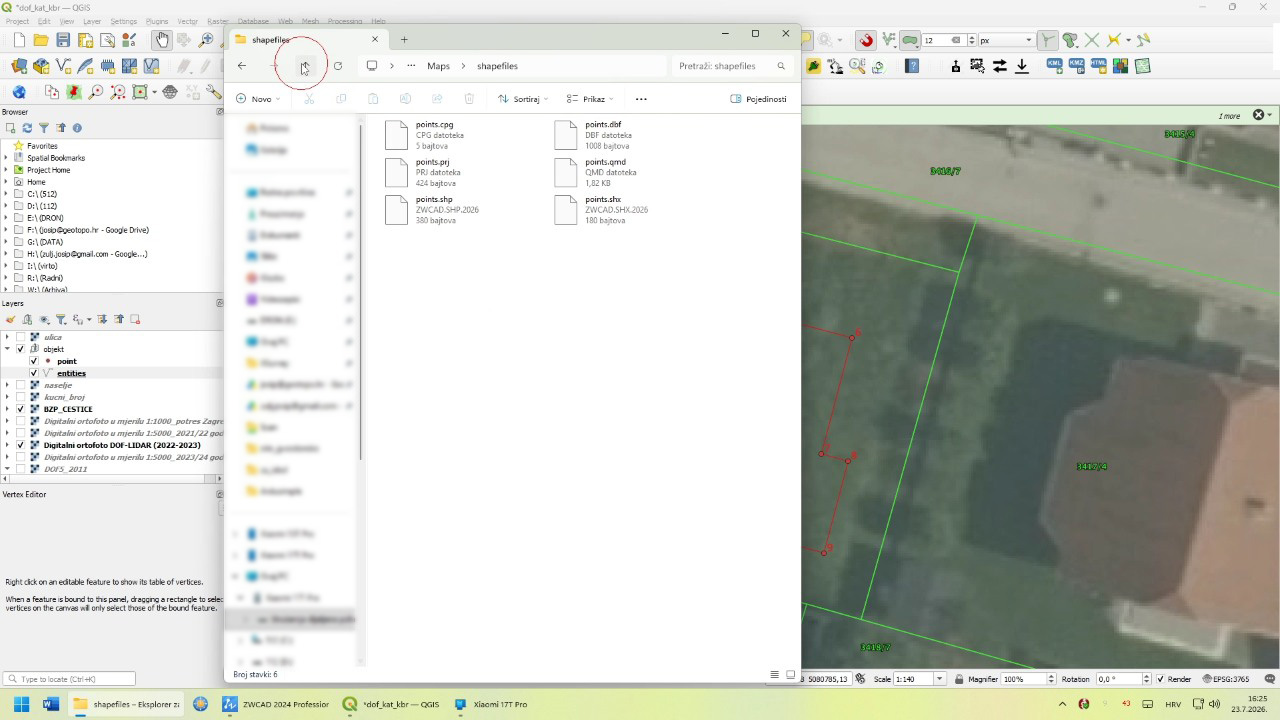
- And the object files under the kml subfolder.
Import the staking out information into SW Maps
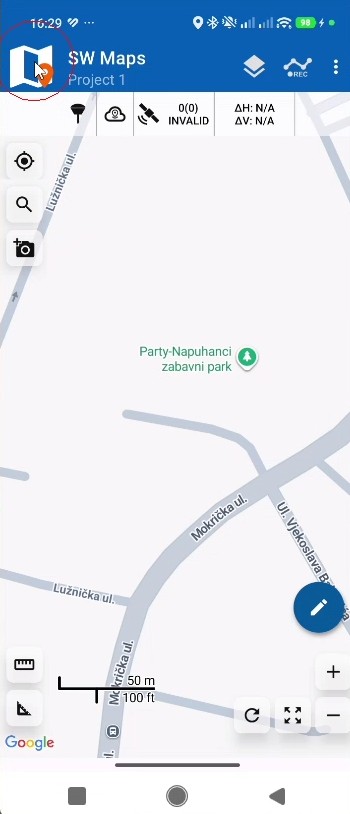
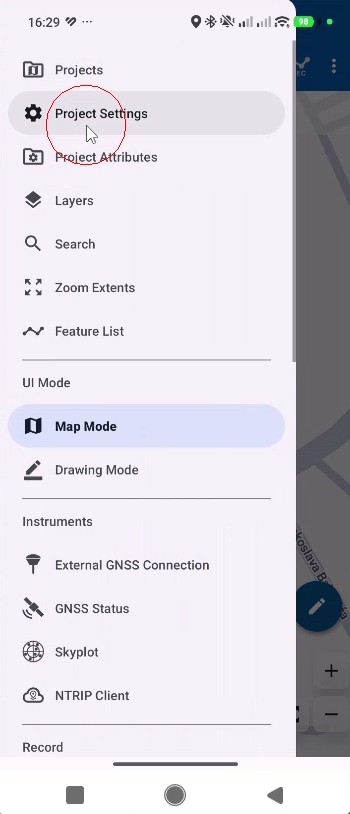
- After creating a new project in SW Maps, go to Main Menu > Project Settings.
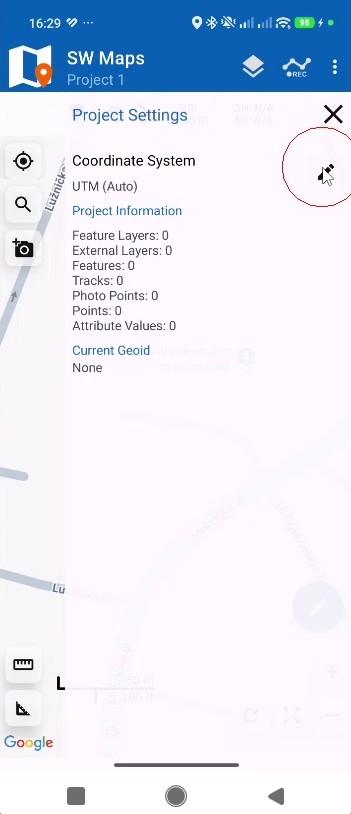
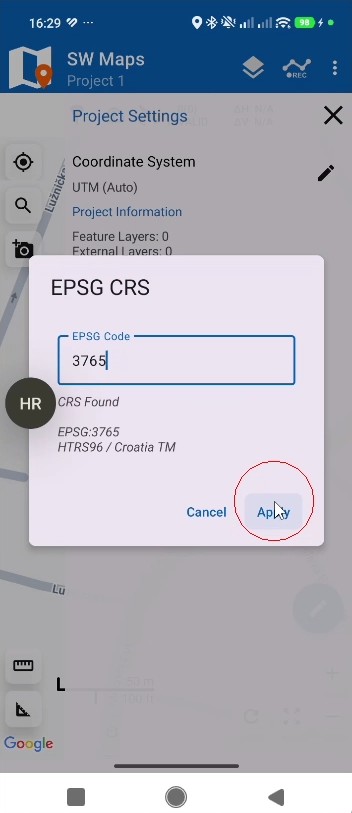
- Again we have to use the same coordinate system from the original file. Find the EPSG code based on your location and set the CRS (Coordinate Reference System) in SW Maps.
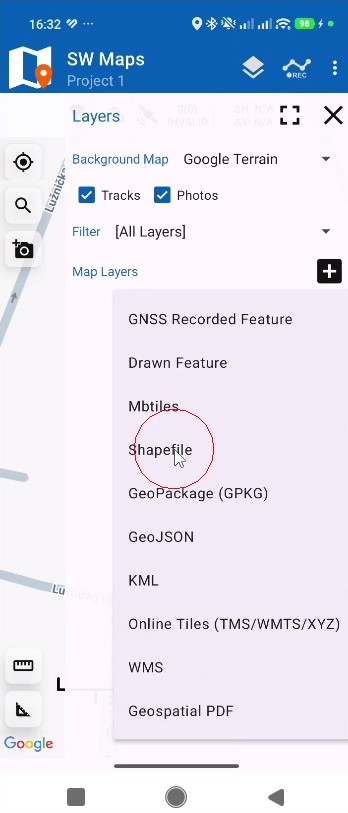
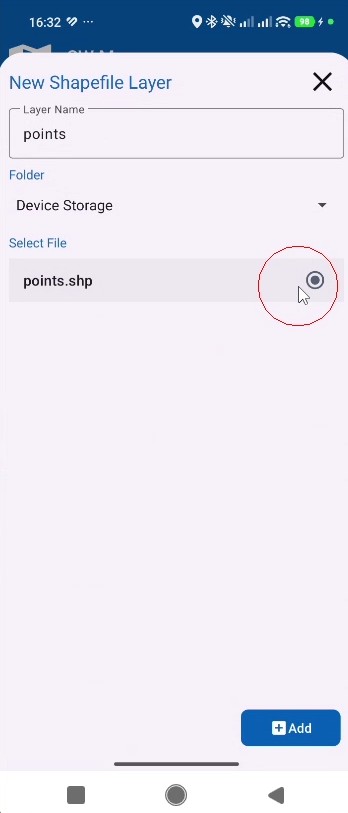
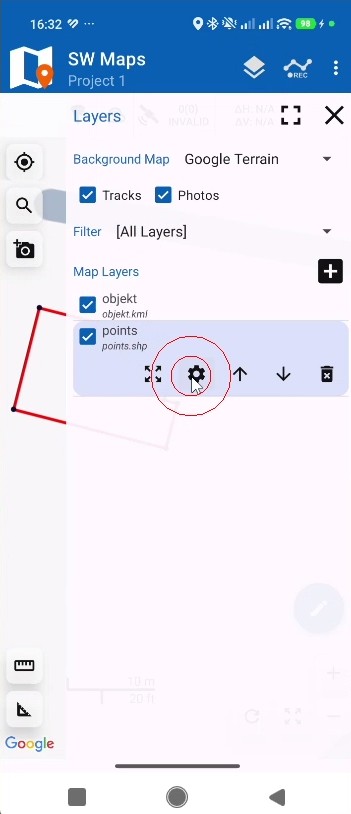
- The points are added as a new layer into SW Maps. Go to Layers > Map Layers + > Shapefile and you should find the points file.
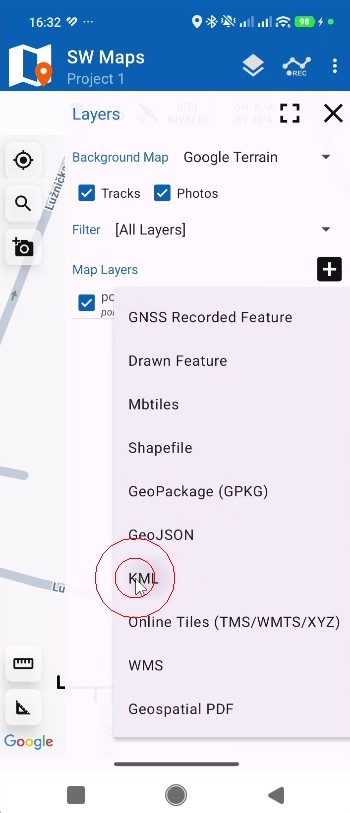
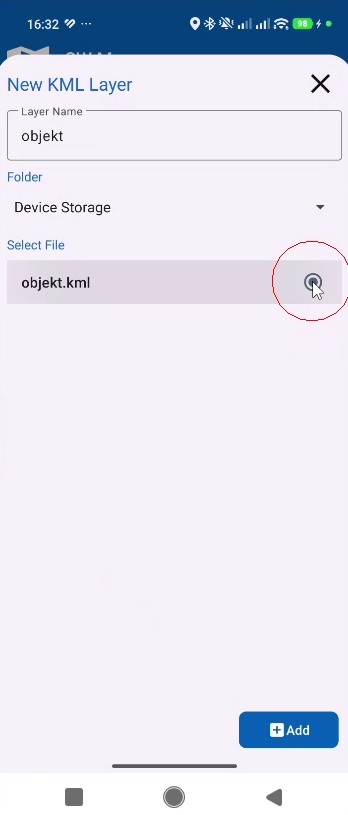
- The building outline is also added as a new layer. Go to Layers > Map Layers + > KML and you should find the object file.
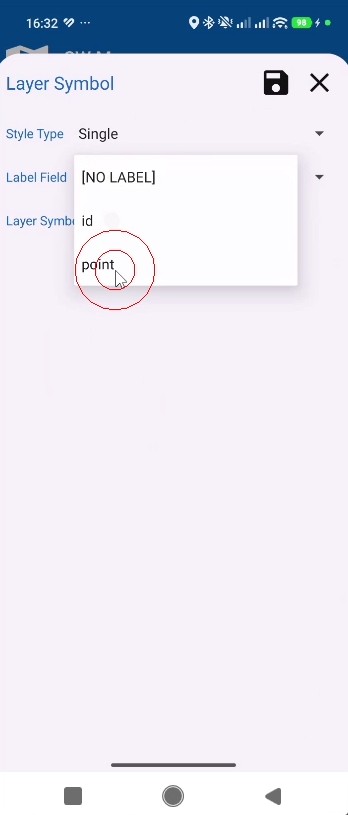
- Open the points layer settings to activate the point labels.
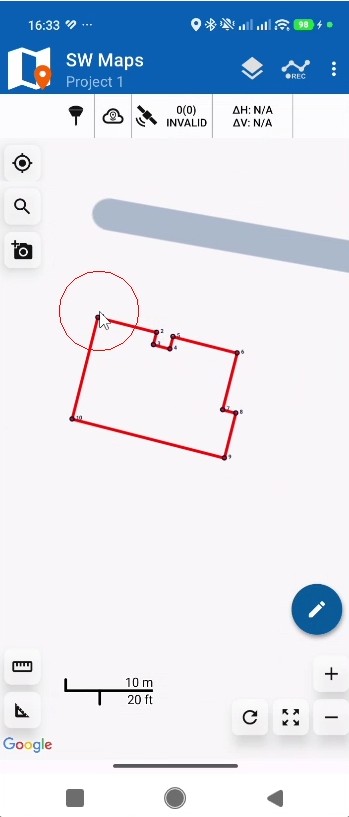
- We have now the building outline and staking points correctly imported in SW Maps.
Stake out process in SW Maps
- Go back to SW Maps Layers menu and disable the building outline object layer to have only the staking out points visible in the map.
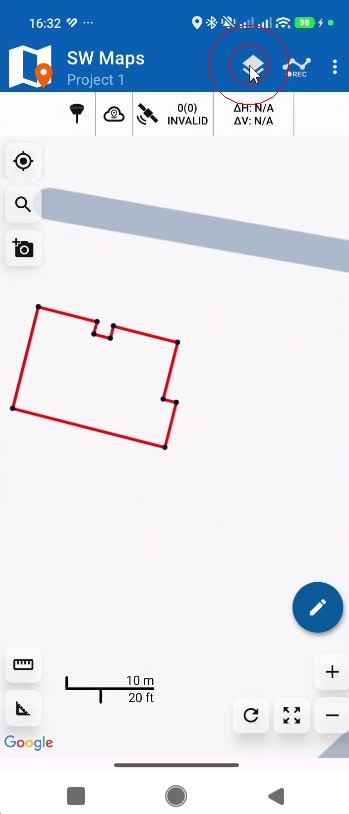
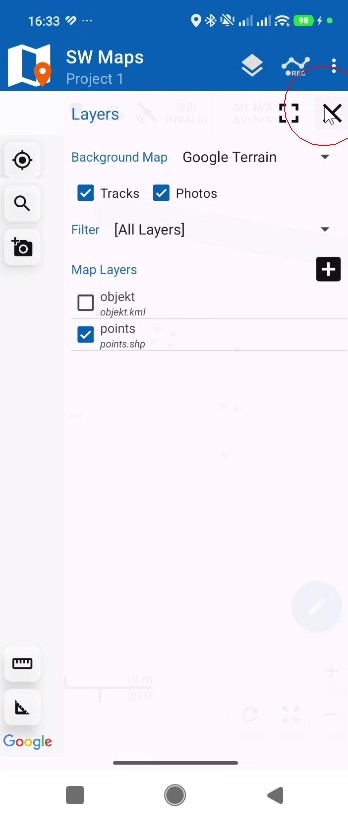
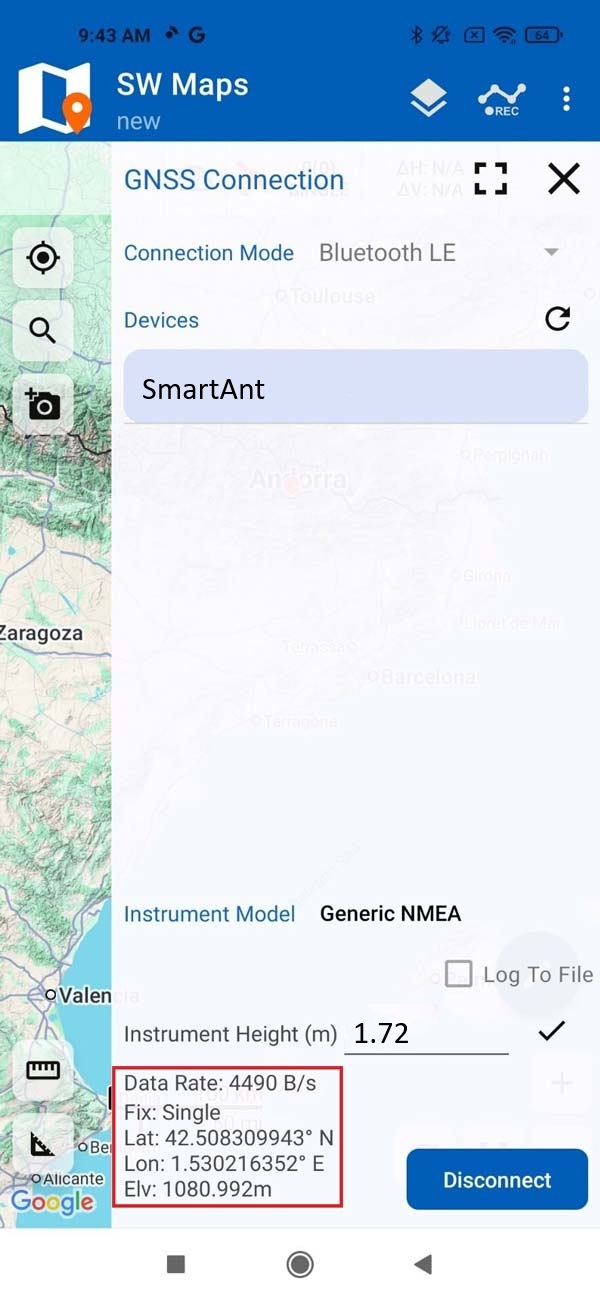
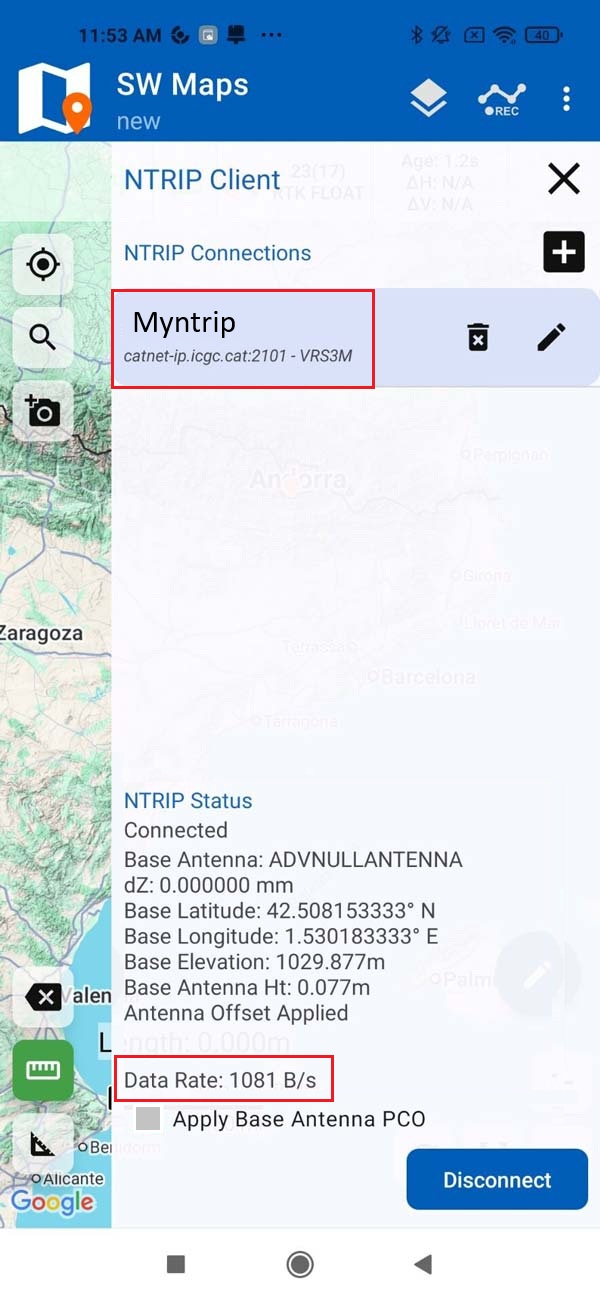
- Connect the ArduSimple RTK Smart Antenna and internal NTRIP Client in SW Maps to improve position accuracy up to centimeter-level. If you don’t know how to do it please follow the RTK Smart Antenna user guide.
- Select individual point to find the Bearing and Distance to it from current position. Press the location icon to start the staking out process.
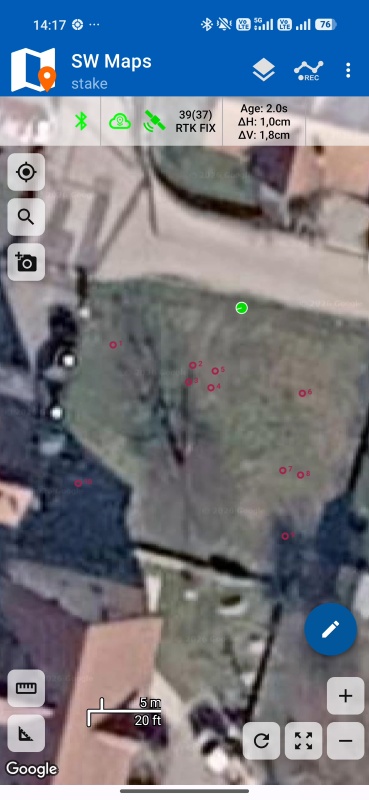
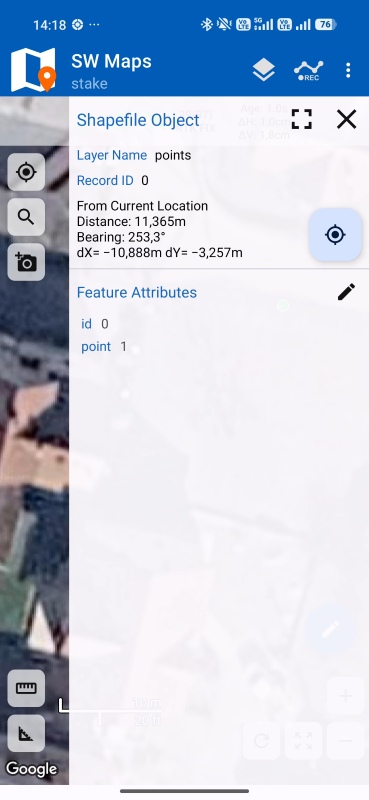
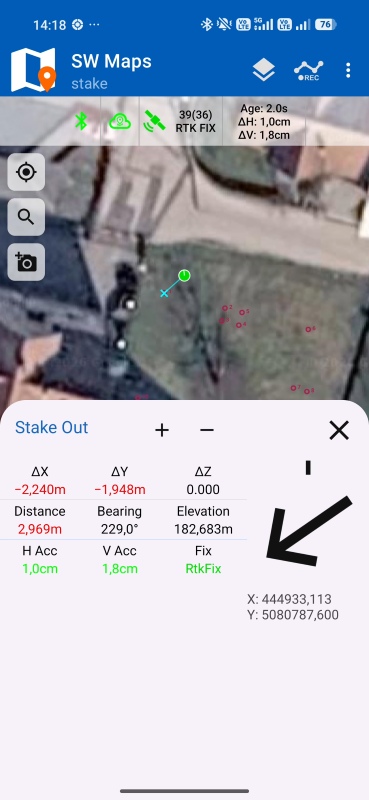
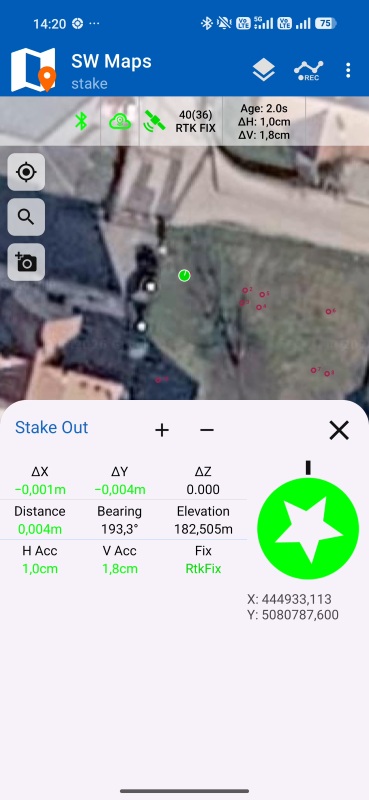
- The Stake Out interface will guide you in the direction to follow in order to reach the point position. Once you are at the point location a star symbol will appear and you can proceed marking the point on the ground.
Related products
If you want to follow this tutorial we have all the products in stock and ready to be shipped worldwide within 1-3 days.

Still having issues?
Contact us for support from a real engineer—not AI—or request the tutorial you’re missing