How to connect low cost RTK kit to Carlson SurvPC for archaeological surveying
We’ve received many questions about how to pair the ArduSimple RTK kit with the Carlson SurvCE or SurvPC software. So today, we’ll walk you through the steps to get connected.
SurvPC supports external GPS/GNSS receivers and has a built-in NTRIP client. This means you can receive real-time RTK corrections over the internet. When you pair your ArduSimple kit with SurvPC on a Windows tablet, you can reach centimeter-level accuracy in your field surveys. It is a paid software, however, demo version has a full functionality but it is limited to 15 points.
Before starting this tutorial, make sure you have the necessary credentials to connect to an NTRIP service. If you’re unsure about NTRIP services in your area, we’ve prepared List of NTRIP correction services in your country.
How to survey with affordable RTK kit and Carlson SurvPC
Connect RTK kit to tablet and start NTRIP connection
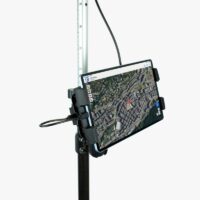
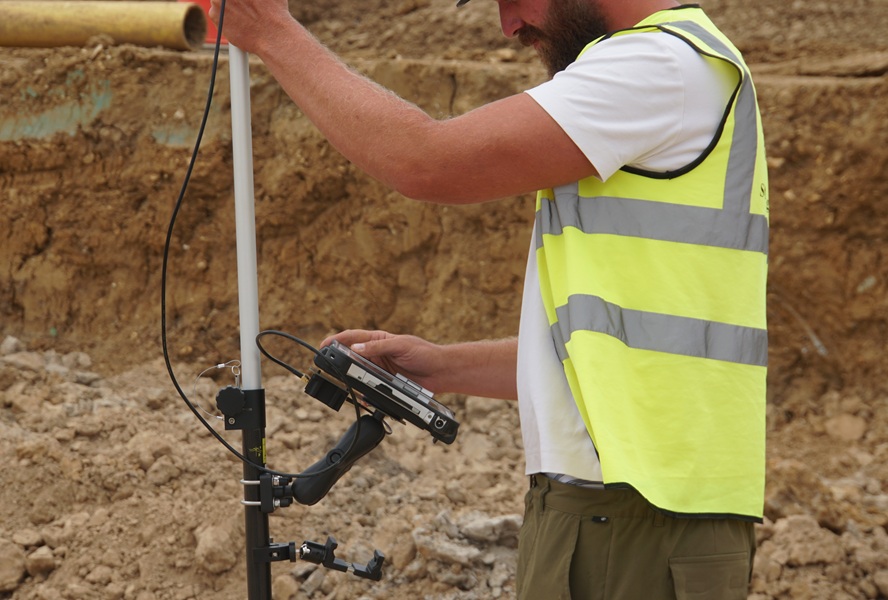
Connect RTK kit to your tablet using USB cable.
Open Bluetooth settings on your tablet, search for your RTK kit which name will be BT+BLE_Bridge_XXXX. Tap Pair. Note: This only need to be done once.
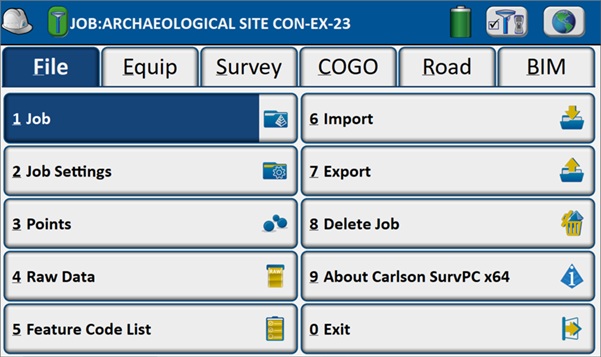
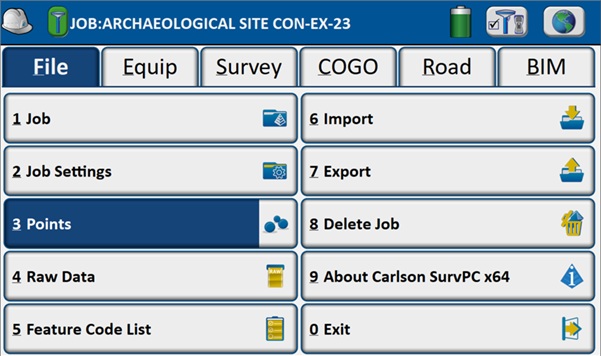
Open SurvPC appby tapping grey helmet icon on desktop of the tablet. Go to File—>Job to select existing job or set-up new one.
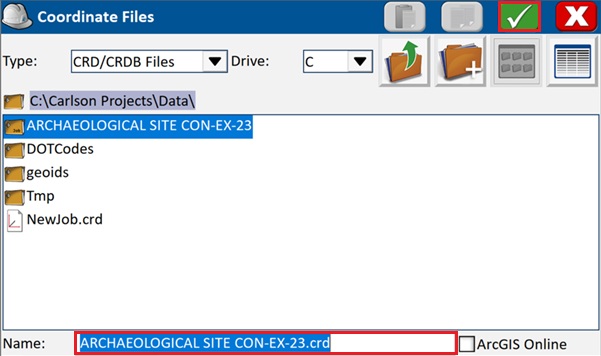
In case if you’re creating a new job – type a name of a new job and confirm with green √ button.
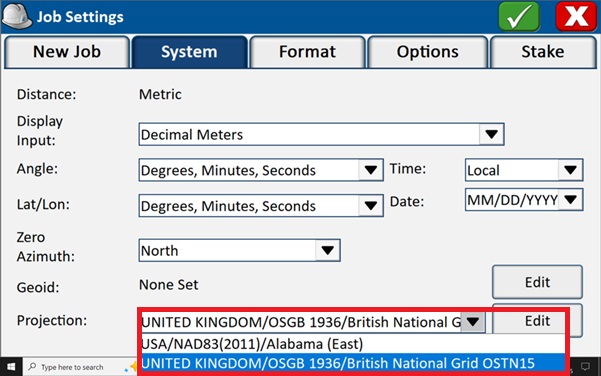
Press Job Settings. In the System tab set-up measurement units, zero Azimuth, Geoid model for orthometric heights and choose projection system that is relevant to your Country. For example, in case of United Kingdom select OSGB 1936 the latest revision OSTN15 and Geoid model OSGM15. Confirm Job Settings with green √ button.
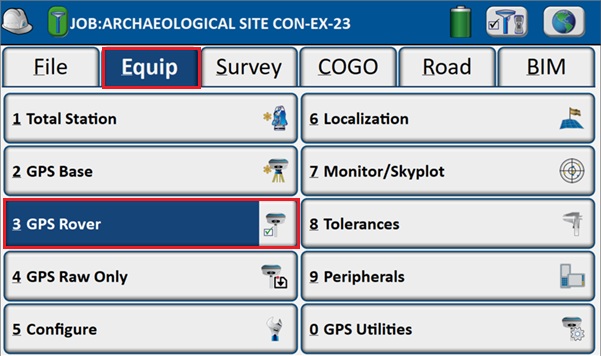
Go to Equip tab and press GPS Rover.
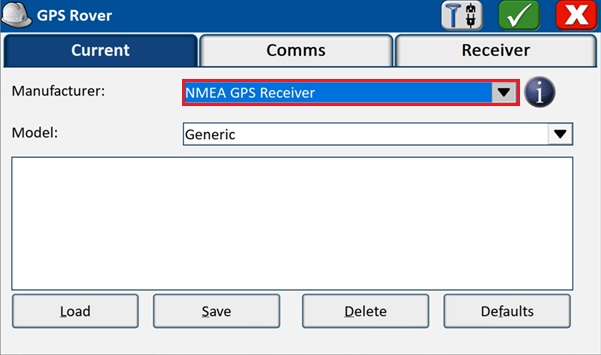
Select NMEA GPS Receiver from the Manufacturer drop-down menu.
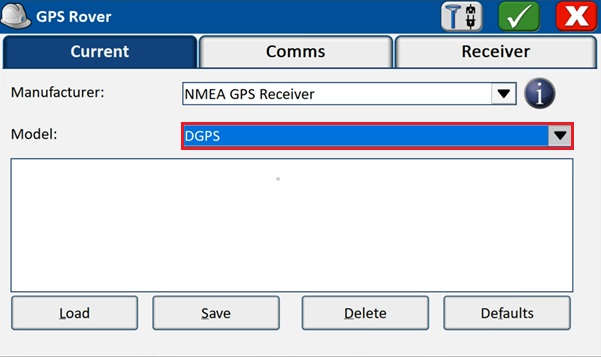
Select DGPS from the model drop-down menu.
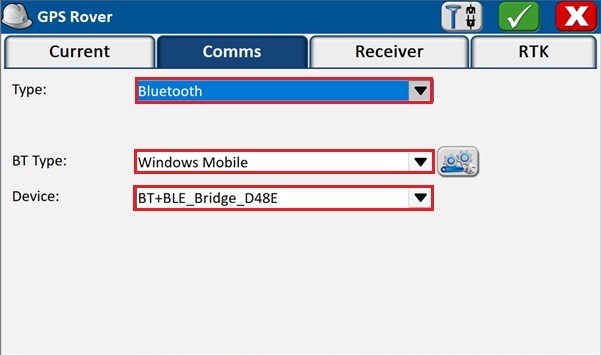
Go to Comms tab and select Bluetooth in Type. Select Windows Mobile in BT Type. Choose BT+BLE_Bridge_XXXX at Device.
Go to Receiver tab and set Antenna Height. You can also enter antenna height in your Survey->Store Points.
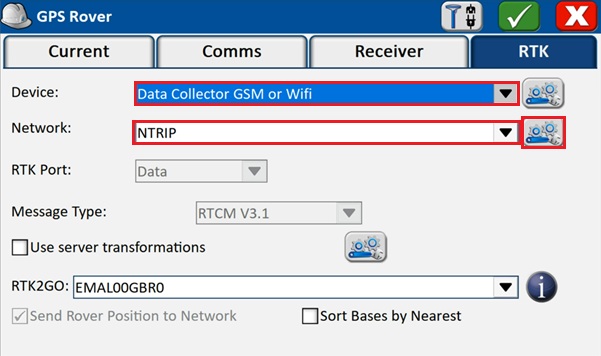
Go to the RTK tab to configure the correction stream that SurvPC will send to your receiver. Select Data Collector GSM or Wifi at Device. Select NTRIP at Network. Select Data at RTK Port. Press gears button to the left next to Network to configure your NTRIP provider.
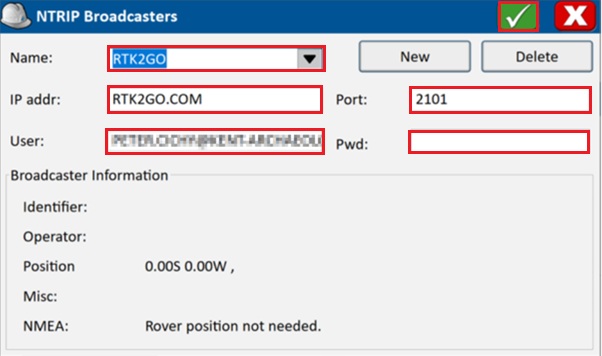
Set the Name of NTRIP Broadcaster, IP address, Port, User name and Password. Press green √ button to confirm credentials.
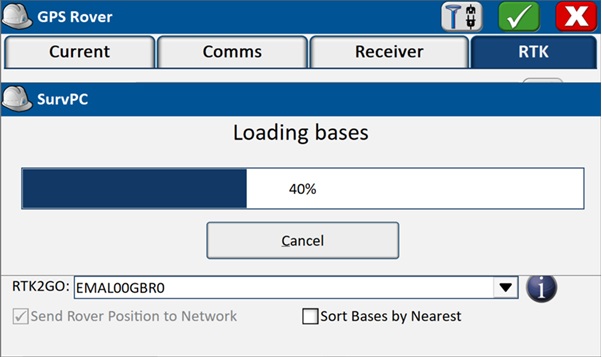
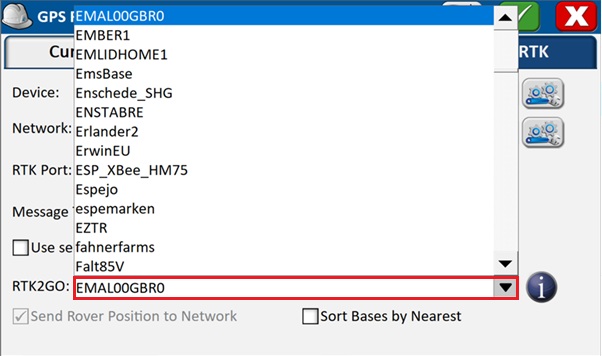
After confirming with green √ button, SurvPC will connect to the server and retrieve available base stations (mountpoints).
Choose Base station from the list.
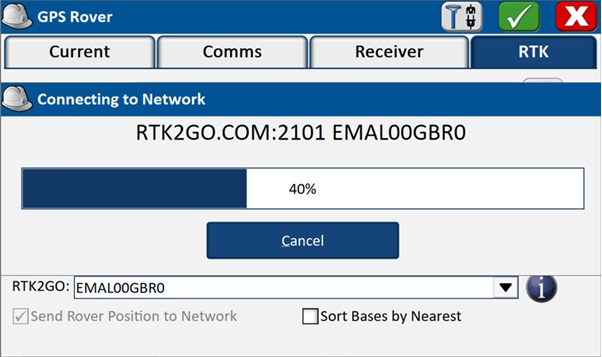
Press green √ button and go back to the main menu. The program will connect to the Network and attempt to read the corrections.
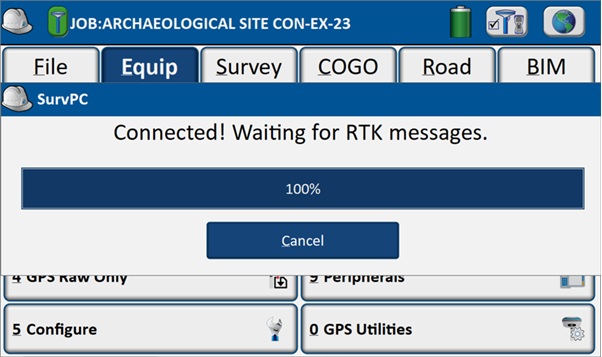
If connection to NTRIP is successful, confirmation message will appear.
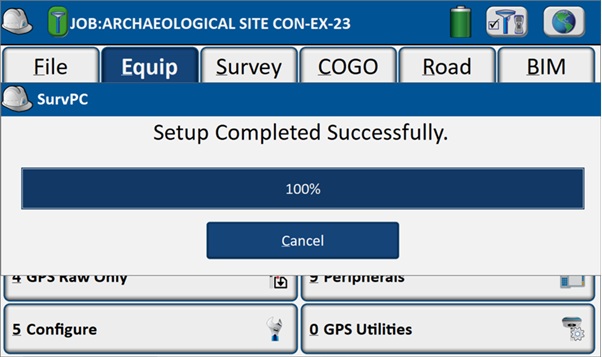
If entire set-up of your Rover is set correctly this will be confirmed by another pop-up window shown below. That should be also confirmed by voiced announcement too.
Survey and map with centimeter accuracy
Now go outside to an open area with a clear view of the sky to test functionality or taking measurements on-site.
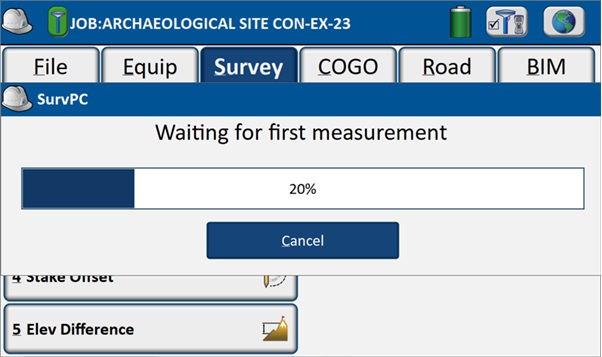
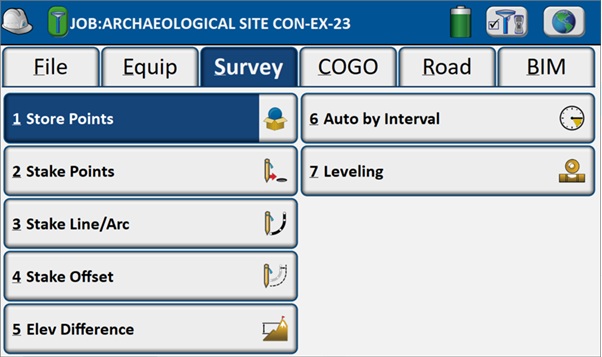
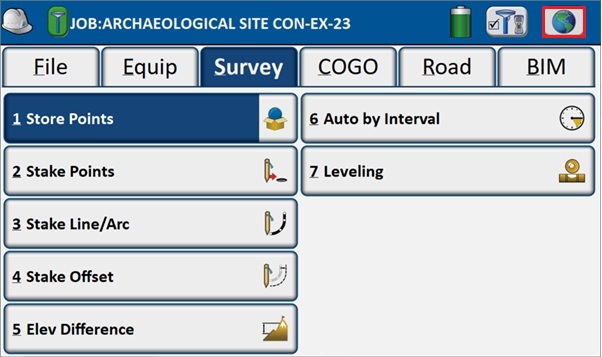
Go to the Survey tab and select Store Points. Before the point storage screen opens, the software will wait for the first position fix to test the receiver. If the signal is successfully received, a confirmation message will appear.
Now it is time to take measurements with centimeter level accuracy. Go to Store Points in the Survey tab.
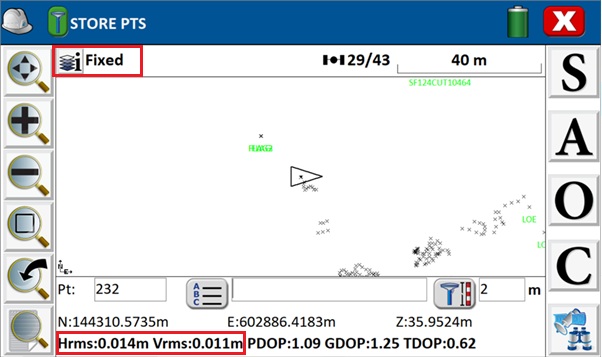
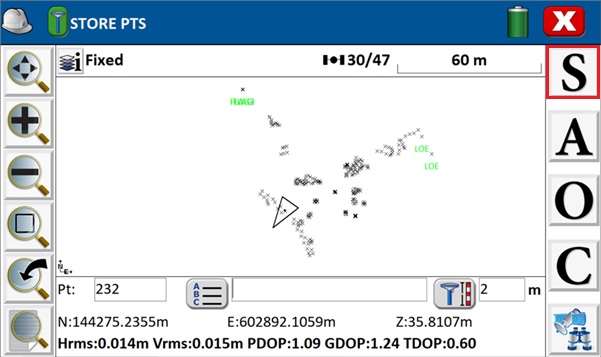
You are now in Store Points mode. Check the RTK Fixed status in the top-left corner. At the bottom left, you’ll see the horizontal accuracy (e.g., 1.4 cm) and vertical accuracy (e.g., 1.1 cm). With a solid RTK FIXED status, you can expect centimeter-level precision.
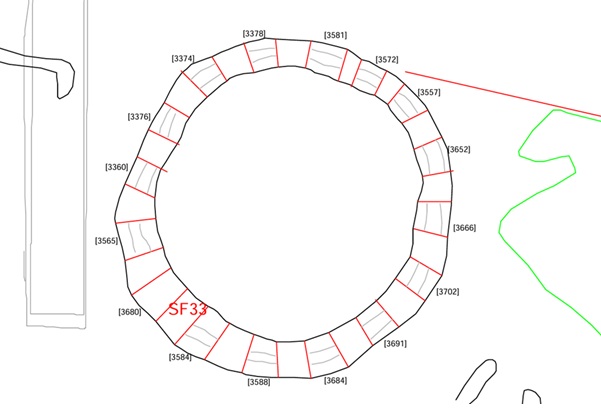
Now if the solution is Fixed you’re all set to begin your survey. Primarily archaeological surveys consist of mapping the edges of revealed archaeological features or geological discolourations with subsequent survey of undertaken hand- or machine-dug interventions
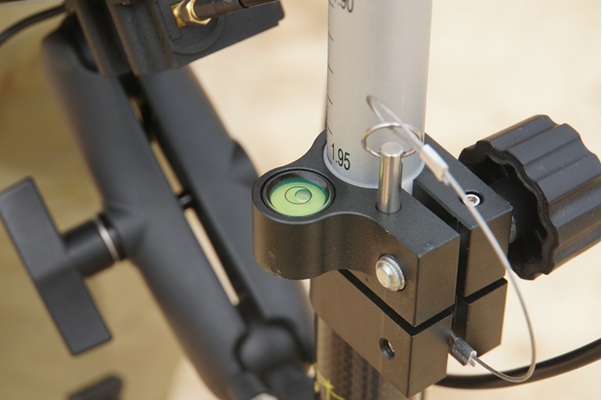
Place your pole on point or line you want to survey. Mind a bullseye spirit level on your pole so it’s in the middle as much as possible. If the levelling of your survey pole is out of the central circle, this may result in inaccuracies.
When you’re ready to store point, just tap S button to the right and successful action will be confirmed by Point Stored briefly displayed on top of your map and you’ll hear a blip sound from the speaker of the tablet. If the quality of the solution decreases or will turn into Float the system prompt will inform you about this and will ask ‘do you still want to store the point’ or ‘wait until fixed’.
The other options in the right-hand column are:
A: Averaging
O: Offset
C: General options and coding styles
Monitor/Skyplot
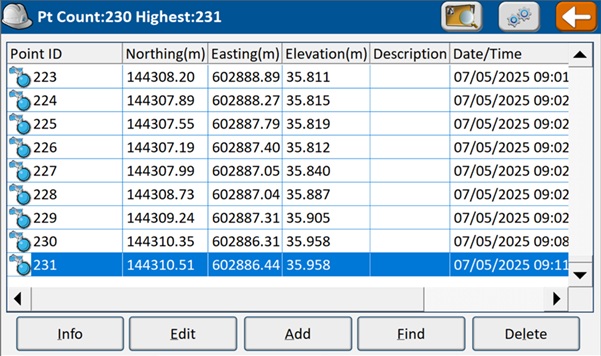
In case you want to view the list of surveyed points, go out of the Survey window by tapping red X button and go to File->Points.
A list of surveyed points will appear.
Export measurements for use in CAD or GIS
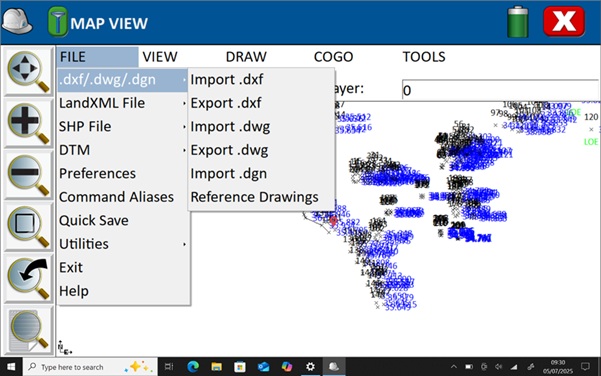
When your survey is finished, go back to the main menu. Tap Globe button on the top right corner to access Map View.
To export your collected data, go to File and choose your preferred format, such as CAD (DWG/DXF) or ESRI Shapefile.
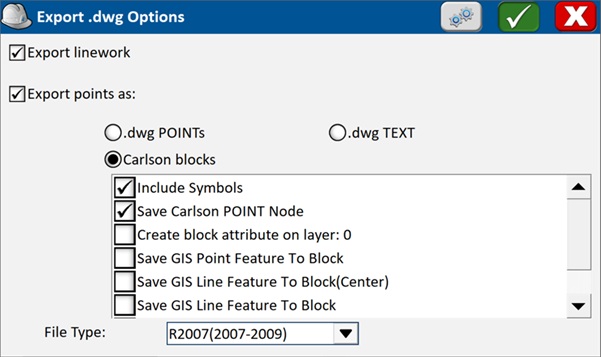
Type filename or select the existing one if you want to replace it. Tap green √ button.
Select options for your exported CAD file. You can leave everything as it is and confirm by tapping green √ button. Tip: when preparing CAD file to import always save in 2010 format and remember to remove any hatches (objects fills) otherwise it won’t be imported properly.
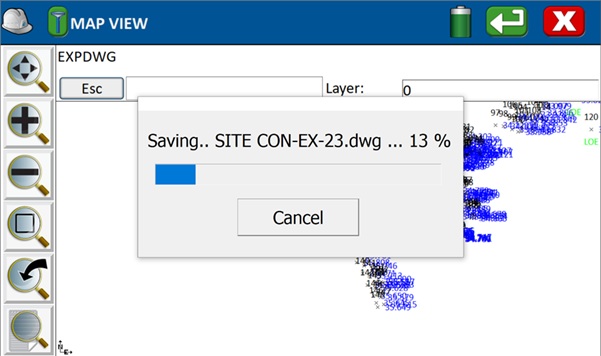
After confirming with the green button, your file will be exported. This process may take a few seconds to a few minutes, depending on the complexity of your survey.
Once export is finished, you will see confirmation message.
You can now close the SurvPC software. There’s no need to manually save your survey, as each point is automatically stored during capture. You can continue working on and analyzing your survey data later on your preferred desktop PC.
If you want to follow this tutorial, we have all the products in stock and ready to be shipped:


 and
and  How to get a quotation