Meet our team in San Diego, United States, from Tuesday 23 until Thursday 25 of April at XPONENTIAL, booth 4700
How to log basic data with simpleRTK2B ZED-F9P integrated memory
2020-04-16
In this tutorial we want to tell you about the interesting feature of simpleRTK2B series boards with ZED-F9P . The onboard flash memory can be used as a “black box” to record up to 50’000 positions, but only of some limited position fix data. The recorded data for a fix comprises:
The time and date of the fix recorded to a precision of one second
Latitude and longitude to a precision of one millionth of a degree. Depending on position on Earth this is a precision in the order of 0.1 m.
Altitude (height above mean sea level) to a precision of 0.1 m
Ground speed to a precision of 1 cm/s Satellites used
Position accuracy value, but anything below 70cm will be shown as 70cm. Position fix, but it only stores 3D fix, even if it’s a RTK fix or FLOAT fix.
As you can see from above, is not really usable for RTK position storage, but it can useful as “black box” in case you need it.
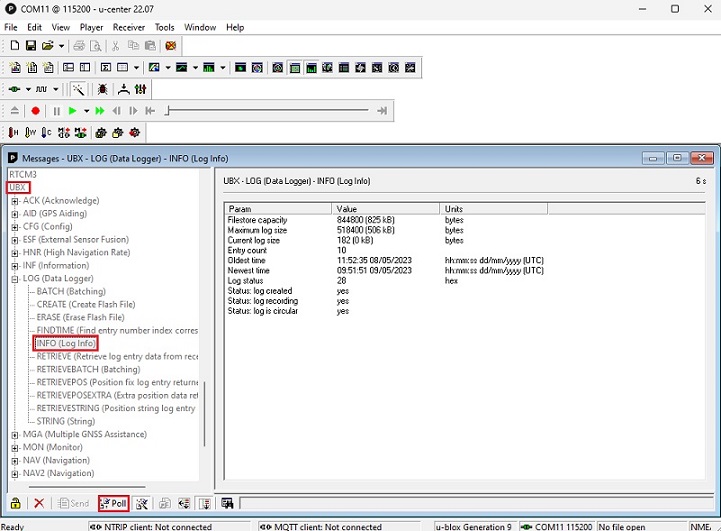
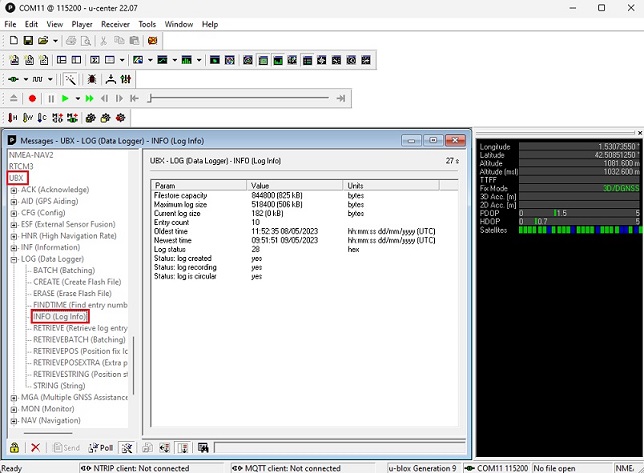
Go to UBX–>LOG–>INFO and press Poll. This message will give us information about the available memory, data stored, recording enabled/disabled. It’s just for your information, we will come to this message later.
Secondly, create the log.
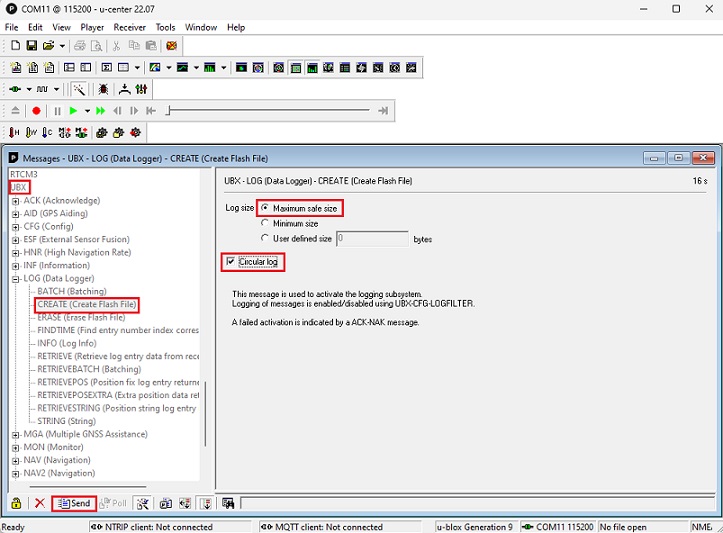
We need to allocate the space for a logfile. We can do this from UBX–>LOG–> CREATE:
Define if you want a maximum file size or you want to define the size of the logfile. You might want to limit this size, otherwise it can get difficult to browse through the logfile (see section “Retrieving the log” below. It might be useful for you to know that each fix stored is around 15bytes).
Remember to click Circular log, so in case you fill in all available memory, the system deletes the oldest position.
Click Send and the logfile is created.
Thirdly, activate the log.
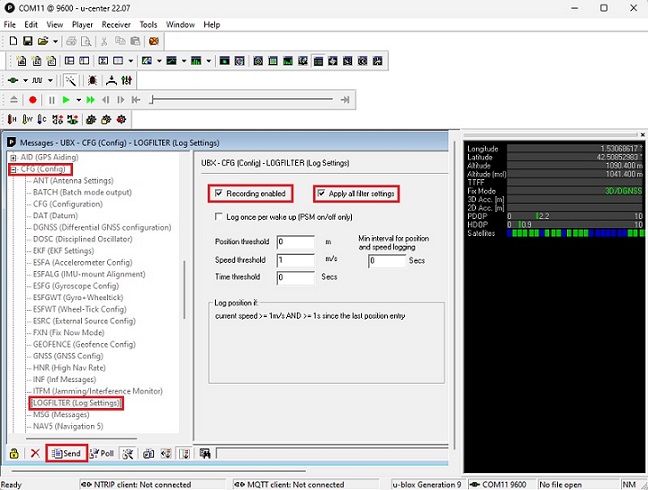
Since the file is created, we can activate the logging functionality to start adding entries. For this we can go to UBX–>CFG–>LOGFILER:
Activate the flag Recording Enabled. If nothing else is pressed, the system will record one position per second.
Activate the flag Apply all filter settings if you want to change some thresholds, e.g. if you want the system to only log positions when speed is about a certain threshold.
You don’t need the flag Log once per wake up, this is for some power optimized modes not used in RTK systems.
Now click Send and the logging will start. You can go back to UBX–>LOG–>INFO and see how the logfile size increases.
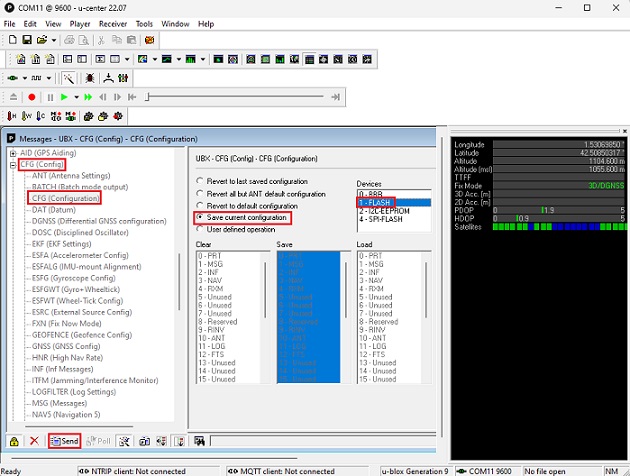
Fourthly, configure the system so it records also after next power up.
If we want the receiver to start logging right after power-up, we need to store this configuration in the permanent flash memory. Go to UBX–>CFG–>CFG and Save current configuration in FLASH and press Send.
Now you can remove the power.
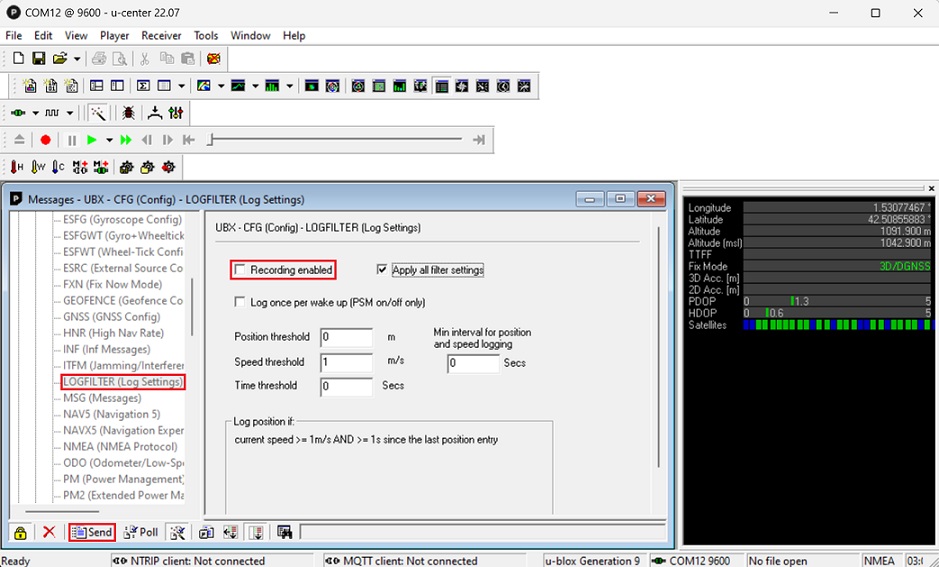
Finally, at a certain point we want to retrieve log data.
To access the log, the first thing we need to do, is to stop logfile feature. This can be done going again to UBX–>CFG–>LOGFILTER, unselecting Recording Enabled, and click Send.
Now we can go to UBX–>LOG–>INFO to understand the content of the logfile.
Oldest Time that will be stored in position 0.
Entry count, in our example 10.
Newest time that will be stored in position “Entry count -1”. In our example will be position 9.
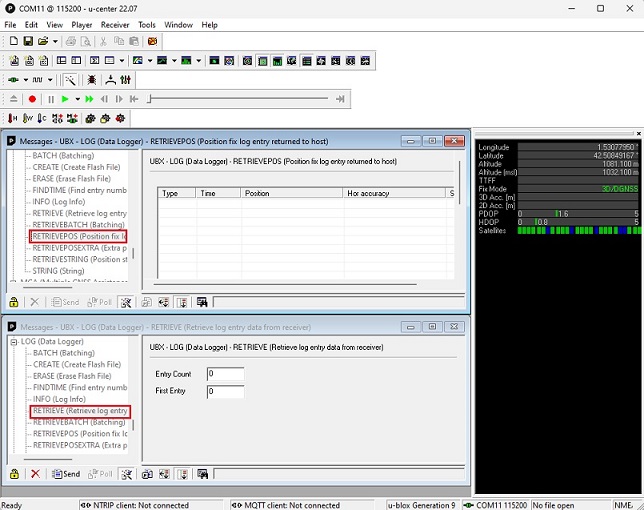
We recommend to open 2 Message View windows: one with UBX–>LOG–> RETRIEVE and another one with UBX–>LOG–>RETRIEVEPOS. A big limitation of the log browser is that you can only retrieve 256 positions at a time.
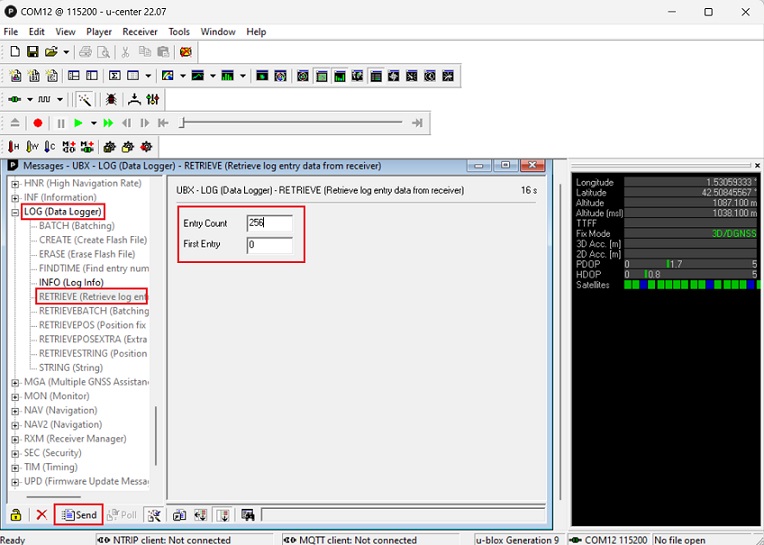
In the UBX–>LOG–>RETRIEVE window, we need to select as following and press Send.
First entry: in our example above, from which entry 0 to 10 we want to start the data dump.
Entry count: how many positions we want the system to ouput. The maximum value is 256.
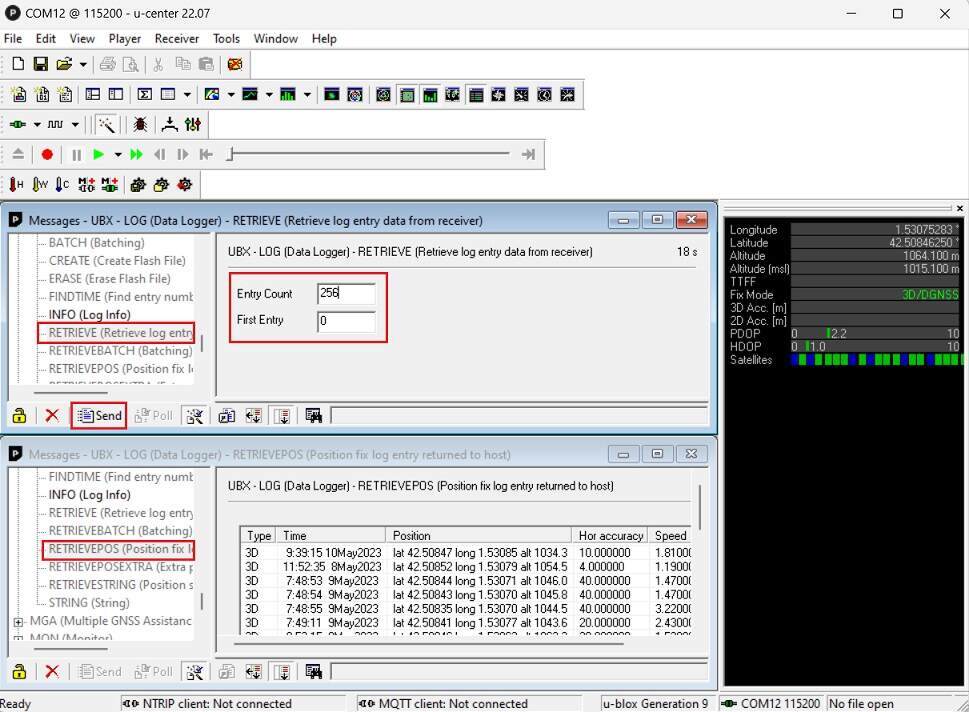
In our example above, it would then output all positions from 0 to 10, and this position will appear in the other window with UBX–>LOG–>RETRIEVEPOS.
We can then copy paste the table and export to Excel or our map tool.
If you want to do this tutorial, we have the simpleRTK2B series receiver and USB cable in stock and ready to be shipped.
If you liked this content, you can follow us on Twitter, YouTube, Facebook or LinkedIn to stay updated of content like this.
Want to learn more about GPS/RTK?
1. Our engineering team will contact you to solve any questions
2. We will keep you updated about promotions and new product releases
3.You will only hear from us when we have important news, we won’t spam your email
 and
and